Lemon Verbena & Honey Cheese

It’s a bit difficult to find Lemon Verbena in the markets but I was fortunate to find two sources this year; Four Leaf Farm at the Durham Farmers’ Market and Weaver Street Market. Lemon Verbena doesn’t survive frost or temperatures under 40F so you’ll have to bring it inside or start again each year.

Also known as Vervain, the scent is light and clean and tastes about the same way. The leaves are a bit stiff, so it’s great to use baked, but eating it raw will require you to cut it up in small pieces because the leaf if a bit rough. It’s good on toast, french toast or simple crackers.

Apparently there’s also a way to preserve the leaves by creating a paste with 1 part leaves to 2 parts sugar. Using a food processor, you mix until you have a paste and then freeze it to use on desserts or in drinks. I haven’t tried that yet, but it sounds like a fun idea to use with shortbread cookies or in some sort of punch. There are many recipes for treats using this herb on the internet, so pick up one or two and get creative!

I’ve used this herb a couple of times in soft cheese and I like it in both Ricotta & Chevre equally well. For this recipe you are going to need just a couple of items and it will take you no more than 15 minutes to put this together with local ingredients, maybe they are in your garden already.

Honey, Lemon Verbena & the soft cheese of your choice – Ricotta or Chevre are all that you need for this simple pleasure. The Ricotta you can even make on your own with an hours’ worth of time and some whole milk.

Stop by the Durham Farmers’ Market Cooking Demonstration this Wednesday to taste this refreshing spread and take a look at the plant.


Lemon Verbena & Honey Cheese

Ingredients

  • 1/2 cup either fresh local Ricotta or Chevre
  • 6-8 fresh leaves of Lemon Verbena (about 1 1/2″ long)
  • 2 teaspoon local honey (give or take a teaspoon)

Preparation

  • Finely chop or cut the Lemon Verbena leaves without bruising.
  • Mix the  cut leaves, honey and cheese together slowly tasting and adjusting to suit your taste for lemon and sweetness.
  • Refrigerate for up to 4 days or freeze.

 Notes

This recipe is light so I would recommend Woodleaf Honey in Louisburg and the Orange County Blend from Just Bee Apiary.

Posted in Appetizer, Breakfast, Gluten-Free, Recipes, Snack, Year-Round | Tagged , , , , , , , , , , , , , , , , , , , , , , , , , , | Leave a comment

Spring Broccoli Pesto

The rain this year and wild swings in temperatures have been a bonus for broccoli and some of the other early spring crops that love cool weather. They were pushed forward in the growing season with early record warm temperatures and just about the time we all expected it to stay warm, cool weather flushed the state and encouraged these plants to develop nice tight heads and additional side shoots. There’s a ton of broccoli and cauliflower showing up in the markets and the color and texture are amazing  this spring.

This week while playing around with this recipe, we added it to an omelette, Quiche and toasted cheese sandwiches. I know I seem to be on a pesto kick, but ever since Jason at Edible Earthscapes suggested using sorrel as a lemon replacement, I’ve been experimenting. (And by the way – he’s got a recipe for Cilantro Pesto) I need to admit, it was his grilled cheese sandwich idea that got me going, but this stuff is wonderful on pasta and it’s amazing teamed up with eggs.  And the great thing about pesto is the ability to freeze it in small amounts and pull it out anytime. So there’s that “second harvest” theme going for this recipe, too.

I’ve tried this recipe 3 ways so there are a couple of notes at the end. Alter it to suit your taste buds as well as your location, since I try to find all local ingredients for my recipes. I’m cheating a little on this because I can get the walnuts from a couple of private farms in Western NC. Local pecans will work well and they are plentiful from last year’s crop and they will be a little sweeter by nature. Just keep them in your freezer until you are ready to use them.

The only thing I want to note here up front is that I’ve used a scale extensively in this recipe. The reason is that depending on how finely you chop your veggies or grate your cheese, the measurement can be off significantly when you’re working with a recipe like this. And that changes the flavor quite a bit when you’re working with some ingredients. So to be the most accurate in this one, I’ve got two measurements for you. It’s adaptable and forgiving so don’t fret if you don’t have a scale. At home I use a little inexpensive OXO battery operated scale. They last for years so I feel like it’s worth the investment and helps to make your recipes a little more consistent over time, especially some of the older recipes you might have handed down in your family.

This recipe makes enough to feed several people sandwiches, create a half-dozen omelettes, make a good size bowl of pasta for a family, or to have a couple of small containers extra to throw into your freezer for later.


Spring Broccoli Pesto

Ingredients

  • 1 ounce broccoli stems ( 1 1/2 cups), cut into small pieces, very  lightly steamed
  • 3 ounces broccoli florets (1/3 cup), cut into small pieces, very lightly steamed
  • 1 tablespoon green onion, finely chopped
  • 1 teaspoon green garlic, finely chopped
  • 1/2 ounce walnuts or pecans (1/6 cup), lightly toasted
  • 1/4 ounce Chapel Hill Creamery Calvander cheese (1/6 cup), grated
  • 1/4 Chapel Hill Creamery Hickory Grove cheese (1/6 cup), grated
  • 1/8 ounce sorrel (2 tablespoons), chopped

Preparation

  • Chop the green onion and green garlic to 1/2″ or less sections. Chop the sorrel. Set aside.
  • After you wash and cut up the broccoli, lightly steam the stems and florets separately. The stems will take about 2-3 minutes, the florets about 1-2 minutes. They should not be cooked all the way through. They will turn a very lovely bright green color with the light steam and hold this color in the pesto. If you cook them all the way through, they will darken in color and the texture and flavor will change significantly. Chill these immediately if you do not plan to finish the recipe right away because they will continue to cook for a few minutes as they are cooling.
  • Put all of the ingredients into a food processor and blend until you reach the puree that you prefer. This is just going to take a minute or two. For a smooth texture, run the processor for about 2 minutes total, pulsing it on and off. The ingredients come together quickly as you blend. Once they come together, you will just need to run the processor another minute at the most.

Notes

  • In this recipe, unlike the Asparagus Pesto, the sorrel tended to taste more bitter the more you added. But the recipe needs a bit of lemon to brighten it up, so you might also try lemon verbena or just a bit of lemon juice if you don’t have sorrel.
  • Himalayan salt seemed to work best in this recipe. The Murray River Flake Salt seemed a bit bright and the Chardonnay Oak Barrel Smoked Salt worked fine, but didn’t bring out the broccoli and didn’t seem to enhance the cheese as well as the Pink Himalayan.
  • If you decide to change the cheese, the Calvander is an Asiago style, but go with less of this and more of the creamy type melting cheese like Hickory Grove. Think Broccoli Cheese Soup here. You will taste the Asiago in the front of your mouth, but you’ll remember the creamy cheese all the way through the bite.
Posted in Appetizer, Diabetic Friendly, Fall, Freezing & Canning, Gluten-Free, Lunch, Recipes, Seasonal Eating, Second Harvest, Sides, Snack, Spring | Tagged , , , , , , , , , , , , , , , , , , , , , , | Leave a comment

Broccoli Cheese Soup for Chilly Spring Days

This is a great little soup to make from your farmers’ market purchases. This year the crazy weather has produced what looks like a bumper crop of broccoli. What has actually happened is that many farms have had multiple rows or sections of fields produce faster than normal, catching up to earlier planted fields. That’s a bonus for the market shopper that loves green stuff. Everything from broccoli to chard, kale, lettuce, and the tops of turnips, carrots, radishes are all lush and ready for you to make smoothies, stir fry, soup, pesto, or salads. There’s so much choice that you can take the same ingredients and prepare them a different way every night of the week.

But let’s talk about broccoli. I’m not a fan of freezing or dehydrating this crop on its own. I simply don’t like the texture when it comes out of the freezer. Flash freezing is another matter,  but that is not available to most folks. So here’s the plan. Buy it and lightly steam it. I mean for just a couple of minutes to set the color. No salt or pepper. Put it into containers and freeze it. Then use it for casseroles, soups and maybe stir fry.  Primarily I stick to things where the texture won’t matter,  but the flavor will. Broccoli holds the flavor just fine so put it into lasagna, mac & cheese, pesto, quinoa or rice casseroles or soup. And this cheese soup is just the ticket for a fast meal. It’s easy, healthy and uses local ingredients.


Broccoli Cheese Soup

Ingredients

  • 2-3 cups broccoli florets, just the tip-tops of them, not the stem
  • 1 cup small broccoli stems cut into small 1/4″ pieces or smaller
  • 1/2 cup carrots, chopped to 1/4″ pieces or smaller
  • 1 tablespoon green garlic, finely chopped
  • 2 tablespoons green onion including the dark green stem, finely chopped
  • 1/4 teaspoon ground nutmeg
  • 1  1/2 cups chicken or vegetable  stock (preferably homemade)
  • 1 cup whole milk (low-fat will work, skim will not)
  • 1 tablespoon arrow-root
  • 2 ounces Chapel Hill Creamery Hickory Grove, grated
  • 1 ounce Chapel Hill Creamery Calvander, grated
  • Himalayan Salt (about 1/2 teaspoon)
  • Four Corners Pepper Blend (about 1/8 teaspoon)

Preparation

  • Put the stock in a stainless pot or dutch oven and heat to light boil. Turn down to simmer and add the carrots and broccoli stems, cooking for 5 minutes.
  • Add in the green garlic and green onions.
  • Blend the milk with the arrow-root and add it to the stock, stirring with a whisk to distribute the starch evenly. Bring up to a light boil, then lower the heat and simmer to thicken.
  • Thicken the soup instantly by putting it through a food processor. Blend until you like the texture.
  • Add the shredded cheese and blend with a whisk.
  • Add the salt & pepper.
  • Add the broccoli tops and cook for just 3 minutes so they remain firm.
  • Cook for just another minute or two and serve. You can top it with more broccoli, carrots, or some fresh chopped chives.


Posted in Fall, General, Gluten-Free, Recipes, Seasonal Eating, Second Harvest, Soup, Spring | Tagged , , , , , , , , , , , , , , , , , , , | Leave a comment

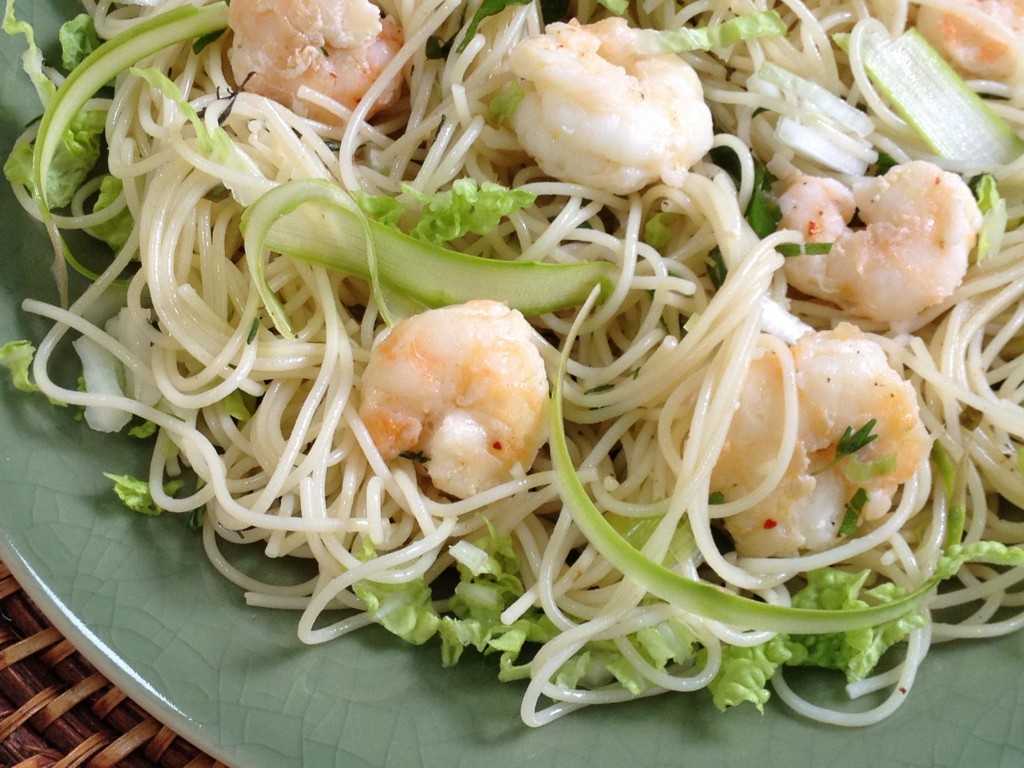
Fresh Water Prawns with Asparagus, Sorrel & Cabbage

I haven’t had prawns in quite a few years.  And being pretty much a purist about the flavor of fish, I don’t try to mask the flavor of it. Fresh water prawns have a really mild flavor so I tried to develop a recipe that would not cover up the texture, color or taste of them. For those of you that aren’t in love with shrimp or other stronger fish, these guys might be just the ticket.

The prawns I worked with were from the American Prawn Cooperative which has been around for nine years. Locals Seafood has just started working with these folks and providing their products at local farmers’ markets in the Triangle. They are free from chemicals, antibiotics and hormones and their containment/growing areas are set up in no-fly zones to avoid accidental contamination from crop dusting or other aircraft. Prawns from this cooperative are harvested only once per year in October and flash frozen. So we’re combining an out of season stored product with early spring harvest products.

Eventually I settled on a recipe that uses spring asparagus, a little color and lemon flavor from sorrel, fresh thyme, green onion, a bit of olive oil, a Grey Sea Salt mixed with Piment d’Espelette (Paprika pepper) from Savory Spice Shop, and thin capellini to hold it all together. Serving this with the fresh spring baby squash and beautiful bright green onions sauteed in olive oil makes for a colorful plate as the temperatures begin to warm up here in the south. It takes no time at all to put this together and you can either saute the prawns inside or grill them for some added smoke flavor. As an added bonus, this is great at room temperature or warm so you can adjust the recipe depending on the weather. This recipe will serve 2 comfortably.

Fresh Water Prawns & Pasta Spring Salad

Ingredients

  • 1 lb NC fresh water prawns heads, tails & shells removed
  • 1-2 Asparagus, shaved with vegetable peeler
  • 2 Sorrel leaves, julienne
  • 2-3 teaspoons finely chopped green onion
  • 1 teaspoon finely chopped green garlic (if available)
  • 1/2 teaspoon fresh thyme leaves
  • 6 oz dry capellini pasta
  • 2 mature Napa Cabbage leaves (optional) or several baby Napa cabbage leaves
  • A couple of turns of Four Corners Blend Peppercorns from Savory Spice
  • 1/8-1/4 teaspoon Grey Sea Salt blended with Piment D’Espelette (Paprika Pepper) or fresh paprika pepper available from the farmers’ market (can be dehydrated and ground up)

Preparation

  • Wash your sorrel, cabbage & asparagus. Dry off everything with a clean towel or paper towel.
  • Julienne slice the sorrel and cabbage. Set aside.
  • Chop the green onion and green garlic and set aside.
  • Using a vegetable peeler, shave ribbons of asparagus below the flower head f the plant. This is a great use for thicker mature asparagus.
  • Toss your raw prawns with a little olive oil, fresh thyme, green onion, green garlic and a small amount of the grey salt blended with Piment D’Espelette.
  • Using medium high heat or a heavy cast iron pan, quickly saute the prawns, thyme, onion and garlic in some good virgin olive oil. My favorite is a single source oil from Sicily and it has a bit of a peppery flavor, so it might not be for everyone. A little goes a long way with this oil matched against the prawns. You can always select a more mild EVOO or add just a smidge of some butter. Alternately, you can grill this on skewers very quickly. They don’t take long at all, maybe 4 minutes on the grill. Once they are firm, they’re finished. Set aside.
  • Cook your pasta until it is barely cooked through. It will continue to finish cooking as you are blending it with the other ingredients.
  • Toss the pasta, raw asparagus, raw cabbage, raw sorrel, cooked prawns, and any additional onions or garlic you would like with about a couple teaspoons of olive oil.
  • The salt & pepper will take a couple of minutes to come up in flavor totally as it warms in the pasta and you can adapt to your tastes.
  • Serve with bright spring yellow squash sautéed in olive oil with fresh herbs and tossed with local cheese like Calvander from Chapel Hill Creamery & serve.
Posted in Appetizer, Dairy-Free, Diabetic Friendly, Dinner, Fish, Recipes, Salads, Spring | Tagged , , , , , , , , , , , , , , | 1 Comment

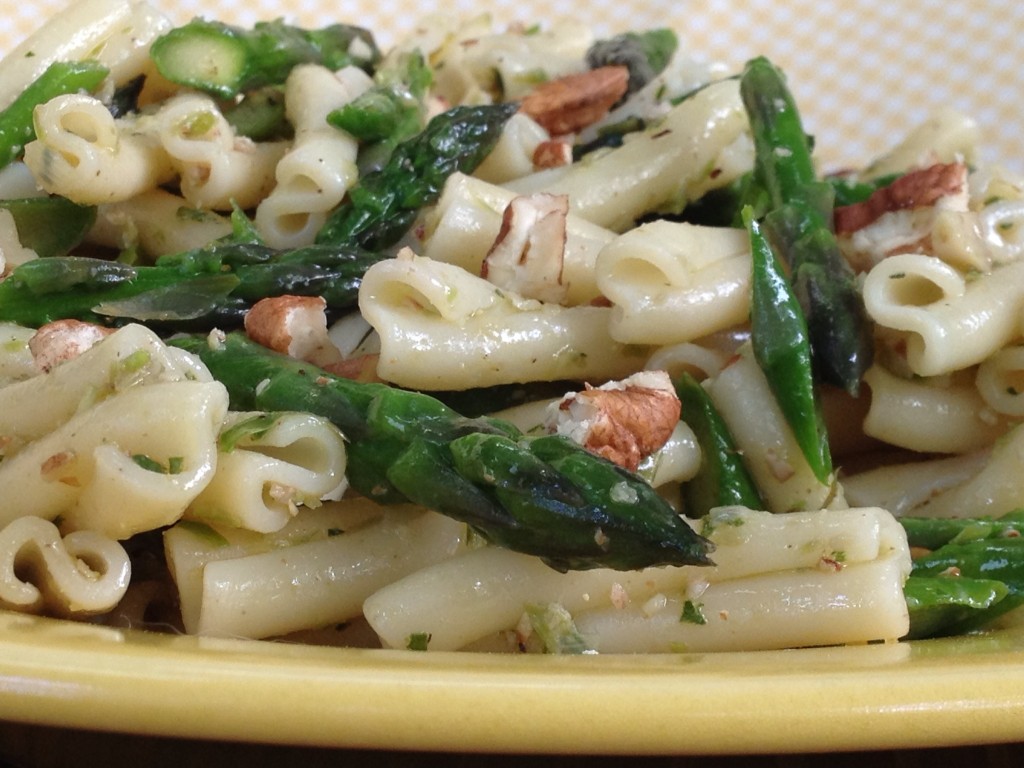
Asparagus & Sorrel Pesto Pasta

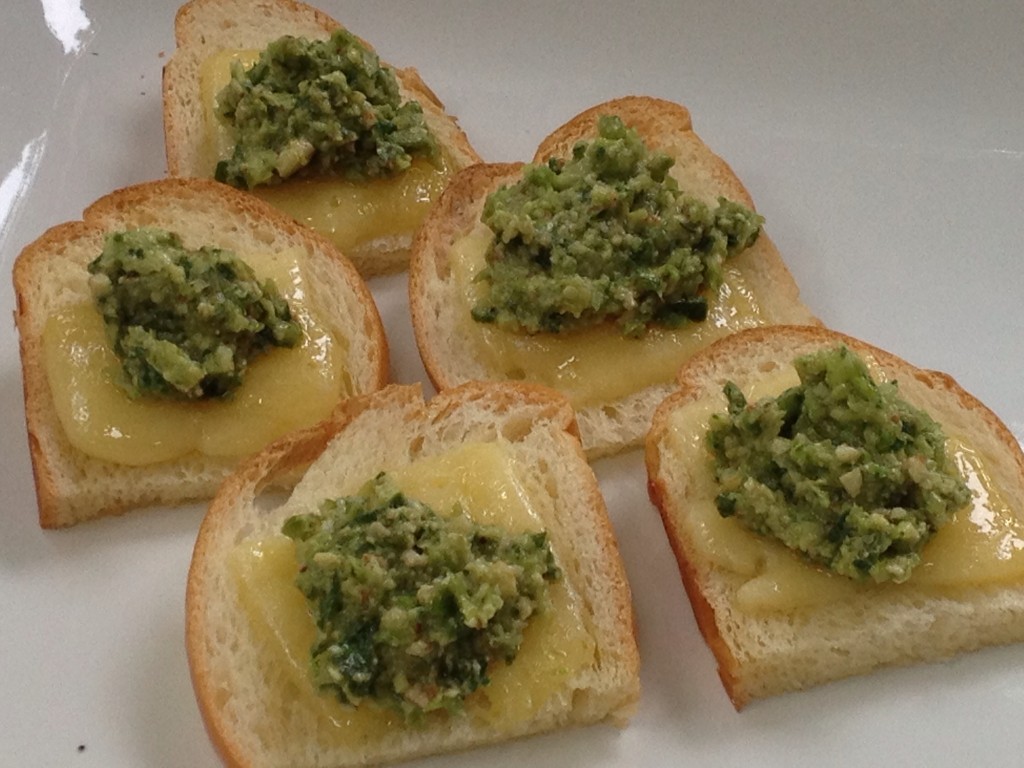
We previewed this recipe for pesto pasta at the Wednesday Carrboro Farmers Market and it got great responses from the shoppers. The base pesto recipe came from Edible Earthscapes Farm in Chatham County, NC. I simply increased the sorrel and changed the pine nuts to toasted pecans from Sweetwater Pecan Orchard and used Calvander cheese from Chapel Hill Creamery. While I was chopping up the asparagus, I saved the tips and sautéed them in olive oil with a little fresh thyme and added them in later as I assembled this dish which gave it a bit more variation in color. For the market, I also added some additional rough chopped toasted pecans which added some crunchy texture.

You can make your own changes to this depending on what is available in your area, but I think you will agree that the bright fresh flavor is unlike a typical basil pesto. The Edible Earthscapes recipe also suggests using this on grilled cheese sandwiches, and I tested that as well as a small appetizer pictured below. Both were excellent so this recipe gets a huge thumbs up for versatility in the kitchen. The trick here is to have really fresh asparagus and sorrel. Use them both within a day or so of buying them at the market.

Asparagus & Sorrel Pesto Pasta

Ingredients

  • 1 cup raw young asparagus, (slimmer work better for this recipe), chopped, reserve the tips to saute or steam and add in later in assembly
  • 1 cup raw sorrel chopped (pressed into cup), stems removed up to the leaf
  • 1 tablespoon green garlic, chopped
  • 1/3 cup Chapel Hill Creamery Calvander Asiago Cheese, grated
  • 4 tablespoons chopped toasted pecans, (a little more if you want to add some during assembly)
  • 1/4 – 1/2 teaspoon Murray River Flake Salt (Himalayan salt will work)
  • 1/8-1/4 teaspoon Four Corners Pepper Blend, fresh ground
  • 4 tablespoons Extra Virgin Olive Oil
  • 3 cups dry Strozzapreti Pasta (Montebello) or a gluten-free pasta of your choice

Preparation

  •  In a small food processing add the asparagus stems, sorrel, green garlic, cheese, pecans, olive oil, salt and pepper.
  • Process until it is fairly smooth. It tastes nice with a little texture. For a thinner sauce add more olive oil.
  • Set aside. You will only need about 1/3 of this to make a large portion for 4 people. Freeze the remainder in an airtight bag or use within a day.
  • Cook the pasta according to the directions, drain and toss with pesto.
  • Add salt & pepper to taste. Murray River Flake Salt or Himalayan Pink Salt are both good choices.
  • Add cooked asparagus tips and prawns along with any additional cheese, or nuts.
  • Serve on a bed of shredded greens like baby chard, baby bok choy or baby cabbage. All three will be delicate and tender.
  • Or use the pesto on toast with a small slice of Chapel Hill Creamery Hickory Grove or as a grilled cheese sandwich.


Posted in Appetizer, Dinner, General, Salads, Spring | Tagged , , , , , , , , , , , , , , , , , , | Leave a comment

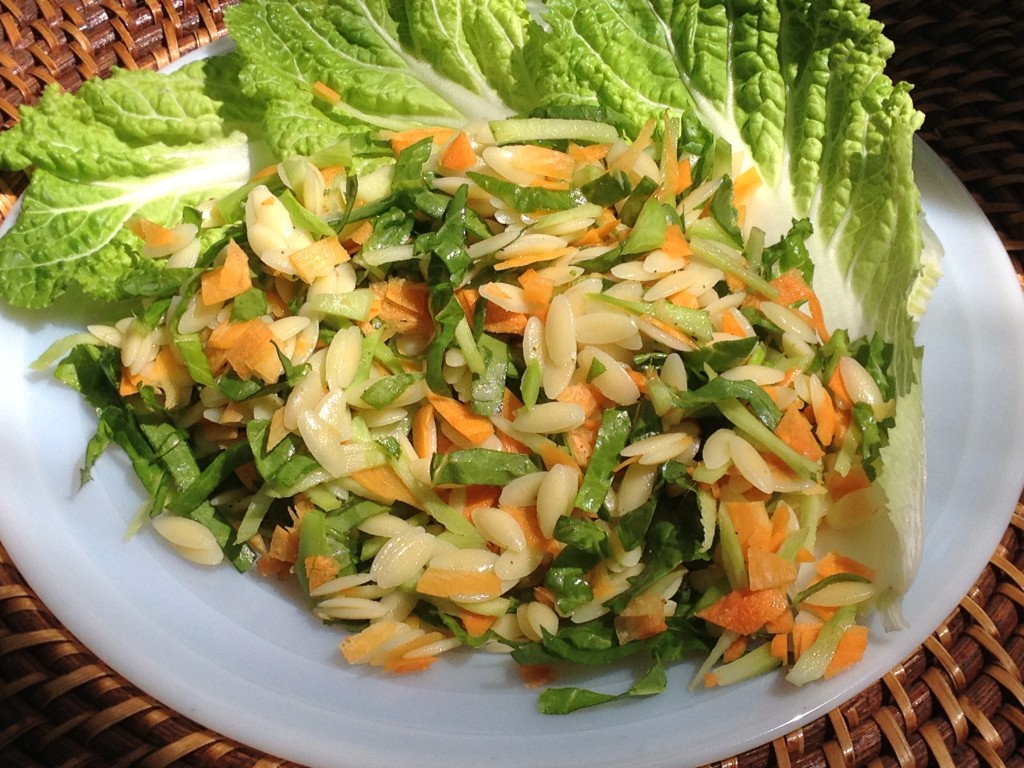
Broccoli, Carrot & Greens Salad to Soup

Anyone that knows me knows I love to recycle just about anything. Recipes included. The base for this recipe is one of my family’s favorites (Broccoli, Carrot & Orzo Soup) and I have to say that I have also used it in a puree form for both babies and sick family members because it’s packed with lots of good flavor and easy to swallow.

The variation we sampled at the Carrboro Farmers’ Market this week probably won’t puree as well, but it’s packed with even more color, nutrition and flavor. Best of all, it’s really fast to make all year round if you freeze a few seasonal items as they come in during the spring and fall. There’s also the added benefit of being a salad first and a soup on another day with all of the same ingredients and a lot of flexibility depending on your health needs. This is a light soup, so even if it’s a warm spring or fall day, this soup is light.

To make the salad, just eliminate the broth and pre-cook and cool your pasta or quinoa. Toss the entire mixture with a light dressing or just some olive oil, salt & pepper, remembering to save some for use in the soup without the dressing.

Broccoli, Carrot, Greens Soup with Pasta or Quinoa

Ingredients

  • 1 cup chopped carrots ( ¼“  slices)
  • 1 cup chopped broccoli stems peeled and chopped into ¼” slices
  • 1 cup chopped broccoli florets, chopped into pieces about 1/4 – 1/2″
  • 2 teaspoons chopped green garlic or green onion if available
  • ½ cup dry orzo (or other small pasta or 1 cup cooked quinoa)
  • 2 cups shredded baby chard (spinach is going to be stronger flavor)
  • 1 cup baby or medium bok choy, stems and leaves
  • 4 cups chicken or vegetable stock
  • 2 eggs, beaten
  • 2-4 Tablespoon Chapel Hill Creamery Calvander Asiago cheese, grated
  • Salt and pepper to taste

Salad Preparation – can be served warm, room temperature, or chilled

  • If you would like quinoa, couscous or orzo in your salad, prepare that according to the directions and set aside.
  • Wash and dry the chard & bok choy. Julienne cut it into thin 1/8-1/4″ strips including the stems of the bok choy (not the chard)
  • Prepare the carrots and broccoli. Make sure to cut away the outside thick skin that covers the larger stalk of the plant.
  • If you want cheese in your salad, use a medium grater
  • Clean and finely chop green garlic & green garlic and add to the salad
  • Toss everything together and add your favorite dressing.


Soup Preparation

  • In a large pot, heat the broth to boiling and add the pasta, green garlic, onion, carrots and the stem slices of the broccoli (save the florets or they will over-cook). Partially cover and simmer for 10 minutes on low. Pasta may tend to boil over if the pot is not large enough or the heat is too high. If you choose to use quinoa, I recommend you cook it first using a baked method.
  • Stir in the remainder of the broccoli florets and cook 5 minutes on low simmer.
  • Bring the soup up to a boil again and slowly drizzle the beaten egg into the soup so it cooks as it hits the liquid. Stir constantly as you add the egg to get threads in the soup.
  • Add in the shredded greens. Cook one minute.
  • Add the cheese and season to taste with salt & pepper.

Notes

If you would like to make this soup in the middle of winter or summer as a Second Harvest recipe, you can steam the broccoli and carrots and freeze them to save a step when they are out of season. It’s also possible to put them into the broth and add the egg and then freeze that mixture and pull it out and add cooked pasta, quinoa cheese or greens when you reheat it.

Posted in Diabetic Friendly, Gluten-Free, Recipes, Salads, Second Harvest, Soup | Tagged , , , , , , , , , , , , , , , , , , , , , , , | Leave a comment

Strawberry Madeleines for Mother’s Day

Dealing with 25 pounds of any fruit can be challenging, especially when you need to clean and store it as quickly as possible to retain the best flavor. That’s probably why most folks resort to canning or freezing. So it shouldn’t surprise you that I spent the better part of two days making a couple different variations of strawberry jam this year. (The recipes are on the site) Everyone has their favorite and I tried a couple of new ones this year. I did not fall in love with the roasted strawberries. Unlike roasted figs, I thought the texture and flavor of the strawberries were not enhanced in the process.  Most of the time, I’m not a jam eater. I like to use the fruit in recipes when I can’t get fresh local fruit, but I really enjoyed this year’s early crop of Sweet Charlies from Whitted Bowers Farm. They were quite sweet and this year I swapped out half of the cane sugar for coconut sugar in my recipes with really wonderful results in the complexity of the jam.

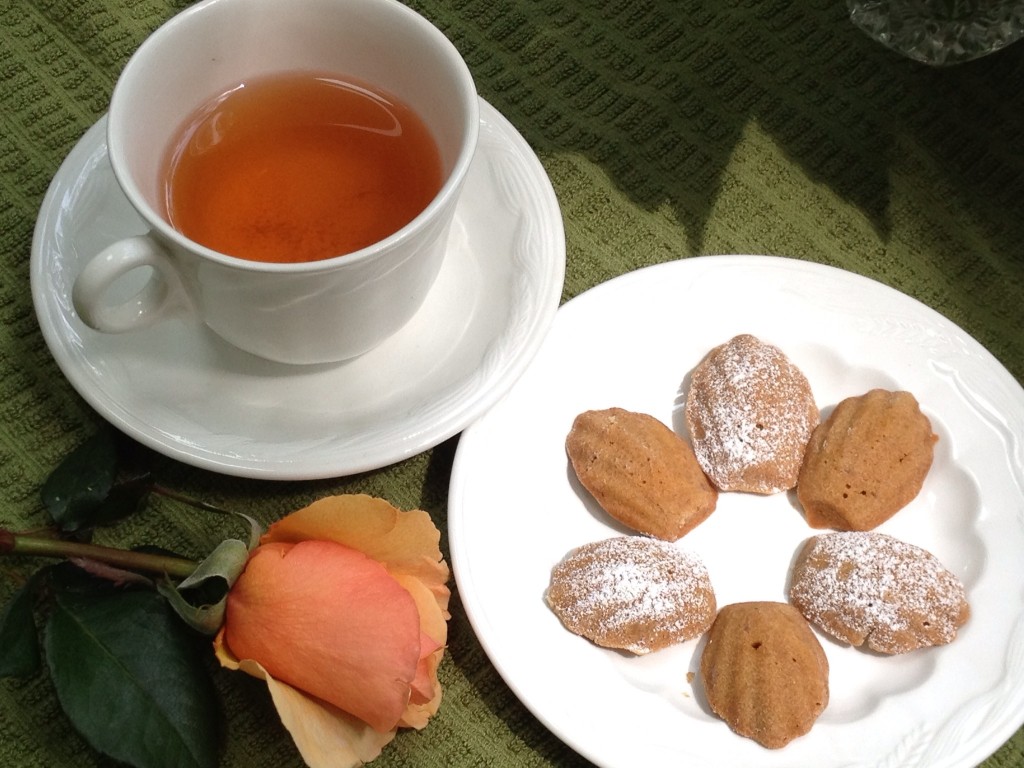
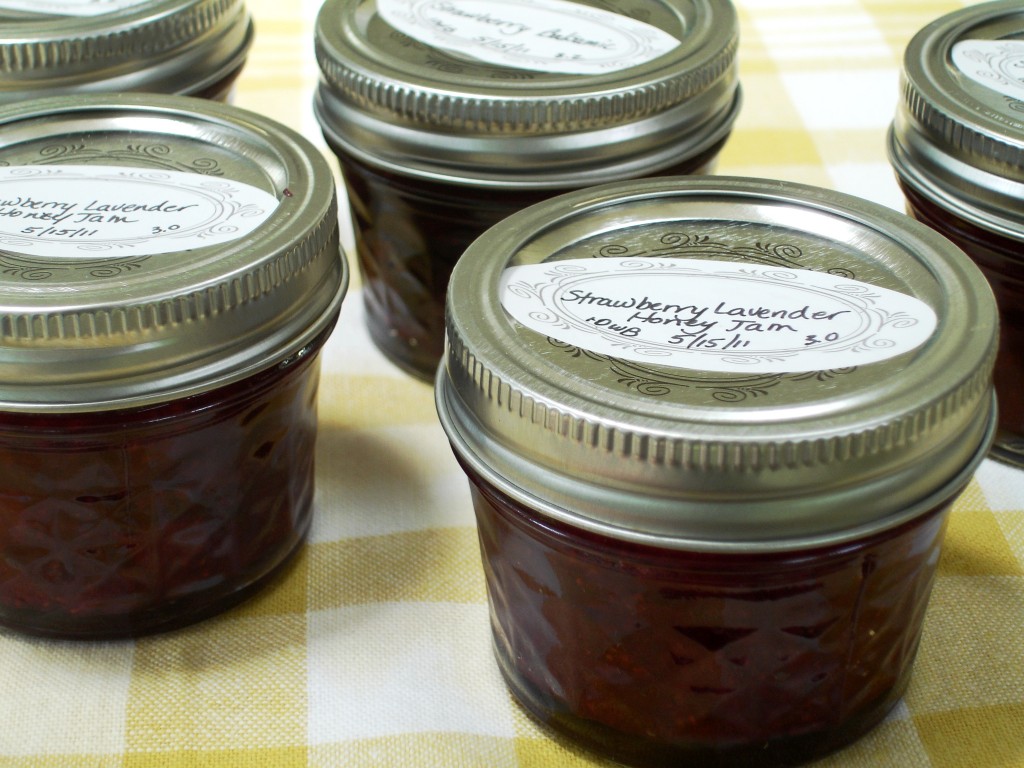
I’ve been meaning to try to make these little tea cakes for some time and I happened to find several recipes that incorporated both savory and sweet into the traditional plain batter when I was searching for muffin recipes. While I don’t think you can really taste all that much strawberry in these, the flavor is light and delicate and worth the effort for a special day.  I used the Strawberry Balsamic Jam but I think the Strawberry Lavender Honey might be even better.

My first recollection of confectioners’ sugar was my mom dusting what we used to refer to as “Jello Cake”. Basically you cover up all the holes you have poked in the cake with the sugar to make it look pretty. So it tends to be the way I use confectioners sugar today. Much less as an ingredient and more like coverup makeup. These are pretty right out of the pan and don’t require the dusted sugar for flavor. In fact, I think the sugar covers up some of the light flavor that the nutmeg and cinnamon add to the cake. But it does make them fancy on the plate. So you might consider doing just a few. Make sure you wait until they are cooled before dusting with the sugar, and I like to use a spring mesh tea holder because it sifts the sugar and makes less mess, being quite small.

This recipe is quite small and only makes about 20-24 cookies. Enough for Mother’s Day and not much more. It’s not a terribly healthy recipe but you can use local flour, butter, eggs, and jam.  Be sure not to overload the molds because the batter spreads and rises during the baking process and you just want the cakes to go to the edge and hold it for a perfect shape when you take them out of the molds. Watch them closely in the oven so you don’t over-bake them or they will be dry. I haven’t tried replacing some of the butter with coconut oil yet, but I would expect that it’s possible to replace at least half in this sweet version.

Strawberry Madeleines

Ingredients

  • 1 egg
  • 5 tablespoons coconut sugar (or cane sugar)
  • 1/4 teaspoon vanilla extract
  • 2-3 tablespoons strawberry balsamic or lavender jam (doesn’t have to be thick)
  • Pinch Pink Himalayan Salt
  • 1/2 cup organic all-purpose flour
  • 5 tablespoons local salted butter (melted and cooled slightly)

Preparation

  • Preheat oven to 375F.
  • Melt butter and set aside to cool.
  • Butter and flour mini-madeleine pans well. I used extra melted butter and a tea caddy to add flour to each mold evenly.This left me with a light but very even coating.
  • With a hand whisk, beat the egg and sugar in a large until they are well-blended.
  • Beat in vanilla, jam, and salt.
  • Add flour and beat until just blended.
  • Gradually add cooled melted butter to mixture, beating until just blended.
  • Spoon one teaspoon of batter into each cake shell. The batter may thicken as it cools but don’t overfill or try to press the batter into the mold, they batter will spread and fill the mold.
  • Bake until puffed and edges are lightly golden, about 10-12 minutes. Do not brown. The time may vary depending on your baking sheet. I used the mini madeleine coated pan from Williams-Sonoma. Makes about 20-24 depending on how full you fill the molds.
  • Cool in pan for 3-5 minutes, then remove from the pan gently with a silicon spatula and finishing cooling on a wire rack.
  • Store in an airtight container for up to 3 days.
  • Dust with confectioners sugar just before serving.


Posted in Dessert, Preserves, Recipes, Spring, Year-Round | Tagged , , , , , , , , | Leave a comment

Strawberry Mini Muffins

The season has brought us some unusual weather and lush strawberries along with cooler temps this week that might warrant a cup of coffee and chocolate covered strawberries beside a warm fire! But for breakfast, this recipe is easy and you can make it anytime of the year if you freeze some extra berries. Many of you know that I love going up to Whitted-Bowers Farm just north of Hillsborough. I was really excited to see their new sales shed with all the lovely baskets hanging on the wall and the skylights that let natural light fill the room even on a damp rainy morning. If my back would hold out, I could probably spend the day picking berries in that setting.

Since I always pick more than I can possibly use in a day or so, it’s necessary to store some. So I dry and half or quarter them before storing them in containers in the freezer. I know they are going to be blended, cooked or mashed so I don’t worry about adding sugar or making them freeze in any particular way. For this recipe I used my version of a Strawberry Balsamic Jam which is more like spreadable fruit with a little pectin from some dried apples I keep around in the fridge.

The batter should have the consistency of cake batter before you cook it. And this week I had an opportunity to try out some new larger mini muffin pans from Williams-Sonoma. I did not get the “gold-touch” pans although they looked quite nice. It might be something to consider if you are gentle with your pans and you want to make sure you don’t have any problems with sticking. I lug mine back and forth to the commercial kitchen, on vacation and on occasion they get loaned out, so I didn’t want to invest in the super-nice model for fear I would scratch them up with my unconventional lifestyle. The heavy aluminum ones with the steal coating worked very well. I always grease the pans with coconut oil or butter and I didn’t have problems with sticking. The first use of these pans was in the large convection oven and there wasn’t any twisting or warping during multiple bake times. There is a good lip around the edge for handling these pans in and out of the oven. It’s a great safety feature, in my opinion, because they are quite a bit more heavy than traditional aluminum pans.


Strawberry Muffins

Ingredients

  • 1 3/4 cup all-purpose organic flour
  • 1/2 teaspoon Himalayan fine salt
  • 2 tablespoons cane sugar
  • 1 teaspoon baking soda
  • 1/8 – 1/4  teaspoon nutmeg
  • 1/8 – 1/4 teaspoon Ceylon cinnamon
  • 2 eggs (farm eggs – regular size, not L/XL)
  • 1/3 cup cane sugar
  • 1/3 cup coconut sugar (with or w/out vanilla)
  • 1/2 cup organic greek yogurt (regular or non-fat)
  • 2 tablespoons butter melted and cooled
  • 2 tablespoons coconut oil, (warm just to liquid state)
  • 1 teaspoon vanilla extract
  • 1/2 cup fresh strawberry puree with juice
  • 1/2 cup strawberry preserve puree

Preparation

  • Sift together the flour, 2 tablespoons sugar, salt, baking soda, nutmeg and cinnamon. Set aside
  • In a mixer, combine the eggs and both sugars until smooth.
  • Add the melted and cooled butter and coconut oil. Blend.
  • Add the yogurt and vanilla extract along with the strawberries and preserves. Blend well.
  • In 3 parts add the dry ingredients and incorporate quickly without over-mixing.
  • Scrape down the sides of the bowl and by hand gently fold in any remaining dry ingredients.
  • If the consistency is not like cake batter, add some additional jam or strawberry puree to thin the batter.
  • Grease the muffin tins with butter or coconut oil.
  • Fill the cups about 3/4 full, but no more. They will rise.
  • Bake at 375F for 11-13 minutes. Just bake until set, otherwise they will be overdone when cooled.
  • For a convection oven, lower the heat to 250 and bake time to 9-10 minutes.
  • Dust with confectioners sugar just before serving if you want to spruce them up.

Notes

  • These were good made with Strawberry Balsamic Preserves.
  • For added texture, finely chop your strawberries instead of using a puree base.
  • They will not keep as well using the chopped berries and the texture and bake time can vary up to a minute.


Posted in Preserves, Recipes, Second Harvest, Snack, Spring | Tagged , , , , , , , , , , , , , , , , , , | Leave a comment

Strawberry, Lavender & Honey Jam

I just got a note from Whitted Bowers Farm outside of Hillsborough in Cedar Grove, NC. Their season for strawberries is going to be early and short this year. It seems that the warm winter has everything coming in early but also has it maturing more quickly which condenses the harvest time. Last year I heard rumblings about this issue from several farmers regarding just about every crop. Even if you don’t believe climate change is real, you’ll need to add some food preservation skills to your cooking techniques if you want to enjoy some of these crops year-round.

Strawberries are no exception. Last year I sliced quite a few and ran them through the Excalibur dehydrator. I’m still enjoying the crisp little red delights as a snack food this month. And I was able to add them to a cobblers all winter to help thicken the extra liquid that seems to be present with frozen berries, creating a nice rich thick sauce under the crumb topping.

Jams are a good way to preserve seasonal fruit for use in “second harvest” recipes. You don’t have to use a ton of sugar to end up with something wonderful that can be frozen and added to smoothies, cobblers, or the top of cakes later in the year. This recipe is an adaptation of several found on the internet. All of the originals had quite a bit more lavender, but I’m not a huge fan of that flavor in my food. This recipe has the amount trimmed down quite a bit so there’s just a hint when you’re finished and the honey really comes through with the berries. And I used a mix of berries from the farm because like any other fruit or vegetable, there are different sugar levels in each type of berry that contribute to the unique flavor of this recipe.

One note is that this actually tasted better after I canned it and let it sit for a couple of weeks. The lavender flavor blended well and became more subtle over time. And don’t leave out the pepper. It’s just a smidge and it’s important to the overall final flavor just like the lemon in this recipe. I used the Four Corners blend of mixed peppercorns from Savory Spice Shop in my grinder, but fresh ground black pepper will do.


Strawberry, Lavender & Honey Jam

Ingredients

  • 4 cups chopped clean strawberries
  • 1/2 cup organic cane sugar
  • 1/2 cup local honey
  • 1/2 teaspoon dried lavender flower heads (culinary grade)
  • 1/2 teaspoon lemon zest
  • 1/8 teaspoon fresh ground black pepper


Preparation

  • Gently wash and dry the strawberries, removing any spoiled or bruised parts as well as the tops & stems.
  • Cut the berries into quarters
  • Place the lavender in a tea strainer or cheese cloth so you can drop it into the cooking jam.
  • Cook all of the ingredients for about 10 minutes on medium / high heat, stirring frequently to avoid burning, but keep at a rapid boil to break down the fruit and sugar. A high-wall stainless pan like the Multipro Cuisinart or Le Creuset type dutch oven both work well for this process as they keep the heat very even all the way up the sidewall of the pot.
  • Lower the heat and remove the chunks of strawberries that are left. Set them aside and continue to cook the liquid for another 10 minutes to reduce and thicken while stirring.
  • Add the strawberry chunks back into the reduced liquid and taste. Add additional lemon if you like your jam more tart. Other wise refrigerate for 12 hours before freezing or canning.
  • If you plan to can, I recommend using a pH meter to test your acidity level and adjusting the mixture to meet safe requirements before proceeding to a water bath process.
  • This should yield about 4 of the 1/2 pint canning jars.

Notes

If you don’t have time to make jam or dehydrate right away. You can freeze the berries in small hard containers and come back to make jam later in the season. Many internet comments say you need to coat the berries in sugar. You don’t. I’ve done it both ways and the problem with coating them in sugar is that it will mess up your final measurements when you go to make jam. The berries freeze just fine without it, whether you are making smoothies or jam later in the year. You can leave them whole, half  or quarter them, but make sure you clean and dry them well before you freeze them if you plan to eat them raw later in the year.  If you choose to dehydrate, you’ll need to work with the berries right after you clean and dry them. Just slice them about 1/8-1/4 inch thick and lay them on the silicon sheets for the dehydrator. They retain their bright red color quite well and are an excellent snack for lunches or hiking.

7/13/12 If you are near Louisburg, I have used Woodleaf Honey for more than 25 years and it is wonderful in this recipe. Bill has a lot of Tulip Poplar trees on his property. Maybe it’s just my affinity for this particular tree in the fall when it turns the most beautiful shade of yellow-orange.  I think the Orange County Blend from Just Bee Apiaries in Chapel Hill would also work well in this recipe and not overpower the lavender or strawberries.

Posted in Breakfast, Dessert, General, Preserves, Recipes, Second Harvest, Snack, Spring, Vegetarian, Year-Round | Tagged , , , , , , , , , , , , , , , , , , , , , , , , , , , , | 1 Comment

Tomatoes & Cauliflower: Out of the Freezer & Into the Pan


Many of you remember the funny looking giant orange tomatoes from Wild Onion Farm at the Raleigh Downtown Farmers’ Market  last season. “Kellogs Breakfast” is a beefsteak  tomato with a sweeter profile. So initially I paired it with some spicy sausage from Cohen Farm for contrast. When I made the sauce for a market tasting, there was some left, which I brought home and froze in single serving containers for those nights when I wanted a quick dinner.

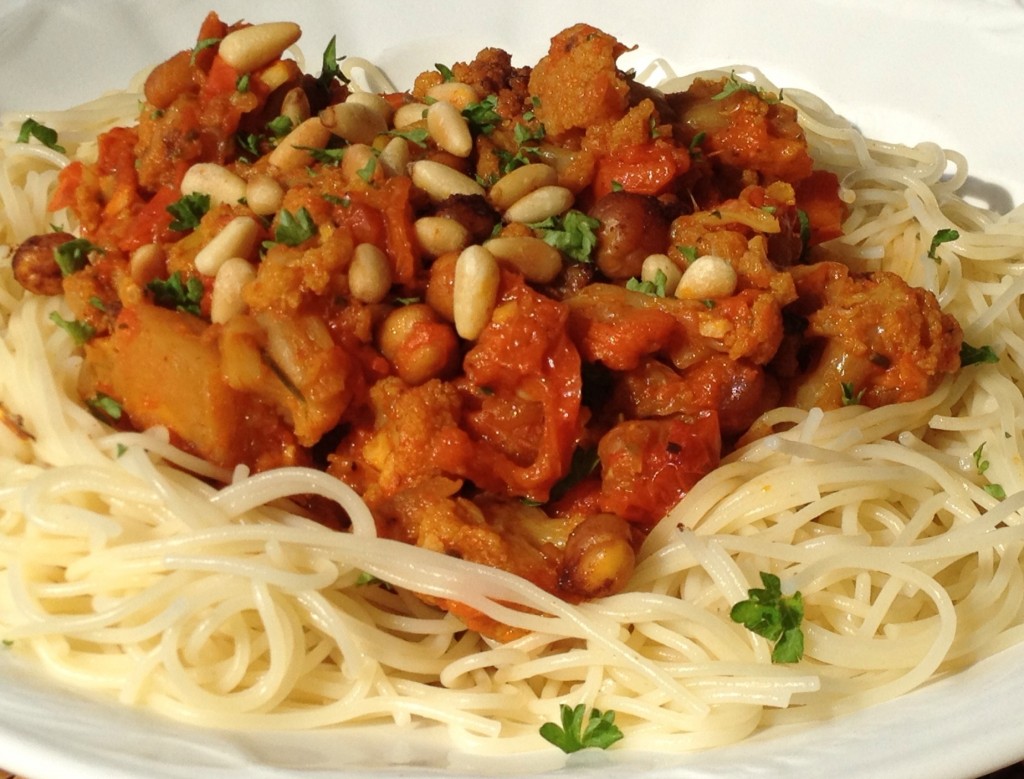
Today I pulled a couple of them because I also had some leftover roasted cauliflower that I sautéed in a Sambar spices from a recent lesson  at Vimila’s Curryblossom Cafe in Chapel Hill. Armed with these two ingredients a good internet connection, I found a lot of recipes that combined tomatoes and cauliflower.  Searching through them I found many recipes also included chickpeas. And so I went to the freezer and found some roasted chickpeas.

Now we’re cooking! I heated all the elements up on low in a wide bottom pot so the spices from the cauliflower and chickpeas would blend into the liquid from the tomato sauce. There was  still  more liquid than I wanted, and I didn’t want to just cook it off, so I threw in some dehydrated Roma and Sungold cherry tomatoes to soak up the excess liquid. Just ten minutes later a wonderful “Meatless Monday” lunch emerged.

If you can’t eat pasta, then there are a couple wonderful alternatives. The first is spaghetti squash. Just roast the squash for about 40 minutes at 400F with the cut side down on some parchment paper in a sealed pot or aluminum foil packet.  When it’s tender, flip it back over and loosen some of the strands of squash before you add the add the tomato and cauliflower sauce.  Just serve it all in the skin.

The second alternative is to use Petite Golden Lentils, which look like a split yellow peas, as a base. They cook up in about 30 minutes and have a nutty flavor that holds its shape well. I recommend cooking it with a bit of sautéed carrot and celery in vegetable broth, both of which will blend well with the tomato and cauliflower. You might consider using this as a base for a soup and add some additional broth.

This recipe is made from the Kellog’s Breakfast Orange Tomato Sauce base recipe (16 ounces – about 2 1/4 cups) , the Roasted Chickpea recipe (about 1/2 cup) (I just pulled out the pepitas). Then add some frozen Roasted Cauliflower (about 1 1/2 cups) sautéed with a little olive oil and Sambar Powder which was left from my cooking class at Vimala’s Curryblossom Cafe  which is taught on Sunday’s throughout the year. (Go light and start with 1/4 teaspoon add 1/4 at a time. The base is red chilies and peppercorns.)  I added about 1/16 teaspoon of both turmeric and cinnamon along with about a teaspoon of olive oil when I reheated the cauliflower with the spices.

At the end I dry toasted about 1/4 cup of pine nuts in a small pan until they were barely beginning to turn brown. Add them at the end so they stay a crunchy while you are eating the dish. All of these elements can be made separately when the necessary ingredients are in season and then put together for a really fast meal. If you have regular tomato sauce, it should work pretty well for this recipe. You won’t get quite the contrast that the sweeter Kellog’s Breakfast tomatoes adds, but it will still make a fine meal! And if you want a little more heat, there are those lovely dried cayenne peppers at the Carrboro Farmers Market. I would only recommend using a quarter to a half of one for this recipe and make sure to dump out the seeds first.

There are some stores to buy the Sambar Powder spice, but each recipe will vary because they are normally passed down in families. Vimala’s came from her mother. If you would like it, it’s part of her cooking class and well worth your time and money to take given the vast amount of knowledge she shares. I did find an “instant” recipe for Sambar on another site called Edible Garden and a spice powder you can purchase on Nataraja Spices.


Notes for Saving Cauliflower

Posted in Dairy-Free, Dehydrating, Diabetic Friendly, Fall, Gluten-Free, Recipes, Second Harvest, Vegetarian, Winter | Tagged , , , , , , , , , , , , , , , , | Leave a comment