Late Summer Veggie, Egg & Cheese Wrap

Some people in the house just can’t stand it when you mention zucchini, squash or eggplant by the time late September rolls around. These are three vegetables that seem to thrive in the South and I really enjoy them all year round with some storage techniques I’ve developed over the years.

But here’s a way to enjoy all three along with local eggs, cheese, sausage or ham, and tortillas or naan for a quick breakfast, lunch or dinner. Make your vegetables up on Sunday or after the market mid-week and you can have meals for a couple of days using the same vegetables either in wraps or salads.


Late Summer Veggie, Egg & Cheese Wrap

Ingredients

  • 1 Rosa Bianca or Graffiti Eggplant weighing about 1/2 lb, cut into 1/2″cubes
  • 1 zucchini weighing  4-5 oz, cut into 1/2″ cubes
  • 1 summer yellow squash weighing 4-5 oz, cut into 1/2 ” cubes
  • 1/2 Italian Sweet Red Pepper, thinly sliced
  • 1/4 cup chopped cooked ham or sausage (optional)
  • 1 zucchini weighing  4-5 oz, cut into 1/2″ cube
  • 1 summer yellow squash weighing 4-5 oz, cut into 1/2 ” cubes
  • 1-2 tablespoons green onion, chopped
  • 6 Sungold cherry tomatoes, cut in half
  • 1-2 tablespoons Olive Oil
  • 1/2 teaspoon Himalayan salt
  • 1/4 teaspoon mixed ground peppercorn blend
  • 3 eggs, lightly beaten with 1 tablespoon filtered water
  • 1/4 cup shredded Chapel Hill Creamery Hickory Grove Cheese
  • Local Naan (Chicken Bridge Bakery) or Tortillas (Box Turtle Bakery) from the farmers market

Preparation

  • Warm a large skillet and add enough olive oil to lightly coat the entire surface, realizing that the eggplant will soak it up.
  • After a minute when the oil is warm, add the eggplant, peppers (and meat) and stir to coat with the oil.  Add the salt and pepper. Let the mixture cook about 5 minutes and stir.
  • Add the zucchini & squash. Cook about 3-5 minutes until the squash is barely cooked through and still firm.
  • Set the vegetables aside on a plate and use the warm skillet and a little additional olive oil to cook the eggs either as an omelette or scrambled. Near the end of cooking as they are just about finished add the amount of cooked vegetables, raw green onion, raw tomatoes and cheese to the eggs.
  • When the eggs are finished cooking add them to the fresh Naan or Tortillas, fold over and serve warm.
  • If you need to save these for a later meal, wrap them in parchment or wax paper and store in an airtight container for up to 2 days.




Posted in Breakfast, Egg, Fall, Nut-Free, Recipes, Seasonal Eating, Summer | Tagged , , , , , , , , , , , , , , , , , , , , , , , , | Leave a comment

Early Fall Vegetable & Quinoa Salad

Sunday is usually spent working out the final recipes for mid-week market demos or planning family meals based on what purchases happened at the farmers’ markets over the weekend. Yes, I’m a market junkie and it’s not abnormal for me to visit 3 markets on Saturday when I’m not working at one. Part of it is purchasing from different vendors and seeing new items in each market and part of it is purely the social aspects of visiting with farmers that I might not get a chance to see more than once a month because of schedule conflicts.

Regardless, there is always a cooler full of veggies to be sliced, diced, cooked or otherwise dealt with on Sunday and that’s normally the day I make a pot of some sort of bean, rice and quinoa to mix into a hummus, soup or salad.

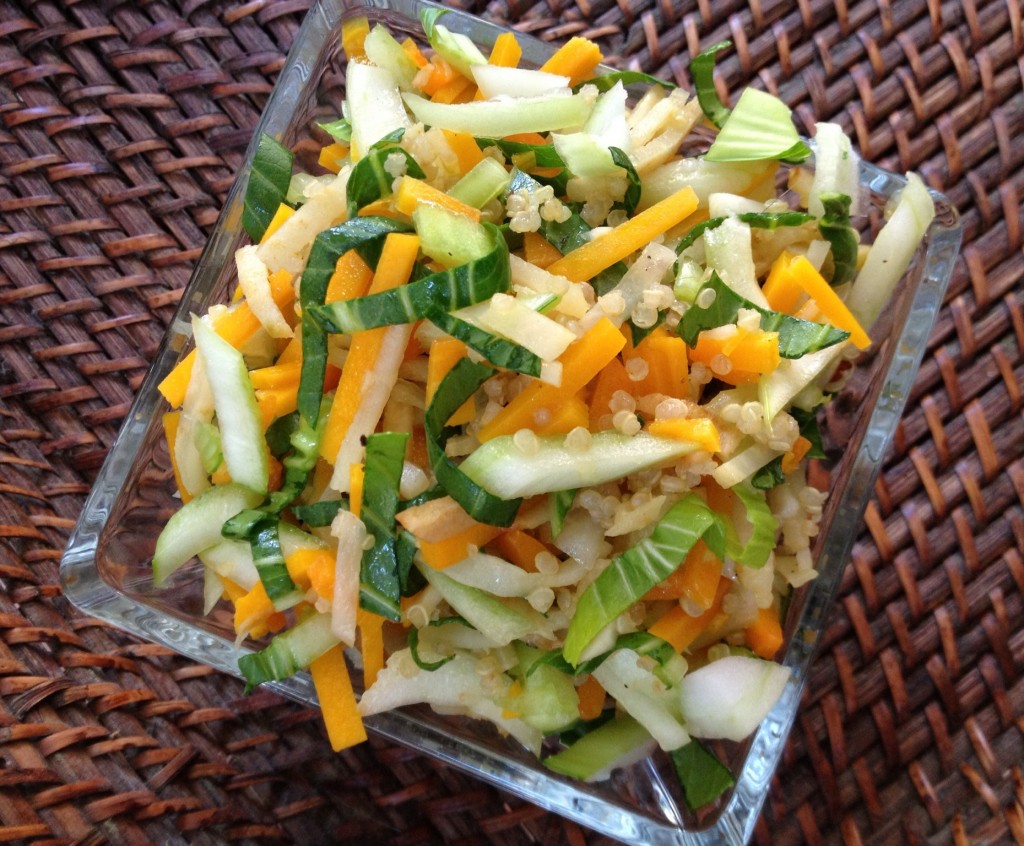
This week for the Carrboro Farmers’ Market I had Butternut Squash, Celery Root, White Turnips and some bok Choy. Many times I will simply spiral cut the turnips to be used in both a raw salad and then a soup but this week I decided to matchstick cut them (otherwise known as julienne) along with the butternut and celery root. Then I lightly sauteed the butternut and turnips (a longer saute on the celery root) and mixed all three with the quinoa and fresh cut bok choy (which was left raw).

Using Big Spoon Roaster plain Peanut Butter along with Just Bee Apiary Saxapahaw Honey I mixed together some fresh ginger, garlic and green onion with a tad of tamari and white balsamic vinegar for a dressing. Reflecting on this, I think that you could easily add some chicken to this salad in addition or as a replacement for the quinoa, depending on how you wanted to manage your protein intake.

A couple of notes are below about vegetable swaps, but regardless of that you could also use a large grater for the celery root, butternut squash, turnips and cabbage to make a traditional raw slaw out of this and leave out the quinoa. If you make the salad that way, cut back a little on the turnips and celery root and consider using radishes as a replacement for the turnips for a more mild flavor. You could also add some raw apple since apples, butternut squash and peanut butter all go well together!

This salad should make enough for 4 side servings.


Early Fall Vegetable & Quinoa Salad

Salad Ingredients

  • 2 cups butternut squash, julienne cut
  • 1 cup celery root, julienne cut
  • 1 cup white turnip, julienne cut
  • 1 cup thinly sliced baby bok choy ( the larger the plant, the stronger the flavor)
  • 1/2 – 1 cup cooked quinoa

Dressing Ingredients

  • 2 tablespoons Big Spoon Roasters Plain Peanut Butter
  • 1 teaspoon Just Bee Apiary Saxapahaw Honey
  • 1 1/2 teaspoons White Balsamic Vinegar
  • 1-2 teaspoons extra virgin olive oil
  • 2 teaspoons gluten-free tamari
  • 1 teaspoon fresh local ginger
  • 1 teaspoon fresh or roasted garlic
  • 1 teaspoon filtered water if needed to thin

Preparation

  • Using a large skillet, saute the celery root in olive oil for 3 minutes. It will sweeten as it cooks.
  • Add the turnip to the pan with the celery root and cook an additional 2 minutes.
  • Add the butternut squash and cook another minute or two.
  • Mix the cooked vegetables with the raw cabbage or bok choy and quinoa.
  • Mix all of the ingredients together for the dressing and toss with the salad right before serving.

Notes

Kelp Noodles could be used in place of quino in this salad if you were short on time or wanted to make this a totally raw salad (except for your roasted peanut butter)

What to do with leftovers? If you haven’t added a lot of quinoa you can warm this in a skillet and add some cooked pasta or soba noodles along with some hot red pepper flakes or bits of a Thai pepper. You may need to add a little additional peanut butter and tamari or water to keep it from sticking but it makes a lovely spicy lunch or dinner.

Posted in Diabetic Friendly, Dinner, Fall, General, Gluten-Free, Lunch, Recipes, Salads, Seasonal Eating, Sides, Vegetarian | Tagged , , , , , , , , , , , , , , , , , | Leave a comment

Fall Celery Root & Sweet Potato Soup

The chilly mornings are such a delight after a long Southern summer. It no longer seems foreign to be purchasing pumpkins and butternut squash or sweet potatoes & celery root at the market.

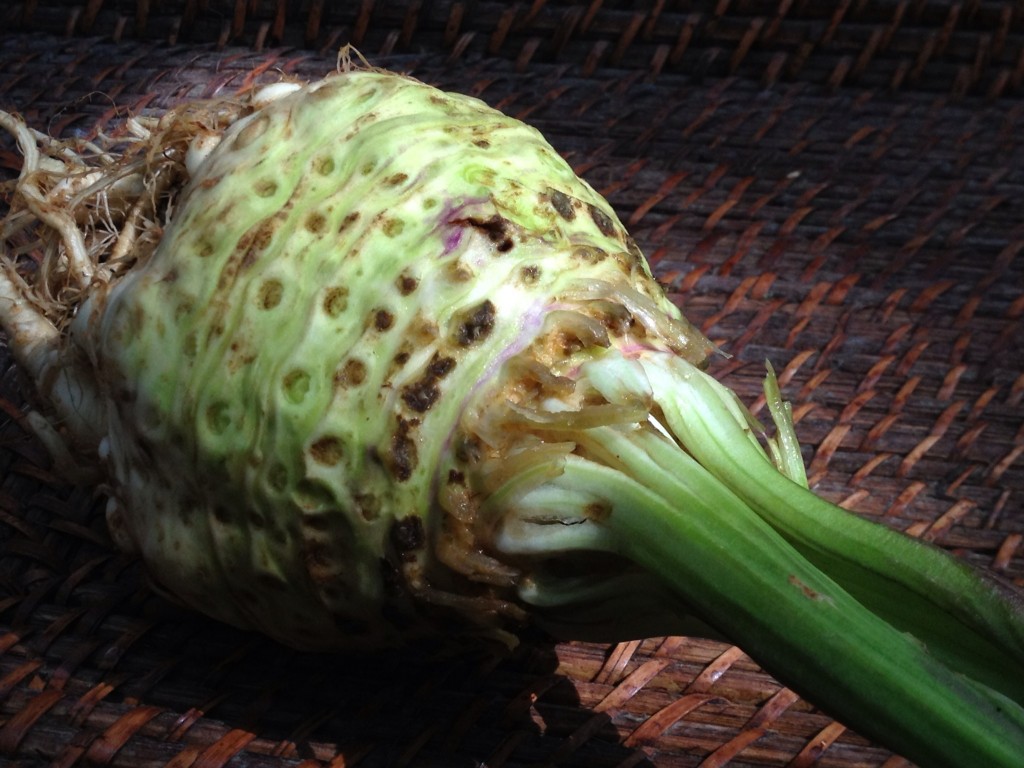
Celery root is an odd-looking vegetable and it tastes like a mild version of the celery stalk that you’re used to seeing at the grocery store or at the farmers’ market. It’s a different plant, as I understand from the farmers. You will need to scrub it clean, because like many root vegetables, dirt hides everywhere. Even though you will be peeling off the outside, it’s better to start with a clean vegetable. I would suggest using the serrated OXO vegetable peeler for this job. Please remember to be careful as that is not a forgiving tool if you slip and hit your hand.

Like many of my soup recipes, this one is forgiving and once you taste it, you may want to either add some heat with a hot pepper or two, or add some sweetness with coconut milk and fresh ginger. I think it could easily go either way. This takes no time to put together and it freezes really well. It’s also delightful chilled in the middle of summer. The other lovely thing about this recipe is that you can roast all these vegetable separately and store them in your freezer that way, and make your soup anytime throughout the winter. Second Harvest Soups are some of my favorites because you can try to mix and match whatever is left in your freezer near the end of winter to make new combinations and variations.


Celery Root & Sweet Potato Soup

Ingredients

  • 1 pound raw sweet potato (peeled)
  • 1/2 lb raw white turnips (washed and stemmed)
  • 1/2 pound raw celery root (peeled)
  • 1/2 pound raw sweet onion (peeled)
  • 1 teaspoon chopped (roasted or raw) garlic
  • 1/2 – 1 teaspoon thyme
  • 1 teaspoon Himalayan salt
  • 1/4 – 1/2 teaspoon mixed ground peppercorns
  • 1/2-1 teaspoon Chardonnay Oak Barrel Smoked Salt
  • 1/8 teaspoon nutmeg (do not use allspice)
  • 1/4 cup olive oil
  • 32 oz vegetable or chicken broth


Preparation

  • Slice the peeled sweet potato, white turnips, celery root and onions thinly.
  • Warm a large pot (Dutch oven or large heavy-duty stainless or cast iron casserole) on low/medium and add olive oil when the pan is warm. Let the oil warm just a minute.
  • Add the sliced sweet potato, white turnips, celery root, and sweet onion.
  • Add the Himalayan salt and the ground pepper. Stir to coat the vegetables. Add a lid and bring up to a low simmer so the vegetables begin to brown.
  • Cook for approximately 15-20 minutes until the vegetables are tender. Add the garlic, nutmeg and Chardonnay smoked salt. Simmer a couple of minutes until the garlic is lightly cooked.
  • Add the broth and bring back to a low simmer. Cook 15 minutes with the lid on.
  • Add the mixture to a food processor or blender and puree until smooth. Adjust for salt & pepper.


Notes

Several recipes online suggested using coconut milk instead or in addition to broth. Ginger would work well with the addition of coconut milk and maybe eliminate the nutmeg. And this mix might work well with a bit of heat from some local chilies or a dried powder.

Other recipes suggested the use of fennel and apples in additional to the current vegetables.

Posted in Dairy-Free, Diabetic Friendly, Dinner, Fall, Freezing & Canning, General, Gluten-Free, Lunch, Nut-Free, Recipes, Seasonal Eating, Second Harvest, Soup, Vegetarian | Tagged , , , , , , , , , , , , , , , , , , , , , , , , | Leave a comment

Le Creuset Give Away!


I can’t believe we are coming to the end of our main summer season at the farmers’ markets! There’s been heat and rain, but hey, we live in the South! The cooler days are just calling for grilled sandwiches with fresh veggies and local cheese.

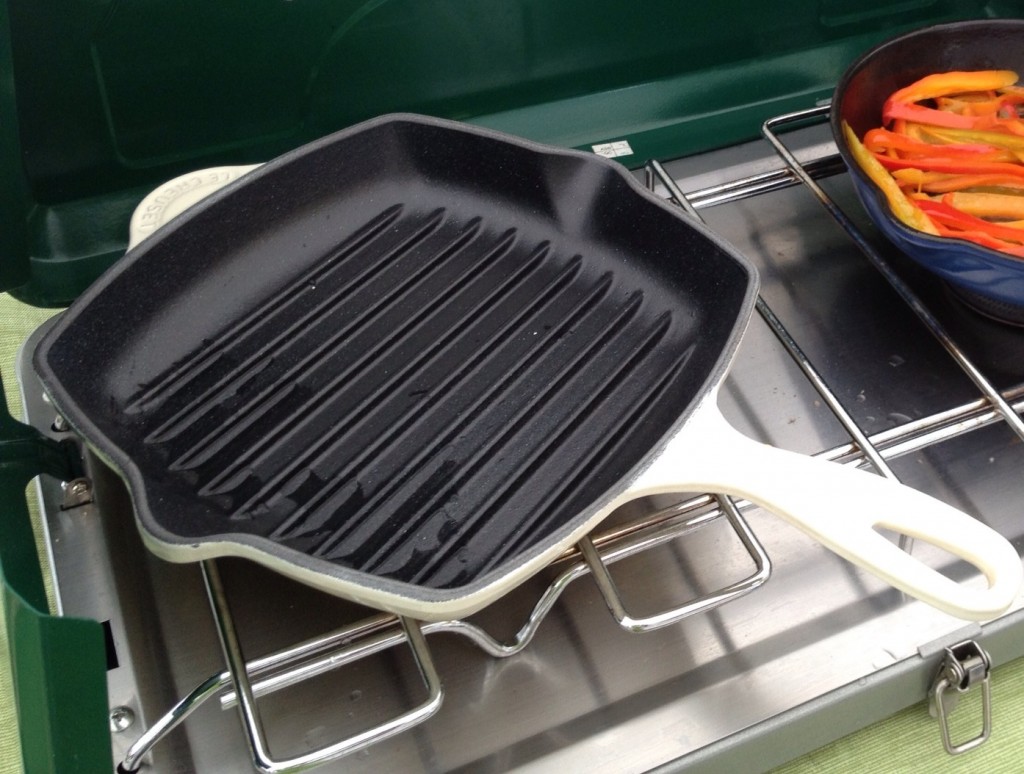
In anticipation of reaching 500 “likes” on facebook, I picked up an extra Tarheel Foodie green (aka Kiwi) griddle pan about a month ago at the Burlington outlet store sale. I can’t say enough good things about all of the managers at our local Le Creuset stores. They all cook and know how to use their products really well so ask questions when you go visit!

As many of you know, I’ve been using this product line for more than 30 years. It’s what my mother started me on when I developed an interest in cooking as a young teenager. This stuff is built to last a lifetime and I’m now handing down some of mine to my kids as they venture forth in their own cooking experiments.

So to spread the love and get you cooking up those excellent local farm products. I’ll be giving away a large griddle pan when we reach 500 likes on facebook. Maybe you don’t use facebook or twitter, so here’s the deal: spread the word and help me get to 500 likes on facebook. You can do this by emailing your friends with a link to this page or through twitter or facebook sharing and retweeting. If you are doing it just by emails with a link to this page, you’ll need to comment on this page (it will get approved in a couple of days and doesn’t show up automatically) and that will count that as an entry. The more you spread the word, the more entries you have. That’s it.

This includes individuals as well as schools, non-profit groups, farmers’ markets, and farmers. Our goal is to have you cooking local sustainable products and using great cookware to enhance the already inherent wonderful flavors that our farmers across the state bring us each and every week!

When we reach 500, we’ll pick a winner randomly and mail you the griddle pan.

In the meantime, keep cooking! There are over 150 recipes on this website now for you to try and many have variations that allow you to adapt them even further. Feel free to email me with questions too.

Good Luck and thank you all very much for a truly wonderful season cooking for you!


Posted in General, Tools | Tagged , , , , , , , , , , , , , , , , , , , , , , , , , | 1 Comment

Black Beans in the Pressure Cooker

It’s been raining all day, which makes it a good day to cook beans. Beans are a great side dish for many meals and if you make a few extra they are great in quinoa salads and soups as well. I like these added to the Eggplant & Black Bean Chili recipe.  Here’s a quick way to make a simple version of black beans where you can control the spices, salt & pepper and save a lot of money over canned beans from the store in the process. While I make them a little different for Black Bean Soup, this recipe is my “go to” when I’m in a rush and need to make a vegetarian version for several recipes. I’ve even frozen them for a week or two when I make too many. This will make about 2 cups of finished beans so adjust the amounts according to your family needs.

I advise using the long soaking method to prepare these beans. The quick boil works for many beans, including the black beans, but the beans seem to cook more evenly using the long soak method.


Pressure Cooker Black Beans

Ingredients

  • 1 cup dry black beans
  • 1 tablespoons Italian Blend Herbs (Savory Spice Shop)
  • 1 tablespoon crushed dried celery leaves (or 1 cup finely chopped celery stalk)
  • 1/2 cup sweet onion, finely chopped (or 1/4 cup frozen roasted onions)
  • 1 teaspoon garlic, finely chopped (or 1 teaspoon roasted garlic)
  • 1 bay leaf
  • 1/2 -1 teaspoon Alder Wood Smoked Salt (Savory Spice Shop)
  • 1/2 – 1 teaspoon Chardonnay Oak Barrel Smoked Salt (Savory Spice Shop)
  • 1/4 teaspoon Mesquite & Apple Wood Smoked Pepper (Savory Spice Shop)
  • Filtered Water

Preparation

  • In a covered bowl add the dried beans along with 6 cups filtered water.
  • Cover and let sit overnight.
  • Drain and rinse the beans (this removes surface dirt from the field or processing plant).
  • Using a stainless pressure cooker (4-6 quart size), add the beans, dried herbs, celery leaves, garlic, bay leaf, onion and ground pepper. Cover with 6-8 cups of filtered water.
  • Put the lid on along with the pressure valve and bring the pot up to a full boil according to the manufacturer’s instructions.
  • Reduce the heat to medium so the pressure valve is still moving actively.
  • Boil for 15 minutes after you reduce the heat to medium, maintaining an active boil.
  • Turn the heat off and let the pressure release naturally for 10-15 minutes. The beans will continue to cook.
  • Test the beans to make sure they are firm but cooked all the way through. If they are not, continue to simmer until they are finished.
  • Remove the beans from the liquid while they are still very hot and add the salt. The beans will soak in the salt. If you add it to the liquid, it will be too diluted and you will waste a lot of salt.
  • Let the beans sit 5 minutes while the salt soaks in and adjust the salt. They will taste more salty after they sit a few minutes.
  • Serve or refrigerate immediately.


Posted in Dairy-Free, Diabetic Friendly, Dinner, General, Gluten-Free, Lunch, Recipes, Salads, Second Harvest, Sides, Soup, Vegetarian, Year-Round | Tagged , , , , , , , , , , , , , , , , , , | Leave a comment

Pressure Cooker Chicken & Homemade Broth

I can’t say that I ever used a pressure cooker growing up. Neither of my grandmothers cooked with one that I ever remember. And we didn’t have one in home economics classes either. They were probably deemed “unsafe” for school use since the lids were not made quite so well back in the day.

It wasn’t until after I had my children, and time became an issue with work and day care arrangements, that I started testing out recipes using the cooker.  I rarely used it to make whole meals and I’ve never tried baking items in it. But, as a tool, to reduce the time it takes to cook meat or certain vegetables, it’s a great investment. It’s highly useful for canning those little gift jars of jam and makes quick work of the process too. Invest in a stainless one since aluminum sheds heavy metal at high temperatures and that is not healthy for you.

One of my favorite ways to use the pressure cooker is for poultry because it yields full-flavored, moist chicken along with broth for Mulligatawany Chicken Soup or risotto. Like the green bean recipe on this site, it’s simple and you can change some of the spices if you want to use your leftover chicken or broth for a specific recipe later. I also use this method to cook chicken backs and necks if I just need to make broth quickly or to cook multiple quail from my cousins’ hunting excursions. I’m sure you will find the broth from this recipe many times better than anything you buy at the grocery store and you’ll be able to control the salt and additives, creating a more healthy version.


Pressure Cooker Chicken &  Homemade Broth

Ingredients

  • 1 whole chicken (4-5 lbs fresh or thawed)
  • 1 teaspoon Himalayan salt
  • 1/2 teaspoon fresh ground pepper
  • 1 tablespoon Italian Herb Blend
  • 1 stick fresh rosemary 3″ long, rinsed
  • 1 tablespoon dried crushed celery leaves ( or 1 cup fresh celery, roughly chopped)
  • 1 cup sweet onion, roughly chopped (or 1/2 cup of frozen roasted onions)
  • 1/2 cup carrot, roughly cut up (optional)
  • 1 teaspoon garlic, rough chopped (or 1 teaspoon roasted garlic)

Preparation

  • Wash your chicken or chicken parts well. It’s not necessary to dry them.
  • Add everything to the pressure cooker and make sure your lid will close without binding.
  • Add enough filtered water to fill the pot 1/3 – 1/2 way full, no more! The chicken does not have to be totally submerged because the cooking is done with heat and pressure. The liquid is just to provide you with broth. Over-filling is dangerous, so follow your manufacturer’s instructions.
  • Put the lid on and add the pressure valve.
  • Bring the pot up to a full boil according to your manufacturer’s instructions so the pressure valve is spinning very fast and loud.
  • Reduce the heat to medium – high so the valve is running actively. Adjust the heat for your stove top.
  • Cook for 30 minutes after the valve is spinning rapidly and turn off the heat. The pressure cooker will continue to cook the poultry for about an additional 15 minutes as the temperature reduces naturally. Don’t use the fast cooling method. Let the pressure continue to finish cooking the poultry.
  • Once it is safe to open, you can remove the chicken and check the internal temperature which should be at least 165F.
  • At that point it is safe to pull the chicken off of the bone and serve it warm.
  • Strain the broth and discard the vegetables and spices. Refrigerate your broth overnight in small containers so that it cools down quickly. The fat will rise to the top and solidify. Skim it off before moving the broth to the freezer. Remember to label your broth with a date and use within 3 months.
  • Store the chicken separate from the broth to use or freeze.


Posted in Chicken, Dairy-Free, Freezing & Canning, General, Gluten-Free, Nut-Free, Recipes, Second Harvest, Year-Round | Tagged , , , , , , , , , , , , , , , , , , , , | Leave a comment

Pressure Cooker Green Beans

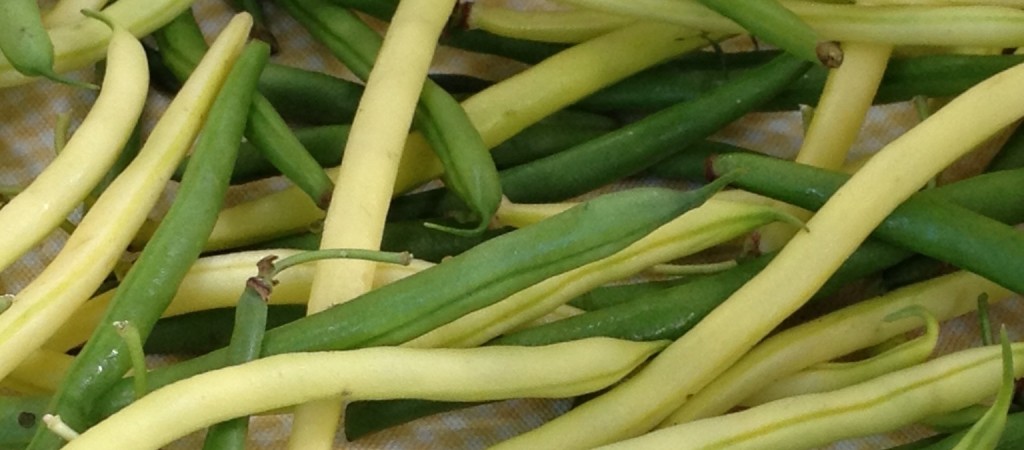
Many of the local farmers plant multiple types of beans each year ranging in color from bright yellow to deep dark purple with several shades of green complimenting the mix. While the lighter shades of green-yellow hold their color and make any dish look wonderful, it is unfortunate that the purple beans turn green once cooked. Still, they are fun to purchase and if you like to eat them raw or barely cooked, you can keep some of the outstanding color alive.

Basically all of the “snap” beans as we refer to them in the South cook the same so they go into the pot together for this method.  And for you vegetarians, using the smoked salts and pepper creates some of the smokey flavor of bacon you might have grown up with, minus the meat or fat. The pressure cooker will cut the time down significantly to around 25 minutes and you can go on to use your leftover liquid in the Ham, Potato, Green Bean & Cabbage Stew another night during the week in less than thirty minutes. This is a simple recipe without a lot of fuss, just meant to save you a bit of time as the days grow shorter.


Pressure Cooker Green Beans

Ingredients

  • 2 lbs fresh green beans (whatever variety you prefer)
  • 1 teaspoon Alder Wood Smoked Salt (Savory Spice Shop)
  • 1 teaspoon Chardonnay Oak Barrel Smoked Salt (Savory Spice Shop)
  • 1/2 teaspoon Mesquite & Apple Wood Smoked Pepper (Savory Spice Shop)
  •  1/2 cup sweet onion, finely chopped (can use frozen cooked in olive oil or dehydrated)
  • 1/4 cup turbinado or light brown sugar

Preparation

  • Rinse green beans well and snap off the ends. Break or cut the beans to 1-2″ length.
  • Mix the salts, pepper, onion and sugar with the beans
  • Add enough filtered water to fill the pressure cooker pot 1/3 of the way full.
  • Put the lid on securely and add the pressure valve.
  • Bring the pot up to a full boil so the pressure valve is spinning very fast and loud.
  • Reduce the heat to medium, enough to keep the valve moving  rapidly. Adjust for your stove top.
  • Cook for 15 minutes and then turn off the heat. The pressure cooker will continue to cook for an additional 5-10 minutes as the temperature and pressure reduces. Don’t use the fast cooling method. Let the pressure reduce naturally unless you want your beans more firm.
  • Serve warm.
  • Reserve the liquid to use in the Ham, Potato, Green Bean & Cabbage Stew recipe.
Posted in Fall, General, Gluten-Free, Recipes, Seasonal Eating, Second Harvest, Sides, Summer, Vegetarian | Tagged , , , , , , , , , , , , , , , , , , , , , | Leave a comment

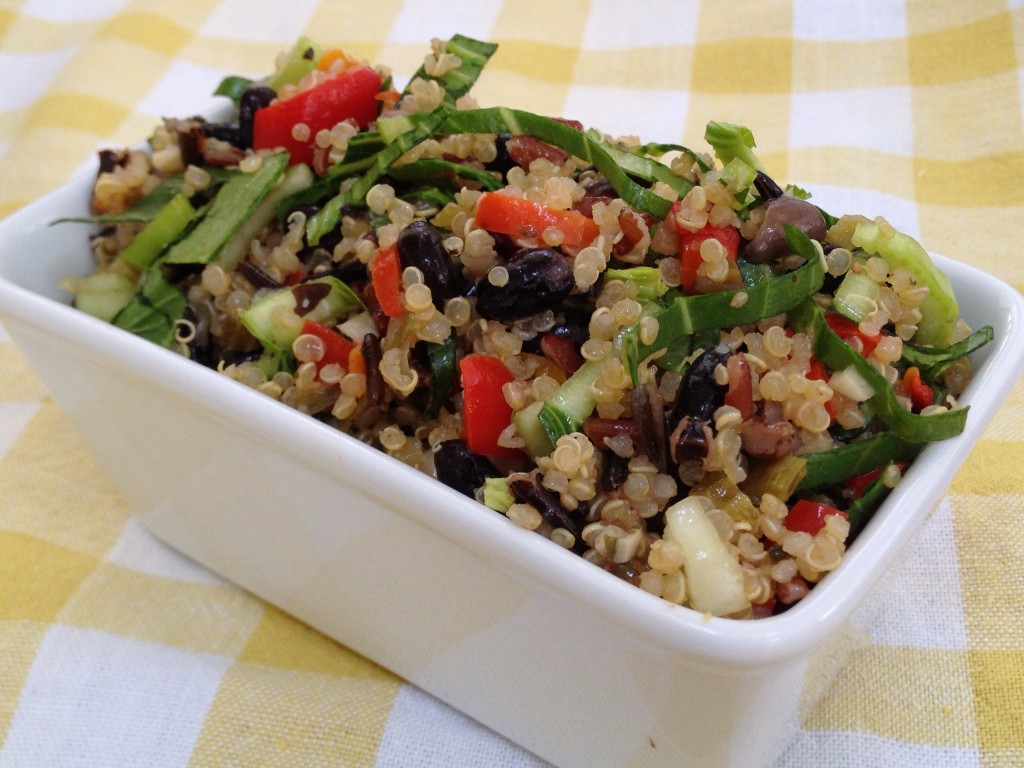
Quinoa Salad with Local Vegetables, Black Beans & Wild Rice

Here we are at the end of summer when this sort of salad works well despite the odd changes in temperature we tend to have this time of year from one day to the next. The mix of fresh local vegetables with quinoa and the ability to change it up by just adding some greens or a bit of meat make this worthy of lunch or dinner any day of the week.

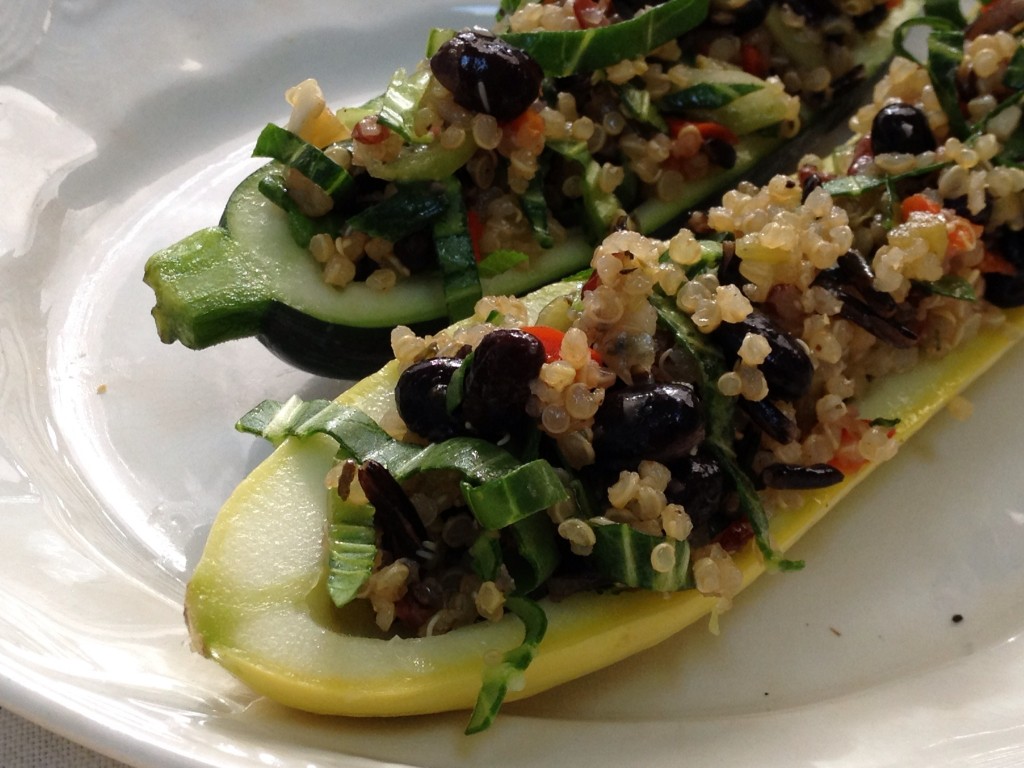
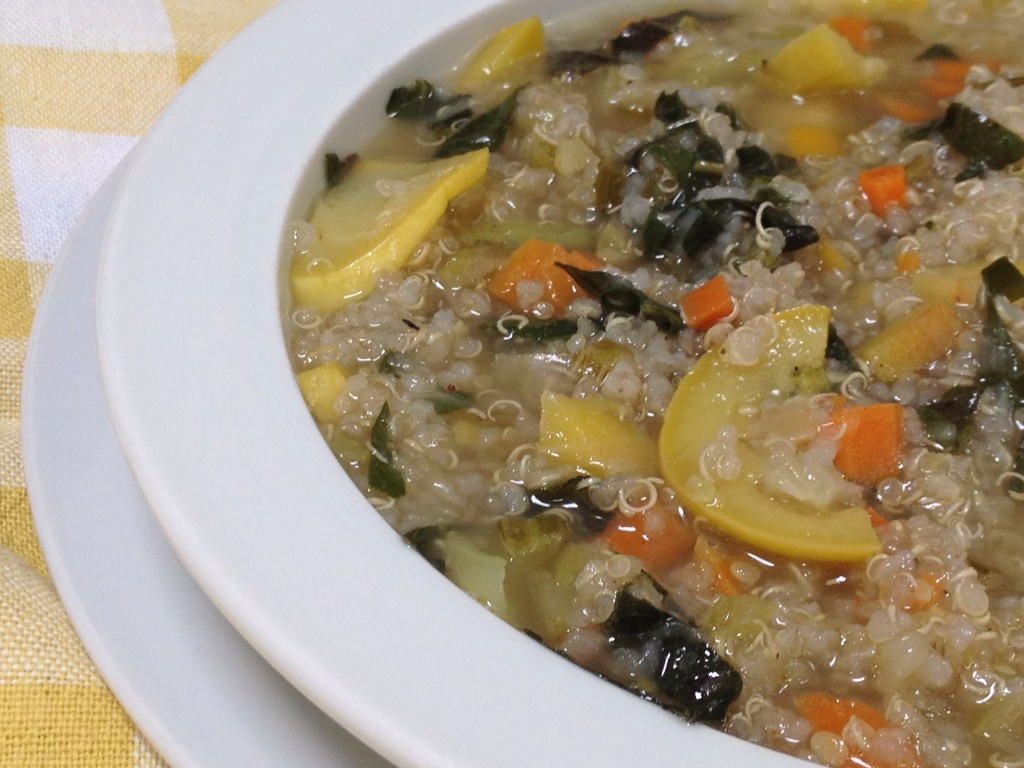
Start your week by eating this recipe as a salad and if you like chicken, that makes a good topping. Add a little warm broth and you have a simple soup for another meal.  Add some eggs and milk and you have a simple quiche type casserole. Or stuff the salad into peppers or squash for yet another meal. That’s four meals from this one recipe.

For this recipe I used a few base ingredients that I make almost every week. Quinoa, rice & beans. You can choose to use any color of quinoa based on what kind of beans, rice and vegetables you have available. Just pick a different color for everything. And a note here. Not that I like a lot of kitchen gadgets, but the pressure cooker can really cut your time for cooking beans, the rice cooker will make perfect rice or quinoa every time without you doing anything and that allows you to spend all of your time with the precious veggies which are at the heart of this meal.

Here are some examples for you to combine and this list is endless once you factor in all the different fresh greens that are available beginning in the late summer and running all the way through winter and into early spring:

White Quinoa, Black Wild Rice, Red Rice, Black Beans Onions, Celery, Peppers

White Quinoa, Red Rice, Black Beans, Yellow Summer Squash, Green Zucchini, Onions

Red Quinoa, Black Wild Rice, White  Beans, Peppers, Onions, Eggplant

Black Quinoa, Brown Rice, Red Beans (multiple types) Yellow Squash, Red Peppers, Onions

The true beauty of this recipe is that most of the vegetables are put up at the height of the season and pulled when you need them. The dried beans, rice, and quinoa are made each week. And the greens are purchased and used fresh each week giving you multiple options.

The quantities of each item can vary to suit your tastes. Try to make this look at lovely as it tastes and you won’t go wrong. And you already know my opinions on using various salts to bring out the best in each vegetable as you work with it.


Quinoa Salad with Local Vegetables, Black Beans & Wild Rice

Ingredients

  • 1/2 cup dry white quinoa
  • 1/2 cup dry rice
  • 1/2 cup dry beans
  • 2 cups combined sautéed or grilled vegetables of your choice
  • 2 cups raw greens, shredded or finely chopped
  • Optional meat, broth, other vegetables for stuffing


Preparation

  • Cook your quinoa with a ratio of 1:1 in water or broth after rinsing it well (3 times ’til clear) with a turn or two of pepper and 1/4 teaspoon salt.
  • Cook your rice according to directions with a turn of pepper and 1/4 teaspoon salt.
  • Pre-soak and rinse your beans before cooking them in fresh water or broth. Do not add salt until the last 5 minutes of cooking. Drain a good amount of the water just before the beans are finished or at finishing and add enough salt to taste (about 1/2 teaspoon) so the beans will soak up the salt.
  • Combine all of the ingredients along with the vegetables and create your salad.


Notes

  • If you want to make a soup, heat your broth first to boiling and then add the salad ingredients. It will only take a couple of minutes to warm the salad and wilt the greens.
  • If you want to stuff your salad into a pepper, squash or tomato and bake it, simply hollow out the veggie, stuff and cover with foil. Bake at 350 for about 20-30 minutes until everything is heated through.
  • If you want to make an egg casserole, you’ll need 3 eggs and 1/2 cup of low-fat or whole milk beaten with 1 teaspoon of corn starch. Add that to about 2 1/2 cups of the salad mix along with 3 oz of mixed shredded cheese (Chapel Hill Creamery Swiss, Hickory Grove & Calvander mixed). Bake at 400F  for 30 minutes in an oiled glass baking dish, covered with parchment paper. Uncover and bake another 5-15 minutes to lightly brown and finish setting up.


Posted in Appetizer, Diabetic Friendly, Fall, Gluten-Free, Recipes, Salads, Seasonal Eating, Second Harvest, Sides, Soup, Spring, Vegetarian, Winter | Tagged , , , , , , , , , , , , , , , , , , , , , , , , | Leave a comment

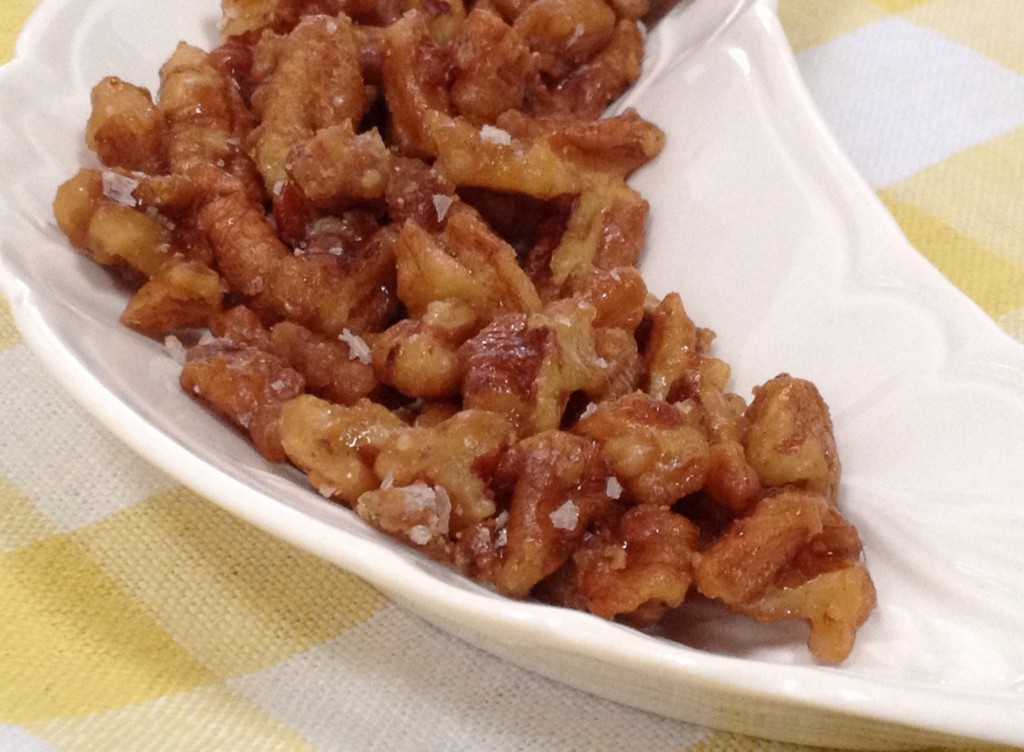
Quick Candied Pecans

My kids are pretty fond of this quick recipe and I use it often as a way to add some flavor into base recipes like the Buttermilk Pancakes.  You can use it in all sorts of ways from a handy party snack to mixing the pecans into granola and muffins. They will keep in an airtight container for a week. Humidity can be an issue with the maple syrup so don’t try to make too many at one time.


Quick Candied Pecans

Ingredients

  • 1 cup broken fresh pecans
  • 1 teaspoon salted butter
  • 1 tablespoon maple syrup
  • 1/2 teaspoon finely chopped candied ginger (can use fresh but cut back to 1/4 teaspoon)
  • 1/4 teaspoon Murray River Flake Salt

Preparation

  • Using a stainless pot or pan, melt the butter on low and add the broken pecan pieces and the ginger.
  • Stirring frequently, cook the pecans on medium/low heat until the butter has been absorbed by the pecans (without browning the butter).
  • Add the maple syrup and continue to cook and stir until the water evaporates out of the syrup and the pecans are coated. The maple syrup will be bubbling even on low as the water evaporates and begins to “candy” the pecans.
  • Pour the hot mixture out on a plate or parchment paper and spread out to cool.
  • Sprinkle the salt over the pecans as they begin to cool and it will stick to the maple syrup but not melt.


Posted in Appetizer, Gluten-Free, Recipes, Snack, Year-Round | Tagged , , , , , , , , , , , , , , , , , | Leave a comment

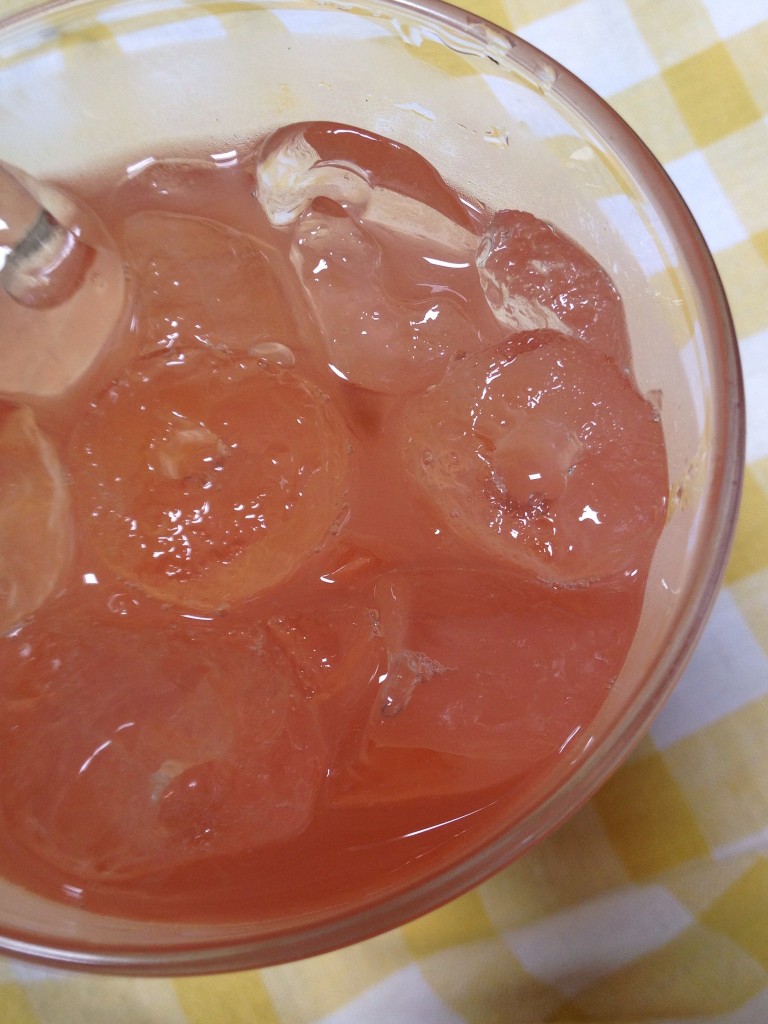
Fresh Peach Lemonade

I’m not going to spend a lot of time discussing the fact that organic or at least sustainable peaches are almost impossible to find around NC. The fact is that peaches are very difficult to grow without chemicals if you want them blemish free. Borers are notoriously horrible and consumers want beautiful fruit. All I ask today is that you actually go look into the types of chemicals used on this crop. Like strawberries, this is one fruit I will not eat unless I know it is chemical free.

Last year I was fortunate to have access to some from a private farm at the very last of the crop. This year, not so lucky. But Whole Foods in North Raleigh had some organic peaches from a farm in SC and I picked up a few of the softball quality gems and let them ripen at the house. Kudos to them for going to the effort to find these gems because they are not always beautiful and they are expensive to transport and store correctly!

While not as juicy as last year’s crop that was picked at the perfect time for eating, most of the peaches ripened well enough to save in the freezer for some jam or a smoothie later in the year. A couple ripened really well out of each batch so I had the pleasure of eating them sliced on ice cream.

There are a couple of quick steps for freezing peaches so they retain color and in the process you’ll get enough liquid each time for a small batch of lemonade. Or, you can just make a thicker batch up with the peaches themselves, which is how I’ve written this recipe for you to try.

But first a primer on peach saving from the “Freezer Queen”. Bring a pot of water to boil and gently drop in your ripe peaches. I do about 4-6 at a time so they don’t end up cooking in the process. Pull them out after about a minute and you will be able to gently pull the skins from each of them, leaving you with the delicate and delightful flesh. Just section this off and place the sections in a bowl of about 6-8 cups of water with the juice of 2 lemons. When you are finished slicing all of your peaches, just let them sit in the mixture for a couple of minutes and then place in freezer bags neatly and freeze on cookie sheets. Then stack them in the freezer. This way you can pull off individual slices if you need to and they stack well over time as you fill the freezer.

You might take note that I also dehydrate peaches. While they are not as pretty, they have a really concentrated flavor that is quite yummy as a snack on hikes or re-hydrated into a recipe. And it doesn’t use up your freezer space.

The leftover water will be flavored nicely and you can add some local honey to sweeten it a bit. I found a lighter honey worked well with the peaches. More robust varieties overpowered the delicate flavor of the peach. (Orange County Blend from Just Bee Apiaries worked quite well in this recipe.)

But on to the quick method!


Fresh Peach Lemonade

Ingredients

  • 3 peaches, peeled using a hot water bath and sliced
  • juice from 1 lemon
  • 2-4 tablespoons local honey

Preparation

  • Throw it all into a blender and blend until it’s smooth.
  • Refrigerate.
  • Serve over ice.
Posted in Dairy-Free, Drinks, Freezing & Canning, Gluten-Free, Recipes, Seasonal Eating, Snack, Summer, Year-Round | Tagged , , , , , , , , , , , , , , , , , , , , , , , , , , | Leave a comment