Setting an Updated Vintage Table


We all have them; passed on glasses, dishes, mismatched serving pieces, worn stainless, odds and ends of candy trays, pitchers and endless numbers of tiny coffee cups and saucers that don’t really fit our busy lifestyle or the colors we prefer to use. But given the alternative of purchasing new dishes for occasional use, I’ve decided it is just easier to work with what I’ve been given and modify the look of it by creating unusual combinations of old and new. If you keep an open mind, it is pretty easy to have a lot of fun with old dishes if you learn to mismatch them deliberately. You can extend a small set of china to accommodate a large party of people by pulling together patters with linens or a few choice pieces of glassware or serving plates.

This winter, use what you have and add a few small pieces here and there from thrift shops and local flea markets or consider trading plates and bowls or saucers and cups with friends to create casual, inexpensive, but beautiful table settings. Add new or vintage linens. Add velvet or silk ribbons to tie up napkins.  Remake old curtains into tablecloths or napkins for a second life. Pick up pine cones, cut magnolia leaves and blend them with fresh flowers to make your table unique. Plan on using those itsy bitsy coffee cups for a lovely rich dessert instead of coffee. If you don’t serve gravy, that boat will make a great low flower holder for camellias, mums or even some pansies or violets. You can even use low tumblers as candle holders. Whatever you do, take inspiration from those around you to use what you have and think outside the box for setting your table!

Recently I had the pleasure of working with some lovely china, silver and crystal from Hunt & Gather on Glenwood Avenue. The folks there were so good to set up a table for me in the front area where the sunlight filters through the windows. And then they went and pulled some beautiful cut crystal and sterling pieces that captured the light beautifully for me to use.  I spent the morning, perusing the individual shop areas in the store and the main floor area, pulling different pieces to mix and match for this post. There was so much to choose from! A couple of hours flew by in no time and I didn’t finish my work before the sun changed angles on me, so look for a couple more posts on this topic in the future from their location. There is plenty to choose from whether you want some casual pieces to fill in or you are hunting down a full set of pristine china, crystal or flatware. They have several lovely trays that I plan to try to photograph the next time as well. I will post some additional pictures from the store on Facebook to give you more ideas.

After Thanksgiving, I’m going to be borrowing some vintage china from friends in the area, so there will be another post before the New Year. You can also take a look at Pinterest to see additional boards with options for Table Settings, Textiles and Vintage  that I’ve collected from other boards and while you are there you can peruse the board for Farm Event Inspirations and Gifts from the Farm if you like to shop locally at the farmers’ markets. Hopefully, you’ll find something that you like on one of those boards and start to follow. Enjoy the pictures and let me know if there is something you would like to see in the future about table setting with vintage pieces.


Posted in General, Tables | Tagged , , , , , , , , , , , , , , , | Leave a comment

Warm Brussels Sprout Salad as Winter Begins & Ends

Every farmers’ market I visited in the early spring had Brussels sprouts just as the weather was beginning to turn just a slight bit warm. This week for Thanksgiving the temperature has plummeted here in the South from sandal weather to long-john weather in a matter of two days. And that means Brussels Sprouts and other cabbage family foods are available at all of the local markets just in time for Thanksgiving.

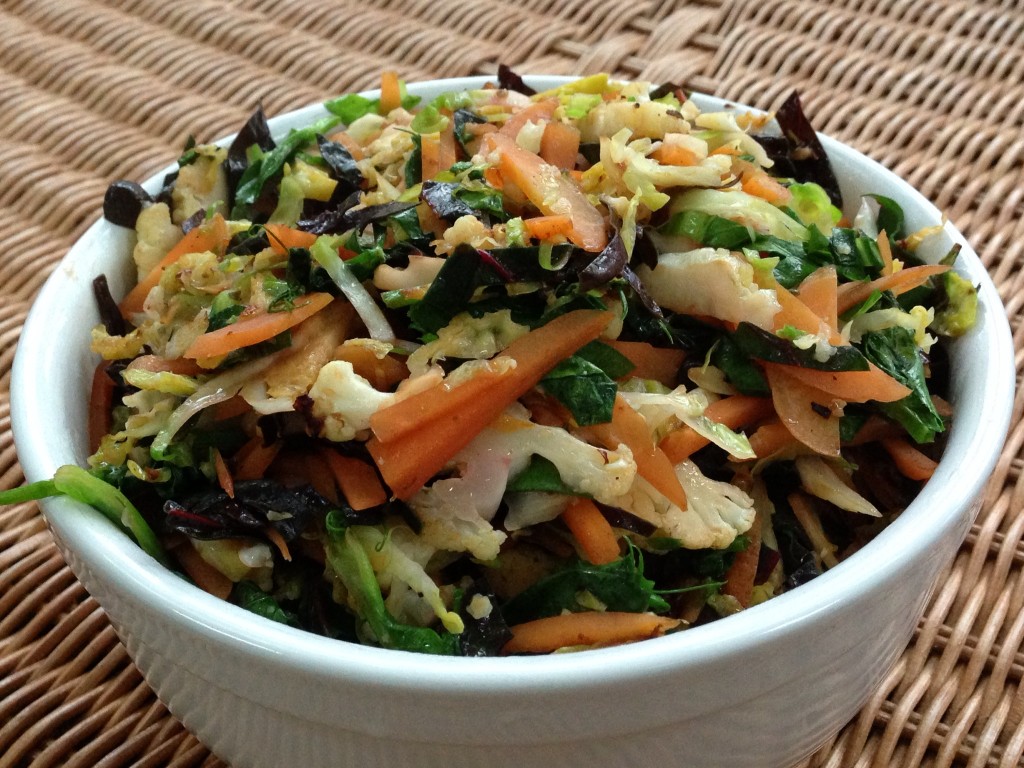
These little baby cabbages are versatile to work with for many reasons. Like their large cabbage cousins, they can be eaten raw, cooked or prepared somewhere in-between. They hold their color and texture quite well and for this simple recipe you’ll need a couple of handfuls of Brussels sprouts and about a hand full of any other spring or fall vegetable that you like from your local farmers. I like to use cauliflower, carrots, chard and a small amount of green onion, all of which are harvested at the same time. If you happen to have green garlic, it works well in this recipe too along with quinoa, rice or protein like rabbit, chicken, duck or white fish .  For a twist on this dish, add some lightly cooked turnip noodles tossed with baby pea shoots and seasoned well with salt & pepper.

The other delightful thing about warm fall vegetable salads is that the olive oil harvest has just started to come in so the oil is quite fresh and this is the easiest time to taste the flavor of fresh oil blended with the vegetables. Oils taste different depending on the type of olive and region they are grown so try several types to find the single origin or blended olives that fit your style of cooking. These oils age throughout the year, but not in a positive sense like wine. The flavor can change dramatically from the  first six months to the last of the year. My preference is to never use oil more than a year old. Storage temperature, air and light are key to maintaining the best flavor be careful about checking the harvest date which is noted on the bottle and think about how quickly you use oil to decide what size of bottle fits your needs. Many oils are now being packaged in a dark purple bottle that offers even more UV protection than the green bottles and this should help preserve the harvest better in future years. The downside of this bottle, as I found out this week, is that it’s really hard to see how much is left!

Locally, Southern Season in Chapel Hill has an excellent selection of oils and particularly of organic oils. They offer individual appointments to taste several varieties with the help of one of their knowledgeable staff members and I recommend this service if you are just starting out. Be prepared to talk to the staff about how you plan to use the oil so they can make recommendations. Take notes because just like wine and vegetables, each year the harvest changes and over time, and you should be able to get a feel for a particular producer and the flavor of the oil they bottle. I also find the staff at Olio2Go in Virginia to be quite adept at finding small farms with unique flavor profiles that can add a lot to specific recipes depending on what you’re making and the cooking (or raw) technique. Wherever you shop, make sure the staff understands how you intend to use the oil so they can make good recommendations, and be sure to ask about the producer and their cultivation methods if sustainability or organic farming is important to you.

For this recipe, a good knife, shredding board or mandoline is helpful since all of the vegetables are going to benefit from a short time in the pan. The Brussels sprouts should be thinly sliced since it’s the easiest way to deal with the size of these cabbages. They will not cooked more than a couple of minutes, so the thinner the better. It’s actually nice if they are still a bit on the raw-crisp side in this salad.  You will also need to treat carrots and cauliflower the same way, thinly slicing them. The chard gets the main vein separated from the leaf for this dish. Chop it up into smaller pieces and cook it with the carrots and cauliflower or save it for a soup stock or another dish. Baby green chard is a bit less expensive than Brussels sprouts, so it’s a good veggie to use to add some bulk to this dish if you prefer a lot of greens in your salad. Another alternative is pointy head or savoy cabbage. All three are mild flavored and work well with the other vegetables.  The green onion can be added in small or larger sections, depending on your preference. The main thing to note about making this is that you want each item in the pan as little as possible in order to cook it and retain the color and crunch. It’s more of a warm salad than a stir-fry dish.

As an alternative, you can roast this salad, starting with the carrots, cauliflower, Brussels sprouts and just blend in raw chard and green onions. Roasting gives you the opportunity to develop some sweeter flavors of the vegetables. It’s also possible to get everything prepped and hold the carrots and cauliflower mixed with olive oil in one container and the greens in another so cooking takes less time. Or cook the carrots and cauliflower and just warm them with the greens at the last-minute before serving or serve them with raw greens. You have endless possibilities with this recipe to suit your needs.


Warm Brussels Sprout Salad

Ingredients

  • 1.5 lbs of thinly sliced or large shredded Brussels Sprouts
  • 4-6 oz of carrots, clean (skin if you want to) and julienne or large shred
  • 4-6 oz of cauliflower, cleaned and thinly slice
  • 2 small green onions, slice however you prefer
  • 2-4 oz baby green chard, thinly sliced
  • 3-44 teaspoons olive oil
  • 1/2 teaspoon Himalayan salt
  • 1/4 teaspoon fresh ground peppercorns
  • Optional additions – turnip (spiral noodles), brown rice, quinoa, fried egg

Preparation

  • Clean and dry all of the vegetables.
  • Slice or shred all of the vegetables. Mix the cauliflower, carrots and stems from the chard together. Toss lightly together with half of the olive oil, and all of the salt & pepper.
  • Mix the Brussels sprouts, chard and green onion together and toss with the remainder of olive oil.
  • Using a wide stainless steel frying pan, bring the heat up to high and add the carrots, cauliflower and chard stems and cook for about a minute. Turn the heat back to med/high and continue to cook, stirring to avoid sticking and promote a little browning. Cook about 3 minutes.
  • Add the greens and continue to cook for about 2 minutes. The Brussels sprouts should be just beginning to wilt and take on a little color. Adjust the seasoning and serve warm or blend with quinoa, rice or other protein.


Posted in Dairy-Free, Diabetic Friendly, Dinner, Fall, General, Gluten-Free, Lunch, Nut-Free, Rabbit, Recipes, Salads, Seasonal Eating, Sides, Spring, Vegetarian, Winter | Tagged , , , , , , , , , , , , , , , , , , , , , , , , , , , , , , , , , | Leave a comment

A Trip Back to Maryland for the “Serve It Up Local” Celebration


Some of you might remember Hana Crouch from New Grass Gardens, an urban farm concept, here in Raleigh a couple of years back. For a while, she and her business partner managed a garden for Cafe Helios and for Bickett Market. Along with that they had regular CSA customers and helped the folks at  NoFo with the Five Points Farmers’ Market. Young and full of energy, she decided to head up to Appalachian State in Boone, NC to finish her degree and had the opportunity to be one of the first young farmers at the University’s new sustainable farm. The beginning farmers established vegetable beds, added a large hoop house to grow starter plants and winter crops, and prepared for the addition of livestock to the farm. You could say that she’s a bit of an entrepreneur when it comes farming and not afraid to try new concepts!

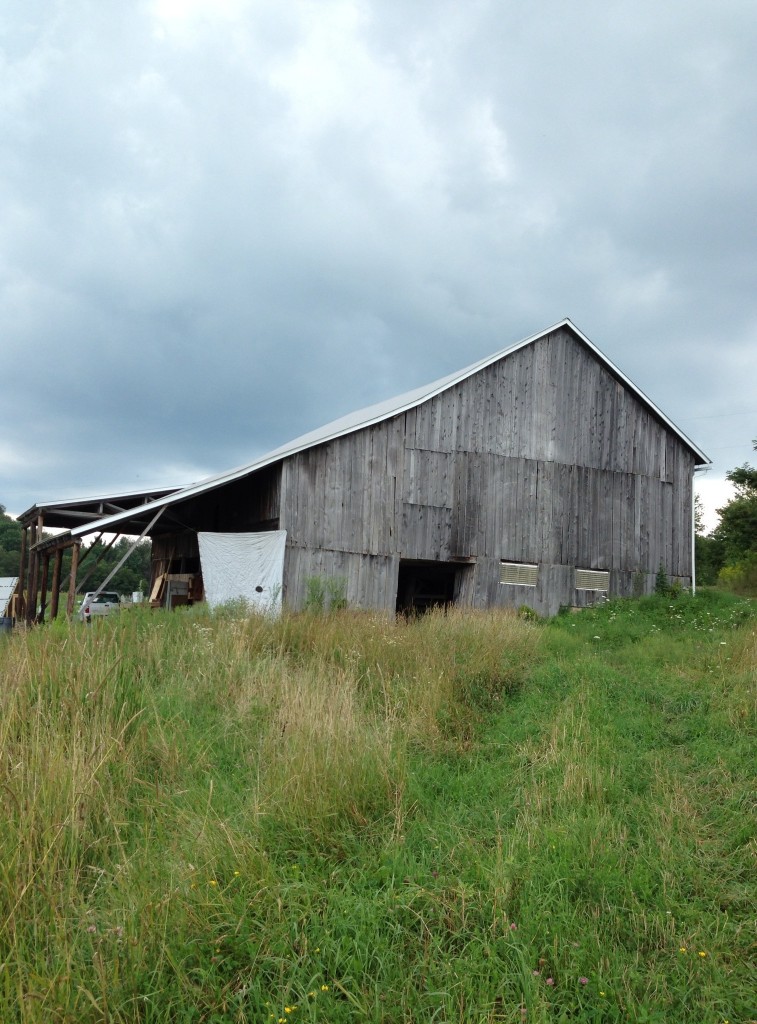
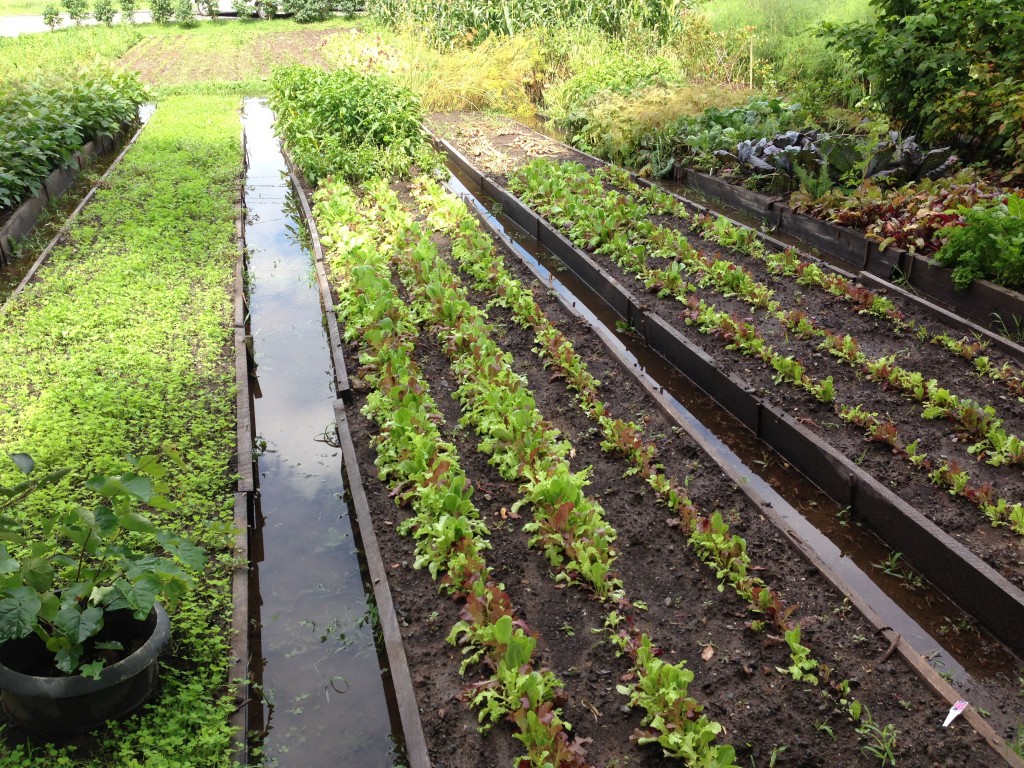
This summer she invited me to come up and see Savage River Farm in Garrett County, Maryland which she helped start with a couple of graduates from App State.  They have pigs, hens, turkeys, lots of field grown organic veggies, cultivated mushrooms and a bit of fruit. Climate is one of the challenges of being so far west in the Alleghenies (part of the Appalachian Mountain Range). With a short summer growing season and brutal winter often including early and late snows, selecting breeds of veggies and managing livestock is essential. Markets tend to be few and far between, so it’s critical to establish three types of customers. The regular CSA members that purchase throughout the year, the seasonal visitors coming into the county that want to eat sustainably grown fresh food, and restaurant/caterers that plan their menus around seasonal food all year.


Maryland is a lot like North Carolina in many respects.  It is pretty easy to get from the coast to the mountains in a matter of hours. It was colonized early and has a long history of immigration.  The food culture throughout the state is representative of changes to the population over time.  I grew up in the Baltimore area and we traveled all over the state during my childhood.  Both of my parents had their favorite spots for summer vacations ranging from the coast for my mother to the mountains for my father. I like both equally well!

My father grew up in Baltimore City and he loved to eat.  When we were young, he would take us to little places throughout the city and tell us the stories about how he discovered these places growing up. From Polish sausages to Italian pizza and clam bakes to bakery sweets, we were always out exploring food around the city. Our weekend ritual included getting up early to go down to the local German bakery in Ellicott City. A line formed before the doors opened on Saturday and Sunday. Leidigs, which was run by one of my father’s old buddies, had the most amazing soft sandwich buns that I have ever eaten. And their jam and custard filled doughnuts and pastries were known throughout the county. The entire store was sold out of everything on the weekends as people waited in line with paper numbers for their turn.

My mother was raised in the very small town of . Port Deposit Maryland with a population of under a thousand at last count. The Cecil County area dates back to the 1600’s with many homes still existing from the 1700 & 1800’s.  Her love of seafood and history is not surprising given her upbringing. Coming from a family of thirteen they raised their own chickens, eggs, vegetables and fruit. My grandmother was well-known for her fruit pies and to this day I have not mastered the blackberry pie, apple cake or fried chicken that my mother is able to make. There were no recipes, just show & tell, which is probably why I enjoy giving classes so much at the market and rarely follow recipes at home.

 

So the long story to short, is that my trip to Garrett County to see Savage River Farm was a trip down memory lane.  I had the opportunity to be one of three judges at the first “Serve It Up Local” event for the county. Executive Chef  & Restauranteur Spike Gjerde  of Woodberry Kitchen and Executive Chef Adam Murray of Pine Lodge Steakhouse were wonderful to work with for this competition. Both have far more training and experience in the commercial field of food than I do. And, they offered up ways to evaluate the individual creations on each plate we were served. Their knowledge of cooking techniques and specific regional  ingredients proved invaluable with so many competing chefs.

More than a dozen local chefs were assembled and local farms were encouraged to aid with food choices for the competition. In one day I saw as many ways to use food as an entire season at one of our local farmers’ markets. The chefs spent a tremendous amount of time coordinating with local farms and selecting seasonal ingredients. Each of the chefs had a chance to explain their dish and note the local food and farm they used to us as we went through the process.


The recipes ranged from simple to complex. The mountain season is just a couple of weeks behind ours in the summer and then it ends a bit more abruptly in the fall than ours with the first freeze and snow. The chefs ranged from self-taught to professionally educated.  We had sweet corn and fresh onion in a delightful chowder. And a ramp sorbet. Not something I would want to eat all of the time, but very creative and quite well-balanced. We also had some lovely tenderloin from a local farm that was expertly prepared. Here’s a list of the winners, many of which either do private catering or run a restaurant. I encourage you to try out their creations if you get a chance to be near Garrett County, Maryland.

It was encouraging to find some local restaurants already taking up the challenge of working with seasonal local food. I was fortunate enough to find a couple of restaurants in the area like Water Street Cafe using local eggs and veggies at breakfast along with an organic honey. Mountain State Brewing at Deep Creek Lake is using local sausage and goat cheese from FireFly Farms to make extraordinary pizzas. I really can’t say enough about the quality of the cheese at FireFly. You can find some of their products at Weaver Street Market.

Sourcing from multiple vendors who are growing different varieties of the same food and harvesting weeks apart takes a lot of work. Adapting these local ingredients that change with each harvest into a business plan when customers expect a hundred items on a menu each and every night is a huge task.  Riverside Hotel takes a simple approach and generally cooks two soups a night, along with a salad cut right from their back yard and a couple of desserts.

It seems like many of the chefs at the event enjoyed learning what was available seasonally and meeting the farmers. So the lesson to be learned here is it’s a push and pull strategy that works to incorporate locally grown farm food into the local food industry.  It takes both the home cook and the local chef to make farming work as a business today. Farmers are hard pressed to sell to one or the other. Everyone has to be smarter about what they grow, how they store and use it, and how to differentiate it for their business to succeed. But as consumers, we can help by understanding the seasons and adjusting our eating habits and taste buds to incorporate more local fresh food and by asking our local chefs to use locally grown sustainable foods.

Throughout the event there were classes taught by local chefs focused on using and storing local food. Here are some photos.  Near the end of the event I had the opportunity to teach a children’s class where we focused on a combination of raw and cooked foods. The highlight for the kids was using the spiral cutter to make fresh raw noodles from fresh picked zucchini. Everyone had a really great time taking turns, including parents, and then hand slicing other veggies to cook for the topping on the vegetable noodles. It took less than thirty minutes to pull together a delightful fresh snack of spaghetti, which they all gobbled up.
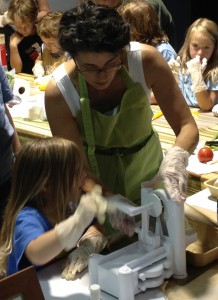
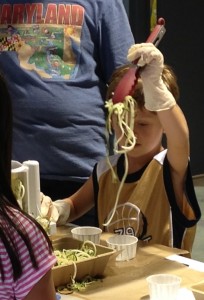


At the end of the festival and competition and award ceremony there was a lovely catered “50 Mile Meal , serving up more local food, including pulled pig. And all of the judges received a wonderful basket of products to take home from the area. I also had the opportunity the day before to pick up a couple of items from the Frostburg Farmers’ Market.

As a part of the dinner celebration, Chef Spike Gjerde gave us a wonderful presentation about his coordination with farmers, fisheries, and dairies that service Woodberry Kitchen. It’s impressive to see the canning and preserving operation that sustains the restaurant all year, putting up more than 60,000 lbs of tomatoes. The preservation operation is moving to his new restaurant called Shoo-Fly where customers will be able to purchase some of the same ingredients he uses in his restaurant.  There is an article talking about his work over the past several years that I think is really worth reading if you have the time. Here’s the link:  http://eater.com/archives/2013/08/07/spike-gjerde-interview.php . And another article in the Baltimore Sun talking about a new food hub in Baltimore that is in the planning stages now.

Chef Gjerde is committed to understanding the history of Maryland cuisine and the challenges of local fisheries, farms and dairies. His desire to teach others about sustainable planning, preparation and eating food thoughtfully is rare among chefs, in my opinion. During the evening he spoke about the challenges of explaining to patrons the necessity of carefully choosing what fish and seafood to serve at his restaurant and why he chose to eliminate foods from his menu during different seasons or because they simply were having a bad year. Hopefully his passion will inspire other chefs and consumers to follow in his footsteps. Here’s a good article worth reading at the Washington Post.

The second opportunity I had at this dinner was to spend a little more time with the local chefs who participated in the competition. We spoke about their personal challenge to incorporate local food in a rural community that really had not embraced the “local food” movement yet. Most consumers shopping in a traditional grocery store don’t fully understand the concept of seasonal eating because our food is brought in from all over the world. Several commented that they intended to make some permanent changes in their own recipes to reflect seasonal foods and look at offering more classes as a way to educate their customers.  We stayed late  into a beautiful night and  I was quite tired when we finally left that evening.

The next day presented us with a bright sun and blue sky. We were invited to have brunch with everyone working at Savage River Farm.  I never miss an opportunity to eat a meal with Hana as she’s a wonderful cook. There was a large bucket of freshly gathered eggs next to the stove, bacon cooking in a cast iron pan and big stack of buckwheat pancakes on the counter right next to a large mason jar of maple syrup and a large block of farm butter.

We gathered up the food and carried it out to the picnic bench under the tree by the house. Brunch was relaxing and wonderful and filled with stories about the animal antics and the craziness of raising pigs. We discussed possible plans for renovating the barn to host farm activity days. And the very possible addition of more livestock and additional hoop houses to extend the seasons and provide for local restaurants. It will be interesting to see how “Crowd Funding” moves forward to enable small starting farmers a method for raising funds outside of large institutional loans and grants.

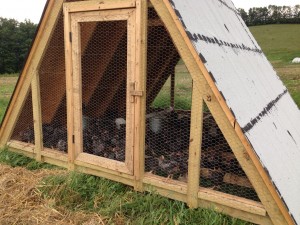
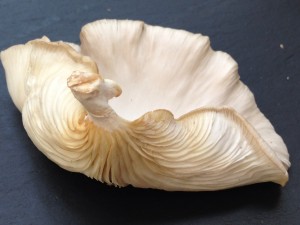
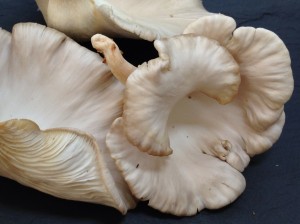
   Following a lovely meal, we toured the farm. Visiting the baby turkeys was pretty straight forward, but of course we all needed to pet the pigs, which are Hana’s obsession. They are fed daily with goat whey from the local goat cheese maker, Fire Fly.  Then we inspected a set of hoop houses with a special design from a local ag extension agent, that allows them to be shifted over time and give the ground beneath them some rest.  They have a solar dehydrator at the farm which is based on a design from a professor at App State. We also had the opportunity to pick a huge bag of oyster mushrooms in the barn that had taken off with the warm humid weather.  After talking a little more  it was time to  gather up  the eggs, fresh produce, and mushrooms for the long drive home.
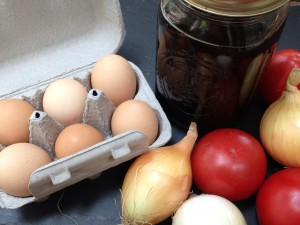
   We took the parkway for much of the drive home since the weather was much improved and the highway trip was just about unbearable. There was time to stop and take pictures of lovely buildings and little towns and eat a few snacks along the way. It was a great trip and one I hope to repeat. The folks in Garrett County plan to hold the festival again next year because the turn-out was so good. I hope you have a chance to go visit and taste all the delights that county has to offer.

In the meantime, if you have an opportunity to pick up some oyster mushrooms at your local farmers’ market, I’ve put together a post outlining the method I use to cook and store these in bulk. It differs from the way I cook shiitake mushrooms because the oyster mushrooms are more delicate in texture and require much less cooking time to retain their beauty and flavor. Here’s the link to Cooking with Local Oyster Mushrooms.


Posted in Farms, General, Summer | Tagged , , , , , , , , , , , , , , , , , , , , , , , , , , , | Leave a comment

Mushrooms & Greens in the Spring & Fall

It strikes me as ironic that as the days get shorter, we naturally gravitate to meals that generally take longer to cook. Why is that? During the summer, about the most we want to do is rinse vegetables and grill outside for under 15 minutes. It seems like we’re lucky to get dinner on the table by 8 or 9 when the sun has just finish setting.

Over the weekend I talked to a couple of local  farmers about this and they agreed that what people buy in the summer includes quick cooking foods  like steaks, boneless poultry breasts and lots of greens and fruits for smoothies and salads. Keeping in mind that greens grow best here in the our cooler months, farmers actually have a hard time selling some of the most beautiful green crops during chilly weather.

So maybe it’s time to change how we think about cooking? When I was much younger and had a lot more energy, it didn’t seem like a difficult task to cook after I returned home from work. But as the children came along, so did homework, a lot more cleaning, and a need to pack lunch and snacks along with cooking breakfast and dinner. Suddenly there was a lot more food preparation.

I’m sure that many of you can identify with this situation. Imagine adding farm animals to this and you have more than double that load.  So it’s no surprise to me that many of our female farming counterparts employ the same technique I learned many years ago.  I refer to it as “Food Prepping” .

Basically, you identify the crops that only come in once or twice a year for a brief time, but are items you need all year. That includes things like onions, celery, carrots, peas, beans, tomatoes, corn, rice, and garlic. And it could include potatoes, rutabaga, sweet potatoes, turnips, apples,  and beets. Cooking, canning or dehydrating those items when they are in their prime allows you to save time later when you are making a traditional long recipe because the main part of the cooking has been completed, cutting out an hour or more of preparation time.  It also gives you a lot of options for trying out new combinations that you find on the internet through pinterest or a food blog.

If you eat meat proteins, you can also consider cooking larger quantities of meatballs, sausage, whole chickens, larger roasts or multiple pounds of stew meat or hamburger and simply freezing it in small quantities that will thaw quickly to be added to a soup, casserole or sandwich. This can easily shave your dinner or lunch preparations down by hours each week. We happen to like making large pots of soup and then freezing them in ice-cream serving cups with lids so they can go to work or school and be heated in their paper containers.

Many of my recipes use crops and meats  that have been prepped  and are combined with some fresh ingredients from the market like eggs, greens, mushrooms, cheese and fruit. It should not be a surprise that we eat around 85-90% local food that is bought directly from sustainable farms. It’s taken a while to get to this point, but once you have suppliers in place and understand the seasons, it becomes a little more manageable to eat this way. The added bonus is that the food is fresher since it is normally picked just a day or two  in advance of a market.
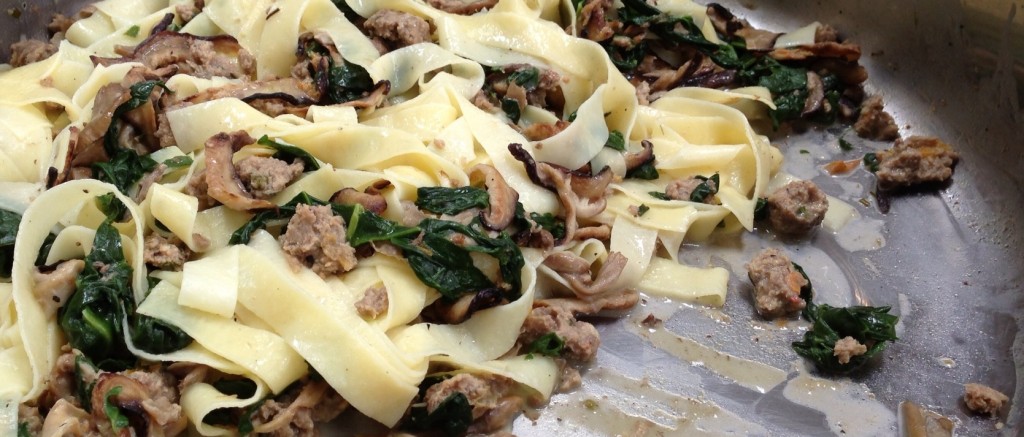
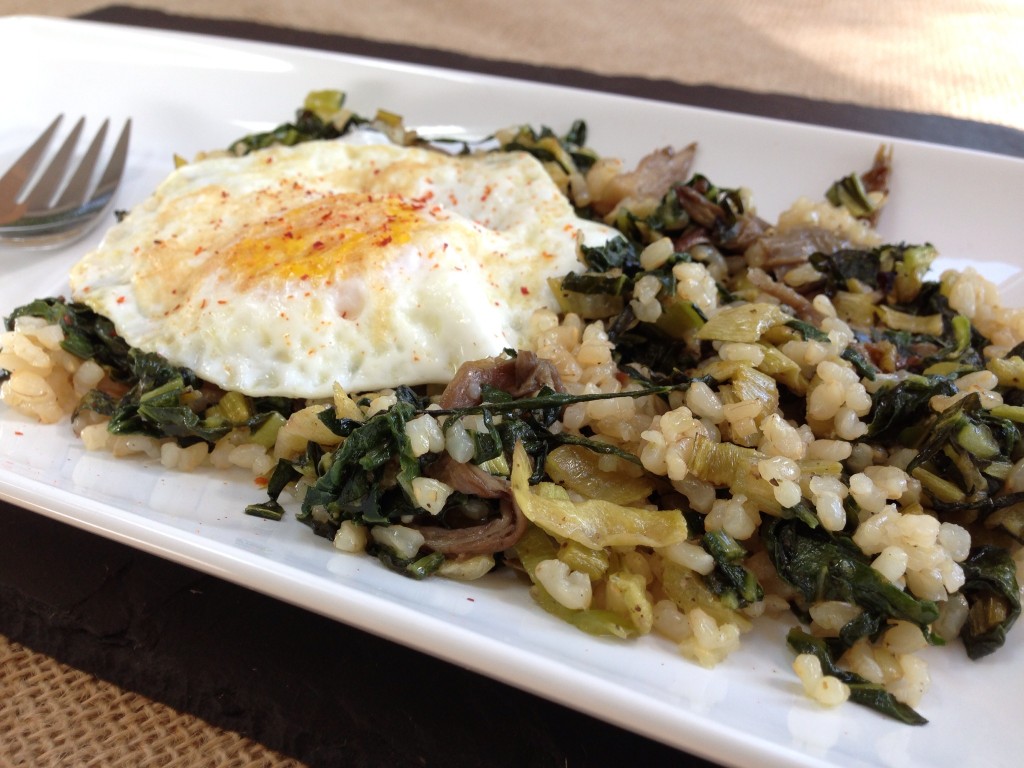
This recipe is one of those that can come almost totally from the market or totally from your freezer. The meat can be any form of meatball that you like to make or it can be sausage, pulled pork or chicken or stew beef. If you like sausage but you are vegetarian, there are several good products on the market now that you can substitute. I can even imagine this with some fish and you’ll see that I’ve made it with roasted bok choy, mixed mushrooms, an egg and short brown rice minus the sauce (waiting patiently for the 2013 rice harvest from Edible Earthscapes). The broth is light enough that it won’t cover up some leftover grilled fish or just skip it altogether. It is also flexible with volume. If you like more gravy, just double the amount of broth and arrow root. Change the pasta to local rice or ravioli if it’s available or consider making a galette or a small quiche. Add some chopped chives or bright green onions for a little color.  Use whatever variety of mushrooms are grown in your area.

This recipe easily feeds two.


Mushrooms & Greens

Ingredients

  • 1/2 cup broth (similar in nature to the sausage)
  • 2 teaspoons arrowroot (gluten-free thickening agent)
  • 1 cup cooked lamb, beef or goat meatballs / sausage / or pulled shredded meat, fish
  • 1 cup mixed local mushrooms, sautéed (Shiitake, Oyster)
  • 2 cups julienne fresh mild greens (spinach, chard, cabbage, baby arugula, baby pea shoots with leaves)
  • 3-4 cups cooked wide ribbon pasta ( this includes fettuccine, tagliatelle, pappardelle). Egg, Spinach, Herb, Tomato or Pepper pasta work as well. Substitute pre-cooked rice or toasted cooked quinoa for gluten-free option
  • Salt & Pepper
  • 1 teaspoon Italian Herb blend or a handful of chopped fresh herbs – optional

Preparation

  • Heat a pot of water until it’s at a low boil, high simmer and keep it there until you are ready to add your noodles. You will be cooking the noodles at the same time as the main part of the dish so plan to add them at the appropriate time to cook simultaneously.
  • Mix the chilled broth with the arrow root until it’s smooth. Set aside.
  • Heat a frying or saute pan (stainless or cast iron work well to retain heat evenly) on medium high heat and add just a bit of olive oil as it comes up to the appropriate temperature.
  • Add your meat. Heat all the way through for about 5 minutes depending on the density of the meat.
  • While the meat is cooking, add your noodles to the water to cook.
  • Add the mix of broth and arrow root to the meat, making sure to stir the broth well just before adding it to the hot pan. Using medium high heat, continue to stir the broth so it comes to a low simmer and hold there for about 3 minutes stirring until it begins to thicken.
  • Check your noodles. Remove from pot if they are finished and set aside with a little of their warm cooking water which has some starch from the noodles in it.
  • Quickly add the pre-cooked mushrooms  to the meat and broth. (these are cooked in season and frozen in small containers for up to 6 months). Warm for about a minute.
  • Add the cut fresh greens to the meat, mushrooms and broth. Warm for about minutes depending on how cooked you want your greens. These could actually be just tossed in with the warm pasta if you wanted a lighter version.
  • Add the noodles to the meat mixture and toss for about a minute so they absorb some of the broth. Or serve the meat mixture over the noodles so they retain their color and texture.
  • Serve with fresh herbs and cheese on top. Recommendations are for Chapel Hill Creamery Calvander, parsley, basil, thyme.


I’ll leave you with some additional inspirational photos so you can decide how to create your own recipe from this one. The beautiful pink oyster mushrooms were grown by Old Milburnie Farm in Raleigh, NC. The white oyster mushrooms were grown by Savage River Farm in Garrett County, MD. The shiitake mushrooms are grown by several vendors locally including Edible Earthscapes, Woodfruit, Kellam-Wyatt Farm, Maple Springs Farm just to name a few.


Posted in Beef, Chicken, Dinner, Fall, Fish, General, Gluten-Free, Lunch, Pork, Recipes, Seasonal Eating, Second Harvest, Spring, Vegetarian | Tagged , , , , , , , , , , , , , , , , | Leave a comment

Fresh Turmeric Tea with Maple Syrup Candied Ginger

There’s finally a real chill in the air this morning and I’ve been saving up this recipe for just such a day. Fresh turmeric and ginger have been making an appearance at local farmers markets for a couple of weeks now. Their amazing colors of pink, ivory and gold bear no resemblance to the dull brown and gray roots you will find at the grocery store either in color or flavor. While it’s a task to put up enough to last an entire year, it’s worth the effort because the preserved flavor of freshly dug roots  in your dehydrator or by using a candy method far surpass anything you’ve ever bought from the store.

And this is why I specifically saved up the fresh farm maple syrup given to me by the folks at Savage River Farm in Garrett County, Maryland a few weeks back and combined it with maple sugar from Milroy Farms in Pennsylvania to make Candied Ginger.  The result is sliced baby ginger that is golden brown, spicy and sweet, all at the same time when you bite into it. The intense color and flavor of small batch farm maple syrup combined with locally grown fresh ginger makes any dessert, soup or drink simply amazing. But don’t let that stop you from trying this with store-bought candied ginger or ground turmeric. Some great products exist, they are just not quite so intense so you will need to do a little adjusting.

It was pretty obvious from the drop in temperature and the smell of a wood burning fire last night when I stepped outside, that we would have a nice fall morning today. So I pulled out everything necessary to make a cup of Turmeric Tea. And you’re in luck because I’ve got a recipe that you can make with either local fresh turmeric and ginger or ground spices. There are several recipes on the internet, but many are much stronger than this recipe and don’t use fresh roots. After testing this recipe a with a couple of different dairy alternatives , I settled on coconut milk for best results.

If you choose to use full-fat coconut milk, remember that like dairy milk, the fat in the “milk” encapsulates many of the spices so you may need to adjust the amounts a bit. I was pleasantly surprised at how much I enjoyed this tea. It’s a toss-up for me between the Sweet Potato Lattes and this for a local warm drink if I’m avoiding chocolate and coffee. Both are soothing, rich, colorful and scream fall. Both can be served to young and old and are significantly more healthy than alternatives and use fresh locally grown organic ingredients.

So drink up. This recipe makes just a single cup. If you decide to increase the volume for a group, you’ll need to adjust the spices. Many times that means adding more than just the multiplier. But this one is forgiving and you can use more or less of everything.


Fresh Turmeric Tea with Maple Syrup Candied Ginger

Ingredients using fresh turmeric

  • 6-8 oz coconut milk (either low-fat or whole-fat)
  • 3/4 – 1 teaspoon very finely chopped freshly dug turmeric
  • 1/4 teaspoon Pumpkin Pie spice (or a combination that you like)
  • 1/4 teaspoon Vietnamese Saigon Cinnamon
  • 3/4 -1 teaspoon finely chopped fresh Maple Candied Ginger
  • 1/2 teaspoon crumb maple sugar (infused with fresh ginger)
  • 1/2 -1 teaspoon local honey (medium to dark in color)
  • fresh grated nutmeg for garnish

Ingredients using all dry spices

Preparation

  • In a small saucepan, combine all of the ingredients and whisk to eliminate all of any lumps from the spices.
  • Gently warm the ingredients over medium heat for a couple of minutes until it barely begins to simmer (bubble).
  • Cook for just a minute or two to warm through. Remember that a cool mug will chill it immediately so bring it to a temperature to accommodate the change.
  • Strain into a cup or mug.
  • Garnish with whipped coconut cream and a sprinkle of cinnamon or a little fresh grated nutmeg.
Posted in Dairy-Free, Drinks, Fall, Gluten-Free, Nut-Free, Recipes, Seasonal Eating, Vegetarian | Tagged , , , , , , , , , , , , , , , , , , , , , , , | Leave a comment

Summer Squash & Sweet Italian Pepper Soup

Near the end of summer vacation when tomatoes are beginning to decline at the farmers market and eggplant shows up in every shade and size, the summer squash are still pushing out new blossoms to be stuffed and sweet peppers begin to ripen into a beautiful array of colors ranging from yellow to various shades of orange and red. My favorite sweet peppers are the Italian heirloom long ones. I like their texture both raw and cooked. The thinner outside skin is not as bitter at the bell peppers and they produce fewer seeds and a smaller spine internally so there is less waste when you are processing them.  For all those reasons, I’ve switched over from bells to these for the fall, winter and early spring recipes this year. This soup is delightful because it’s good chilled or warm and you can add toasted pumpkin seeds or paneer to make it more interesting.

There are several farms growing these peppers in our area. They were new to the farmers markets just a couple of years ago but caught on quickly as farmers explained how they grew better, tasted sweeter and roasted with less effort than the traditional bells.  Peregrine Farm grows a variety of Corno di Toro that are lovely and if you want to learn more about peppers, Southern Season holds classes with the help of Craig Lehoullier (better known around here as the tomato man) for home gardeners.

For those of you not familiar with the zephyr squash, it’s quite a bit like the yellow crookneck squash. It tends to grow fairly straight but my preference for it started a couple of years ago when I found it kept better in the fridge and had fewer seeds and tender skin. It grills quite well and holds up in a dish of sautéed vegetables. Many of the local farmers have commented that it’s easier to grow and doesn’t seem to succumb to the bugs and viruses quite so easily.  You could substitute patty pan squash in this recipe as well. Basically, we’re trying to use a yellow squash to keep the color of the soup on the orange side. The patty pan will have a slightly thicker skin and be denser inside so it might require a little more cooking time up front, but not much.

This recipe is designed to use vegetables that have already been cooked so it’s great to make if you have leftovers after a meal or make it with items you already put away for the season. Summer squash typically doesn’t hold up well in the freezer, but I find it adds wonderful flavors to vegetable soup or stock broth. If you are starting from scratch, try to cook extra since it is an inexpensive vegetable that can provide a lot of flavor to many other soups or stocks that you make throughout the year. The fact that it doesn’t hold shape well in the freezer shouldn’t deter you from using it in a base or dehydrating it to use as part of your stock or on a camping trip.

I’ve added raw cashews to this recipe as a way to add some protein. But in addition to the protein, many of you will find the cashews really make the soup creamy once they are blended into the broth. This will be more pronounced if you sprout your cashews. Many raw food chefs use cashews as a base to replace things like sour cream and mayonnaise. I’ll have to thank Matthew Daniels from Triangle Raw Foods here for introducing me to this concept in one of his classes. I gave up using mayo and sour cream in favor of kefir and yogurt a while ago but I think the cashews really do wonders for many dishes above and beyond the dairy options I normally use. The raw sprouted cashew cream Matthew uses in several of his recipes is one of my favorites.  I think you’ll agree that it really compliments the peppers in this recipe.


Summer Squash & Sweet Italian Pepper Soup

Ingredients

  • 2 cups sautéed zephyr squash (patty pan will work )
  • 1/2 – 2/3 cup slow-cooked sweet white onions
  • 2/3  cup roasted or sautéed Italian red & yellow peppers
  • 1/2 cup cooked red lentils
  • 1/4 cup dehydrated, crushed heirloom tomato slices (or 1 tablespoon tomato paste with a few fresh or dried herbs like thyme & marjoram)
  • 3 cups broth (vegetable, corn or chicken)
  • 1/2 cup raw organic cashews
  • 1/2 teaspoon Chardonnay Oak Barrel Smoked salt
  • 1/4 – 1/2 teaspoon Himalayan salt
  • 1/4 teaspoon fresh ground peppercorns (4 Corners Blend)


Preparation

  • Heat all of the ingredients together, except the cashews,  for 15 minutes on medium heat.
  • Add the cashews and puree until smooth in a blender or food processor, adding more broth or seasonings for desired consistency and flavor.
  • Top with toasted pumpkin seeds, paneer.


Posted in Dairy-Free, Dehydrating, Diabetic Friendly, Dinner, Fall, Freezing & Canning, General, Lunch, Recipes, Seasonal Eating, Second Harvest, Soup, Summer, Vegetarian | Tagged , , , , , , , , , , , , , , , , , , , , , , , , , | Leave a comment

Roasted Tomato, Eggplant & Cauliflower Soup

Strange weather we’ve been having this year. It’s basically been raining all year so the tomato crop was slow to come, slow to develop and quick to leave with viruses and rot. If you like green tomatoes, this was your year to enjoy them. Eggplant was another crop that didn’t thrive with our usual heat and sun. By now, the farmers are generally begging shoppers to take eggplant off of their hands. But this year there were far fewer and much smaller in size. The upside of this predicament is that the smaller eggplant tend to be more tender, less bitter with thinner skins. Many farmers grew new varieties this year as well, to appeal to local restaurants for quick grilling and small plate appetizers.

Here’s the advantage for all of you home cooks: You can grill or pickle these smaller varieties more readily for use all winter long.  Eggplant adds a lot of base flavor to many dishes. And it’s a great thickening agent for your chili or soup, especially when you employ a couple of easy tricks while cooking it.

First, eggplant varieties and size determine the bitterness of this vegetable. The lighter colored ivory and light purple varieties like Rosa Bianca, Listada De Gandia or Rotonda Bianca tend to have thinner skins and more mild flavor. There are several other small and delightful varieties of eggplant for individual servings or for pickling that you can find now at local farmers’ markets like the Fairy, Thai and Japanese White that also have interesting flavors.

Second, eggplant  is like a sponge and it LOVES heat, humidity and water as much as it loves the sun. Depending on how you will use the eggplant, you can cube it to saute, thinly slice it or cut it in halves to grill or roast, but you will need some olive oil to keep it from sticking to any surface as it dries out while cooking. If you are going to grill the eggplant, oil your grates and apply a thin coating of olive oil to the eggplant slices or small eggplant cut in half before you put it on the grill. If you plan to roast it, apply the olive oil to the eggplant with some seasoning before placing it in the oven. And if you plan to sauté it, you’ll need some oil in the pan after it heats up which the eggplant will immediately soak up.

Third, eggplant plays well with other foods and herbs whether you choose a vegetarian dish or something with a protein, you can change the dynamic value of this veggie to be the star or just a side note in your recipe. One of my favorite ways to cook this for later use is using Alder Wood smoked salt and Mesquite & Apple Wood smoked peppercorns with a stronger olive oil from Nocellara olives. There are a couple of certified organic olive oils available on the market each year from smaller orchards. This combination of salt, pepper and good EVOO provides an undertone to soups, hummus spreads and chili that most people can’t identify but allows the dish to be vegetarian with a hint of smoky flavor.

Many chefs will scoff at using different salts, thinking they are all like “seasoned salt” with additives that can be commonly found at the grocery store, but I like to use different salts and peppercorns from different parts of the world. Salts from Hawaii or the Murray River in Australia have distinct flavors and smoked salts & peppercorns take on flavors from the wood that’s used just like your food would in a similar situation.  These seasonings become another layer in your recipe. To me, this is no different from choosing the correct chile from a geographical region for a dish or putting together a curry based on the herbs of a particular culture. They can get expensive, but I find a little goes a long way when using these products so you need less than regular salt and in many cases they enhance the dish better than generic salt.

Now on to the recipe. There’s another one on the website which was the start for this one. It’s the Tomato & Cauliflower Pasta dish. Sometimes there are leftovers in the house which don’t lend themselves to storage easily, so they become something else in an effort to avoid waste. The tomato soup started as very old recipe from Cooking Light which you can make in your blender. It was a great summer recipe but it lacked the weight and depth of flavor I wanted in February and March when it is cold, rainy and generally damp. Eggplant seemed to provide what I was looking for in the base and it breaks down well after it’s cooked. Adding some smoke to the recipe with the salt and peppercorns made it appealing for cooler nights when a simple grilled cheese sandwich with wilted greens would fit the bill for a quick and nourishing dinner. Leave that sandwich open face and add an egg for even more protein or use risotto with mushrooms, greens and cheese as a side dish. There are so many ways to vary this soup as a meal depending on what you have available at your local farmers’ market.

The base recipe is forgiving and depending on the harvest, you will have more or less liquid and acid in your roasted tomatoes. For a sweeter base, add more yellow and orange tomatoes. For more acid, lean towards the very dark reds like Cherokee Purple. Only add the smoked salt and peppercorns to the eggplant. Use  Himalayan or Murray River salt with the tomatoes which will highlight their bright clean flavor from summer.  I normally roast my tomatoes with local garlic, sweet onions and a variety of herbs so it’s ready to go for several recipes during the winter. You can choose to use canned tomatoes like the organic Muir Glen roasted tomatoes with herbs and the recipe will turn out just fine. You won’t be able to add as much salt if you go in that direction. So be careful with your eggplant.

Please remember that for many of these recipes, the base ingredients are cooked, frozen, dehydrated and canned when they are in season. Creating the final products is quick compared to starting from scratch each time. Use what is most similar on hand for the recipes as they tend to be forgiving for quantity and spice range.


Roasted Tomato, Eggplant & Cauliflower Soup

Ingredients

  • 1/3- 1/2 cup cooked red lentils (not essential)
  • 8 oz cooked carrots (sautéed in olive oil is best)
  • 16 oz roasted heirloom tomatoes with herbs & onions
  • 4 oz slow roasted tomatoes with balsamic vinegar (if you have them)
  • 6-8 oz eggplant grilled or saute with Olive Oil, Alder Wood smoked salt & Apple & Mesquite Wood smoked peppercorns (finished weight)
  • 1 tablespoon roasted garlic (half if you use raw)
  • 1 tablespoon dehydrated parsley (use more with fresh, it tastes better)
  • 1 tablespoon dehydrated celery leaves (use more with fresh or eliminate)
  • 3 1/2- 4 cups vegetable broth (or chicken broth)
  • 3/4 cup Spicy Chickpeas (www.tarheelfoodie.com/2011/09/10/roasted-chickpeas-pepitas/)
  • 1-2 cups of chopped roasted cauliflower with olive oil & curry powder of your choice
  • 1 tablespoon toasted pumpkin seeds with salt for topping

Preparation

  • Warm everything except the cauliflower and pumpkin seeds together in a pan for about 15 minutes.
  • Blend together until smooth.
  • Top with warm cauliflower and pumpkin seeds.

Notes

  • You can leave out some of the chickpeas and add them to the topping after they are reheated (in toaster oven on parchment).
  • If you use plain chickpeas from a can, rinse them well and add the spices to the soup in a reduced amount from the original Spicy Chickpea Recipe or process them as you would dried/fresh chickpeas.
  • If you eliminate the slow roasted tomatoes with balsamic vinegar, only add the vinegar if you have a good long-aged vinegar because roasting it with the tomatoes sweetens the flavor of the vinegar. Less aged vinegar tend to be much more acidic. Use it sparingly or eliminate it altogether.
  • If your tomatoes do not have onions added, use about 1/4 cup slow cooked sweet onions to balance the tomatoes and eggplant.
  • If you have leftovers or you want to hide the cauliflower, simply blend it into the soup after you have roasted it.
Posted in Dairy-Free, Diabetic Friendly, Dinner, Fall, Freezing & Canning, General, Gluten-Free, Lunch, Recipes, Seasonal Eating, Second Harvest, Soup, Vegetarian, Winter | Tagged , , , , , , , , , , , , , , , , , , , , , , , | Leave a comment

Maple Syrup Candied Ginger

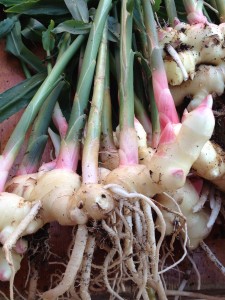
Ginger is one of those lovely plants that likes to sit out in the shade during the summer heat here in the South. In fact, it thrives in the humidity and rich moist soil, showing off some broad beautiful foliage and pretty flowers along with a bit of fragrance. In the last few weeks of summer, along with the last of the tomatoes, peppers and the beginning of early fall greens, the young tender fresh rhizomes show up in all their pink,green and ivory glory. They are almost too beautiful to cut and hardly resemble the dry brown roots you’re most likely to find at the grocery store any time of year. I think I can safely say that once you’ve had some freshly dug ginger root, it will be nearly impossible to go back to the grocery store or pull a jar out of your spice rack.

A couple of weeks back I made a trip to Western Maryland for a local food event in Garrett County. I would like to say the drive up was beautiful, but it was far from it. Friday traffic and a horrific rain storm made the trip terrible, dangerous and very long. I don’t do well in a car for more than a couple of hours so when we got up over eight, you can imagine that I was fit to be tied. But all was instantly better when the sun came out for the local food festival and I was given maple syrup by not one, but two local sources! Both Savage River Farm and Milroy Farms were quite kind to give me syrup this year. As you probably remember, I was pretty much devastated by the news last year that Maple Creek Farm in Burnsville NC was unable to produce syrup because of warmer winters with climate change. As the southern most organic producer of maple syrup, they were a delight to go visit. The sun shined through that lovely deep golden amber and everything seemed instantly right!

The bright flavor of tender ginger root slices combined with maple syrup from the Southern Appalachian Mountains creates a unique flavor that is different from the typical candied ginger you will find at the store. This stuff I’m going to tell you how to make is spicy deep rich sweet. That ginger from the store has been candied with sugar and there’s no telling if it was beet, cane, or some other kind of sweet product. But just like honey, maple syrup takes on slightly different flavors depending on the mineral content of the soil around the trees, the amount of moisture and age of the tree, along with the number of freezes during the harvest season.

Harvesting maple syrup is no easy task. There are miles of food grade lines strung through the woods up and down the mountain sides (gravity feed is the name of the game when harvesting the raw sap). Tapping the trees year after year so they are not killed requires experience and good eyesight to see scars left from prior taps. There are all sorts of grades of maple syrup from light to dark but my only advice is just find some that you like and get plenty!

The more you replace conventional sugar with honey, sorghum or maple syrup, the more you will enjoy your family recipes because they each add a little subtle flavor! As an added bonus, if you have heard of vanilla sugar, let me introduce you to ginger infused maple sugar and ginger infused maple syrup with this “recipe”! Try the infused sugar in your fall pumpkin cookies or lattes and the infused maple syrup on winter squash or pumpkin pancakes. There is no end to the possibilities using these homemade products.  Younger rhizomes will be less spicy than older ones so your harvest or purchase from the market might vary from year to year or vendor to vendor. If you don’t like the spice of ginger so much, look for the smaller, younger roots or get a mix from a couple of sources each year so the batch is more consistent once the process is complete.


Here’s the method I use after I buy fresh ginger root at the farmers’ market.

  • Clean the ginger with a stiff vegetable brush under a slow running stream of cold water. Some of the outer skin will be removed in the process, but so will all of the dirt.
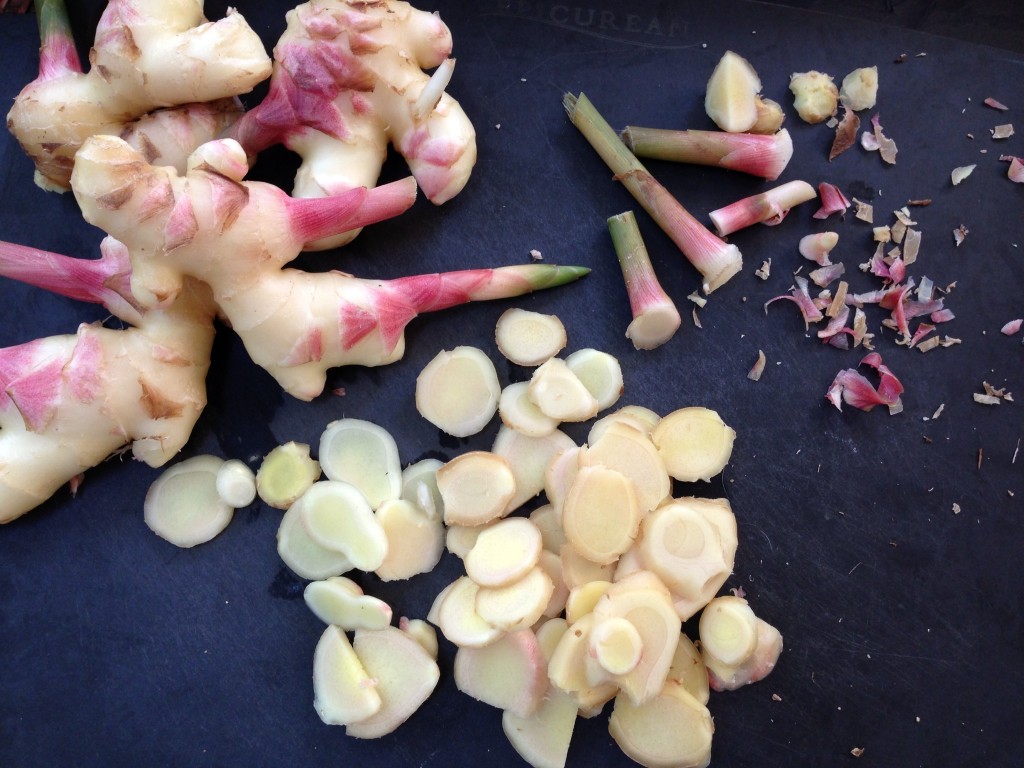
  • Then use a towel to dry the ginger and slice it up cross-grain about 1/8 ” thick.
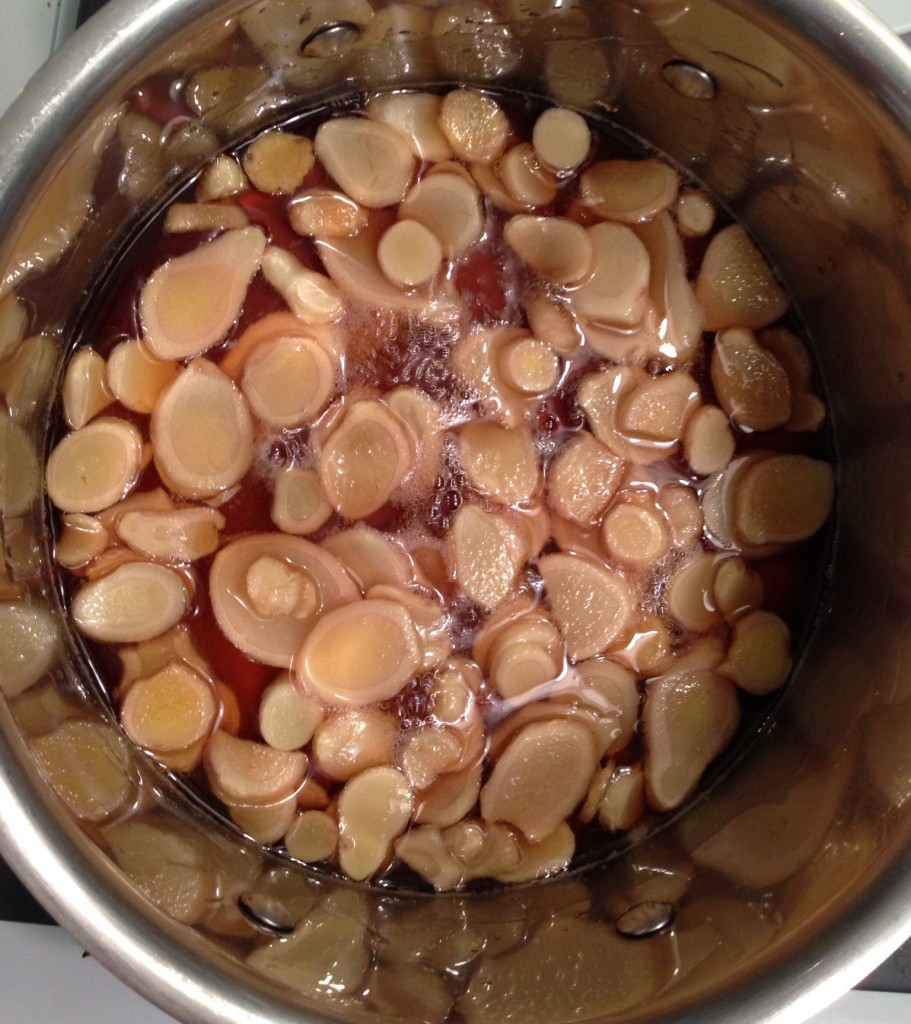
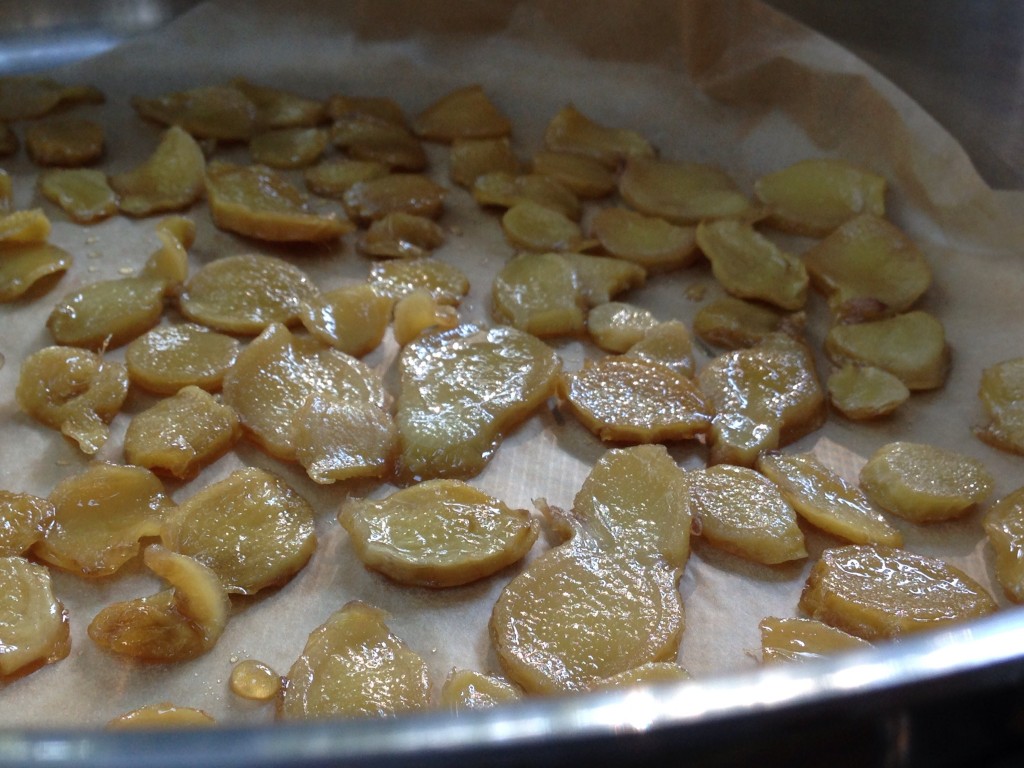
  • From this point, the slices get placed into a stainless pot and barely covered with some fresh maple syrup. For twenty minutes they lightly simmer away as the maple syrup begins to thicken. Do not boil these too hard unless you plan to stand and watch them during the process. You can cut the time down, but the slices may end up more firm in the process from the maple syrup actually turning to hard candy. And be careful about spatter because it is notoriously hot and will burn you. The water will be reduced in the maple syrup through the process and the color will deepen to a dark amber color.
  • Remove the slices, allowing them to drain in the pot and set on a rack to drip and dry. A dehydrator will work for this process, or air drying if it is not humid.
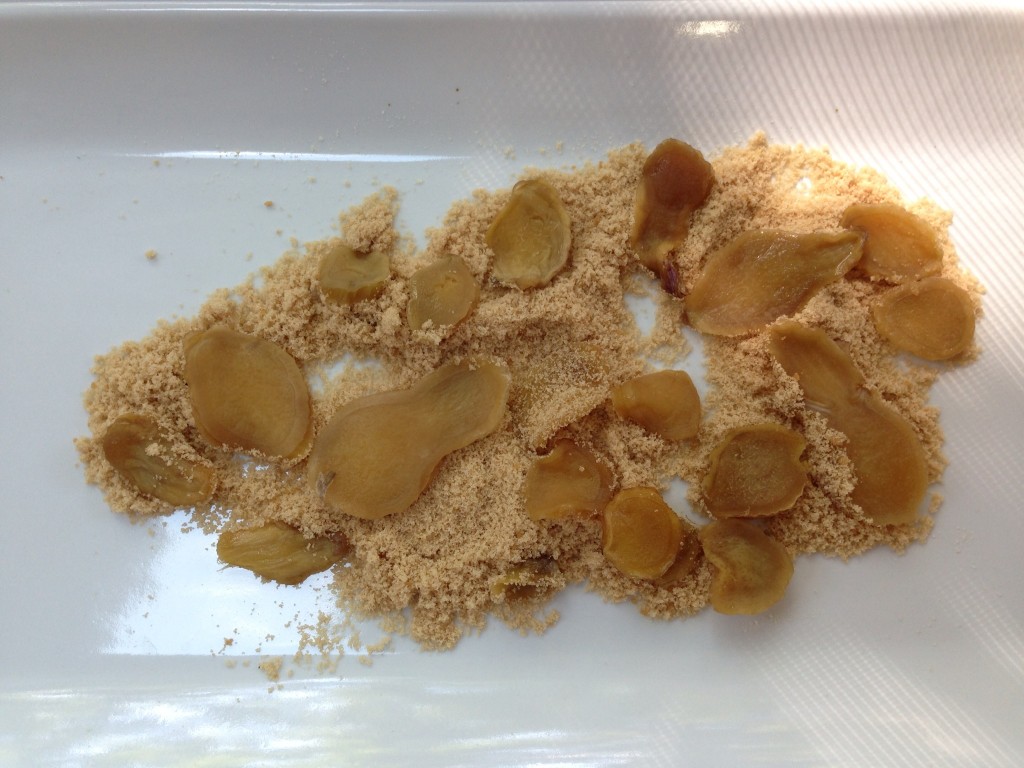
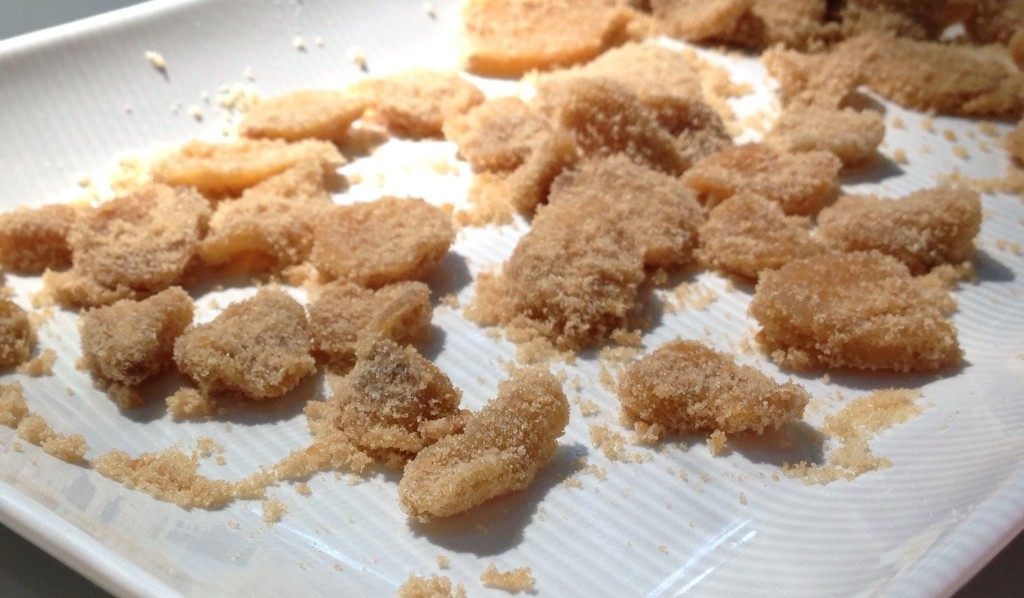
  • When the slices appear mostly dry but still quite pliable, press and roll them in pure maple sugar. Store in a sealed container with additional maple sugar in the refrigerator for up to a year. Pull out slices as you need them in recipes or add to toasted pecans for a surprise ice cream topping. The sugar can be used as a replacement in baked recipes as well.
  • Remaining maple syrup and infused sugar should be stored in the refrigerator in sterile jars.


Posted in Dairy-Free, Dessert, General, Nut-Free, Preserves, Recipes, Second Harvest, Snack, Vegetarian, Year-Round | Tagged , , , , , , , , , , , , , , , , , , , , , , , , , | 2 Comments

Brown Butter & Maple Syrup Corn Muffins

Over the years, I’ve accumulated a few different recipes for corn bread. Many of them can be adapted easily to make muffins by reducing the cooking time. This tends to work out better for parties or simple portion-control if you’re like me and can’t stop at just one overly large piece.

Coming from Maryland, we tended to have sweet corn bread and not so much of the savory cast-iron pan style that you find around more Southern parts of the country. I like both types so it’s fun to play with the recipes and see how much can be changed to make them more interesting with a particular dish. And just a quick note on the topic of butter & honey. They’re not just for biscuits in my book. I love honey, maple syrup, sorghum and butter on cornbread, especially when they first come out of the oven!

I’ve had this particular recipe for well over 20 years and it’s been adjusted just a bit to make it more healthy and it uses local ingredients that are pretty easy to find or make at home. For a while Chapel Hill Creamery was making yogurt and it was awesome. But they’ve stopped making it so I use the organic Greek yogurt from the store. Soon enough I’m going to start making it at home in the dehydrator in the hopes of having something that tastes a little less generic. The original recipe calls for sour cream and it’s wonderful and rich, but I like the tangy flavor from the yogurt. Buttermilk or plain unsweetened kefir can be used in place of the milk as well to increase the lift in the muffin as a result of increased acid. Feel free to use fresh corn, lightly steamed kernels or corn that has been roasted in this recipe. Each will change the flavor slightly and go better with one food or another that you are serving. If you choose to make these more savory, try adding some fresh chopped chives, thyme or rosemary. All of them will blend well with the maple syrup.

My only other suggestion, because I dislike cleaning up after myself, is to use large tulip paper cup liners in your muffin tins. Check for them in your local paper store that sells items to restaurants. Kitchen stores frequently have them in stock in smaller packages and a multitude of online stores carry them. They basically eliminate cleanup and make it easy to serve these without everyone touching them or having them break apart so easily.

Now a little about the farmers that contributed to this recipe. Elizabeth & Andy run Wild Onion Farms in Johnston County, NC. They grow everything organically on their 7 acre farm. That’s important to know because Beth has been bombarded by questions at the market in prior years about growing corn. She drives through her farming community to see if anyone is growing GMO corn. She won’t grow corn unless she knows she can avoid cross-pollination and contamination from other crops in the area. So her organic corn this year was particularly sweet in my opinion, given the effort she and Andy put forth with the terrible weather to get their corn to market. The eggs came from S&L Farm out of Louisburg, NC. A farming community that is home to several farms using organic growing techniques. Linda at S&L has a multitude of veggies, fruits and meats on her 36 acre farm and brings some unusual jams to market as well. The maple syrup came from my dear friends at Savage River Farm in Garrett County, Maryland. Hana grew up in Raleigh and studied sustainable agriculture at one of my favorite colleges in Appalachian State in Boone, where she met her soon-to-be husband, Ben. I’ve worked with her on several projects here in town, in Boone and now in Maryland. Knowing my love of maple syrup candied ginger, they gifted me a very large jar from their private stock while I was visiting last month along with some eggs, local butter and quite a few mushrooms and tomatoes. Needless to say, there was quite a bit of cooking when I returned home!


Brown Butter & Maple Syrup Corn Bread

Ingredients

  • 1 cup local organic yellow cornmeal.
  • 1 cup organic all-purpose unbleached flour
  • 2 teaspoons aluminum-free baking powder
  • 1/2 teaspoon baking soda
  • 3/4 – 1 teaspoon Himalayan salt (fine grind)
  • 1/8 – 1/4 teaspoon ground peppercorns (optional)
  • 3 tablespoon maple syrup
  • 1 organic egg, lightly beaten
  • 1/2 cup organic whole milk (kefir, buttermilk, cream or 2% will work)
  • 3/4 cup greek yogurt (don’t include whey if it has separated a little)
  • 3 tablespoons butter (salted or unsalted)
  • 1 cup corn off the cob (freshly cut, lightly steamed, or roasted)

Preparation

  • Pre-heat oven to 375F (190C)
  • Lightly cook the butter in a pan on medium-low. watching it carefully, until it is lightly browned and then set it aside to cool completely. It will continue to cook for another minute. (Be sure not to burn the butter while cooking it)
  • In a large bowl combine cornmeal, flour, baking powder, baking soda, and salt. Mix well with a whisk to break up all of the clumps.
  • Add in the corn and mix again. This will help the corn stay separated in the final mix.
  • In a separate bowl, beat the eggs, milk, yogurt, maple syrup and 2 tablespoons of cooled butter until well they are well blended and creamy.
  • Add the egg mixture to the dry ingredients and combine with a few strokes until it’s barely been incorporated.
  • While the batter sits for a minute, use a pastry brush to lightly coat the insides of the paper tulip cups with the excess melted butter OR the muffin tins if you are not using a liner paper. This will help the muffins to brown but not over cook and pull away without breaking.
  • Pour the batter into the liners or tins and fill to about 1/4″ from the top. I used the large muffin tins with liners so this was about 3/4 cup of batter.
  • Bake for about 15-20 minutes. They will be done when the top just begins to appear firm and a toothpick inserted comes out mostly clean. They are overcooked when browned on the top. Leave them in the tin for about 5 minutes if you have not used a liner and then you should be able to remove them easily and place them on a cooling rack. If you have used a liner, remove them holding the liner and set them on a cooling rack.
  • Serve warm within the first 5-10 minutes with honey or sorghum butter. Adding some fresh chopped thyme makes it a little more interesting. The recipe should make about 8 large muffins.


Posted in Appetizer, Breakfast, Dinner, General, Lunch, Nut-Free, Recipes, Seasonal Eating, Second Harvest, Sides, Snack, Year-Round | Tagged , , , , , , , , , , , , , , , , , , | 1 Comment

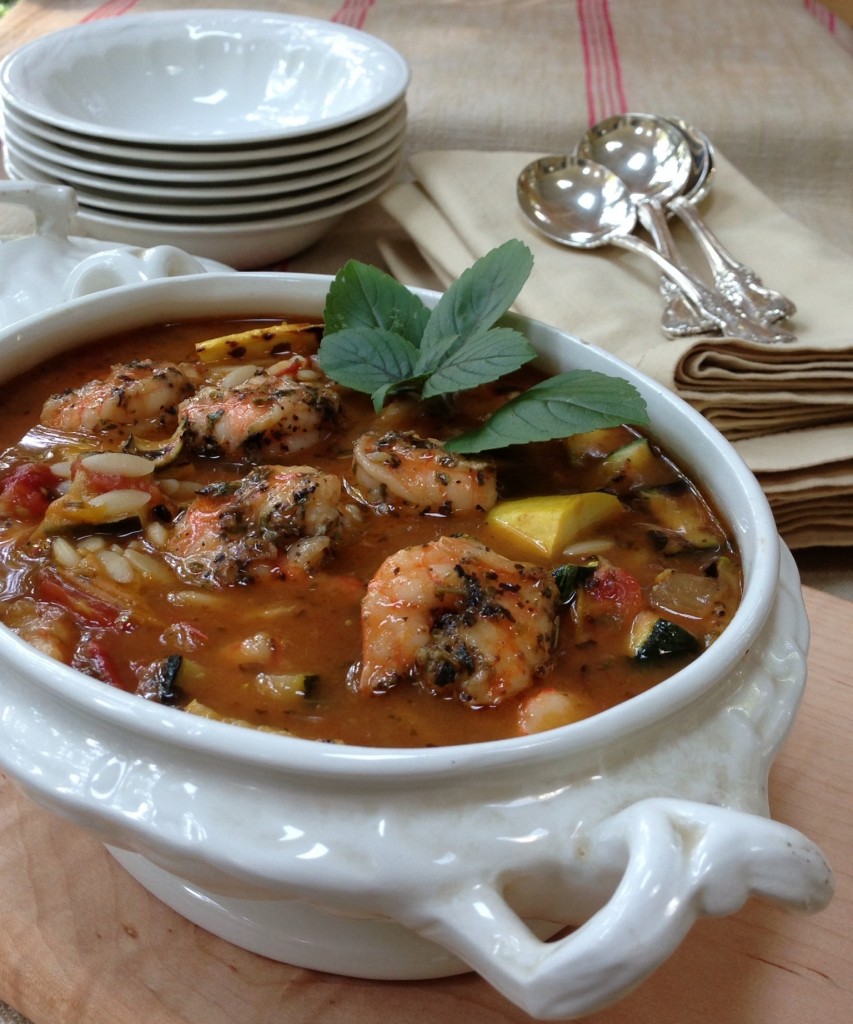
Late Summer Minestrone Soup

Minestrone loosely translated means “vegetable soup” and it reminds me of the colors of fall when the green leaves start to turn yellow, orange and red. I’ve adapted what is traditionally thought of as winter soup with root vegetables and heavy sausages to a lighter, colorful summer version that incorporates bright yellow and green summer squash along with orange and red heirloom tomatoes and beautiful shades of leafy greens and delicate cabbage. And then we just top it off with awesome goodness in the form of local cheese & fresh greens and herbs.


This mix of tomatoes, summer squash, onions and delicate greens presents a perfect base for just about any light meat, poultry, shrimp or fish you can throw at it. Leftovers are a wonderful addition to this soup. And if you’re eating vegetarian style, try adding roasted chickpeas for a bit of crunch factor. For me, a minestrone soup that changes with the seasons is a perfect recipe for late summer evenings when the storm fronts start to bring in lower temperatures and less humidity. Sitting out on the porch with a bowl of soup just feels right in September. The tomatoes are harder to come by and the squash has started its final run before the farmers pull the plants for fall crops. The onions and garlic bulbs have been harvested and dried and some of the herbs are starting to put up their last flowers in hopes of dropping some seed into the soil before a frost comes along.

There is no special formula for this soup. Everyone has a family minestrone soup recipe so please feel free to make alterations. Don’t despair if you are missing something or you don’t have exactly the right amount. I use home-roasted garlic because it’s a little more mild combined with the summer squash for this recipe. I used slow cooked onions because they are sweeter. The summer squash are simply cut into thick slices and brushed with salt, pepper and olive oil and then thrown on a very hot grill for the barest amount of time you can stand to get some lovely grill marks on both sides. Literally they cook for about 4 minutes total. Fresh herbs are better than dried, in my opinion, but the ridiculous spring and summer rain has ruined my home plantings this year so I relied on dried while cooking this up last week. In the summer version I prefer more delicate greens so they don’t compete with the squash or just some fresh basil leaves thrown in right before you serve your guests. The greens should change seasonally to reflect their relationship with other vegetables in the soup. And as a reminder, try to find local farmers that are growing organically. They work hard to feed you well!

This recipe will make enough for 4 people and there are some additional serving suggestions at the end.


Late Summer Minestrone Soup

Ingredients

  • 8-10 oz (about 2-3 cups) roasted tomatoes with juice, mostly chopped
  • 1 cup slow-cooked onion, chopped
  • 1 clove roasted garlic, smashed
  • 1 tablespoon Italian seasonings
  • 4 cups water, thereabouts, of beef or chicken broth mixed with water, or veggie broth
  • 3 cups chopped grilled zucchini with olive oil, salt & pepper
  • 2/3 cup orzo or other pasta or cooked white beans (drained)
  • 2 cups shredded greens (arugula, bok choy, savory or delicate cabbage)
  • Optional protein – about 2/3 lb of shredded beef (beef heart was used in this recipe), chicken, fish, shrimp – something that will hold together well when added to a soup.
  • 1/2 cup shredded Chapel Hill Creamery Calvander (Asiago style cheese would be my first choice but this is flexible so use what’s local)
  • 1/2 cup fresh parsley, chopped or basil – to top with the cheese as serving

Preparation

  • Add the roasted tomatoes, water, broth, onion, spices, and garlic to a pot and bring to a low simmer on medium high heat until heated all the way through. About 5 minutes.
  • Add in the pasta or beans and cook until almost done or heated through along with any protein (meat, chicken, fish ). Keep an eye on the pasta and beans so they do not stick to the bottom of the pot. Stir if necessary.
  • Add in the shredded or baby greens and zucchini pieces just before the pasta is finished cooking (about 2 minutes before it’s finished) and heat for another couple of minutes. The temperature will drop slightly so you may have to increase the heat to bring it back up quickly. Again, keep an eye out for the pasta and beans, stirring as necessary.
  • Top each bowl with fresh herbs and cheese while the soup is hot.

Notes

As an option, serve with corn bread croutons along with the herbs and cheese or eliminate the pasta and serve over creamy grits or polenta.

Posted in Beef, Chicken, Dairy-Free, Diabetic Friendly, Dinner, Fall, Fish, Freezing & Canning, General, Lunch, Nut-Free, Recipes, Seasonal Eating, Second Harvest, Soup, Spring, Summer | Tagged , , , , , , , , , , , , , , , , , , , , , , , , , , , , , , | Leave a comment