Keep Extra Dog Treats With You At All Times!

This week I’ve been pretty busy gathering all the food I need for an “Open House” event this Saturday in downtown Raleigh.  I’ve been really focused on this project because as anyone starting a business knows, you need to make a great first impression. In this case, I’m representing several local farms as well as my own company so I hope you’ll come check it out.  http://on.fb.me/ghMBrd

Along the way this week I discovered something awesome: Women excel at farming!

Whether it’s an animal, plant or person, women in the field talk about how something is growing and what they will be doing to help it along or what they will change to make it better. Not once this week did I hear a complaint. There were plans to expand and change to meet the demands of a long recession. There were stories of how these women were helping each other and going out of their way to avoid competitive situations that would hurt fellow farmers.

You are probably shaking your head at this point. Seriously, these women are looking for NEW value-added products that they can make and sell  instead of tearing each other apart. They are looking for ways to partner with each other in CSA pools or recommend each others products at the markets they attend. They want everyone to succeed! And we should too, because the demise of our country’s small family farms is something we should all be concerned about if we want to continue having a choice in what we eat.

Large corporate farms sow the seeds that are the easiest and cheapest to grow. They will continue to genetically modify them and use chemicals to make the process as efficient as possible. It’s a slippery slope.  So if you want to continue to have choice, you should make sure you are doing all you can to support your local sustainable farms.

That includes paying a fair price for the food you buy. What’s a fair price? Is it market or cost driven? How about you go to a farm and spend the day “helping” the farmer and then you decide if that’s what you want to do every day. If it’s not, what’s it worth to you to have that farmer provide you with food for your table? That’s what a fair price is to me.

My ability to eat well and stay healthy depends on their ability to run a successful farm business. More than that, these folks are friends and you wouldn’t want a friend to get fired or loose their home if they were working hard, making good business choices, and living frugally. So leave the change, tell a farmer if she’s selling something too cheap, pay for your class or tour, and give them ideas for new products that you are willing to buy; in other words: anti-up to the table to make sure that farm stays in business.

It is always a  true pleasure for me to go out and spend more time in the field and homes of these farmers. I try very hard to use my many years in software marketing/sales to help them understand social marketing tools and partnering strategies as well as market segmentation and price points.  I share the information I have on markets and possible business partners.  And, in return I learn more each day than I could ever imagine possible. The biggest lesson this week was: keep looking forward. The second: keep extra dog treats with you at all times!

Posted in General | Tagged , , , , , , , , , , , , , , , , , , , , , | Leave a comment

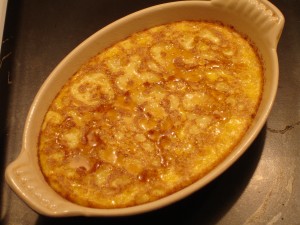
Coconut Rice Pudding

This dish is not your typical soft pudding with rice mixed in. The texture is completely set and that’s why I like it. I generally use leftover rice because the recipe is pretty quick to prepare for 2-4 people with just a few ingredients. I honestly can’t remember where I got the original base recipe because it’s been more than 25 years.

I’ve made several changes over the years and I can offer you a couple of options for additional flavor changes or allergy issues. You’ll note that I specify ceylan cinnamon in this recipe. This type has a more mild flavor that the regular Mexican variety you find at the grocery store. I was experimenting with some new spices this past month and this one is going to be a favorite for those times when you need something subtle. If you use the regular kind from the grocery store, just try cutting the amount in half so it’s not overpowering. I also added a finger pinch of  nutmeg in one of my tests and liked that quite a bit when I didn’t use a liquor. I have used a tablespoon or two of Kahlua in this recipe in the past and it’s wonderful, but you can use whatever liquor you prefer along with some fresh fruit if you have it.

This recipe cooks up pretty fast and I normally make it in my toaster oven but I keep an eye on it to make sure I don’t over cook it. You’re looking for it to just start to brown. More than that, and it will be too dry when it cools. It will also double easily but you need to add about 10-15 minutes to the cook time and use a larger baking dish.

I generally use a #20 Le Creuset  enamel oval baking dish which is pretty small. I have also used a couple of #20’s for individual servings. I haven’t tried to cook it in ramekins and water bath yet, but I think it would be great that way too, especially if you wanted to significantly increase the volume and not worry about it baking up properly in a large dish.

The base recipe re-heats in the microwave oven quickly on a low power setting (eggs & milk), but it is best served as it comes out of the oven with maple syrup (I use an infused  cardamom & ginger but you could add the spices to the base recipe). It’s a very pretty dessert and it smells heavenly as it’s cooking and when it first comes out of the oven.

You’ll notice that I have suggested cooking the rice in coconut water. It works well to cook it in coconut milk, but the rice and coconut water blend came out more fluffy than using plain water or “milk”.  I have also substituted coconut milk for dairy milk and changed the butter to coconut oil or a soy based non-hydrogenated margarine. Both work well if you need to make this lactose free. I think that almond milk would work equally as well as a substitute for the dairy milk and I’ll make some notes on the post when I try that in the next couple of weeks. For now, I’m kind of tired of eating rice pudding.

Ingredients:

  • 2 eggs
  • 3/4 cup low-fat milk (coconut milk}
  • 2 tablespoons sugar
  • 1/4 teaspoon ceylon cinnamon
  • 1/2 tablespoon melted butter (coconut oil or  margarine) cooled
  • pinch of nutmeg
  • 1/2 teaspoon vanilla extract
  • 1 cup cooked basmati rice (suggest cooking in coconut water)

Directions:

  • Beat the eggs and milk together until well blended.
  • Add in the rest of the ingredients minus the rice and mix well.
  • Then add the rice making sure it is not clumped and mix well.
  • Pour this into a well-buttered dish (4″x6″) and bake uncovered for about 35-45 minutes at 350F until it is just starting to brown. You can test it by sticking a toothpick into the middle. It should come out clean and not have any wiggle. This dish can be dry if it’s over-baked.
  • Serve warm with maple syrup or honey. You can use a liquor, fruit butter, fresh coconut , fruit, or whipped cream to top it off too.
Posted in Dairy-Free, Dessert, General, Gluten-Free, Nut-Free, Recipes, Vegetarian, Year-Round | Tagged , , , , , , , , , , , , , , , , , , , , , | Leave a comment

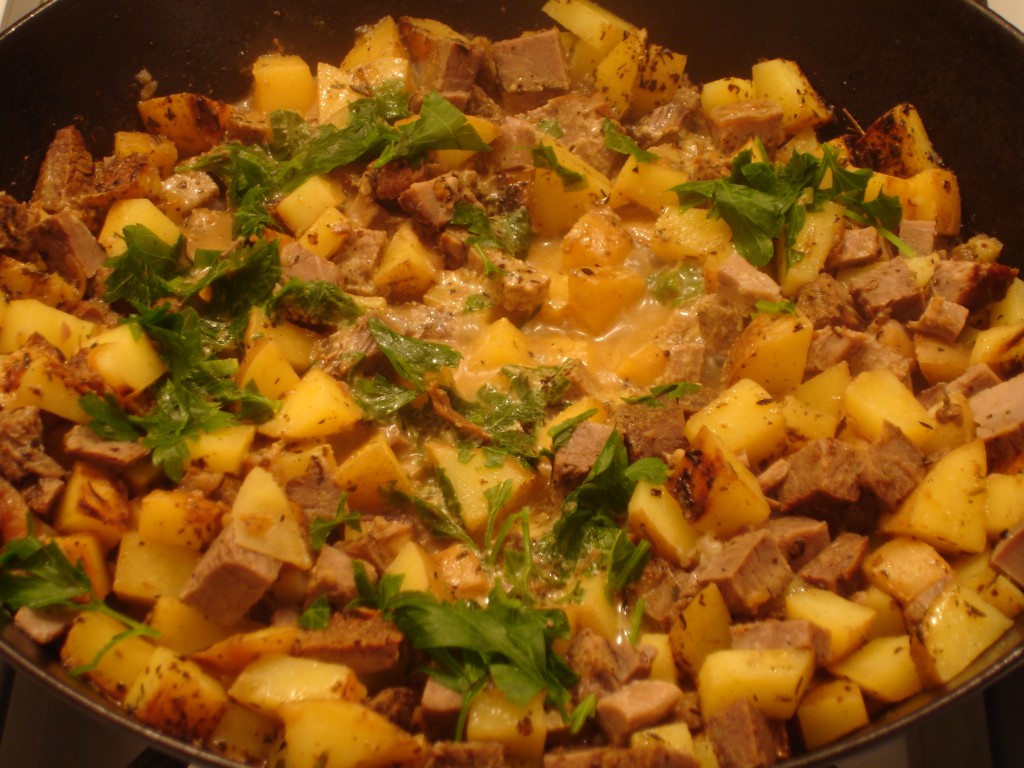
Sunday’s Roast Beef Reappears as Beef & Potato Hash

Did your Mom spend Sunday cooking a roast? It was a favorite for family gatherings when I was growing up. Probably because it’s so full-proof. Most roast cuts are really easy to make and the leftovers are the huge bonus!

One of the favorite “leftover recipes” at our house is Roast Beef Hash. This started out as a Corned Beef Hash recipe, which I grew up on in Maryland and still love; but my family isn’t as enamored as I am with corned beef, so we modified the recipe and it’s wonderful for any meal.

This recipe will take you less than 30 minutes to prep, cook and serve and it’s great for breakfast, lunch or dinner. I have used both shoulder and chuck roasts for this, applying a dry rub of Italian spices, salt, pepper and a little sweet paprika a couple of hours before cooking and a handful of dehydrated sweet onions as it’s cooking. But the dry rub is not necessary to get a good result from either of these cuts of meat.  The key to the slow cook is searing the meat in some olive oil before you put it into the oven to cook. You could use a slow cooker as well, on low. It cooked for about 3 hours, covered in a dutch oven, on  250F after I browned each side in olive oil. Basically I cooked it until I thought it was tender enough to serve. The salt in the dry rub helps the internal marbled fat render properly as the roast cooks. If you are not using a very heavy dutch oven or slow cooker, you may need to play around with the temperature. the cast iron dutch ovens created more heat inside then the oven temperature is reading. So a setting of 325F might be more appropriate for a stainless roasting pan that is not going to retain the heat as well as the cast iron.  This is a recipe for 2-3 people


Roast Beef & Potato Hash

Ingredients

  • Olive oil
  • 2 cups cubed small Yukon/similar potato, leave skin on (raw)
  • 3/4 – 1 lb of cubed cooked roast beef, fat removed
  • 1/2-1 cup chopped sweet onion (or onions from roast)
  • 1 tablespoon Worcestershire Sauce
  • 1/3- 1/2  cup beef broth
  • 1/2 cup milk, warmed (can be 2%, whole or half/half)
  • 2 tablespoons fresh flat leaf parsley, chopped
  • Salt & Pepper to season

Directions

  • Put enough olive oil in the bottom of a large sauce pan or heavy bottom cast iron pan to coat sufficiently. Heat to medium high and then add the cubed potatoes (about 1/2″ cubes or smaller)  into the pan along with about a teaspoon of salt and 1/4 teaspoon of pepper. Continue to cook on medium high, covered, without burning. Turn the heat down if your pan seems to get too hot and starts smoking. This is going to take you about 5 minutes and you don’t really need to stir because you are trying to develop a browned surface one side of the potatoes before you stir them. If you onions are raw then add these in with the potatoes and they will add some additional liquid as they cook and brown.
  • Stir the potatoes and continue to cook about another 5 minutes, covered. Check the potatoes at 5 minutes and when they are cooked almost all the way, add the cooked beef cubes and the cooked or dehydrated onions if you have them for more flavor. Then add the beef broth and Worcestershire Sauce and stir the mixture well trying to coat the potatoes well. Cover and cook for a couple of minutes to blend everything.
  • Add the warmed milk. Warming the milk helps ensure it won’t curdle when you put it into the hot beef and potatoes. Stir the dish and then add the parsley on the top.
  • Cover the dish and let the potatoes and beef absorb the milk. This should take about another couple of minutes. Adjust the seasonings and serve.

Notes

If you want an additional shortcut, use some pre-roasted potatoes. I simply chop a lot of potatoes and cover them with olive oil, Italian spices, rosemary,thyme, salt and pepper and roast them with aluminum foil on the bottom and the top at 425F for about 30  minutes in a preheated oven on a preheated heavy cast iron or stainless pan. Preheating the pan helps to sear the potatoes the minute they hit the pan. Be careful about spattering oil!  When you remove them from the oven, leave the cover on for about 5-10 minutes and the potatoes will release from the bottom foil piece easily with a silicon spatula.

Posted in Beef, Breakfast, General, Nut-Free, Recipes, Second Harvest, Year-Round | Tagged , , , , , , , , , , , , , , , , , | 6 Comments

Pumpkins to Waffles

Heirloom Pumpkins

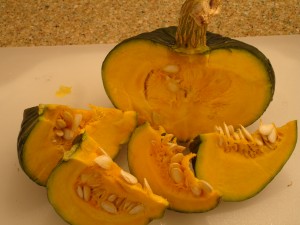
I had an opportunity to see more pumpkin varieties this fall at the Boone Farmers Market than anywhere else at one time. So when I was offered a couple of heirloom varieties to play with after Halloween by a local shop, of course I jumped at the offer.

But first, a bit of history provided by the University of Illinois: “Native Americans dried strips of pumpkin and wove them into mats. They also roasted long strips of pumpkin on the open fire and ate them. The origin of pumpkin pie occurred when the colonists sliced off the pumpkin top, removed the seeds, and filled the inside with milk, spices and honey. The pumpkin was then baked in hot ashes.”  Sort of a pumpkin custard and not too dissimilar from what we eat today as a pie.

Heirloom Pumpkin

The orange pumpkin pictured above had a texture similar to spaghetti squash so I was careful not to take too much out when I cleaned it. The blue pumpkin was more like butternut squash in consistency. I tried two tests on the initial cooking method. I skinned part of them partially and roasted 1″ pieces with some olive oil.  Then, I left the skin on some pieces and cut them into wedges and roasted them with no oil. In both cases the pumpkin was covered with foil to retain moisture. It was much easier to roast them with the skin on because I didn’t have to check the temperature of the grill as closely. I do most of my roasting on the grill.  Without the skin, you have to make sure your browning doesn’t go the route of burning; which can happen pretty quickly when you’re at 450F.  The squash came out of the skin easily and I think I lost less flesh that way too.

At this point, I’ve mashed the pumpkin and put some of it in the freezer and some of it has been magically turned into pumpkin waffles, which are pretty high in nutrition value compared to normal waffles and they freeze well. Personally, I like mine with a bit of maple syrup and granola or just some pecans for added crunch. I was really pleased to be able to use my home-made canned applesauce in this recipe too. The only thing missing was some whipped cream. Maybe next time.

Pumpkin Waffles

Pumpkin Waffles

Dry Ingredients:

  • 1 ¼ cups all purpose flour
  • 1 cup wheat/white flour
  • ¼ cup lightly packed light brown sugar
  • 4 teaspoons baking powder
  • 1 ½ teaspoons ground cinnamon
  • 1 teaspoon ground allspice
  • ½ teaspoon ground ginger
  • ½ teaspoon salt

Wet Ingredients:

  • 4 large eggs separated
  • 1 cup mashed pumpkin (fresh baked or canned)
  • ¼ cup smooth applesauce
  • 2 cups low-fat milk

Sift or mix with a whisk the dry ingredients together. Set aside.

Mix the egg yolks with the pumpkin, applesauce and milk until well blended.

Add the wet ingredients to the dry and blend well.

Beat the egg whites until stiff and then fold them gently in thirds into the other mixture. Don’t worry about incorporating them completely.

Use a hot waffle iron coated with butter, margarine (I use a non-hydrogenated form) or coconut oil to keep the waffles from sticking. These can be refrigerated for 3 days or frozen in baggies and reheated in the toaster oven later. If you plan to freeze them, just barely finish cooking them, but don’t brown them in the waffle iron. Let them come to room temperature before toasting so they don’t burn but do have time to brown and warm through completely. Makes about 10-12 waffles depending on the size of waffle iron.

Posted in Breakfast, Fall, General, Nut-Free, Recipes, Vegetarian | Tagged , , , , , , , , , , , , , , , , , , | 1 Comment

Apple, Pear & Cranberry Cobbler for the winter months

I served a cobbler at Raleigh’s Midtown Farmers’ Market a couple of weeks ago. It was made from NC apples, some local pears (and some not so local, but organic), cranberries (sorry – can’t get ’em local) along with my skillet granola crumb topping.  It is wonderful for breakfast with a cup of rooibus tea or as a side dish to a pork roast as the weather just starts to turn chilly and many of you asked for the recipe.

It took me a bit longer to post this recipe than I planned because I wanted to get the refined sugar amount down a bit more and I had to experiment with the cranberries a few times to adapt the original recipe. The apples and pears don’t really require any sugar if you pick more sweet varieties and have multiple types to increase the range of flavor in the dish. You might try using a bit of date sugar in them if you really want to mix it up.

Everybody knows how tart cranberries can be and they are pesky to work with although the natural pectin is a delight in a dish like this. I found that cooking them in a bit of apple cider allowed me to reduce the refined sugar down to 2.5 tablespoons for the filling. You still get some tartness from the cranberries, but the sweetness is really provided by the apple cider and the other fruits as this dish bakes.   I also added some dehydrated apple pieces to the filling to absorb any additional juices that might occur during cooking. That works well to keep the liquid to a minimum and you might try it the next time you make an apple pie to keep your bottom crust from getting too soggy. I made a couple of additional recipe notes for gluten and lactose free at the bottom.

Sorry for the delay but I hope you will find this an easy recipe to make. I have tested freezing the filling after I completed cooking it and then thawing it to make the rest of the cobbler. And, I’ve tested making the entire cobbler, cooking it and then freezing it so you just reheat it at a later date. Both methods worked well so figure out how much storage you have and make this at the height of the season when the fruit is plentiful and less expensive.

Apple, Pear & Cranberry Cobbler
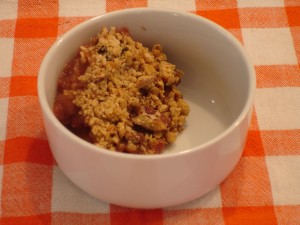
Apple, Pear & Cranberry Cobbler

Apple Cranberry Cobbler

Fruit Filling

  • 1 cup fresh or frozen cranberries – unsweetened, chopped in half/quarters
  • 2 ½ tablespoons light brown sugar
  • ½ cup apple cider
  • 1 ½-2 lbs variety of local apples, peeled and sliced ½” thick
  • ¾-1 lb variety of local pears, peeled and sliced ½” thick
  • 1 teaspoon fresh lemon juice
  • ¼ teaspoon nutmeg
  • ¼ teaspoon cinnamon
  • ½ cup sweetened dried cherries
  • ¼ cup dried apples (or pears)

Topping

  • ¾ cup wheat/white flour
  • 1/6 cup packed dark brown sugar
  • ¼ teaspoon salt
  • 1 teaspoon baking powder
  • 2 ½ tablespoons unsalted butter
  • ¼ cup sour cream (low-fat is fine)
  • 1 cup Skillet Granola
  • ¼ cup chopped pecans or walnuts

As you slice the pears and apples, mix them with the lemon juice to keep them from browning before you cook them.

Bring the cranberries, sugar and ¼ cup of the apple cider to a slow simmer over medium heat and stir until the cranberries are soft and the mixture is like thin jam. If you like dried cherries, you can add them to this part of the process to intensify the cranberry flavor. You may need a bit more apple cider, so keep an eye on the liquid as you cook. This takes from 5-10 minutes. Stir, so it does not burn or stick. A stainless pot is best for this process

Put the cranberry mixture into a bowl, wipe the pot with a wet paper towel and use the same pot to cook the apples and pears in ¼ cup of apple cider along with the nutmeg & cinnamon. You will just cook this just a little bit to set the fruit for freezing and to release a bit of their natural juices. Cook these on medium-high heat until the apples just start to soften. This won’t take long.  If the apples are not juicy, then use more cider or juice to keep the mixture from burning. You can also add a bit of butter (2 teaspoons)  or date sugar at this point, but it’s not necessary unless you like the flavor.

When both steps are finished, mix all of the fruit together and you can freeze it at this point for up to 3 months, or refrigerate it for up to 3 days, or continue to add the topping and bake.  (Do not add the dried apples/pears yet.) I have not measured the pH of this mixture so I don’t know if it’s appropriate to can this mixture at this point.

For the topping, mix the flour, sugar, baking powder and salt together using a whisk to break up clumps. Then cut in butter with a pastry cutter, your fingers (which is melt the butter a bit) or a food processor. You are trying to have small clumps of butter left so they melt as the topping is baking. Then add in the sour cream. Lastly, add in the granola and the extra nuts. The mixture will be very clumping and seem difficult to work with at this point.

To continue, butter the outside and bottom of a pan (this can be a simple aluminum pan or a heavier baking dish. If you use a heavy baking dish please keep an eye on the bake time as some dishes tend to hold heat and bake faster.

Add some of the filling to the pan and then spread the dried apples or pears on top of that so they absorb extra juices as the cobbler cooks. Then add the remainder of the filling and add the granola topping. Just grab little pieces of the topping and spread it over the top of the cobbler trying to cover most of it with an even amount. Don’t worry about making it pretty. Just keep the depth of the topping even so you don’t under or over cook parts of the top.

Now bake it in a pre-heated at 350F oven for 40 minutes, covered with foil. Uncover and continue to bake for 20 minutes until the topping is just starting to brown. Don’t overcook the topping or the cobbler will be dry.

A Couple of Cooking Notes:

This cobbler is not terribly sweet and if you decide to add some vanilla ice cream it will seem appropriately sweet. I frequently use a coconut base ice cream for lactose free friends and it works well with these flavors. If you prefer it without ice cream then you might want to try the filling before you bake the cobbler and add more sugar if you prefer it sweeter to at that step. You can try adding date sugar which gives it more depth also.

If you need a gluten free cobbler, then just use the skillet granola topping but I would add it after the cobbler bakes for about 30 minutes (covered) and watch the cobbler for the next 15-20 minutes as it bakes uncovered to make sure the granola doesn’t burn. Or bake the filling plain and serve it with granola and ice-cream.

Re-heating is easy. Just leave the frozen or refrigerated cobbler covered, bring it to room temperature and bake it, covered, for about 20-30 minutes until it’s warm. Serve right away.

Posted in Dessert, Fall, General, Recipes, Winter | Tagged , , , , , , , , , , , , , , , , , | Leave a comment

Holiday Crackers

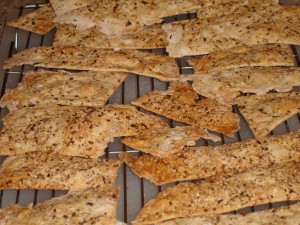
This is a recipe from Fine Cooking, December 2007 and it’s one I will be making for Galatea’s Holiday Open House December 4th (http://on.fb.me/9NIyvj). It’s so easy your kids can help you and it’s flexible enough to change for whatever cheese or spread you plan to use. The beauty of this dough is that you can refrigerate it for up to 2 days or freeze it for a month. After the crackers are baked they hold very well for a solid week in an air-tight container. They are lovely as a gift with some local chevre mixed with fresh herbs.

Seeded Crackers

Ingredients for Dough:

  • 1 1/2 cups (6.75 oz) unbleached all-purpose flour with a bit extra for rolling
  • 2 oz whole-wheat flour
  • 1 teaspoon salt
  • 3 tablespoons extra-virgin olive oil

Ingredients for Topping:

  • 1 tablespoon sesame seeds
  • 2 teaspoons poppy seeds
  • 1-2 teaspoon caraway seeds
  • 3/4 teaspoon kosher salt (or other large grain salt)
  • 2 tablespoons fresh chopped rosemary (optional)
  • 1 teaspoon roasted chopped garlic (optional)

Directions:

  1. Preheat the oven to 450F with rack in the lower third of the oven.
  2. Make the topping and set aside.
  3. Fill a separate small bowl with cold water and set aside a pastry brush.
  4. In a large bowl, whisk together the all-purpose flour, whole-wheat flour and table salt. Add the olive oil and 1/2 cup water to the flour. Stir with a rubber spatula until it collects in a soft, crumbly ball of dough. Use the spatula or your hands (I find using vinyl gloves are useful with this recipe) to press the dough together and gather all the stray flour in the bowl.
  5. Set the dough aside on a lightly floured work surface and portion it into thirds. I normally just leave these as balls and set aside with a clean damp towel over them. I have found that using some parchment paper under the dough I am rolling is helpful later in the process for transferring the dough to the baking sheet. Roll the remaining dough into a rectangle about 1/16″ thick and 7-8 inches wide by 14-15 inches long. Whenever you feel resistance, lift up one edge of the dough and sprinkle more flour underneath before you continue to roll this out. The thinner the dough, the crisper they will be. However, if they are too thin, they will break when you try to add anything to them. It’s pretty easy to tell if they are too thin when you transfer the pieces to the baking sheet. You won’t be able to transfer them properly if the dough is rolled too thin.
  6. With the pastry brush, lightly dab the dough with water and sprinkle about 1/3 of the seed/herb mix onto the top of the dough evenly and about 1/4 of the larger grain salt. I find lightly pressing all of this into the dough at this point is helpful in keeping it on after this bakes. You can also use a very small rolling pin (like the kind you use for Asian dumplings) to press the mixture into the dough.
  7. Using whatever tool you want (pizza cutter, dough scraper, ravioli cutter or sharp knife) cut the dough in half lengthwise and then cut across to make rectangular pieces that are about 2″wide x 4″ long. You will have rough edges on some of these. Don’t worry about it as they look great once they are baked. Transfer these pieces to an unlined baking sheet and bake until nicely browned which takes about 10 minutes. These require a watchful eye. They will be under-baked and not crispy if they do not brown, but they also go from perfectly browned to burned in a matter of a minute or two.  Remove them from the baking sheet and cool them on a wire rack.
  8. Continue the process until you are finished with each ball of dough.  Cool everything completely before storing in an airtight container.
Posted in Dairy-Free, General, Nut-Free, Recipes, Snack, Vegetarian, Year-Round | Tagged , , , , , , , , , , , , , , | Leave a comment

Cooking Soup at the Farmers’ Market

I must admit that I spend a huge amount of time in the summer buying in bulk and “putting things up” for the winter. It can be time-consuming. But eventually the days become shorter and cooler and I want to eat a nourishing bowl of soup. This is when the work during summer pays off in a big way for me.

Going to the freezer to pull out some herb and olive oil roasted tomatoes, peppers, onions, roasted corn and steamed butter beans to make a hearty bowl soup is quite satisfying. More than half of the work has already been completed and now it will take little more than 1/2 hour to put everything together to have a vegetable beef soup on the table with a grilled cheese sandwich made with local bread and cheese. How good does that sound? Just imagine how good it makes you feel?

Tomorrow I’m going to demonstrate how to make two very easy soups at a local Raleigh Farmers Market with “preserved” and fresh foods. I’ll put up pictures when I get back from the market but I wanted to give you the recipes ahead of time so you can buy what you need to make these soups this weekend. They are both inexpensive, healthy meals that can easily feed 4 people and you can feel great about supporting local sustainable agriculture.

Tomorrow all of  the real food I am using is local! Only the pasta is store-bought. I’ve got lots of goodies from: Piedmont BioFarm, Cohen Farm, Edible Earthscapes, Cedar Rock Farm, Robeson’s Rocky River Farm, Wild Onion Farm, S&L Farm, & Chapel Hill Creamery.

Enjoy eating well and please thank your local farmers for getting up in the chilly mornings and the heat of summer to pick out fresh veggies for you to eat all year-long.

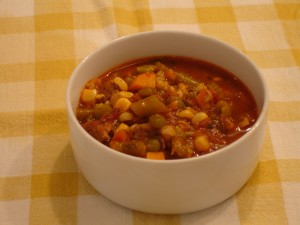
Vegetable Beef Barley Soup

Beef & Barley Vegetable Soup

  • 2 cups water 1 lb leftover beef roast cut into ½” cubes (hamburger works too)
  • 16 oz roasted tomatoes with herbs
  • 12 oz roasted tomato juice (or vegetable juice)
  • 2/3 cup pearl barley
  • 1/3 cup dried green split peas
  • ½ cup chopped onion (can use dehydrated onions)
  • ¾ cup chopped celery with leaves (fresh or frozen)
  • 14 oz beef stock
  • ¼ teaspoon pepper
  • ½ teaspoon basil
  • ½ teaspoon oregano
  • 1 bay leaf
  • 1 Tablespoon Worcestershire Sauce
  • About ¾ teaspoon salt
  • 1 cup roasted corn (frozen)
  • 1 cup green beans or butter beans
  • 1/3 cup roasted carrots (frozen)

Saute onions and celery in olive oil until translucent on medium low heat. Add water, beef stock, tomato juice, barley, peas, spices, Worcestershire sauce and cook for 30 minutes. Stir in carrots, corn, and beans. Simmer 15-30 minutes. Remove bay leaf and serve.

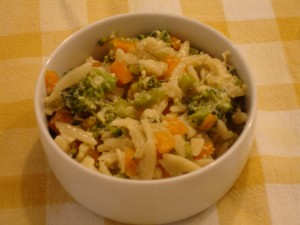
Broccoli Carrot & Orzo Soup

Broccoli, Carrot & Orzo Soup

  • 4 cups chicken (or vegetable) stock
  • 1 cup chopped carrots ( ¼“  slices)
  • 2 cups chopped broccoli (including stems peeled and chopped into ¼” slices )
  • 1/3 – ½ cup orzo (or other small pasta or quinoa)
  • 2 eggs, beaten
  • 2 Tablespoon Chapel Hill Creamery Calavander Asiago cheese, grated (or Parmesan)
  • Salt and pepper to taste

In a large pot, heat the broth to boiling and add the pasta, carrots and the stem slices of the broccoli. Cover and cook for 10 minutes on low simmer. Pasta may tend to boil over if the pot is not large enough or the heat is too high.

Stir in the remainder of the broccoli florets and cook 5 minutes on low simmer.

Bring the soup up to a boil again and slowly drizzle the beaten egg into the soup so it cooks as it hits the liquid. Stir constantly as you add the egg to get threads in the soup.

Add the cheese and season to taste with salt & pepper.

Copyright 2010  Susan Walter Sink  & Tarheel Foodie, LLC

Posted in Fall, General, Recipes, Soup, Spring | Tagged , , , , , , , , , , , , , , , , , , , | Leave a comment

Mushrooms are Disruptive

Fungi should be considered disruptive for many industries.

That’s a big statement and I hope it got your attention. Fungi were the first organisms to come to Earth more than 1.3 Billion years ago and plants followed several hundred Million years later. The largest organism on Earth TODAY is in Oregon and it’s 2200 acres in size and 2000 years old. Wow, that’s huge! Guess what it is? Put your head around all of those numbers. As an organism, fungi have clearly adapted well and for that reason alone, they are worth 20 minutes of your time today.

There’s a super cool TED video by Dr. Paul Stamets that I’d love for you to watch.  If it doesn’t spark your imagination about the possibilities we have in our future with mushrooms, I don’t know what will.

To get you started: here’s just a few of the highlights you’ll hear about.

  • biotech -farming – natural pesticides & clean up of hog waste spills after storms
  • energy- generation of fuels
  • sequester carbon dioxide and help form new soil from rock
  • conservation – eats petroleum waste,  improves soil structure, holds 30x it’s mass
  • medical – produce strong antibiotics, effective against pox strains & virus strains

The TED video by Dr. Paul Stamets on 6 Ways Mushrooms Can Save the World can be found here: http://bit.ly/apD70E . Dr. Stamets’ book on the subject:  Mycelium Running: How Mushrooms Can Help Save the World http://amzn.to/t8KGc.

Posted in General | Tagged , , , , , , , , , , , , , , , , | Leave a comment

A Better Farmers’ Market

“if the community doesn’t have a good way of communicating with each other or the costs of self-organization are too high, then they won’t organize, and there will be failures.” Elinor Ostrom / Nobel Laureate in Economics 2010. http://bit.ly/ctv59M

Ms Ostrom was talking about our natural resources when she gave this quote. The particular article is about her work and teachings on the economics of natural resources.  It’s as good a place as any to start the morning in afterthought about last night’s Wake County Farmers’ Market Managers Meeting and realizing how many wonderful resources we have locally that are under utilized.

As it has been explained to me, many managers in many towns across the country feel like they are in competition with each other for each market customer and somehow there might not be enough to go around.

My point of view is different. I think the market is expanding with many new, highly creative vendors. Current social media platforms allow these folks to “push” the information & their products out to new highly motivated customers that are looking for something. So really understanding what place or niche your farmers’ market fills in your community is the starting point. There are lots of RIGHT answers to this question for every market manager. What’s right for one market may be totally incorrect for another given the local population and a normal radius of 5 miles for a trip to the market. Adjusting for seasonal weather, transportation, physical needs of your clients should all be considered and so much more. You are putting together an “experience” just like the folks at Disney do every day. Close your eyes and think like them. Just imagine what a better market would look, feel, sound and smell like. Use all of your sensory facilities. Now go make it happen!

Another issue that came up during our meeting was how to service the areas in our county that are considered “food deserts”, people using WIC and EBT services, and a whole generation of folks that simply can’t cook real food. Study after study shows a discrepancy in the ability for low income or elderly folks to reach a market where they can learn about and/or have access to healthy foods.  A recent study was conducted in my county by 4-H that highlighted the food deserts in one municipality: http://bit.ly/cpSLw2 Another huge issue is simply the hours of the market. Many employees already have jobs to attend to on Saturday morning. Is there a way to service their needs in a more creative way like delivery to a local school with a mobile market or possibly a farm stand at or near their workplace each week? Maybe organizing delivery right to their workplace each week with descriptions and instructions on preparing food could be helpful? Need to teach cooking lessons? How about lunch time lessons at a workplace or local grocery store with a community room? These ideas are not new and even in our state, good working models exist. Do you have a creative idea to solve a problem like this in your community? If so, please share it in the comments.

In the meantime another great site to visit and share ideas is the  www.farmersmarketcoalition.org. And for additional thoughts on social media platforms and different ways in which people “consume” information here is a great blog that Brian Solis put out today. http://bit.ly/aa4cCR

Posted in General | Tagged , , , , , , , , , , | Leave a comment

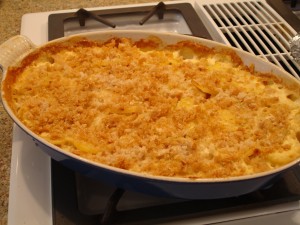
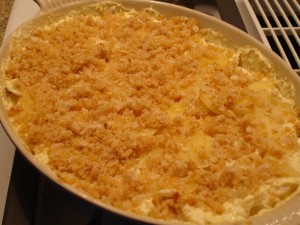
Two Potato Scallop

I love plain sweet potatoes roasted in foil with just salt & pepper and a spatter of butter. But my extended family likes the southern sweet style of potatoes with marsh mellow, which I cannot make for any amount of money in the world. One year I needed a middle ground for a holiday dinner and this is the recipe I stumbled upon.

This is not sweet, but very rich and better if you make it a day or so in advance, cover it, and reheat it for your meal. The flavors meld together and the potatoes are so creamy they melt in your mouth. This is the least healthy dish I make during the holiday but it goes with anything I put on the table, meatloaf, chicken, turkey, steak, ham, fish-maybe. It only takes a little bit to fill you up and the rest of the meal can be totally healthy.

The cream and whipping cream  make this dish unique. You can lighten it with low fat and regular milk, but the flavor will not be the same. I’ve tried it. It’s not worth it; just eat less, or try to! I’ve found similar recipes since I started making this one many moons ago.  I still love it better than the ones with whole milk and cheese. I’ll give up the cheese for the whipping cream in this recipe.

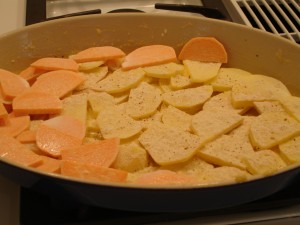
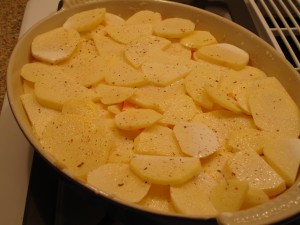
Be warned- it takes a really large dish to bake this. I use a 2 1/2″ high oval dish that is about 8″ wide and 12″ long. Deeper is not necessarily better for this dish. The potatoes really need to be layered correctly or it won’t bake all the way through properly and it will be runny.

Another note on the preparation. I noticed over the years that in the time it takes to skin the potatoes and slice them thinly, some of the potatoes browned up a bit in the air. So now I put all of the milk into a large bowl and I throw the potato slices into the milk as I slice them up. They don’t turn and begin to absorb the milk before they cook. The salt, pepper and flour need to go into the individual layers, so keep those out of the milk mixture.

Ingredients:

  • 1 large clove roasted garlic, smashed or minced
  • 2 1/2 lbs raw small medium starch potatoes like Yukon or local yellow.
  • Peeled and cut into 1/8-1/4″ slices
  • 1 lb raw sweet potato peeled and cut into 1/8-1/4″ slices
  • 2 Tablespoons flour
  • 1 1/2 teaspoons salt
  • 1/4 teaspoon pepper
  • 2 cups half/half
  • 1 cup whipping cream
  • 1 cup coarse fresh bread crumbs (whole wheat work well)
  • 2 Tablespoons butter, melted

Put the potato slices into the mixed creams while you work through them.

Preheat the oven to 325F and use olive oil to lightly grease the baking dish. Spread the roasted garlic on the bottom of the dish and then cover with about 1/2 of the yellow potatoes.

Sprinkle with 1 Tablespoon of the flour, and 1/2 teaspoon of the salt and 1/4 teaspoon of the pepper. Cover this layer with all of the slices of sweet potato and sprinkle with 1 Tablespoon flour, 1/2 teaspoon salt.

Cover this layer with remaining yellow potatoes and pour leftover milk into the dish. Sprinkle the remaining salt and pepper on the top. Cover the potatoes with foil and bake for 1 hour.

Mix the butter and bread crumbs together and after first hour of baking add the bread crumbs to the top of the dish and uncover to finish baking for 45 minutes longer.

Serve immediately or cool and reheat with foil covering the next day. You can stop baking halfway through the process and cool and finish baking the next day but remember to bring the dish to room temperature before baking and you may need to add 15 minutes to the process because it is much cooler than it would have been on the second part of the bake time.

Cooking Notes added February 2012

  • To lower the GI count, use sliced white turnips (they are more mild than the purple topped) or rutabagas to replace the white potatoes. Turnips take on an almost sweet flavor where the rutabagas are more similar to the white potatoes.
  • To lower the fat count, replace the half/half with whole milk. The cream still provides sweetness it adds to the dish but it is less filling with the whole milk.
Posted in Fall, General, Nut-Free, Recipes, Sides, Winter | Tagged , , , , , , , , , , , , , , , | Leave a comment