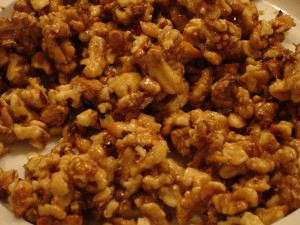
Asian Snacks with a Local Southern Twist

This week I’ve got a couple Asian New Year inspired snacking recipes for you. I don’t think I would go so far as to call these “healthy”, but tasked with an Asian Celebration this week that required easy finger food, these are a couple of the recipes that made the final cut.  I’ll post a couple more later in the week for you to try.
First up: Asian Inspired Honey Pepper Walnuts. I had an opportunity a couple of years ago to spend some time cooking with a native of Bejing. Her husband used to bring back packaged snacks on his trips back and forth.  My favorites was a tiny candied walnut.

These snacks are typically fried in the wok because ovens are rare in most households. The most interesting part of this snack is that the Asian walnuts are typically significantly smaller in size and more delicate in flavor than the black walnuts we have in the US. So I decided to break up my pieces just a bit to get a more consistent ratio of sweetness to the nut flavor in the original snack.

Another challenge was to use local ingredients. Locally, I’m not sure where to get walnuts. I have had trees on my property before and see them around the parks but not at the market. But we can get peanuts from many sources. My favorite is a Black Peanut, so named because of the black skin. They are little guys but packed with flavor. I would have used them in this recipe if I had any left, but we finished them off a couple of months ago. Being an heirloom peanut, I only know of one source locally to get these gems:  Wild Onion Farm in Johnston County and they are grown organically (not certified). So I ended up going to the market for NC peanuts. I also wanted to replace all of the white sugar with local honey. Unfortunately, doing this yields a lovely sticky walnut that is worthy of a great topping on ice cream, but not exactly finger food.

I eliminated the soy sauce found in most recipes because it’s so salty that it wouldn’t allow me to experiment with different types of salts. It can also be overbearing. The last challenge was “frying”.  Eliminating the oil makes this more healthy, keeps your hands cleaner, and makes it possible for first-time cooks to make this in a toaster oven in less than 15 minutes.

Asian Inspired Candied Walnuts

Ingredients:
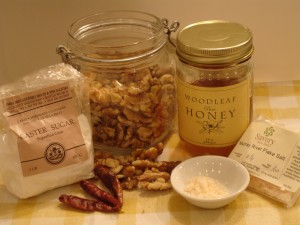
  • 1 1/2 cups raw black walnuts broken into pieces
  • 1/4 cup Superfine Castor sugar (raw will work)
  • 1/4 cup local honey (I used Woodleaf: Louisburg NC)
  • 1 -1 1/2 Chinese medium size dry peppers, chopped w/seeds
  • 3/4-1 teaspoon salt (I used the Murray River Flake Salt)

Preparation:

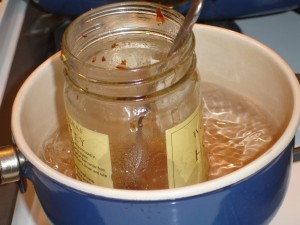
  • Combine your sugar, honey, chopped dry peppers and salt in a small pan or a double-boiler set-up and heat for about 5 minutes until your sugar is completely dissolved. Superfine Castor sugar is typically used in bar drinks because it dissolves faster, so be more careful about your heat setting if you are using a raw sugar. Stir constantly so you don’t burn the mixture. The heat will help the peppers begin to release oil and infuse the sugar.
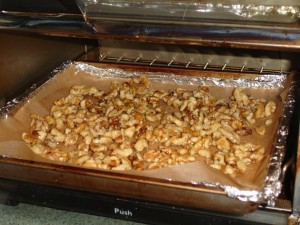
  • Turn off the heat and working quickly, put your walnut pieces into the mixture and stir it well to coat all of the walnuts.
  • Pour the mixture on a small baking sheet that is covered with foil on the bottom and then parchment on top of the foil. The parchment will keep the walnuts and sugar from sticking to the pan and burning.
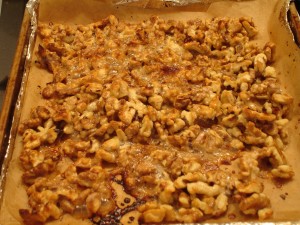
  • Using your toaster over, toast these for about 5-7 minutes. You will need to watch them so they don’t burn. The sugar will get quite bubbly and you may see some smoke, but you should not smell burning. If you do, pull them out quickly.
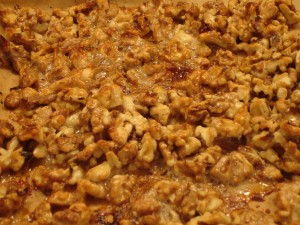
  • Using a spatula (silicon works best), put the entire hot mixture on a cold ceramic heat-proof plate to cool. Spread it out well with forks and let it cool. It hardens as it cools and this takes about 30 minutes.
  • Store in airtight container. I haven’t kept these more than a couple of days. They normally get eaten up.

Notes:

  • The amount of dry Chinese pepper you use will be determined by how hot you like your food. 1 pepper is relatively mild while 2 is probably more than most people would care to eat. Remember that each year the peppers will vary in heat so use them sparingly.
  • The Murray River Flake salt is a bit smokey in flavor and I thought that was nice with the walnuts. A Pink Andes Mountain salt works equally well and is very delicate in flavor. You could actually add the fine grade of salt after you toast the nuts and sugar.

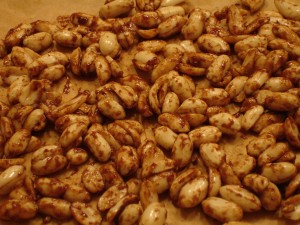
The second recipe was chosen for the traditional use of five spice and peanuts (called groundnuts in China) which are important to the Chinese diet. When I first tried this recipe it was good. Spicy, salty, all the things you want in a “bar nut” to encourage drinking. But I didn’t think it would hold its own without a liquid beverage so I went back and found some additional recipes that used cinnamon and sesame oil. Sometimes recipes come together because of what we have in the pantry. I only had toasted sesame oil and not much because I had already used quite a bit testing a salad recipe this past weekend.  So the recipe was modified for oil and sugar and I left out heat on this one. It’s easy to make and it’s one that kids might like too. Happy Year of the Rabbit!

Toasted Five Spice Peanuts

Ingredients:
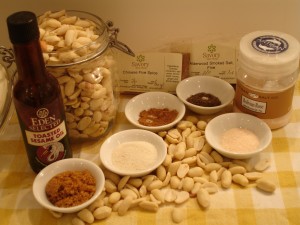
  • 1 cup blanched whole peanuts
  • 1/2 teaspoon Five Spice Powder
  • 1/2 teaspoon Ceylon Cinnamon
  • 2-3 teaspoons light brown sugar
  • 2 teaspoon raw sugar
  • 1/8 – 1/4 teaspoon Alderwood smoked salt
  • 1/4 teaspoon pink Andes Mountain salt
  • 1/2 teaspoon toasted sesame oil
  • 1/4 cup filtered water

Preparation:

  • Mix the spices, sugar, water, and oil in a small pot and heat on low to dissolve the
  • sugar.
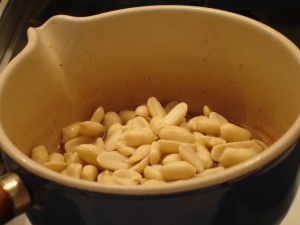
  • Add your blanched peanuts and stir to coat. Continue stirring on low heat using a silicon spatula to avoid sticking to the sugar. Allow the water to almost finish evaporating.
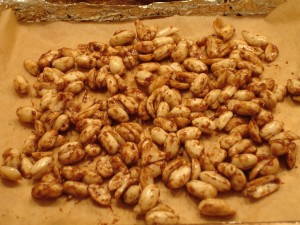
  • Turn off the heat and spread the peanut mixture on a baking sheet that is covered with foil and parchment paper to avoid burning.
  • Bake in a toaster oven at 300F for 45 minutes. Stir every 15 minutes to avoid burning and cook more evenly.
  • Let  cool and store in airtight container

Notes:

  • I did not test this recipe with honey instead of sugar. I liked the brown sugar with the Ceylon cinnamon.
  • The Five Spice Powder lends itself to using the Alderwood salt, but be careful about adding too much.
  • I did test the recipe without sugar and cinnamon and oil. It is a bit salty like the type of snack you would find in a bar and pleasing to eat but I liked the sugar and sesame oil version more.
Posted in Fall, General, Gluten-Free, Nut-Free, Recipes, Snack, Vegetarian, Winter | Tagged , , , , , , , , , , , , , , , , , , , , , | Leave a comment

Spicy Shrimp Satay Soup Served With Pineapple Jasmine Rice

It’s been fun researching and trying out new chilies this winter in different recipes. On my quest to make some Asian inspired healthy appetizers this week I decided to mess around with some shrimp. And being a bit lazy, I picked up some shrimp that had already been steamed in my old-time friend “Old Bay”. Not really very Asian, but I’ve already admitted that I was being lazy so let’s just go with it and we’ll try out some new peppers along the way.

After I made the base for a chicken satay I had a bit of the coconut marinade leftover. It was a lovely color. It smelled good. It tasted good. It was a bit sweet and just a little spicy but workable with my “lazy” shrimp.  These shrimp were not steamed in as much Old Bay as I am used to, being from Maryland. Those of you that have had the spices caked on the steamed shrimp know exactly what I mean! But in the kitchen drawer is an extra container of that delectable spice just for these opportunities.

This soup came together really fast. It was even better the next day after the flavors had a chance to blend in the refrigerator overnight. With shrimp involved, I would not recommend holding this soup more than a day before you serve it and I don’t think it would freeze well.

Jasmine rice has a distinct flavor that compliments the seafood and spices in this dish well. The coconut water adds a bit of sweetness to the dish so you can lower the raw sugar that you would normally add to the base ingredients.

This recipe makes enough for 2 servings. It’s a fairly thin soup. If you want it thicker you can use regular coconut milk. It blends well and distributes the spices evenly through the rice when you serve them together.

Ingredients:

  • 1 cup of canned light coconut milk
  • 1 teaspoon ground coriander
  • 3/4 teaspoon ground turmeric
  • 1/2 teaspoon ground cumin
  • 1/2 teaspoon sugar
  • 1/2 – 2 teaspoons Old Bay
  • 1/2 Chinese dried red pepper
  • 1 tablespoon chopped green onion
  • 1 tablespoon chopped water chestnuts
  • 1/2 lb Steamed Shrimp (31 count)
  • Jasmine rice
  • Coconut water with pineapple
  • Optional – Cayenne or aleppo pepper

Preparation:

  • Prepare the Jasmine Rice according to the directions substituting coconut water with pineapple for the plain water. This will take about 30 minutes.
  • Mix the coconut milk, coriander, turmeric, cumin, sugar, and 1/2 teaspoon Old Bay. Taste the mixture to see if it needs some ground pepper or additional turmeric or old bay. The turmeric helps the soup keep a lovely orange color. The Old Bay will add a significant amount of salt so add this slowly and adjust for your taste. Remember at this stage that depending on how your shrimp were steamed, you may need to add more or less Old Bay.
  • Very finely chop your Red Pepper and add it to the soup along with some seeds. You can add more after you heat this so go easy to start. I used an entire small red pepper along with the seeds for my soup. The peppers will vary year to year so you’ll have to always check the heat on this part of the recipe.
  • Add the chopped water chestnuts and chopped green onions.
  • Heat the mixture on medium-low for about 10 minutes and adjust the spices and peppers.You can also add some fresh ground pepper or more dried Chinese pepper and seeds for heat. Aleppo is low on the heat index and you could add 1/4 teaspoon of this. Cayenne is mid range on the heat index.
  • Chop your shrimp up into small pieces (1/2″ or less) and add to the soup . Warm through and serve over the jasmine rice.  Add sprinkle of paprika to the top of the soup for color and flavor.
Posted in Dairy-Free, Fish, General, Gluten-Free, Nut-Free, Recipes, Year-Round | Tagged , , , , , , , , , , , , , , , , , , , , , , , , , , , , , , , | 2 Comments

Cream of Potato & Leek Soup for Warm or Cool Weather

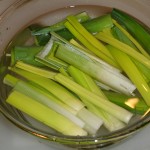
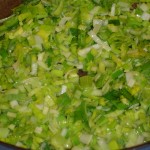
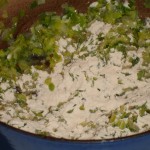
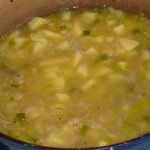
Potato & Leek soup goes so well with a grilled ham sandwich for lunch or dinner and it’s super fast and easy to make.  The original recipe is one of Jacques Haeringer’s but there are many you can find on the web that are similar.  All you need are some small buttery medium starch local potatoes (like Yukon), a couple of leeks, some chicken broth, a bit of chopped sweet onion, milk or cream and you’re set. It actually takes more time to prep the veggies for the soup than to actually make the soup. You can make it a day or so in advance and it will keep in the fridge just fine. There are no special cooking skills necessary for this soup.  My only word of warning is that you really need to wash the leeks well. They are notorious for harboring sandy soil as they push up through the ground and grow. I’ve added some pictures so you can see how the dirt hides in these guys. You don’t want it in your soup. There’s no way to fix it if it gets in there.

Ingredients:

  • 3 tablespoons virgin olive oil
  • 1 tablespoon butter
  • 1 cup chopped washed leeks
  • 1 cup chopped sweet onion
  • 1 tablespoon flour
  • 1 quart chicken broth
  • 1 clove roasted garlic, chopped
  • 4 cups chopped, peeled small Yukon type potatoes
  • 1 teaspoon sea salt
  • 1/4 teaspoon pepper
  • 1 cup half/half or whole milk
  • 1 tablespoon fresh chopped chives or green onion tops
  • 1 tablespoon fresh chopped parsley
  • 1/4- 1/2 teaspoon Worcestershire Sauce
  • Pinch  ground cayenne pepper
  • Pinch ground alpeppo pepper
  • Bacon pieces for topping

Directions:

  • Heat the butter and olive oil over medium low heat in a dutch over or large stock pot, without browning the butter. Add the onion and leeks and saute them without browning them until the onions are translucent. This should take under 15 minutes.  Stir in the flour and blend. (Eliminate the flour if necessary for diet)
  • Cook for another couple of minutes without browning the flour or the veggies.
  • Add your chicken stock and bring to a full boil. Make sure to whisk the flour and onions into the stock well as it’s heating up to avoid lumps.
  • Once it’s at a rolling boiling, add your chopped potatoes, roasted garlic, salt, and pepper. Turn down the heat to medium high and simmer this until the potatoes are cooked through. This will vary depending on the size of the potatoes. Smaller pieces should take about 10 minutes.
  • While the potatoes are cooking, warm your milk or cream just a bit on the stove or in a microwave on a medium heat. It doesn’t need to be terribly hot, just warm to add it to the soup.
  • Puree the soup until it’s smooth. You can do this in a blender, a food processor or with an immersion blender.  Do not overfill your blender or processor because the hot liquid can make quite a mess and burn you if you are not working with it carefully.  You can add your milk in during this process. I normally blend in the chilies and Worcestershire Sauce at this point too.
  • If you choose to store the soup. Puree it with the spices and freeze, but do not add the milk. You can freeze the mixture for a month and then thaw and serve it later. You can also chill the soup and serve it chilled, adding the cream and toppings just before serving. It’s great in the late fall this way when the potatoes are just coming in but our weather hasn’t quite turned chilly yet.
  • If you choose to eat your soup right away, top it with a mix of the fresh parsley, green onions or chives and some bacon pieces. If you lean towards a loaded potato soup, you can add a bit of sour cream to the top and some fresh shredded cheddar cheese too. You might also try to puree the soup just a little and leave some of the potato pieces for more texture.
Posted in Fall, General, Nut-Free, Recipes, Soup, Spring, Summer | Tagged , , , , , , , , , , , , , , , , , , , , , , , , , | Leave a comment

Making Chili Using Leftovers

This past week seems to have flown by. On the business side of my life, I have been searching for weeks for a commercial kitchen space and I had several leads but working through the certification issues for each one took more time then I expected. Fortunately, there were some incredibly helpful folks at the state government offices I called that were knowledgeable about the process. Then I needed to spend time working on my farmers market demo schedule, deciding which recipes I want to highlight each month and how to include all of the vendors in the process. And then there is my crazy need to participate with non-profit organizations. I have been involved with community work for more than 20 years, but it can be a challenge to keep the time requirements in perspective and still achieve my other goals.

So Wednesday rolled around and I realized that I had simply been eating out of the freezer and needed to cook something “fresh”. By now it should be obvious that I like flexible recipes and I like to use stuff that I have put up during the main farming seasons. Chili is a great recipe because it’s really hard to mess it up. It can be really healthy if you make sure to drain the fat from your meat and keep an eye on the “additions” at the end. You can also substitute any number of meat alternatives if you start with a good base recipe.

I have three different recipes and depending on what is leftover in my refrigerator and freezer, I choose one and adapt it for the meal. This might not be the way you want to cook, but in an effort to reduce waste and save time, I am mindful of reusing leftovers in new ways and chili allows me some fun opportunities. Sometimes you can’t duplicate a recipe exactly cooking this way, but in some cases you will discover a new layer of flavor that you can infuse easily into your existing recipes to make a “family secret” recipe that’s all your own just by using a leftover ingredient. That was the case this week when I experimented with the taco beef and my homemade tomato juice in one of my older recipes.

I was reorganizing the freezer and found a half pound of leftover taco spiced beef that needed to get used. Since I had already planned to cook up some spicy local sausage for some other recipes I decided to try to combine the two for a new flavor of chili. I pulled a little of the cooked sausage and threw it in the pot with some frozen caramelized onions; a bit of frozen roasted yellow and red sweet peppers, a few spices, my frozen roasted tomatoes made with roasted local garlic and herbs from my garden; a bit of dry spices and 2 cans of organic mixed chili beans. Voila, dinner in under 15 minutes and all of this except for the beans and some of the dry spices was made with local sustainable ingredients.

Despite the speedy process, the flavor tasted like it had cooked quite a while because the base ingredients were made during the summer with the freshest of local sustainable products that I could find. So what are my 6 must-do’s for chili?

1. Your base will be better with an heirloom mix of roasted tomatoes and fresh herbs.
2. Caramelize your onions so they melt into the sauce.
3. Freezing roasted peppers retains color, texture and flavor.
4. Roasted garlic doesn’t bite you when you eat it like raw.
5. Organic pastured beef and well-fed sustainable pork have more flavor naturally.
6. Don’t over cook the beans. Add them last and just heat them through.

Beyond these tips, you can add any kind of cheese you like to the top of your chili. I enjoy a bit more spice from Ashe County NC Pepper Jack or the Skillet Jalapeno from Guildford County’s Calico Farm and I love fresh chopped green onions for color. Keeping with a more healthy diet, I opt for a bit of plain organic Oikos Greek yogurt instead of sour cream because it’s a bit more tangy and I think it compliments the chilies better.

Ingredients:

  • 1/2-3/4 lb ground beef
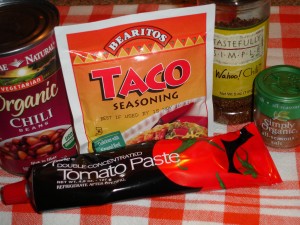
  • 1/2 packet Bearitos Taco Seasoning Mix
  • 1/2 lb sausage (I use a “spicy” local farm pork mix)
  • 1/2 cup finely chopped sweet onions
  • 1 – 15 oz can roasted tomatoes
  • 1 – 15 oz can tomato sauce
  • (or 2 lbs home-made roasted tomatoes)
  • 1 tablespoon tomato paste
  • 1 teaspoon roasted minced garlic
  • 1 – 1 1/2 tablespoons raw sugar
  • 2 tablespoons of your favorite chili powder blend
  • 1/2 teaspoon ground chilpolte chili powder
  • 1/2 teaspoon ground aleppo pepper powder
  • 1/2 teaspoon season salt
  • 1/2 teaspoon cumin
  • 1 tablespoon Worcestershire Sauce
  • 1/2 cup salsa
  • 1-2 cans drained and rinsed Organic Chili Beans
  • Optional :1/2-1 teaspoon dried, or 1 tablespoon fresh cilantro
  • Optional: 1/4 teaspoon red pepper flakes

Directions:

  • Decide if you want to use a large frying pan or a large deep pot for the whole process. Either way, you are going to need space to add all of the ingredients. I have used a really large cast iron frying pan as well as a large coated cast iron dutch oven. Both work equally well.
  • First break up and cook your sausage or pork and drain it. I use a special mix from a local farm but the main ingredient is red pepper flakes so you can add that if you use plain ground pork and some additional hot sauce near the end.
  • Wipe the pan and continue to cook your ground beef. As the beef is cooking you can add your onions and cook along with the beef. Drain the beef and onions on paper towels when you are finished and return it to the pan. At this point you can add the taco mix to the ground beef / onion mix and add the necessary water and cook for the directed time. (This recipe will turn out fine if you want to skip the taco mix).
  • Now you will add all of the other ingredients except the beans. You have some options regarding the amount of spice and heat you can use so start with the smaller increments and taste as the base cooks.
  • When you have it where you want it, add your drained and rinsed beans. You can add more or less of the beans depending on how you prefer your chili.
  • For the toppings I use low-fat organic Greek yogurt but my family prefers sour cream. I like fresh chopped green onions but many people prefer chopped red or sweet onions. I like  Ashe County Pepperjack or NC Calico Farm Jalapeno Skillet Cheese.

Additional Notes on Spice, Heat & Brands to Adjust your Chili Recipe:

The chili powder mix you choose may add salt and heat so start with the smallest amount. The chilpolte powder will add heat, start small. The aleppo is a mild chili pepper and has more sweet undertones rather than heat, so you can add more of that without adding so much heat.  (This is one of the chili powders I use in my hot chocolate.) The salsa will change the heat as well as the cilantro depending on the brand you choose so start in small increments like a couple of tablespoons and test it as you go.

The cumin and Worcestershire Sauce add flavor but not heat. The cilantro will add flavor but you will need to decide how much you need depending on the salsa you have chosen to use.  The sugar is needed to balance the acid in the tomatoes. I roast my own tomatoes so I need less sugar because I balance the blend of heirlooms with high and low acidity. Most canned tomatoes are plum and you may need more sugar. I prefer the Muir Glen brand of tomatoes over other brands and I use Amore tube of double concentrate tomato paste to thicken the sauce if appears to be too thin.

Chocolate. If you have it around, I normally drop in about a tablespoon of 70% dark chocolate. It will compliment the chilies and you won’t notice it at all.

Posted in Beef, Dairy-Free, General, Nut-Free, Recipes, Soup, Year-Round | Tagged , , , , , , , , , , , , , , , , , , , , , , , , | Leave a comment

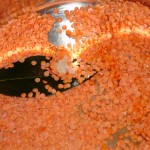
Appetizing Lentil “Falafel” Bites

This recipe isn’t going to be for everyone but it’s healthy, easy, and has a lot of veggie flavors in it.  These are great warmed up with a bowl of soup  or put into a pita during the colder months. They are also lovely in the summer as chilled finger-food.

This recipe came about as a result of a mistake that I made while testing a new lentil “burger” recipe. I got busy and forgot to check on the lentils as they were cooking. So they basically turned to mush. They were cooked in home-made chicken broth so I wasn’t about to throw the mush out! I hate wasting anything and the mush tasted good but certainly wasn’t pretty.

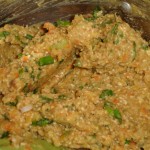
I decided to continue to assemble the original ingredients. It became pretty clear that the recipe was going to be entirely too bland. The stuff in the bowl looked a lot like falafel so I  went back to the freezer and pantry for a few more items like garlic and onions that I had already cooked and put up in the summer and fall.  When I was finished , the raw ingredients tasted pretty good (there’s no egg so you can taste away for seasoning), so I proceeded to saute the little patties in olive oil for additional crisp and flavor. You can make these more like balls if you want but then you have to spend more time turning them or use more oil. Not my cup of tea.

This recipe is flexible so you can add or subtract the amount of stronger ingredients like garlic and onion to suit yourself. These would be great with some herb goat cheese and chopped sweet roasted red peppers to the top for an appetizer at a party.   You might try adding a little shredded zucchini  (press it dry before adding it) during the summer when it’s in season. They are also great served with roasted thyme asparagus stalks (recipe coming later this week).

Ingredients:

  • ½ cup dry red lentils
  • 1 ¼  cups water
  • ½ cup quick cook steel-cut oats
  • ¼- ½  teaspoon salt
  • Pepper to taste
  • ¼ cup roasted (sautéed) onion
  • ¼ cup shredded carrot (steamed)
  • 1 tablespoon finely chopped green onion (raw)
  • ¼ cup fresh chopped flat-leaf parsley
  • ¼ cup dry herb bread stuffing
  • 1 ½ teaspoons soy sauce
  • 1 teaspoon Worcestershire Sauce
  • Olive Oil

Preparation:

  • Bring the lentils and water to a boil and reduce heat to low. Cook until the lentils are almost mush, but don’t let them burn.
  • Add the quick cooking steel-cut oats to them along with the rest of the ingredients and form either small burgers or small appetizer size balls.
  • Cook in a non-stick pan with a bit of olive oil until they are browned and crispy on both sides.
  • Serve in a pita with chopped cucumbers and tzatziki.

Notes:

The Whole Foods 365 organic stuffing mix will work for this recipe. It’s also possible to use your own home-made bread crumbs from day old bread.

You can also add about 1/2 teaspoon baking powder to these to get them to rise a bit.

I haven’t tried to freeze these yet. But I’ll post a note when I do.

Posted in Dairy-Free, General, Nut-Free, Recipes, Vegetarian, Year-Round | Tagged , , , , , , , , , , , , , , , , , , , , , | Leave a comment

Fig & Walnut Biscotti

I know the holiday season is over, but I ran out of time to test a couple of biscotti recipes before the new year started. If you had a chance to catch my food demos for figs at Bickett Market or Earth Fare in Raleigh last summer you know that I foraged a lot of figs in my neighborhood and dehydrated them to  use throughout the winter. Since then, I have been searching for some new recipes.

The web provided me with several similar recipes, but all of them seemed to contain a huge amount of sugar compared to my older recipes, so I made some adjustments and thankfully (unlike the 3 trials of pumpkin pudding back in December), these turned out great and the recipe is forgiving and flexible.

This recipe will produce 12 fairly large biscotti that are 3/4-1″ thick and high; or about 18 if you cut them about  1/2″ thick x 1″ high after the first baking. They will be softer with the baking times I’ve listed if you cut them thick like I did. You can increase the bake time with the thick ones to get more crunch or just cut them thinner and keep the same back time. Just watch for burning as the figs have a fair amount of sugar and I’ve used date and dark brown sugar which can burn more readily. If you were inclined, I think you could add a little bit of finely chopped candied ginger with the figs and walnuts but be sure not to overpower the apricot preserves. These will be fine without the preserves if you don’t have it on hand. Likewise, please feel free to use unbleached white flour or a combo of half white half wheat if you don’t have the specific “white/wheat” from the store.

One additional note on the figs: The home dehydration method for figs leaves them quite a bit dryer than commercially bought dried figs. I simply steamed mine for about 3 minutes just to add some moisture back into the pieces without making them sticky and soggy.

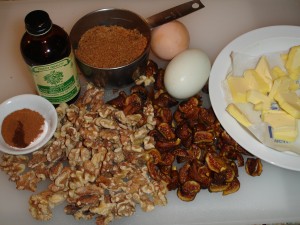
Ingredients:

  • 1 cup rough chopped toasted walnut pieces
  • 1 cup dehydrated figs rough chopped (I used local figs and rehydrated a little bit)
  • 6 tablespoons salted butter at room temperature
  • 2/3 cup packed dark brown sugar
  • 2 tablespoons date sugar (no lumps)
  • 2 eggs at room temperature
  • 1 teaspoon Grand Marnier or 1 tablespoon grated orange zest
  • 1 teaspoon vanilla extract
  • 1 tablespoon apricot preserves
  • 1 ½  teaspoons maple syrup
  • 1 ¾ cup whole wheat-white flour
  • 1 teaspoon baking powder
  • 1/4 teaspoon baking soda
  • 1/2 teaspoon fine sea salt
  • 1 teaspoon ground cinnamon
  • 1/4 teaspoon. ground nutmeg
  • 1/8 teaspoon ground cloves

Mixing & Baking:

  • Rough chop the toasted (cooled) walnuts and dried figs and set aside together.
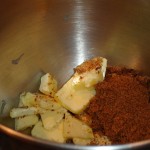
  • Cream the butter and both sugars together well. Add the eggs, one at a time, beating each until it’s incorporated well.
  • Mix in the vanilla, apricot preserves and the Grand Marnier or orange zest.
  • Using a whisk in a large bowl, mix the flour, baking powder, baking soda, salt and spices.
  • Add the dry ingredients into the egg & butter mixture a third at a time.  When finished, the dough will be quite stiff.
  • Fold in the walnuts and figs by hand with a spatula until they are well combined. Wrap the dough tightly in plastic and chill 30 minutes to reset the butter.
  • Place a large piece of parchment paper on your baking sheet and use your hands to press the dough into a log the length of the baking sheet as quickly as possible to avoid warming the butter.
  • Form a rectangle that is 4-5” wide and about 1” high. The length should be determined by the size of your baking sheet. Try to keep the log as even as possible to avoid uneven baking results.
  • Bake at 350F for 20 minutes or until the top seems set and lightly browned. Let it cool for about 10 minutes on the baking sheet when you pull it out.
  • Then using a knife (most people use a serrated but I find a standard chef’s knife works well with nuts), cut your biscotti into ½ – ¾ ” slices and turn on their side for a second baking on the parchment paper.
  • Bake a second time for about 7 minutes and then turn over to the opposite side and bake another 7 minutes.
  • Baking time is determined by the thickness of the slices and how hard you want the final biscotti. If you like drier biscotti, cut them thinner and bake the full 7 minutes or longer but watch for burning or too much browning.
Posted in Dehydrating, Dessert, General, Recipes, Summer, Year-Round | Tagged , , , , , , , , , , , , , , , , , , , | Leave a comment

Summer’s Second Harvest: Roasted Red Pepper Bean Dip

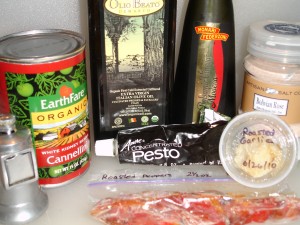
This recipe came to me a couple of weeks ago from the folks at Cooking Light. Here’s the link: http://bit.ly/gsydFN . I thought it was really easy to make and quite healthy. I  was able to use some wonderful organic red and yellow peppers and garlic that I bought at my local farmers market during last summer. I roasted and put everything in the freezer as soon as I bought it to retain the flavor for winter recipes. This also brings the cost of this recipe down significantly.  I made two versions of it with the additional of the basil pesto being optional because the base dip is absolutely delicious without it.

Here are the adjustments that I made to the recipe. The original recipe called for fresh garlic, I used roasted for a sweeter flavor and adjusted the amount up a little bit. It called for any type of balsamic vinegar but I used a 10 year aged for a richer syrup flavor. More aged would increase the sweetness if you have it in your cupboard. I already had roasted red and yellow peppers on hand that had not been stored in liquid or oil so I didn’t need to do anything to my peppers. They have a sweeter flavor than store-bought when you roast and freeze them yourself. I used a first cold-pressing, organic olive oil from Italy.

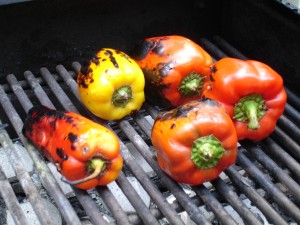
If you haven’t roasted peppers before, you will find it easy and rewarding to try it out this summer. They store great in the freezer and thaw quickly on the counter. You simply put them on the grill whole, without any prep except a good rinse. You turn them periodically with some tongs to “roast” them until they are ugly , black and charred all the way around. Then they get shoved into a clean, recycled brown paper bag and closed up for about 5 minutes to steam the skins.  Next you carefully peel (wipe) off the thin layer of skin to reveal a beautiful red or yellow colored pepper again. Break the peppers in half to take out the seeds and pick off the upper stem of the pepper. Put the steamed skins, stem and seeds back in the brown paper bag and throw the whole mess into the compost pile. How easy is that?

The roasted peppers get sliced into 1/4″ wide strips, weighed out about 2 1/2 ounce piles and put into a plastic snack bags with the date and weight label. If there is some juice from slicing them, I simply put this in the bag or save it and throw it in the freezer separately to use in rice or another recipe later. The peppers are double bagged into a larger freezer bag to avoid breaking once they are cold and off to the freezer they go.

I thought this recipe was excellent both with and without the basil. The dip was delightfully sweet with the roasted garlic, roasted peppers and aged vinegar. The dip had more layers of spicy flavor with the basil pesto and plain basil. You can always serve it in a bowl with a dollop of basil or pesto in the center for people to add on their own. You can serve this with pita chips but my preference was the toasted naan bread which seemed to be less dry than the pita chips.

Ingredients:

  • 1  teaspoon aged balsamic vinegar
  • 5 oz of roasted red peppers
  • 3  tablespoons  extra virgin olive oil
  • 1/2  teaspoon  salt
  • 1/4 teaspoon pepper
  • 1-2  teaspoon(s) roasted garlic
  • 1  can cannellini beans, rinsed & drained (15 oz)
  • Optional: 1/4 cup of chopped fresh basil or 1/2 teaspoon concentrated Amore Basil Pesto

Directions:

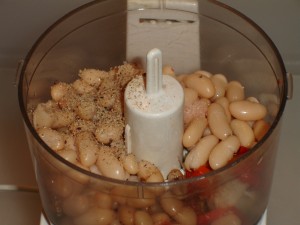
  • Using a small food processor, add all of your ingredients and puree until the mixture is smooth.
  • You can add about 1/2 teaspoon of concentrated basil pesto if you have it handy and like the little bit of spicy flavor that this adds. If you have fresh basil, you can add the recipe’s original 1/4 cup of chopped basil.
  • This would be lovely served with an assortment of olive and you might try chopping some to serve on top of your pita chips or naan chips.
Posted in Dairy-Free, Diabetic Friendly, General, Gluten-Free, Nut-Free, Recipes, Summer, Vegetarian | Tagged , , , , , , , , , , , , , , , , , , , , , , , , , , , | Leave a comment

Home-Made Chicken Pot Pie

Chicken Pie brings up different memories for people in Piedmont NC. The most famous of pies around here is the Moravian Chicken Pie which is luscious and thick with chicken and a home-made crust. If you can find someone to make it for you, you are truly blessed.

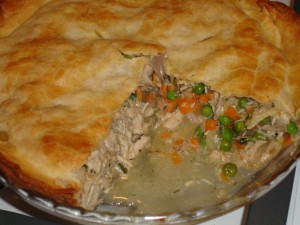
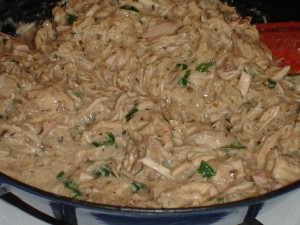
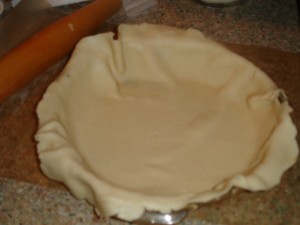
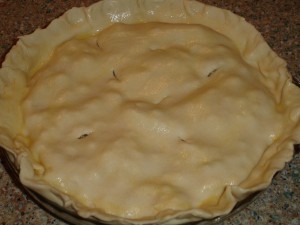
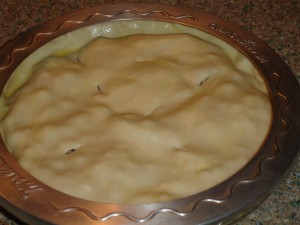
What I’m going to show you is way to make either a traditional Chicken (only) Pie or a Chicken Pot Pie with all of the veggies to complete your meal in one dish. This is going to be a second harvest of many of the lovely spring and summer vegetables that I’ve already pre-cooked and frozen at my house. You can use some store-bought items from the salad bar and hot bars to cut your time in half and still come out with an outstanding meal. As you can see from my pictures, you can combine the two types of pies.

Typically, I already have pressure cooked chicken and broth in my freezer as well as sautéed heirloom celery, onions & carrots, and frozen green peas. In this recipe, all of the veggies and the chicken & broth have come directly from local, sustainable, non-chemical farms. Most of the time, I keep rolled refrigerated pie crusts in the fridge. I started using the Immaculate Bakery Ready-to-Bake pie crusts because they don’t use hydrogenated oil. Having said that let me point out two things. These pie shells have a bit of rice flour so they can be tedious to work with if you do not let them come up to room temperature. I find that just re-rolling them with a bit of flour produces a light and lovely pie crust so when I have trouble, I just use some wax or parchment paper and get out my rolling-pin.  For many years, BC (before children) I made my own crusts.  I ALWAYS roll the commercial crusts just a tad thinner to get a better finished product. They are rolled thick at the factory so they won’t tear easily, but they just don’t cook all the way through. So plan on just 5 minutes with your rolling-pin and no one will know that you didn’t mix the crust yourself and the effort is well worth the result.

Ingredients:

  • 3 cups chopped cooked chicken (for pot pie) OR
  • 5 cups hopped cooked chicken (for chicken only)
  • 3/4 cup chopped sweet onion (both pies)
  • 1 cup chopped celery w/leaves (both pies)
  • 1 cup chopped carrots (pot pie only)
  • 1 cup frozen green peas (pot pie only)
  • 2 tablespoons butter
  • 2 tablespoons olive oil
  • 2 tablespoons flour
  • 2 cups chicken broth
  • 1 cup milk (more fat=richer flavor)
  • 1/4 teaspoon dry poultry seasoning
  • 1 teaspoon chopped fresh thyme
  • 1/2 teaspoon chopped roasted garlic cloves
  • 1 tablespoon chopped fresh chives
  • 1/4 cup chopped fresh flat leaf parsley
  • Salt & pepper to taste
  • 2 pie shells & deep dish pie pan

Directions:

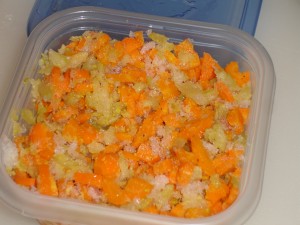
  • Saute the celery and onions in 1 tablespoon of olive oil using a lid to help steam the veggies as you cook them until the onions are translucent and the celery has started to soften.  Remove from pan and put in a bowl with the cooked chopped chicken. If you dislike the texture of the celery and onions in your pie, you can puree them in a food processor at this point and then add them to the cooked chicken.
  • Use the same pan to lightly saute the carrots until they just begin to soften and add those along with the frozen peas to the chicken and onion/celery mix. You can use a bit of the chicken broth to cook the carrots instead of adding more fat to the pan. It is also possible to microwave your carrots in a bit of broth. Be very careful not to dry out the carrots in the process and don’t cook them all the way through or they will turn to mush in the pie. Skip these two veggies if you want a plain chicken pie. It is not necessary to pre-cook the peas because they require so little cooking that they will completely cook in the pie.
  • Next you will make a light roux. Melt the 2 tablespoons of butter and 1 tablespoon of olive oil in a pan on med/low heat and add the flour. Blend the two together and cook for a couple of minutes. Do not brown.
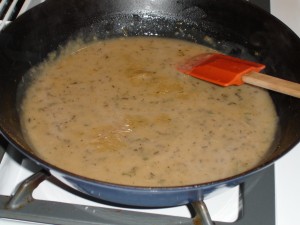
  • Add your chicken broth to the flour mixture. Using a gravy whisk, blend the flour and broth together. Add the thyme, poultry seasoning & roasted garlic. Stir or whisk the mixture while it’s simmering for a couple of minutes on medium heat to thicken the sauce for the pie.
  • Turn the heat down to low when you are finished and add your milk. To avoid curdling the milk, you can warm it before adding it to the hot broth in the microwave for a minute on 50%. Or you can “temper” the milk by adding the hot liquid to the cold slowly and blending it so the cold liquid comes up to a higher temperature before you add it back into a hot pan.
  • Once you have the two liquids blended, continue cooking on med/low heat so that the sauce thickens. Taste the sauce for salt and pepper. I normally do this last because every broth has its own set of flavors whether you make your own or buy the stock. After you add the milk you will find many of the spices mellow out a bit.
  • Add your fresh parsley & chives to the sauce. Add the sauce to the veggies & chicken. Do not worry if your finished mixture seems loose. You are going to let this set for 15 minutes before you put it into a pie shell so you don’t warm the pie shell. During that time, your chicken will absorb a lot of the sauce and that’s what makes the chicken tender when you finish baking your pie.
  • Using some parchment or wax paper, roll out your first pie crust on a bit of flour. I have found that adding a bit of flour to the top and bottom of a commercial pie shell helps it become just a bit drier and more flaky in the baking process. You want to have a little larger bottom shell so that you can form a seal between the top and bottom pie crusts.
  • Place your bottom shell in a deep dish pie pan and refrigerate it if your filling is not really close to room temperature yet. If you fill the pie shell too hot, it doesn’t recover and it stays soggy. Once the filling is cool, you can add it to the pie pan and add the top crust.
  • Roll the edges together tightly so you don’t have any leaking out of the edge. This pie is so dense that it doesn’t really bake well if you use a cookie sheet under the pie pan. I have used just a piece of foil under it with success.  Cut four vents in the top pie crust.
  • Egg wash the entire top pie crust (1 beaten egg/1 teaspoon water) and cover the edges with a pie cover or foil.
  • Bake at 425F for 45-60 minutes, until the top is golden brown.
Posted in Chicken, General, Nut-Free, Recipes, Year-Round | Tagged , , , , , , , , , , , , , , , , , , , , | 2 Comments

Berry Ricotta Pancakes For A Snowy Morning Breakfast

I love the creamy texture and rich flavor of these pancakes. The raspberries came from my backyard garden and the blueberries came from a local organic farm because my bushes are not producing yet. I froze both fruits as soon as they came into season so that I could enjoy a “second harvest” from them in several recipes over the winter.

I adapted this recipe from Fine Cooking April/May 2009. I found the original recipe to be extremely sweet for my taste and difficult to cook. The volume of sugar in the original recipe caused the pancakes to burn before they cooked all the way. By reducing the amount of ricotta cheese I was able to reduce the amount of sugar by half and still maintain a delightfully creamy texture. The pancakes cook more evenly with the changes and require less attention.

This recipe easily feeds 4 people. I have served these with maple syrup and powdered sugar. Raspberries are not as naturally sweet as blueberries so I prefer the blueberries. The base recipe is equally good cooked up plain and served with apricot preserves or apple butter instead of syrup or powdered sugar. As an additional option, you could also use your blueberries or raspberries to make a simple berry sauce for the plain pancakes.

Ingredients:

  • 3 large eggs, separated
  • 1/2 -2/3 ricotta cheese (drain the excess liquid before measuring)
  • 2 1/4 cups low-fat buttermilk
  • 2 1/2 tablespoons raw sugar
  • 2 teaspoons vanilla extract
  • 3/4 teaspoon salt
  • 1 cup all-purpose flour
  • 3/4 cup whole wheat flour (pastry flour if you have it)
  • 1 teaspoon baking powder
  • 1/4 teaspoon baking soda
  • 1 1/2 cups frozen blueberries or raspberries (don’t thaw) or use fresh

Directions:

  • In a large bowl, whisk the egg yolks and ricotta cheese. Whisk in the buttermilk, sugar and vanilla extract.
  • In a small bowl, stir the flours, salt, baking powder, and baking soda with a whisk to break up clumps. Fold this dry mixture into the egg yolk mixture and mix until combined.
  • Beat the egg whites in a clean, dry bowl until they hold firm peaks. Fold them gently a third at a time into the egg/flour mixture.
  • Pour about a 3-4″ pancake on a griddle or cast iron pan on medium low heat and begin cooking. As the pancake sets up, add your fruit around the pancake and continue to cook until the batter has bursting bubbles and is ready to turn. Watch carefully for burning.
  • Turn and continue to cook until the other side is golden brown.
  • Serve with maple syrup or powdered sugar and butter.
  • These will freeze well for a couple of weeks if you wrap them in parchment paper and then aluminum foil. Reheat each of them for about 2 min at 30% power to thaw and then about 30 seconds on 50% power to finish heating through.
Posted in Breakfast, General, Nut-Free, Recipes, Summer, Year-Round | Tagged , , , , , , , , , , , , , , , , , , , , , | Leave a comment

Snowy Chicken Pie & Berry Ricotta Pancakes Shopping List

Well the weather forecast calls for a bit of snow tonight and more over the weekend.   I do not enjoy the whole driving experience of snow & freezing ice that we normally get here in Raleigh. So I’ll head out in a few minutes for the grocery store like everyone else in town, and get what I need for a couple of days worth of meals.

If you are going to the store, here are a few items you can stock up for this weekend so you can cook up some healthy comfort food. These are going to be quick recipes with shortcuts noted below in your shopping list. If you have things already cooked and in the freezer those will work even faster for these recipes.

Chicken Pot Pie – pick up a pre-cooked chicken, a half quart of chicken stock (you can freeze extra if you buy a quart), 1 cup chopped carrots, 1 cup chopped celery, 1 cup chopped onion, a small bag of frozen baby green peas, a pint of half/half or small can of evaporated milk.  A bay leaf, bit of Italian spices, thyme, rosemary (if you like it), roasted garlic, and 2 rolled pie shells of your choice or make your own. If you don’t like veggies in your chicken pie, you can eliminate the carrots and peas but you can’t eliminate the onions and celery – you can puree them.

I’ve adapted this recipe so you can make it quickly using pre-cooked chicken and chopped veggies from the salad bar. Don’t worry about making your own pie shell either, the rolled pie shells in the refrigerated section will give you great results with a little tinkering. If you are concerned about calories or don’t want to work with pie shells, you can use biscuits  (make your own or pick up some that you like) on the top of the chicken pie in ramekins or in a large pie pan or just put a top pie crust on it in the pie pan. Over the years, I’ve done it all these different ways depending on where I was cooking and what food and tools were available to use.

Ricotta Berry Pancakes – pick up a quart of low-fat buttermilk, small container of ricotta cheese, eggs, and a small bag of frozen blueberries or raspberries. Fresh berries are great too, but not critical.

Look for these recipes later today and tomorrow as I get back into the kitchen after a bit of vacation.

Posted in General | Tagged , , , , , , , , , , , , , | Leave a comment