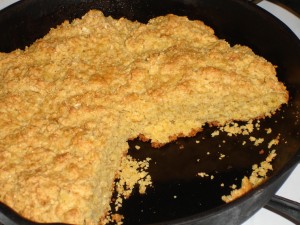
Skillet Cornbread

When I travel, I take lots of recipes with me because I never know what sort of pots and pans are going to be available or what local ingredients I might find when I arrive. Looking through my recipe files I have several recipes that I actively use for chili and a couple different ones for cornbread and most of the time I take these with me because they are easy to cook for a crowd.

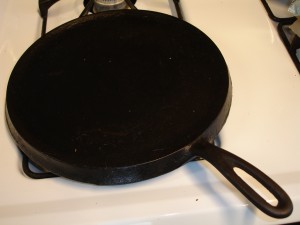
As it happened last week, the house where I stayed was equipped not only a cast-iron griddle for pancakes, but a cast-iron frying pan which was just the right size for skillet cornbread. There were also huge old pots along with a great assortment of gadgets and a big pull-out butcher block that you use to shell beans or to hold extra items when you run out of counter space. Later I learned that the home owner was the granddaughter of a couple that owned a large beach hotel and this was the salvaged kitchen gear from the hotel was torn down years ago!

This recipe comes from a dear neighbor who recently passed away after a relentless battle with lung cancer this past year. She always made this for our annual Halloween party. She loved being at the beach more than any other place so it seemed appropriate to make it in her honor last week for our family and visiting friends.

Kack’s Corn Bread

Ingredients:

  • 2 large eggs, beaten
  • 1 (8 1/2 oz) low-fat sour cream
  • 1 (8 1/2 oz ) can cream style corn
  • 1/4 cup vegetable or olive oil
  • 1 cup self-rising cornmeal
  • More oil for the cast-iron pan

Preparation:

  • Preheat the oven with an 8″, or thereabouts,  cast-iron pan in it to 400F.
  • Mix the eggs and oil together until well blended
  • Then add the sour cream, and corn to the eggs. Mix until it’s smooth.
  • Add the wet mixture into the cornmeal and quickly blend with a spatula until it’s just folded together and everything is incorporated.
  • Pull the hot pan out of the oven and carefully put about 2 tablespoon of vegetable or olive oil in the pan. Swirl it around to coat the sides and bottom of the pan.
  • While it’s still hot, quickly pour the batter in the pan and put it back in the oven to bake for 30-40 minutes until golden brown.

Notes:

  • If you don’t have self-rising cornmeal than you can mix 1 tablespoon all-purpose flour, 1 tablespoon baking powder and 1/2 teaspoon salt added to 1 cup of regular corn meal.
  • This recipe was originally intended to be poured into a 9″ square pan and it works equally well cooked in that manner.
  • You can add  hot peppers to this as well as 1/4 cup of grated cheese.
Posted in Gluten-Free, Nut-Free, Recipes, Vegetarian, Year-Round | Tagged , , , , , , , , | Leave a comment

Buttermilk Pancakes at the Beach & at the Market

What do you fix when you’re at the beach with a house full of people? Pancakes of course! This is one really simple recipe that my family LOVES! I believe it’s from a very old “Cooking Light: because it lists the nutrition info at the bottom. They were one of the first magazines to start printing this info many years ago. This recipe only makes enough for 2 people. Most of their early recipes were designed for young couples. But it doubles or triples very well. I have cut back on the oil from the original recipe and added a bit of salt to contrast the sugar.

Over the years I’ve also tested the amount of sugar: If you like your pancakes with just a bit of butter, then the sugar amount is perfect in the recipe. If you are going to add syrup, you can taper back the sugar by 25% and the pancakes will still be quite tasty. The oil in the recipe helps eliminate sticking to the pan and I’ve tested the amount over the years to get it to a minimum that I felt worked well with all sorts of pans from non-stick to cast iron. The recipe doesn’t have the same texture or flavor when you eliminate it completely. I’ve also tried using a white-wheat flour but the texture changes quite a bit because of the gluten content and I don’t find it appealing for this particular recipe.  I have also tried it with egg white. It doesn’t work well. Too light in my opinion.

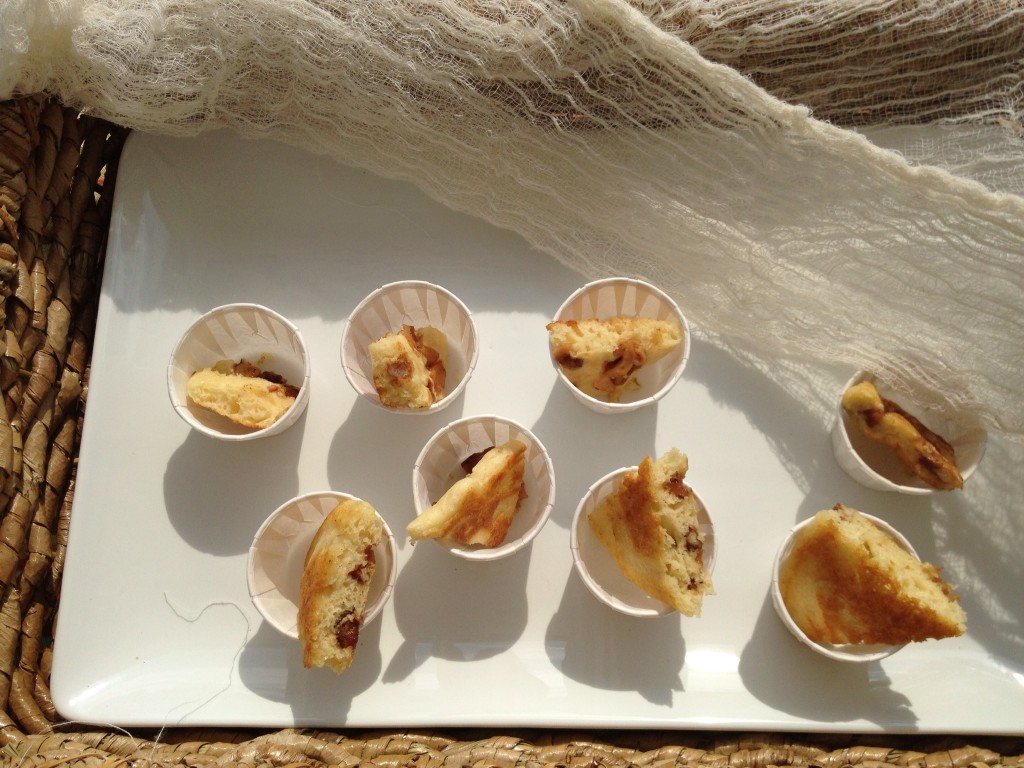
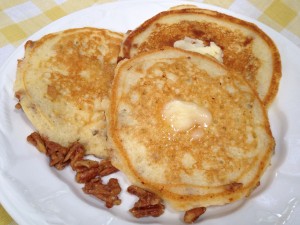
During the recent Cooking Education Demo at Western Wake Farmers’ Market we  re-hydrated Western NC Apples with a little water, cinnamon & nutmeg and also gently cooked some NC pecans in local butter and Western NC Maple Syrup until they were candied and sprinkled just a little of the Savory Spice Murray River Flake Salt on them before using them in the pancake. We also cooked the pancake in coconut oil and substituted coconut oil in the pancake to impart a little more flavor. The result was a surprisingly light pancake with an immense amount of flavor.


Buttermilk Pancakes for Two

Ingredients

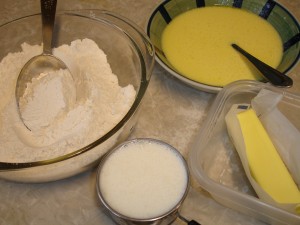
  • 1 cup all-purpose unbleached flour
  • 2 tablespoons raw sugar
  • 1 teaspoon baking powder
  • 1/2 teaspoon baking soda
  • 1/8 teaspoon sea salt
  • 1 cup non-fat buttermilk
  • 1 teaspoon olive oil (or corn oil)
  • 1 large egg, lightly beaten

Preparation

  • Combine all of the dry ingredients through a mesh strainer or blend together with a whisk.
  • Mix the eggs, buttermilk and oil together.
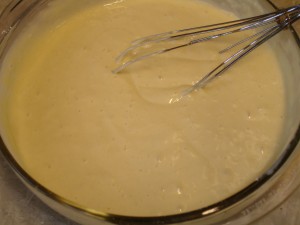
  • Add the dry ingredients to the wet and blend it with a whisk until it’s smooth.  This takes about 20 strokes.

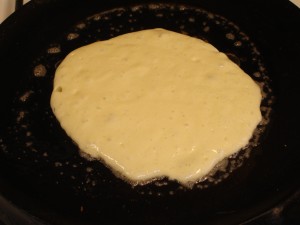
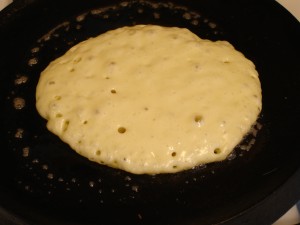
  • Cook these on the pan of your choice on medium heat. They take about 2-3 minutes on the first side and you’ll flip them when you have some breaking bubbles on the pancakes and many that are not quite breaking. The second side frequently takes less than 2 minutes to finish. They will continue to cook just a bit once you take them off the griddle.
  • I serve these with a fast and easy fresh berry topping that I make from frozen local berries that I pick each season.

Notes:

  • The batter can be made a day in advance if you are rushed for time. These also reheat moderately well in the microwave on a setting of 50% for a minute or minute and a half. Any higher power will tend to cook them and make them more rubber like than you might like.
  • These are great for dinner if you want something the kids can fix and you can serve them with a bit of meat or soy substitute sausage to increase your protein. One of my favorites is the GoLean brand for a veggie/meat.
  • According to the original recipe, this has 3 grams protein and 2.3 grams fat (but I reduced the oil to less than a third of the original so your fat is mainly coming from the egg.  Carbohydrates are listed at 14 grams.

Notes:

8/31/12: Substituted coconut oil in the recipe for the vegetable or olive oil and used coconut oil in the cast iron pan to cook the pancakes. Less burning and very light texture. Added about 1 teaspoon of rough chopped re-hydrated apples to each pancake as they were beginning to firm on the first side. To re-hydrate dried apples I use about 1/4 cup of filtered water to 1/2 cup of dried apples with 1/8-1/4 teaspoon of cinnamon & a pinch of nutmeg. Heat in a pan on low until the water is absorbed and let cool. You can   add a smidge of butter. We added candied pecans to the pancake as well. Using the same pan after you are finished hydrating the apples, add about 1 cup of chopped or broken pecans, 1 teaspoon of butter and cook for about 2 minutes, stirring constantly so they don’t burn on med /low heat. Stainless pans work best for both of this process. After a couple of minutes, add about 1 tablespoon of maple syrup and stir to coat. Continue to cook for about 2-3 more minutes until the maple syrup begins to harden as you stir and basically the water evaporates completely. When the pan is almost dry of liquid syrup,  turn off the heat and lightly sprinkle just a smidge of salt on the pecans. I like Murray River Flake Salt for this recipe. Let them cool on a plate or parchment paper. After both items cool you can use them in the pancakes.

Posted in Breakfast, General, Nut-Free | Tagged , , , , , , , , , , , , | Leave a comment

Family Friendly Dips for Hunter’s 2nd Annual Health Fair

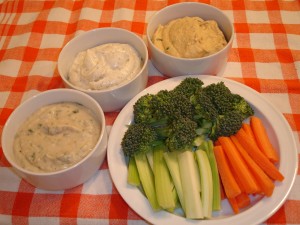
I’ve been working on some healthy dip recipes that highlight the different parts of a plant for a school health fair. Beans are the obvious choice for the base but incorporating leaves can be difficult. The most obvious leaf is spinach but most kids don’t like it and it can changes the color of the dip quite a bit. So I decided to mix it in at the end to eliminate the color change problem.

I know this isn’t terribly exciting stuff, but it’s a health fair and we’re talking about changing the habits of elementary school kids and their parents who are crunched for time and money. Moving them from a chemical-laden ranch dressing mix that is loaded with mayo fat and only takes 5 minutes to prepare to something that’s got fewer additives like Simply Organic Peppercorn Ranch) mixed with low-fat organic sour cream and organic Greek yogurt is a start.

For the second dip I used a recipe from Inter-Faith Food Shuttle which has a base of garbanzo beans, tahini (sesame paste). It’s a great base recipe and I simply mixed in a bit of fresh chopped parsley. With everything on hand, this recipe takes less than 10 minutes to throw together and it keeps for a couple of days so you can send it for lunch with pita bread or veggies.

The third dip is an adaptation of one I found on-line this week. I really thought the initial recipe would be great for adults, but the strong flavors from the spinach and the deep beautiful green color might put off some of the kids. So I significantly changed the ratio of beans to spinach and changed the way you put it together so the color less drastic for the kids.

Parsley Hummus

  • 1 (15 oz) can garbanzo beans, drained & rinsed
  • 2 teaspoons minced roasted garlic
  • 1 tablespoon fresh lemon juice
  • 1/2 cup water
  • 2 tablespoons tahini (sesame paste)
  • 2 tablespoon olive oil
  • 3/4 – 1 teaspoon salt
  • 1 tablespoons finely chopped parsley
  • 1/8 teaspoon pepper

Put all of the ingredients except the parsley into a small food processor and blend until it’s smooth. Hand mix the chopped parsley into the base dip.

You can also add roasted red peppers to the base recipe.

Cannellini Bean Dip with Steamed Spinach

  • 1 (15 oz) can of cannellini beans, drained & rinsed
  • 1/4 cup water
  • 2 teaspoons minced roasted garlic
  • 2 teaspoons fresh lemon juice
  • 3 tablespoons olive oil
  • 1/2 teaspoon balsamic vinegar (aged is sweeter)
  • 3/4 teaspoon salt
  • 1/8 teaspoon pepper
  • 2 tablespoons finely chopped steamed spinach

Put all of the ingredients except the spinach into a small food processor and blend until it’s smooth. Hand mix the spinach into the base dip.

If you don’t mind the green color you can mix the spinach into the base and you can add more than just a couple of tablespoons. It’s also good with a tablespoon of finely grated parmesan or asiago cheese.

Posted in Dairy-Free, Diabetic Friendly, Fall, General, Gluten-Free, Nut-Free, Recipes, Spring, Summer, Vegetarian | Tagged , , , , , , , , , , , , , , , , , , , | 2 Comments

Stretching Your Beliefs About Food

Did you know it takes more than 60 days of repeating a process for it to become a habit for the average individual? Knowing this, I try to keep food rules simple so the habits that follow are easy to repeat day after day. None of these are set in stone. You won’t find me offering up “absolutes” because that would be almost impossible to maintain over your lifetime.

There are over 50 sites that I glance at daily, scouring them for healthy foods or interesting cooking methods or pairings that I think I can incorporate in my work.  While it’s part of my “work”, the hard part comes when I test-cook.  Usually it’s an average of 3 new recipes each week. Many are not my own. There are three tests for each recipe to move to a blog or a Facebook post:

  • Would I be excited to make and eat it again?
  • Would other people like it well enough to want to learn to make it?
  • Is it flexible: Can you modify/use the final product in different ways?

That adds up to a lot of food in the house and you can’t depend on kids and dogs to help devour all of it. So, there’s this little but significant “24 hour rule“. It’s what keeps me from overindulging (most of the time). There are three tricks to making this rule work.

  • Know who’s going to be around and willing to accept samples.
  • Limit the number of foods that are high in calories, fat or sugar.
  • Look for recipes that challenge your perceptions of healthy or help you modify your favorite recipes to be more healthy.

There is one last rule in our home that really came about as a function of raising kids and becoming aware of the way food affects our metabolism and brain development. Not to get on a soap-box, but I believe that many of the behavioral problems we see in people can be traced directly to the food ingested/not ingested each day.

  • Try to eliminate “food” that you can’t trace back to something you can readily touch or smell in life.

This helps eliminate many of the chemicals or processes that get used in commercialized foods today. It certainly doesn’t cover everything, but it’s a good start. Growing up my kids couldn’t buy “foods” if they couldn’t read all of the ingredients (and later: tell me what they were). This worked for a really long time. Then they discovered they liked science. I’m not sure if it was because they really wanted to buy those disgusting products or if they simply enjoyed the topic or maybe they liked to show off.

As time passed, the rule had to be “tweaked” a bit.  Now, “Mom” has to be able to read it and pronounce it correctly. Yes, I can see you rolling on the floor laughing! Who would ever set themselves up for that situation? Of course the parents out there know the result of this rule! I get many science lessons when I’m out with my kids. Right down to the process used to create some bizarre ingredient that some company scientist thought would make my food taste better.

Science is really not my thing so these lectures from my kids can be tedious. I studied design. I like pictures and forms. Pretty gardens, lovely foods, quilts, pottery, creative logos, clever visual charts, sculpture. You get the “picture”? But I try to be very patient, realizing that while explaining these chemicals and processes, my children are learning too.  It happens in their subconscious mind as they begin to question why a company made these choices. They are teaching themselves. What’s even more important is: They will teach their peers by example. Influence can be a powerful tool.

Posted in General | Tagged , , , , , , , , , , , , | Leave a comment

Appetizing Pickled Carrots

Carrots are one of your cool weather crops. They come in during the fall and many farmers continue to “over winter” them by leaving them in the ground. Sometimes the green tops get eaten early in the spring by rabbits but the roots are still there and taste wonderful in the early spring.

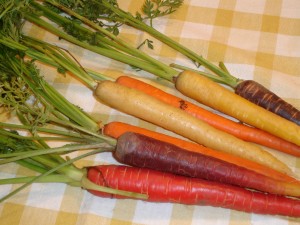
Like many heirloom plants, carrots come in a rainbow of colors from deep purple to red, yellow and varying degrees of orange. There are short stubby ones that are great for the container gardener or in places where the soil is hard to penetrate like clay. You can slice or julienne them, shred or puree them. They can be steamed, stir-fried, eaten raw, sauteed, or canned. They have natural sugars that make them ideal for cakes and muffins.  Carrots freeze and dehydrate well. They are such a versatile vegetable that you can enjoy them all year.

I have really enjoyed pickled carrots from a local restaurant over the years which is what inspired me to undertake making some for an upcoming health fair. I know kids get tired of hearing about your typical carrot stick so I wanted to make some carrots that were just a bit more interesting with some flavors they might not have had mixed together before. Nothing too hot or too sweet. Just something to compliment the natural flavors of the carrot.

This recipe can also be made with carrots that you julienne and then you can add them to salads or sandwiches. I think they would be especially tasty on a ham sandwich along with some shredded radish. I’ve listed some variations and substitutions you can make if you want to play around with it. The sustainable carrots you get at your local market may be smaller than those in the grocery store so you’ll need to adjust the amounts based on that. You can skip the whole peeling part of the recipe by getting baby carrots and simply cutting them up. It might be more kid-friendly and faster to do that way.

Pickled Carrots

Ingredients

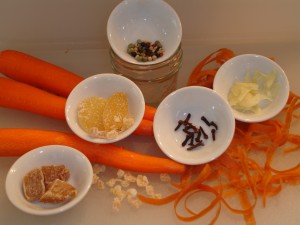
  • 4-6 carrots (about 1 lb)
  • 1 1/2 cups rice vinegar
  • 1/4-1/2 teaspoon pink sea salt
  • 1/4 teaspoon ground allspice
  • 8 whole cloves
  • 10 whole peppercorns
  • 1/4 cup candied ginger
  • 2 (3-4″) pieces Indonesian cinnamon
  • 1-2 tablespoons honey
  • 2-3 tablespoons cane sugar (light or dark brown works just as well)

Preparation

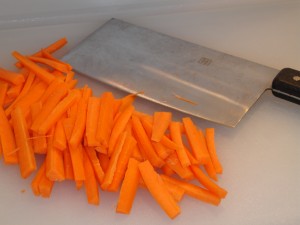
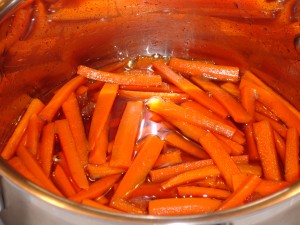
  • Carrots are going to vary in size. You are looking for about 2 cups of carrots cut into wedges that you can eat with your fingers.
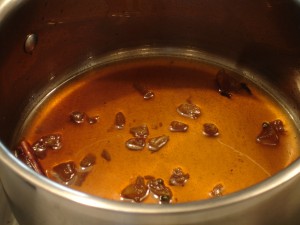
  • Put the rice vinegar and all the sugar, honey and spices into a non-reactive pan and simmer for about 5 minutes.
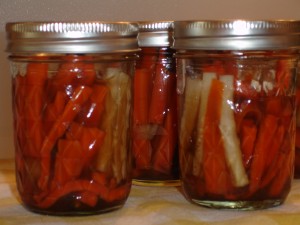
  • Add the carrots to the pan or put the carrots into a canning jar and fill with the hot liquid. Screw the lids on or cover the pot and let it sit it all sit and cool down. You can serve these within the hour but they will have much more flavor if you store them in the fridge for a day and then serve them.

Notes

  • I haven’t checked the pH levels of this recipe so I can’t tell you whether this recipe is ready to be canned. I simply find the canning jars work well for the hot liquid in this recipe and that’s why I use them.
  • You can change the vinegar to white balsamic vinegar for increased acidity.
  • You can change the candied ginger to fresh peeled and sliced ginger root for increased spice.
  • You can change the salt to a smoked salt or any other type of salt.
  • You can julienne the carrots and use this on salads or sandwiches.
Posted in Dairy-Free, General, Gluten-Free, Nut-Free, Recipes, Vegetarian, Year-Round | Tagged , , , , , , , , , , , , , , , , , , | Leave a comment

Two Seasons of Roasted Eggplant Spreads

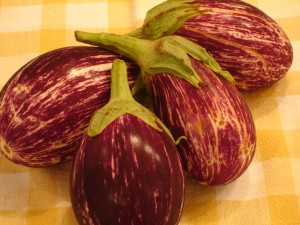
If you run an internet search for “types of eggplant”, you’ll come up with some astonishing pictures of eggplants ranging from ivory to almost black and small round ones to long and slender ones nearly a foot in length. Along the way you are sure to find one that you enjoy. They vary in flavor from bitter to quite mild but one thing that I have always been told was they didn’t freeze well. Totally a myth.

Eggplant is wonderful during the growing season. Cooked properly the texture says firm and a variety like Rosa has fairly thin skin which is not bitter. That also means you can’t handle it roughly and it doesn’t hold long. So you need to use it as soon as you get it and you don’t need to do all of the skinning and salting that’s required with some other varieties with thicker skins.

This year I decided to test freezing this pretty little vegetable. I sliced my rosa eggplant about 1/2″ think and lightly brushed it with olive oil on both sides and roasted it until it was tender on a heavy-duty cooking sheet. (7-10 minutes first side and 5-7 minutes second side) Then I stacked up the slices and froze them for about four months. What came out of the freezer was no worse looking than what went in. I think we can agree that cooked eggplant is not a thing of beauty. The slices remained firm and if you wanted to use them that way, they would certainly hold up in a casserole dish just fine.

I used some of the frozen eggplant in lasagna and it tasted great. Then I tried it in two healthy appetizers and the flavor was excellent so I wanted to share those recipes with you.  Just about every ingredient you should be able to pick up at a local farmers market! I reduced the amounts from the original recipes so you could make them for 2-4 people and enjoy them more often and I’ve adapted the second recipe so you can make it during the colder months with food you’ve already roasted and put up during the season.

Regarding spices: It’s really easy to grow things like rosemary, thyme, oregano and basil and you can use them so readily in many recipes throughout the year. But salt is a little different. I have been experimenting recently with different salts and I found that roasted eggplant was especially tasty with Alderwood smoked salt. The shop owners at Savory Spice Shop suggested the Alderwood over the Hickory salt because it is a bit lighter in flavor and it works as an undertone with the vegetables. It’s worth a small investment in different salts if you can find a shop that will allow you to buy an ounce at a time or let you schedule and appointment to do some sampling (Southern Season in Chapel Hill is excellent for this).

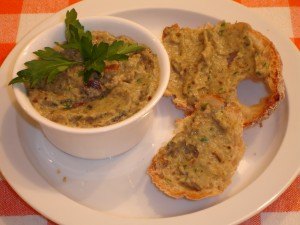
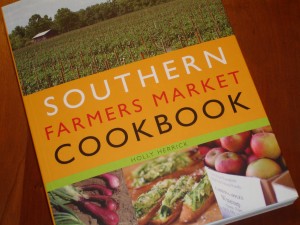
The first recipe comes from my new acquisition “Southern Farmers Market Cookbook” by Holly Herrick: Roasted Eggplant and Garlic Dip. The original recipe doesn’t measure out some of the ingredients. To make a smaller amount that I could enjoy in a day or two I guessed and measured out the eggplant, garlic and lemon juice until I felt like I had some good ratios for flavor. I’m not sure if it will taste the same as the original recipe intended, but hopefully you’ll like what I’ve done with it. You can use store-bought pita chips for this or spread it on toasted whole-wheat Indian naan bread. I was testing some bread in the freezer this past month for another project and I used the polenta bread from LOAF (Ron & Jaimie Graff) in Durham, NC for this recipe. It was excellent toasted up and spread thickly with the dip. It would make a great light lunch with some fresh heirloom tomatoes.

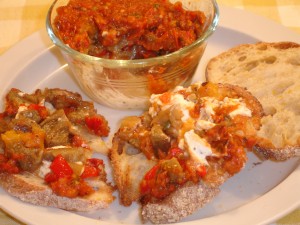
The second recipe is adapted from a blog called “Eat, Read, Drink”  : Meagan’s Roasted Eggplant, Tomato & Goat Cheese Terrine. Like the previous recipe, this one is geared for a party. The reduced amount allows you to make it for 4 people. You can drool over the photo in the original blog. You’ll have to work at making the smaller volume look so nice. When I made it, I simply used a glass dish and didn’t fuss too much over it. So the picture is not nearly as lovely. The great thing about this recipe is that you can really change the volume of each ingredient to highlight one over the other. Pay more attention to your ratios rather than the actual measuring and you’ll find you can adapt this one to your taste. I used my own roasted tomatoes from last fall  instead of fresh when I made it because they’re out of season. Then I served it warm and creamy from the toaster oven topped with some spicy pork and venison sausage from local sources.  This was very good and it’s going to be a recipe I make again as the different tomatoes come back in season. I think it would be excellent with sungold and black cherry tomatoes or a blend of heirlooms instead of the roma. This recipe is very versatile from winter to summer.

Roasted Eggplant & Garlic Dip

Ingredients:

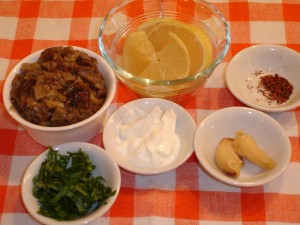
  • 1 cup roasted eggplant roughly chopped
  • 1 teaspoon roasted garlic
  • 1 tablespoon fresh lemon juice
  • 4 teaspoons plain Greek yogurt
  • 2 tablespoons olive oil
  • 1 tablespoon chopped parsley
  • 1/2 teaspoon hot sauce or a pinch of red pepper flakes
  • 1/4 teaspoon Alderwood smoked salt (lighter than hickory smoked)
  • 1/4 teaspoon sea salt

Preparation:

  • Put all of the ingredients into a small food processor and pulse until it’s smooth.

Goat Cheese Terrine with Roasted Vegetables

Ingredients:

  • 4 ounces fresh local goat cheese
  • 1/4 cup roasted red & yellow peppers, chopped
  • 1/4 cup roasted rosa eggplant, chopped
  • 1/2 teaspoon roasted garlic (more if you want)
  • 1/4 cup roasted tomatoes OR 1/4-1/2 cup fresh heirloom tomatoes
  • 1/4 teaspoon Alderwood smoked salt
  • Optional: fresh thyme, rosemary and oregano and parsley added to the tomatoes
  • Optional: pork or venison sausage, cooked
  • Sea salt & pepper to balance any of the ingredients after you taste them combined

Preparation:

  • If your goat cheese is not creamy, add some cream to it to make it spread more easily and blend the roasted garlic into the goat cheese. Remember the cheese will naturally be more creamy at room temperature or warmed up so don’t go overboard on the cream. Form a smashed log or ball on a plate OR spread it directly on baguette slices.
  • Mix the chopped roasted peppers and eggplant together along with the Alderwood salt and a bit of fresh pepper. In the colder months if you have some caramelized onions, you could also add a tablespoon of them, finely chopped, to the eggplant and peppers. Then spread the mixture on top of the goat cheese either on the plate or directly on your bread slices.
  • In the colder months, use your roasted tomatoes and adjust your seasonings with some rosemary and thyme before you spread it on top of the eggplant and peppers. In the warmer months when you can get fresh tomatoes try to use either a mix of large and small heirlooms with some fresh basil and green onions. Remember that the sungold and pear tomatoes will be almost sweet while the black cherry and purple Cherokee will have more richer acid-based flavor.  Be light with your salt: a Andes Mountain or Himalayan pink salt. Add just a pinch of ground pepper; use most of your pepper in the eggplant and roasted peppers portion of the recipe.
  • Serve this at room temperature or warmed in the toaster oven if you are using baguette slices and roasted tomatoes. You can top the warmed appetizers with pork or venison sausage from your local farm or hunter!
Posted in Appetizer, Fall, General, Gluten-Free, Nut-Free, Recipes, Summer, Vegetarian | Tagged , , , , , , , , , , , , , , , , , , , , , , , , , , , , | Leave a comment

Spicy Roasted Pumpkin Soup


Two falls back, Murray & Esta Cohen had the largest heads of cauliflower I have ever seen in their little vegetable garden. My experiments with cauliflower soup were endless and Murray was a really good sport about trying every variation of soup that I brought over. I finally developed a couple of recipes that would freeze well and I was looking forward to making them this fall. Then we had what can only be described as crappy weather late in the summer. It was really hot one day, it was really cold the next, there was no rain, then too much rain; all in all, it was not cauliflower weather.

As it turns out, this was my year for pumpkins. I have really tried to develop a pumpkin custard recipe that tastes as good as a pie filling, but is simple to make and eliminates the calories and frustration of pie shells. I have used up a lot of good eggs on this project and the finished custards look nice enough. Unfortunately, they are not as tasty or nutritious as I would like, so my work on this front continues slowly.

On my recent trip to Boone I stopped at one of my favorite bookstores, Black Bear Books, and got a pile full of books to look through. I’m sure you know how this ends….the book that made it home was “Southern Farmers Market Cookbook” by Holly Herrick. It’s got great photos of how the food should look and easy recipes that a basic cook can put together quickly. Exactly what I need for my upcoming market demos.

The Pumpkin Cookie recipe is great. I didn’t have the lemon extract so I used some lemon zest and I used butter for “shortening”. The recipe calls for walnuts so I tested those along with some local  toasted pecans. I liked the pecans better. I think the texture and flavor of toasted pecans works better with roasted pumpkin.  The cookies are kind of a cross between a pumpkin scone and a very light biscuit.

With plenty of roasted pumpkin in the freezer I decided to try to make a small batch of soup.  On a recent trip to Savory Spice I picked out several new chile powders to try and pumpkin is pretty versatile in the spices you can add to it. This recipe has ranges in the spices because some folks like it hot and some don’t; and some folks really enjoy cumin and others do not embrace it. So adjust it according to your taste.


Spicy Roasted Pumpkin Soup

Ingredients:

  • 2 1/2 cups roasted pumpkin
  • 2 teaspoons dehydrated shallots
  • 1/2 cup chopped celery
  • 1 1/2 cups vegetable broth
  • 1 1/4 cups coconut or low-fat milk
  • 1 – 1/2 teaspoons cumin
  • 1/2 teaspoon Aleppo peppers
  • Pinch mild Chimayo chile powder
  • 1/4 teaspoon hot sauce
  • Ground mixed pepper
  • 1 teaspoon Murray River Flake Salt

Preparation:

  • Your pumpkin should already be roasted. I don’t normally use olive oil for the pumpkin because it has so much moisture it seems to be fine without it. If you do use olive oil, it should still be fine for this recipe.
  • Take your dehydrated shallots and put them in a small saute pan and add a bit of water and about 1 teaspoon of butter. Bring it to a boil and then just keep reducing the water on medium heat.  As the shallots hydrate in the water they will also cook in the butter. Cook them on medium-low until they are a bit soft and translucent. Should take less than 5 minutes on low. Set those aside.
  • Put your finely chopped celery into the pan with a bit of olive oil or butter and saute those until they are soft. I normally do this when the celery comes into season and freeze it. It keeps well and significantly cuts down on the time it takes to make most recipes.
  • In a large dutch oven add the vegetable broth along with the roasted pumpkin, onions, celery and spices (leave out the salt until the very end) and let it simmer for about 15 minutes with the lid on the pot.
  • Heat the milk so it’s warm. Add it to the pumpkin and spices and then puree the entire thing in batches. Taste for spices and now begin to add the finishing salt, Murray River Flake. You can also add more heat. The Aleppo peppers are mild. The mild Chimayo Chile is medium heat and if you want more heat you can add Guajillo Chile or additional Cholula hot sauce.

Notes:

  • I like to serve this with some fresh thyme on top with additional hot sauce. I used Cholula brand hot sauce.
  • You can also add about 1/2 teaspoon of dried thyme or 1 teaspoon of fresh chopped thyme leaves into the soup.
  • If you don’t have dehydrated shallots, use about 1/2 of a good size shallot.
  • Caramelized onion would add some contrast to the sweetness of the coconut milk if you have them on hand.
  • If you don’t have vegetable broth on hand, you can substitute some powdered veggie broth with water.
  • This soup freezes well before you add the coconut or cow’s milk.
Posted in Appetizer, Dairy-Free, Diabetic Friendly, Fall, Freezing & Canning, General, Gluten-Free, Nut-Free, Recipes, Soup, Vegetarian | Tagged , , , , , , , , , , , , , , , , , , , , , , , , , , , | 2 Comments

Healthy Breakfast Ideas for Families on the Go: Eggs

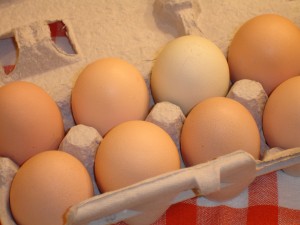
Eggs are getting more plentiful by the day. Longer days and warmer temps here in the south are helping chickens produce. So it’s time to start enjoying them again! They really take less than 5 minutes start to finish if you are just scrambling, frying or poaching. You can always hard boil a half-dozen to eat quickly during the summer when it’s too hot to cook. Creative eggs are simple if you plan ahead and require only basic tools and skills.

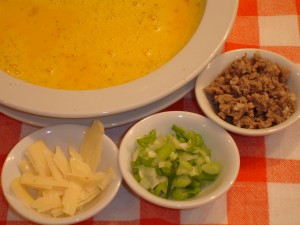
The evening before you want eggs you can chop up any additional ingredients like green onions, peppers, cheese, broccoli, bacon, ham or sausage and store it together  in your refrigerator. This is where leftovers come in handy! The peppers you see here were roasted late last summer and frozen. I just cut off what I need and thaw it. You can do the same with many vegetables.

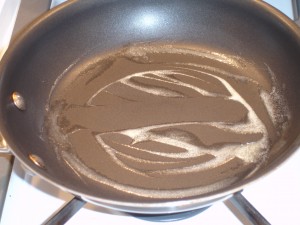
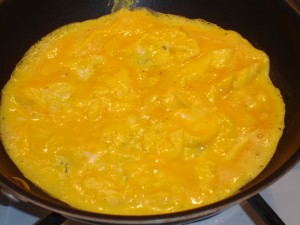
Making an omelette is pretty easy. 2 eggs, 2 tablespoons water, salt & pepper and whatever fillers you like.  Use a non-stick 8″ pan with about a teaspoon of butter in the bottom. Spread it all over the bottom and up the sides a little as you heat the pan on MEDIUM.  You will get the pan too hot if you turn it to high and you’ll scorch your eggs before you get started. Remember those eggs are coming right out of the refrigerator and they are cold when they hit the pan.

Beat your eggs lightly with the water and seasonings. Pour the eggs into the pan and pick the pan up and swirl it around gently to spread the eggs out evenly.

Back on the heat for about 1 minute. As the eggs begin to set up, use a spatula to move the cooked part of the egg into the center and pick up the pan and move the liquid part of the egg to the outer edge; fill in the gaps so the bottom of the pan is covered with egg.  No holes. Repeat this all the way around the edge of the pan and about the time you are finished, your eggs will be setting up nicely.

Spread your fillings around the eggs and let the eggs continue to set up. This will take about another 3 minutes. If you are using goat cheese or another very soft, fresh cheese, then wait to add this cheese until your eggs are completely set to add it.

When the eggs look as set as you like to eat them, use your spatula to get under half of the eggs on the pan and flip that onto the other half of the eggs to make a half-moon. The eggs should be golden brown on the bottom and set up nicely. The water in the eggs will have evaporated in the cooking process so the eggs brown but don’t stick.

You can plate this and let it sit a minute to finish cooking while you finish getting your toast together. It’s that easy. If you really want it easier you can make a couple of these up one night ahead and warm one a day for a couple of days. Just remember to cover with wax paper and heat on 40-50% for about 1-2 minutes in the microwave. The time will depend on how many eggs and fillings.

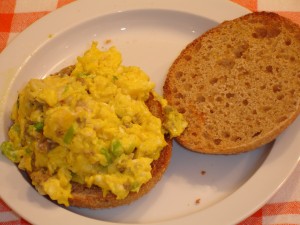
Want an egg sandwich? Just scramble those eggs the same way with the water and use the pan the same way except you will keep moving the eggs around. As they begin to set you can add all of your fillings EXCEPT any cheese. You hold the cheese until the very end and put it in about 30 seconds before you finish cooking. Turn off the heat and let the eggs sit about a minute and the cheese will melt from the heat of the eggs.

Put this on your english muffin or toast and wrap it up to go if you are in a rush.  If you like a slice of ham on your muffin, try warming it in the pan with butter before you cook your eggs. It will flavor you eggs even more and it will brown the ham nicely. You can warm the whole thing at your office wrapped in wax paper on medium heat in the microwave for about a minute.

Have fun. Eat well.

Posted in General | Tagged , , , , , , , , , , , , , , , , , , , , , , , , | Leave a comment

Healthy Breakfast Ideas 4 Families On The Go: Pancakes

As a working mom I understand why most kids and parents don’t eat a solid breakfast and why so many people of all ages rely on fast-food. For years I traveled for work and I really struggled to find ways to cook on the weekends and save food in the freezer or refrigerator that someone else could reheat and feed to my kids while I was away. As the years have passed, I also found these techniques helped me feed aging family members when they were sick or neighbors that needed a special delivery of a nice treat.

Pancakes are easy, delicious & nutritious right out of your freezer.

Over the years, I have run “freezer tests” to determine the best way to make a stack of pancakes and freeze them for use later when I’m in a rush. What I found is that all sorts of pancakes freeze well. I’ve made plain ricotta and ricotta with berries. I have also frozen low-fat buttermilk pancakes. And a few months ago I froze some sweet potato and pumpkin pancakes after a farmers market demonstration.
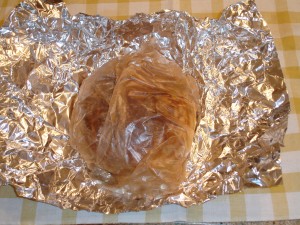
Adding low-fat organic ricotta cheese, local pumpkin and sweet potatoes all  help keep your pancake base moist and seem to freeze well when wrapped appropriately (more on that in a moment).
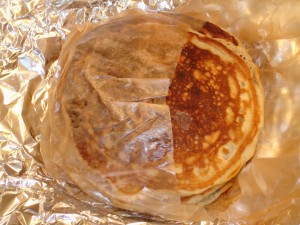
For blueberries and raspberries, I used smaller varieties grown organically at a local farm and in my yard. I also tested the smaller wild Maine blueberries that were available in my local supermarket. All of the fruit was frozen, thawed, and then cooked in the pancakes and re-frozen a second time. All of it did equally well for flavor retention, color and texture.  If you don’t want to add berries into your batter, just warming the berries quickly for about 3 minutes on medium heat with a tiny bit of sugar, nutmeg and lemon juice until they just pop creates a great simple sauce to pour over your pancakes.
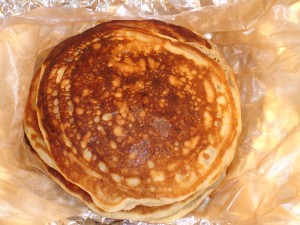
My buttermilk pancake recipe uses non-fat organic buttermilk so they are the lowest in fat content of all the types I cook. They held their height and texture when frozen and were moist when reheated, much to my surprise. I really thought the lack of fat would cause a problem when freezing. What I found was that lower temperature (50%) reheating was optimal for this recipe.

The recipes that I use for sweet potato and pumpkin pancakes use low-fat milk (either 1% or 2% milk). I rarely use skim milk. If I’m going to opt out of all of the fat, I would rather use almond or coconut milk to add more flavor. My sweet potato and pumpkin is roasted and then packed in small containers so it thaws quickly when I need it. Despite the low-fat content in both recipes, they seemed to freeze, thaw and reheat well thanks to the moisture in the vegetable base.

Freezing the Right Way:

What I discovered with these tests was that wrapping makes a difference. The most successful tests included a small square of wax paper or parchment paper between each pancake to avoid having them stick together when they are freezing. Then the whole stack gets wrapped in wax paper. Next, wrap the stack in aluminum foil. I used both regular weight and heavy-duty. The regular weight works well except in the case of “recycled” foil. The “recycled” foil tore easily and left the pancakes open to freezer burn. Make sure to use some freezer tape to label and date your pancakes because the “sharpie” pen won’t be legible on the foil after a period of time. I normally only freeze these for a couple of weeks to a month. You can reuse the foil because it doesn’t touch the food and the wax paper can be used for reheating the pancakes to retain moisture.

Many of you may not use a microwave. To be honest, I am not convinced it’s a healthy choice but I use it for reheating many items because it’s fast. For frozen pancakes you need to thaw them in the refrigerator overnight and in the morning put them on a plate (preferably no more than 2 at time) and reheat them “gently” on a 50% setting for somewhere between 30 seconds and 1 minute. I always cover my food with wax paper to avoid splattering the microwave and to retain moisture, which is crucial for the pancakes. Overcooking will occur if you leave them  in too long or if you heat them on a high setting, so you’ll have to experiment with the timing. But the low heat setting helps you to reheat verses “cooking” them. It is also helpful to only cook your pancakes so they are “done” initially and not try to brown them too much as they lose moisture in the process of cooking them initially. They will not be as pretty, but they will taste better if you plan to use this method.

I think this is a great way to get your kids cooking and show them the benefits of planning out meals and using local fruits and dairy products that help them grow. It can also help make empty-nesting or taking care of an elder family member super-easy and special when you bring over a treat like home-made pancakes for them.

Here are the links for my Ricotta & Local Berry Pancakes http://bit.ly/eMzlX7 & Local Sweet Potato Pancakes with Carolina Pecans http://bit.ly/arN4th
Posted in General | Tagged , , , , , , , , , , , , , , , , , , , , , , , , , , , , , , , | Leave a comment

Hop Into the New Year with Chinese Almond Cookies

These cookies are kind of a twist between a peanut butter cookie and a butter pecan cookie. They have a delicate flavor and texture and they’re very easy to make. The unfortunate part is the amount of butter. The Chinese recipes call for lard which is much more common in their culture. There are some updated recipes with half butter and half lard, but I decided to go with an all-butter recipe because I don’t like using vegetable shortening.  I started with this recipe from Sunset  http://bit.ly/evUCvZ and based on a cooking blog out of Singapore http://bit.ly/hdOpqw I added a couple of things.

The ground almonds in the dough gives them a subtle flavor that is different from the recipes that use all almond extract. The almond butter was just something I wanted to try because I like peanut butter cookies and I thought it might be fun for folks that have peanut allergies to have a similar cookie. I backed down the amount of almond extract based on my testing and added the vanilla after reading the cooking blog from Singapore. Feel free to make changes to both as you desire for your taste.

Lastly on the issue of salted butter. It’s a huge baking deal to use unsalted butter. I run out of it often and end up substituting salted. In this recipe I used salted and adjust the recipe. If you use unsalted, taste the base butter and sugar mix before you add the egg and adjust your salt before you do anything else. It can be upwards of 1/4 – 1/2 teaspoon off depending on your brand. (Yes, sometimes I taste it once everything is finished just to make sure – but I don’t advocate that practice.) I think you could also cut back on the sugar by 2-4 tablespoons (which is 1/8 – 1/4 cup). But they are not overly sweet with this recipe.

Southern Style Chinese Sesame Cookies

Ingredients:

  • 1 cup organic salted butter, room temperature
  • 1 cup raw sugar
  • 1 egg
  • 1 teaspoon vanilla
  • 1/2 teaspoon almond extract
  • 1.15 oz sample package Justin’s Classic Almond Butter
  • 2 1/2 cups all-purpose unbleached flour
  • 1 teaspoon baking powder
  • 1/2 cup blanched almonds – finely chopped in food processor
  • 1/3 cup whole raw almonds
  • 1/4 cup sesame seeds
  • 1 beaten egg yolk
  • 1 tablespoon milk or water

Preparation:

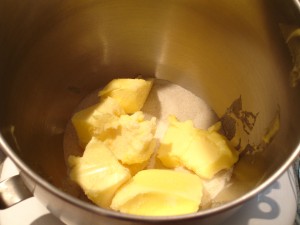
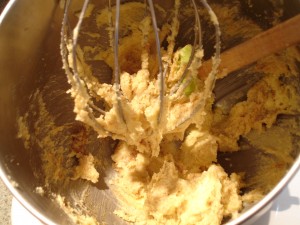
  • Cream the butter and sugar. It will probably not dissolve completely but don’t worry about it  (If you are using caster sugar/ superfine sugar, cut back the volume by 1/4 cup.)
  • Add the egg and blend in thoroughly. add the vanilla and almond extracts along with the almond butter.
  • Sift your flour and baking powder.
  • Add this in thirds to your egg and sugar mixture, blending completely each time.
  • Add in the finely chopped almonds at one time and blend.
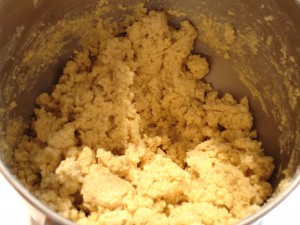
  • Wrap the dough in plastic wrap or put it into a sealed container with some wax paper covering the top of the dough so it doesn’t dry out. Put it in the refrigerator to let the butter set back up for about an hour.
  • Make up the egg wash from the egg yolk and milk/water and keep it cool.
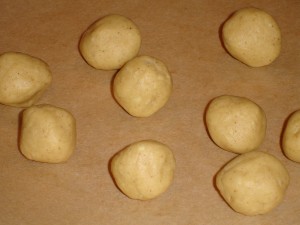
  • When you pull the dough out it will be very stiff and hard from the volume of butter. Use a spoon to pull off anywhere from 1-2 tablespoons of dough at a time and form even balls of the dough. I found it very useful to use vinyl gloves because of the amount of butter. You are trying to work quickly so the dough doesn’t warm up too much.
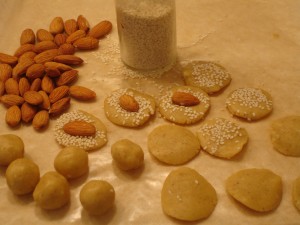
  • Gently flatten each ball to a small circle. Don’t make them too thick as these don’t really spread if you work quickly and the addition of the almonds in the dough keep them pretty stiff.
  • Using wax paper, spread the sesame seeds on the wax paper and press your cookies on one side only, into this mix to pick up the sees.
  • Place your cookies on a baking sheet covered with parchment paper. Lightly egg wash the tops and then press one of the whole almonds into the cookie. It will not seem to stick, but as the cookie cools after baking it stays in place.
  • Bake at 325F for 12-20 minutes. The cook time will depend on the size and thickness of your cookies. The bottoms should be starting to lightly brown. These cookies have very little egg in them so you are mainly cooking butter and flour and they will tend to be crispy rather than chewy. The egg wash will help them achieve a more lovely color. In these pictures I forgot the egg wash and they still turned out great. They will burn quickly if you cook them too long because of the amount of butter. Don’t try to brown them.
  • Cool on a rack and then place in airtight container for storage. I separate mine with layers of wax paper to keep the seeds and almonds in place.
Posted in General | Tagged , , , , , , , , , , , , , , , , , , , | Leave a comment