Easy Baked Eggs for Breakfast

This past week I decided to sample the Garden Bread from Abilicious Bakery for my weekly CSA at NoFo in Raleigh. It has an almost light and spongy texture out of the bag with great mixed flavors from the vegetables. It was wonderful with fresh goat cheese and just as delicious toasted with a bit of butter. So I decided to test it for a super-simple “on-the-go” breakfast. Most people are really busy in the morning and don’t want to cook, but they would love an egg for breakfast.

Hard-boiled eggs are a great option for busy folks but they still require some time (and skill) peeling the eggs. I was looking for an alternative that would hold up for a couple of days in the fridge and could be eaten straight from the fridge, at room temperature, or slightly warmed if you had some extra time. This is a really simple process of baking your eggs inside of a slice of bread. There’s nothing fancy to it. You can cook them less and leave the yolks a little more runny if you prefer to eat them with a fork or just cook them all the way through like I did and take them with you.

This is probably my favorite bread for this recipe at this point in time. The bread holds its color, texture and flavor all the way through the process. I was concerned about possible sticking at first because the bread wouldn’t really mold to the cupcake pan. But I buttered the pan and just fit the pieces in, making sure to cover all of the surface of the cup. The butter helped the bread brown lightly on the outside and kept the egg from sticking to the pan.

  • Butter your cupcake tin before you get started.
  • Cut your bread and fit it into the tin making sure to piece everything so it’s all covered.
  • Break your egg into the bread carefully without breaking the yolk.
  • Bake in pre-heated 350F toaster oven for 12-15 minutes depending on how cooked you like your yolk.

You can eat these immediately with some bacon and chives or hold them for later in the week.


Posted in Nut-Free, Recipes, Vegetarian | Tagged , , , , , , , , , , , , , , , , , , | Leave a comment

Spring Pea & Fresh Ricotta Cheese Puree

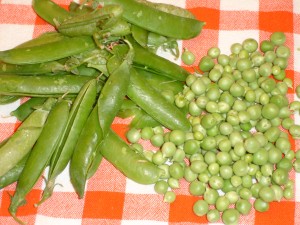
The color of this spread just screams SPRING! This was the first week of fresh pea pods at my local market. Generally they are hard to find because farmers don’t grow them much anymore. They’re not difficult, but consumers don’t enjoy shelling the pods and generally aren’t willing to pay farmers enough money to do it either. They take up a lot of shelf space in the produce section of a grocery store so they aren’t much liked by those folks either.  A conundrum for something so simple, delicious and healthy.

Peas are delightfully sweet when you first shell them and quite a few get eaten before they make it to the cooking stage. Their delicate color and flavor are a perfect match to some incredibly light ricotta that Hillsborough Cheese sent home with me last Saturday from Raleigh’s Midtown Market. It was available at the market loaded with garlic and chives and quite lovely on its own.

Get your spoons ready, because you might not be able to wait for any crackers or fancy bread slices. Let me forewarn you, the complex flavors you are going to taste in the local fresh ingredients are going to be so superior to anything you buy at the “grocery” store that it will make the trip to the market worth your time and effort.

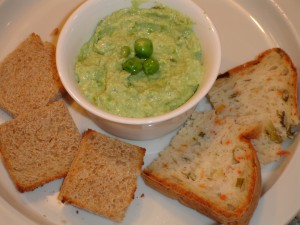
Shown above is the Goat’s Whey Bread from Prodigal Farm in Rougemont & Ablicious Bakery Gluten & Dairy Free Garden Loaf in Pittsboro. The peas came from New Grass Garden / NoFo Market in Raleigh, the ricotta was from Hillsborough Cheese Company.

Spring Pea & Fresh Ricotta Cheese Puree

Ingredients:

  • 4 oz farm fresh ricotta cheese (garlic & chives added if possible)
  • 1 cup shelled green peas
  • Murray River Flake Salt & Mixed Blend of Peppers

Preparation:

  • Cook the peas on medium heat with a lid in a non-stick pan for about 3 minutes with about 2 tablespoons of water and 1/2 teaspoon unsalted butter.
  • Put them in a small food processor along with the ricotta cheese and pulse this until it’s fairly smooth. Add in some fresh ground pepper and salt to your taste. I prefer the Murray River Flake salt in this case because it has a bright tone that I think enhances the sweetness of the peas and the freshness of the ricotta.

Notes:

  • Some recipes may call for you to use olive oil to thin the mixture. This will not be necessary if you are using local fresh ingredients. They are light enough without oil.
  • If you need to add garlic and chives to plain ricotta, be sparing with the garlic because it increases potency over time. Start out with 1/8 teaspoon. You can use roasted garlic which tends to be sweeter if you prefer. The chives need to be cut very small and it should only take about 1/4 teaspoon of fresh chives for a 4 oz container of ricotta.


Posted in Gluten-Free, Nut-Free, Recipes, Spring, Vegetarian | Tagged , , , , , , , , , , , , , , , , , , | Leave a comment

Grilling A Package of Chicken & Vegetables

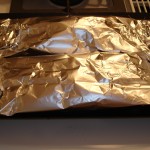
Warmer weather brings on time adjustments for everyone and sometimes it’s dinner time and you haven’t planned anything. Now you can pack & take a variety of meals with you!  Cook them on any grill, any time, any where!  Sounds like an ad right! Just follow a few safety guidelines when handling your raw food and you’ll be serving up healthy meals in no time.  But seriously, you can actually pack up your meal so it’s ready to throw on the grill at home or take it to the office, keep it chilled and cook it for a dinner at the local park.

We dehydrate some of our vegetables like summer squash and onions to have all year round, but it’s especially helpful when you are planning to cook out. The vegetables are light to carry and don’t require a knife to cut or clean up. You can pre-cut your meat and pre-pack your seasonings. The same goes for frozen roasted garlic and peppers. Pack them with your other items!


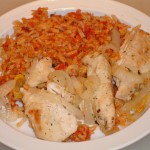
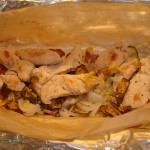
During the summer, I use fresh vegetables in this recipe like peppers, onions, summer squash, butter beans, and corn. You can use any chicken parts that you like for this. We’ve used this technique for all sorts of fish but I don’t find it works as well for red meat. You can cut up the chicken, ostrich or fish into smaller bites and put them into the packet, as I have here to mix up the protein flavor. You could use a variety of fish to make a sort of stew with some cherry tomatoes, onions and garlic thrown into the mix.

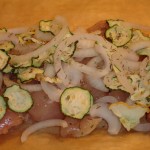
Basically you need to lightly season everything regardless of whether you cut it up or not. Put any dehydrated vegetables at the bottom of the pile with a couple of sprays of water. Put the chicken or fish on top. Any fresh vegetables should go on top to flavor the meat portion. It’s possible to add any spices and herbs that you enjoy like oregano, thyme, rosemary, garlic or a splash of lemon.


Cook this on your grill for about 10-13 minutes around 350F. I try to use indirect heat or set it on a grill tray to avoid burning. You can leave the tray in the grill if you like so it heats up before you put the cold chicken packets on it. Once you take the chicken off of the grill.


Let it remain covered, resting for about 3 minutes depending on your protein. Your protein should have some browning but still remain moist and tender using the method. Serve with rice or noodles if you like.

Posted in Chicken, Dairy-Free, Gluten-Free, Nut-Free, Recipes | Tagged , , , , , , , , , , , , , , | Leave a comment

Seasonal Quiche


4BD7E397-8CF6-45C9-9304-646FB92EAA03

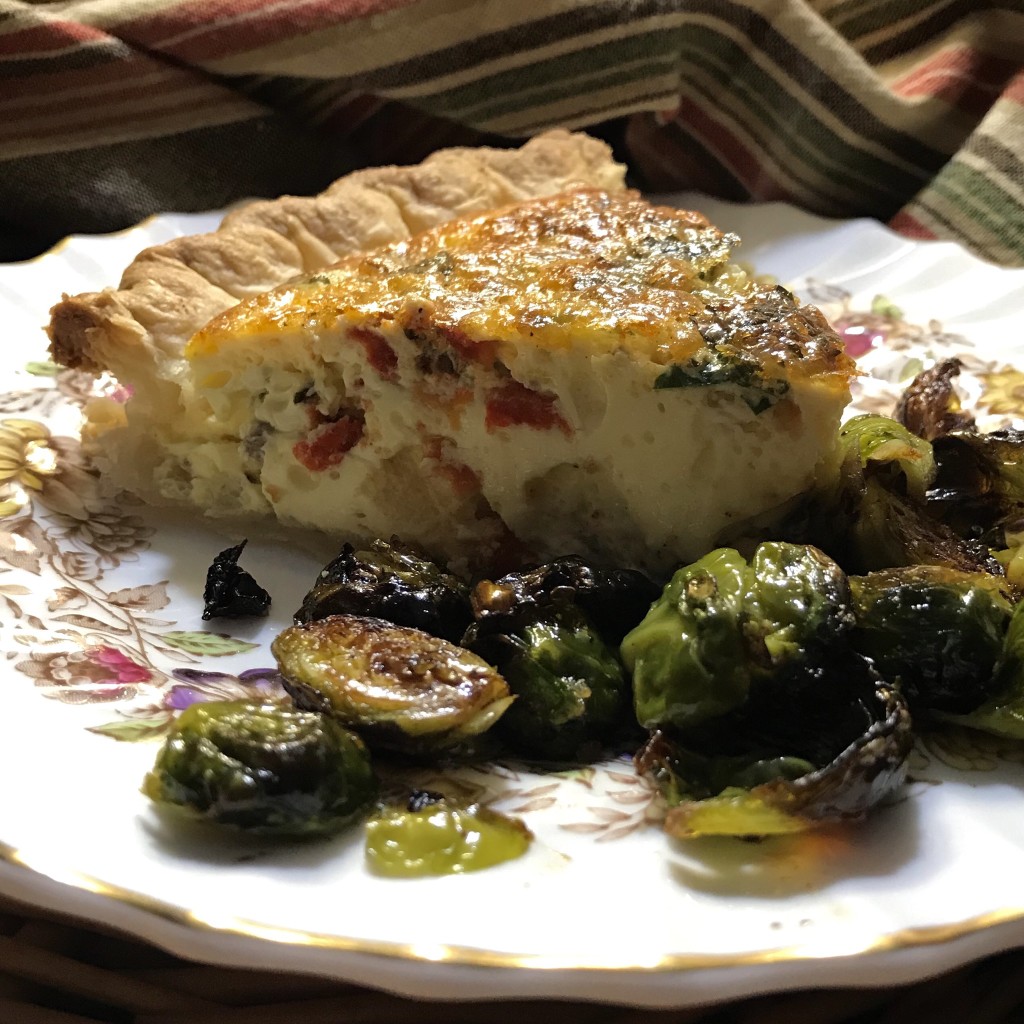
Quiche is one of those foods that most people think is difficult to cook. Over the last 30 years I developed a recipe that is simple, healthy and loaded with locally grown foods from your neighborhood farmers’ market.  If you are fortunate to be able to get goat, sheep or  cow cheese, then you will have endless possible combinations. I’ll give you some alternative suggestions in the note section at the end. The only thing that I would caution you about is the size of your eggs. If you get your eggs  from the farmers market or a neighbor, or even your back yard, they will be ungraded in size.  You will need to adjust the number of eggs depending on the size. This recipe calls for 6 chicken eggs of the medium to large size. If you are using duck eggs, they are larger. If you are using pullet eggs then they will be smaller.

I also prefer whole organic milk. I used to use low-fat milk, but switched a number of years ago to full-fat products for all dairy. I just find that I feel full faster and tend to eat less. If you happen to have a bit of cream or heavy cream sitting in the fridge you can substitute some of that for the whole milk as well. I find that there’s always that little bit that is just going to go to waste. This is a great recipe to use it up.

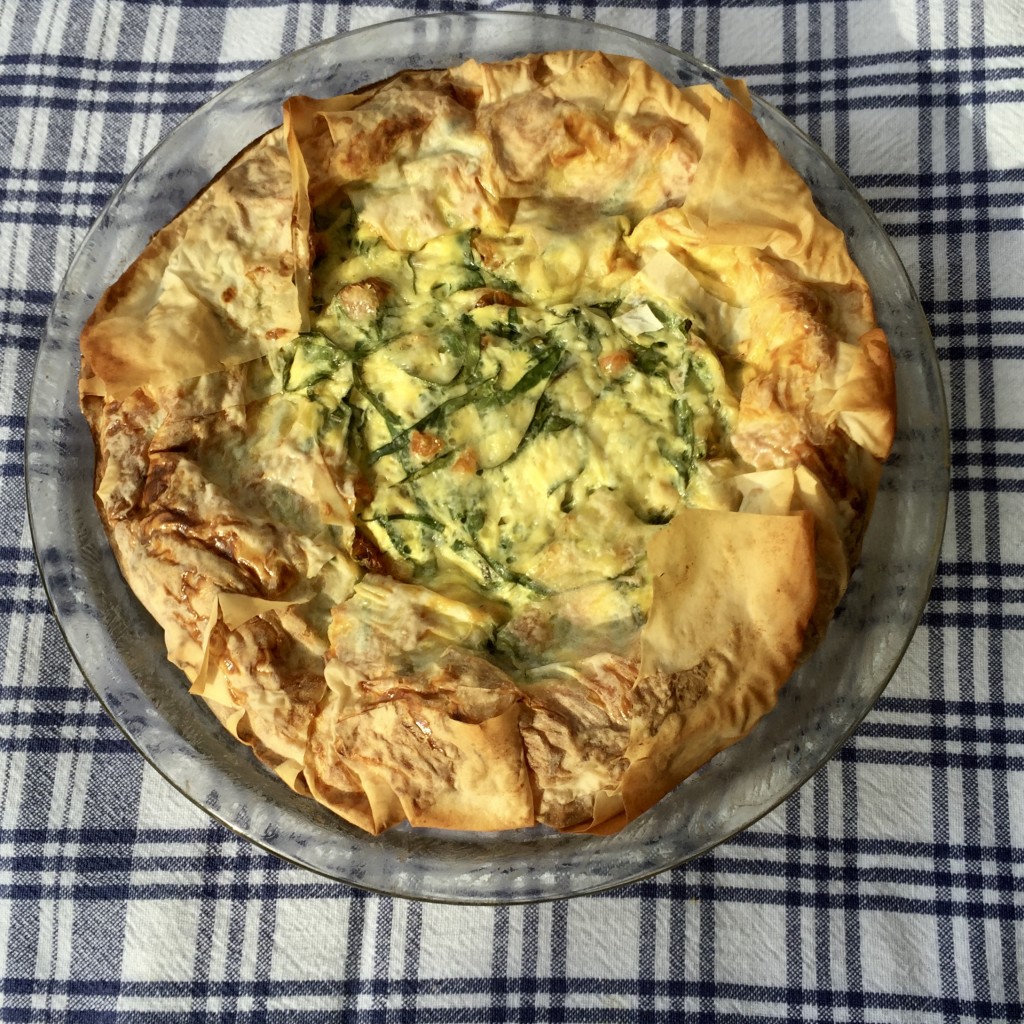
Lastly, there’s the pie shell. Pie shells are pretty simple, but the fact is that few people have time to make one from scratch and there are some excellent alternatives available. Every pie shell browns up differently depending on what’s in it. A while back there was a baker making spelt pie crusts that we’re amazing. They have since stopped baking commercially.  I’ve also occasionally used some leftover phyllo sheets. More recently I’ve also been able to buy pie crusts from a local baker and do a small pre-bake on the shell before filling it. So it turns out perfectly crisp all the way through without burning and it’s much better than I can make on my own.

A few combinations through the seasons to get your imagination going….

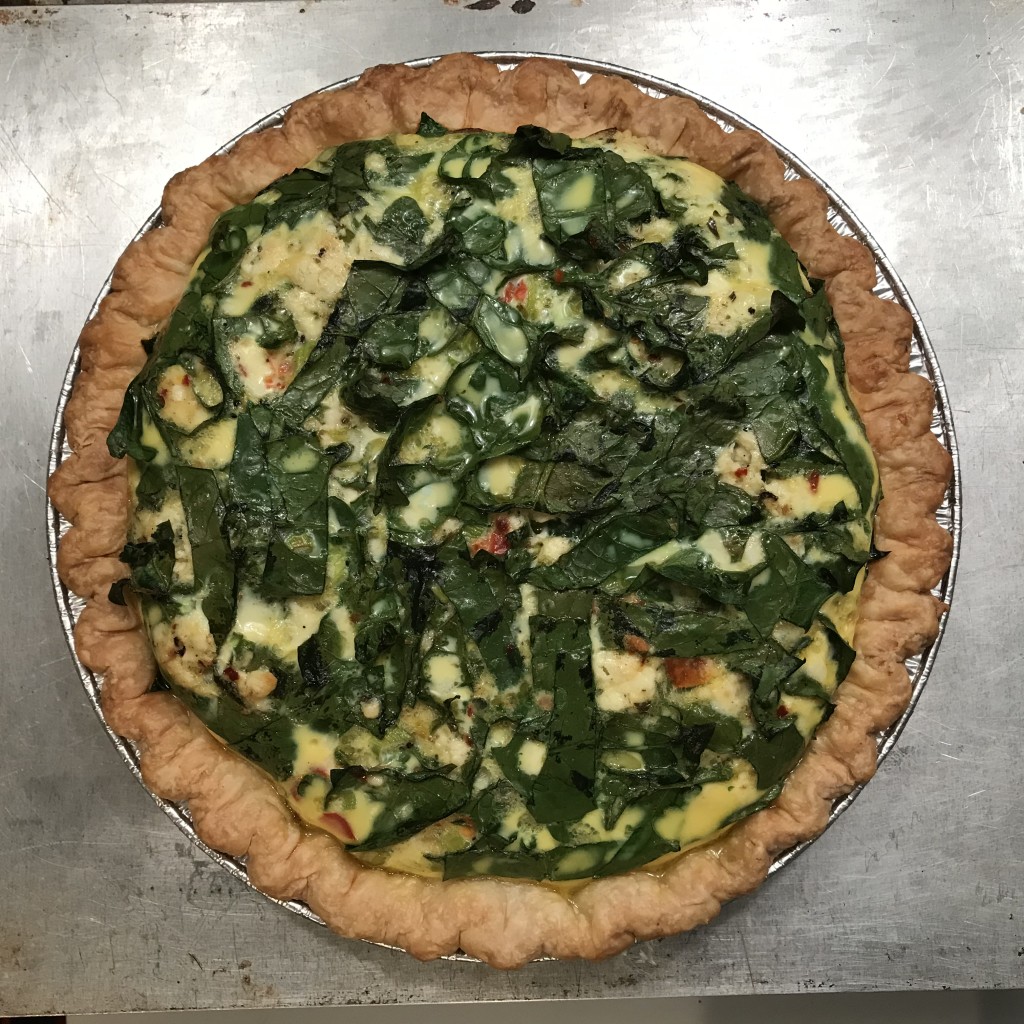
Winter spinach, red pepper & feta marinated in olive oil with spices & hot peppers

6A363D4E-384F-4AEA-AD38-528C20C604AD

Fall broccoli and ham made into individual servings

4DC01326-1C77-491C-B786-1732C1C38275

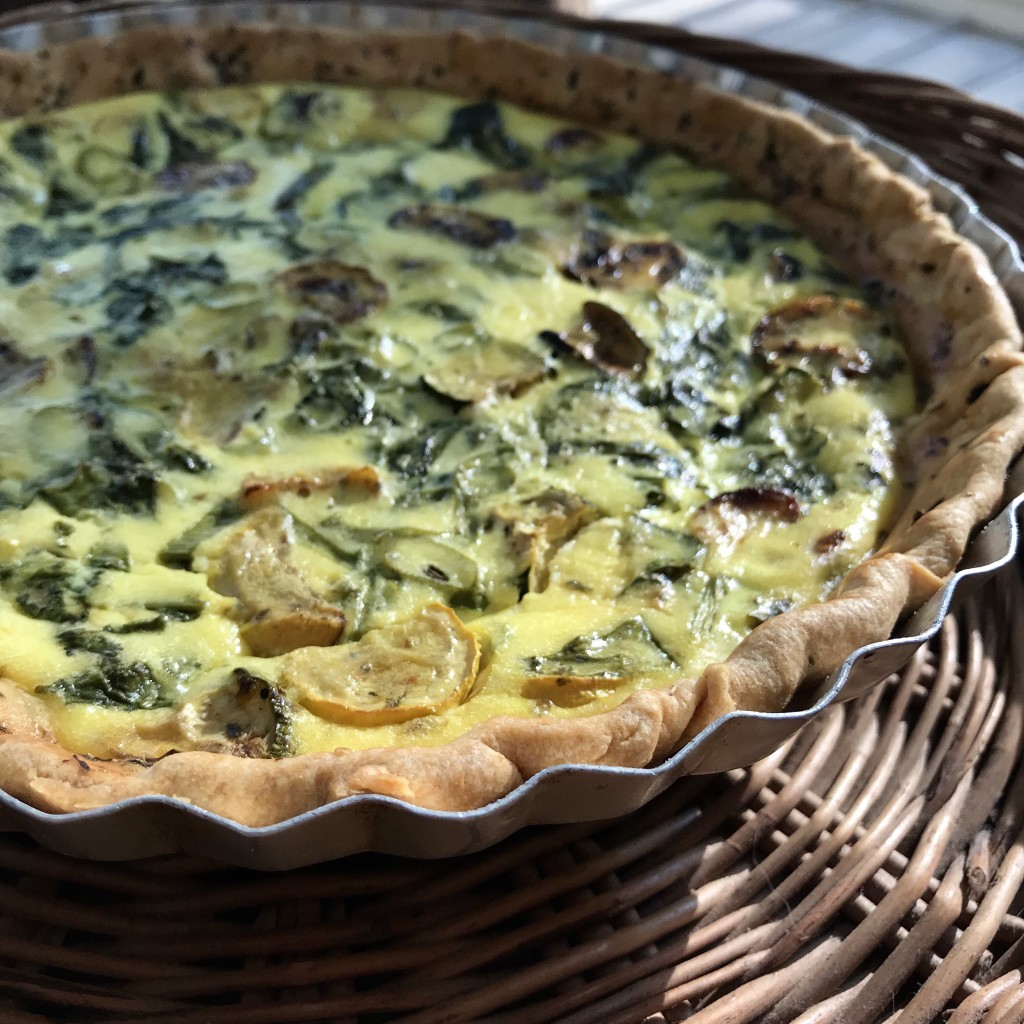
Summer squash & green zucchini with a few greens

12D3BAC0-B634-4F33-A039-5A59ED13BDE0

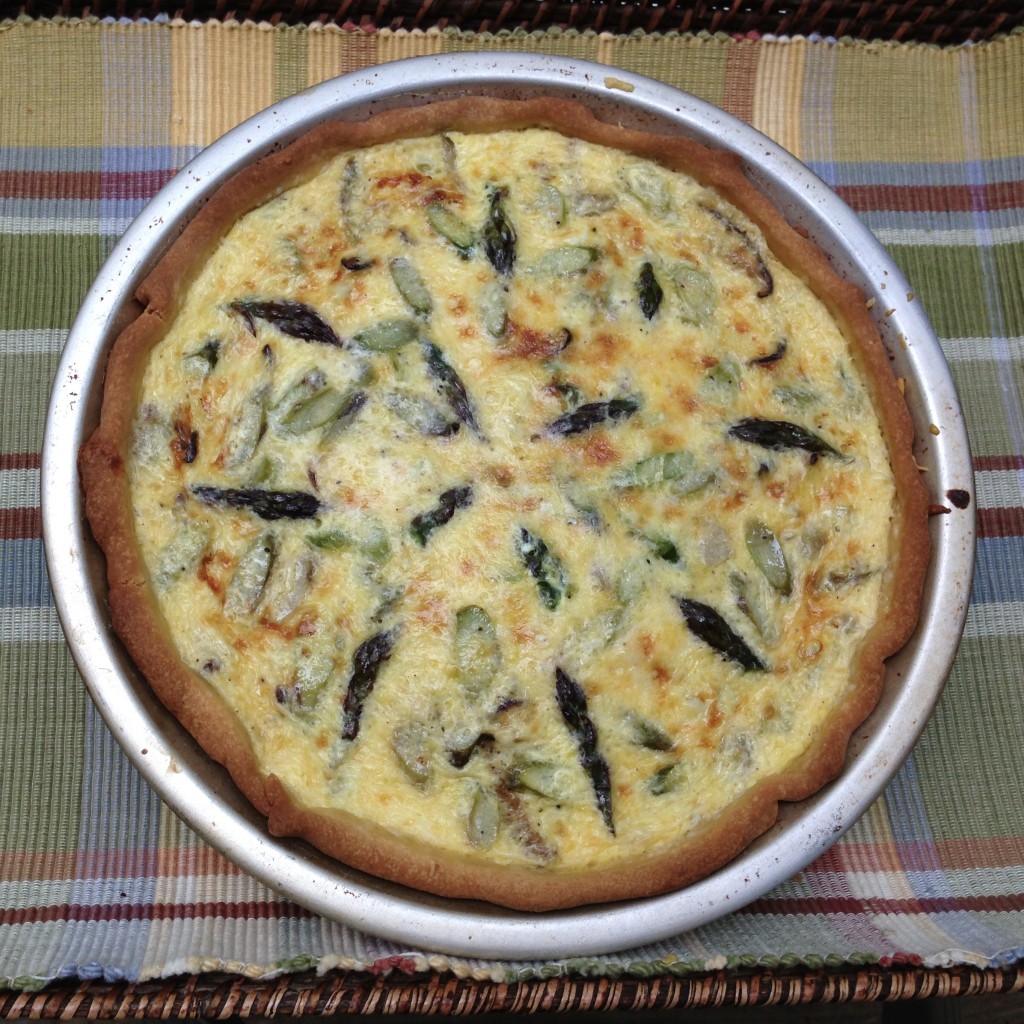
Spring asparagus and green onion or green garlic8C06BB9F-F112-4F43-A18F-23D2E8B4C5FF
And one made with phyllo sheets

2C3AB131-941A-46E5-A955-3F70E8C3B233

Seasonal Quiche

Ingredients:

  • 1 Pie Crust
  • 6 large eggs (or 8 small pullet eggs)
  • 1 1/4 cups whole fat milk
  • 1/2 teaspoon salt (eliminate if using salty ingredients like feta or bacon)
  • 1/4 teaspoon fresh ground pepper
  • 1/4 cup green onions, chopped
  • (OR 1/8 cup caramelized onions)
  • 1/4 to 1/2 cup chopped ham, cooked bacon, sausage or cooked mushrooms (see recipe for shiitake mushrooms)
  • (AND/ OR 2 cups fresh rough chopped spinach & 1/4 cup chopped roasted sweet peppers)
  • 3/4 cup grated Calvander / Asiago cheese /Chapel Hill Creamery
  • (OR 1/2 to 3/4 cup feta that’s been marinated in olive oil, italian seasoning & red pepper flakes)

Preparation:

  • Roll out the pie shell when it is at room temperature on a piece of wax paper. Dust both sides with cornflour or unbleached flour and roll it slightly thinner with your rolling-pin. Place it into a clear glass or aluminum pie pan. Let it rest in the refrigerator for an hour.
  • At this point you can choose to pre-bake your pie shell a bit. I have started to bake it at 350F for about 20-25 minutes using parchment paper to cover all of it along with pie weights to hold the bottom in place. Then I let that cool just a little bit before filling and continuing to bake.
  • While that pie shell is pre-baking, pull out your ingredients so they come to room temperature. That will allow everything to bake more evenly from the center to the outside shell.
  • Arrange a layer of the vegetables and meat in the bottom of the pie crust after it’s cooled just a couple of minutes so you don’t damage the bottom of the pie shell.
  • Add  your choice of cheese(s) on top of the veggies and meat.
  • Repeat another layer of veggies, meat and cheese.
  • Mix the eggs, milk, salt and pepper together. Gently pour over everything to cover.
  • Bake at 375F for about 20 minutes and as the crust begins to brown, keep an eye on it.
  • Place a cover over the pie crust edges (or a piece of parchment covering the entire pie) as it gets close to the golden-brown color you want and continue to cook about 10-15 more minutes.  As it finishes, it will appear to puff up in the center and it’s finished at that point. Don’t let it stay in longer or it will overcook and be dry as it cools. It will settle as it cools.
  • Let cool about 5 minutes before cutting and serving. And that should give you plenty of time to snap some nice photos and send them to all of your friends. 😉

Notes

You can make individual quiche using a muffin tin. Just half this recipe for the egg and fillings and use one pie crust to make about 8-10 small pie shells fitted. Don’t bring the pie crust up too much over the top because it will burn easily. And try to bring your egg and fillings to room temperature so they aren’t so cold when you put this into the oven.


Posted in Egg, Nut-Free, Recipes, Seasonal Eating, Second Harvest, Year-Round | Tagged , , , , , , , , , , , , , , , , , , , , , , , | Leave a comment

Spicy Peanut Soup

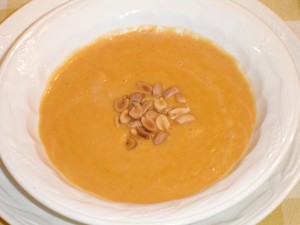
We’ve had some crazy temperature swings this spring and it’s hard to plan meals around this sort of weather, so I rely on some standbys that you can make and freeze or make from pre-cooked, frozen items. In this case I’ve made a Spicy Peanut Soup from frozen ingredients but typically I make this in large batches during the fall  when the sweet potatoes come into season and freeze it in smaller portions. There are many recipes available on the web. Most are pretty similar to the one I’ll give you here. Some use less sweet potato and rely on chickpeas as a thickening agent; some serve this soup over rice. I prefer it the creamy texture on it’s own without rice or chickpeas. Adjust the heat to suit your own taste. I also recommend using a non-hydrogenated, organic peanut butter because they’ve had fewer problems with recalls over the years.

The sweet potatoes were baked in foil and mashed (plain) before they were frozen. The onions and carrots were both chopped and roasted in olive oil. The tomato juice is the leftover from roasting tomatoes for sauce. I simply pour it off and freeze it separately. You can use vegetable or chicken stock in this soup. Both work equally well. In this case, I used chicken stock. I make stock in a pressure cooker so it doesn’t take quite so long. The picture of the veggies and stock is not beautiful, but the simplicity of throwing the ingredients into a Dutch oven and cooking it for under 30 minutes make up for it. This recipe is also great frozen without the hot spices and salt which you can add later depending on who you are serving and their health needs.

Spicy Peanut Soup

Ingredients:

  • 2 cups raw sliced sweet onions
  • 1/2 teaspoon cayenne pepper
  • 1-2 teaspoon grated fresh ginger root
  • 1 cup chopped carrots
  • 2 cups chopped sweet potato (1″ cubes)
  • 4 cups vegetable or chicken stock
  • 2 cups tomato juice (no-salt)
  • 1 cup smooth peanut butter (non-hydrogenated)
  • 1/2-1 teaspoon salt (depends on salt from other ingredients)

Preparation:

  • Saute the onions in olive oil until just translucent. Stir in the cayenne and ginger root. Add the carrots and saute about 5 minutes to achieve some color.
  • Mix in the chopped sweet potato and the stock. Bring the soup to a boil and turn down to simmer for about 15 minutes until your vegetables are all tender.
  • Puree the vegetables and stock along with the tomato juice.
  • Return to the pot and stir in your peanut butter. Blend until smooth.
  • Adjust your seasonings. You need a balance of sweet to hot. Depending on how long you have had your sweet potatoes you may need to add up to 2 teaspoons of sugar to bring the sweet into proportion to the spice. Sweet potatoes get sweeter as they cure so later in the season they will have developed more flavor.

Notes:

I have worked with several additional spices to this recipe over the years. In addition to the cayenne peppers, I’ve added aleppo peppers and mild chimayo chile powder. Both are on the low end of the heat scale but offer some fruity heat and undertones. Just start with 1/4-1/2 teaspoon of each. I have also used pickled ginger when I have run out of ginger root. It works well but doesn’t have quite the fresh bite of the raw ginger root. Some recipes also call for cumin and chickpeas. I have used both but I prefer it without the chickpeas. While the chickpeas add nutritional value, they seem to distract from the sweet potato, in my opinion.


Posted in Dairy-Free, Fall, Gluten-Free, Recipes, Vegetarian, Winter | Tagged , , , , , , , , , , , , , , , , , | Leave a comment

Sweet Potato Casserole with Spicy Pecans

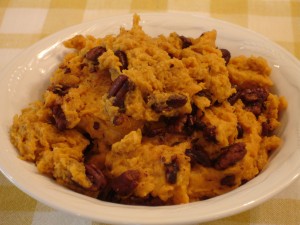
I’ve been developing a simple sweet potato casserole recipe that is light and fluffy minus the marshmallow and sugar. I really enjoy sweet potatoes best when they come out of the oven with a pat of butter, salt & fresh pepper. But when company is coming, this recipe is easy and flavorful and it can be put together ahead of time and baked when you need it.  Keep in mind that I bake and freeze a lot of sweet potato in the fall which makes this pretty quick to throw together in the winter and spring. I have not tried to make this with whole or low-fat milk yet.  This makes enough for 4 small side servings.

(The nuts are adapted from Sarah Foster’s “Fresh Every Day” recipe)

Sweet Potato Casserole with Spicy Pecan Topping

Ingredients for Spicy Pecans:

  • 1 tablespoon vanilla extract
  • 1 teaspoon olive oil
  • 1 teaspoon fresh rosemary, finely chopped
  • 1/4 teaspoon ground cinnamon
  • 1/8-1/4 teaspoon sea salt
  • 1/8 teaspoon cayenne pepper
  • pinch fresh ground pepper
  • 1/2 cup pecan halves

Preparation of Spicy Pecans:

  • Blend the extract, oil, herbs and spices in a bowl.
  • Add the pecans and coat.
  • Spread pecans on baking sheet with parchment paper & bake for 15 minutes at 350F.

Ingredients for Casserole:

  • 2 cups baked sweet potato, mashed
  • 1 tablespoon unsalted butter, melted
  • 1 egg, beaten
  • 1/2 teaspoon salt
  • 1/4 teaspoon powdered ginger
  • 1/4 teaspoon pumpkin pie spice
  • 1 teaspoon maple syrup
  • 1/3 cup half/half or whipping cream
  • 1/2 cup Sara Foster’s Spicy Pecans

Preparation of the Casserole:

  • Beat the all of the ingredients together except the pecans on high for about 2 minutes to add some air to the mixture.
  • Then you can decide to either blend the pecans into the mix before baking in a small 4″ x 8″ pan, or you can sprinkle them on top.
  • Cover the casserole with foil and bake for 30 minutes at 375F.

Notes: I use an infused Ginger Maple Syrup from Moosewood Hollow and I reduce the powdered ginger down to 1/4 teaspoon.


Posted in Fall, Gluten-Free, Recipes, Vegetarian, Winter | Tagged , , , , , , , , , , , , , , | Leave a comment

Farmers’ Market Couscous Salad for all Seasons

The markets are beginning to shift this weekend from winter to spring hours and the Piedmont Farm Tour on April 16 & 17th gives us all an opportunity to learn more about regional agriculture.

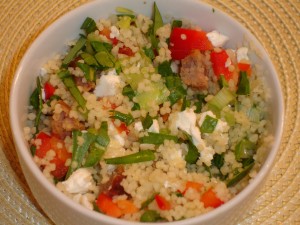
There was  just a bit of the Jalapeno sausage left from Coon Rock and the early spring goat cheese from Hillsborough Cheese Company left after the Western Wake Farmers’ Market last week. So I made a very simple salad that works well in any season with some simple ingredient changes.
In the spring & summer I enjoy the crunch of the fresh vegetables mixed with mild plain chevre and jalapeno sausage. In the winter, I prefer to use roasted peppers with marinated goat feta, more spicy sausage, sweet caramelized onions and less tangy roasted garlic. Both salads pair well with either chilled or warm soups. The recipe is for 4 servings.


Chevre Couscous Salad

Ingredients for Spring & Summer:

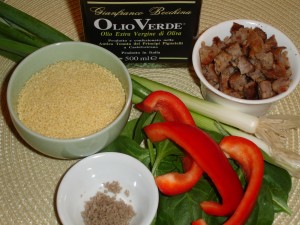
  • 1 cup raw couscous
  • 1 1/4 cups water or chicken broth
  • 2 tablespoons olive oil
  • 2 green onions or baby leeks
  • 1/3 cup fresh sweet red pepper
  • 1/2-3/4 cup Jalapeno sausage
  • Small handful of baby spinach
  • 1/2 cup fresh mild goat cheese
  • 1/4-1/2 clove fresh garlic
  • Himalayan or Oak Barrel Smoked Salt
  • Fresh chives if you have them

Ingredients for Fall & Winter:

  • 1 cup raw couscous
  • 1 1/4 cups vegetable or chicken broth
  • 2 tablespoons olive oil
  • 1/3 cup caramelized sweet onions
  • 1/3 cup roasted sweet red pepper
  • 1/2 cup mixed spice sausage
  • 2 tablespoons steamed spinach
  • 1/3 cup feta marinated in herbs
  • 1/2-1 whole roasted garlic clove
  • Oak Barrel Smoked Salt
  • Fresh chives if you have them

Preparation:

  • Cook the couscous in the water / broth with 1 tablespoon oil as directed.
  • Chop your spinach, onions, red pepper chives and garlic.
  • Break up your cheese and sausage.
  • Mix everything up very gently with another tablespoon of olive oil so your colors and textures stay intact.

Notes:

  • The spring/summer salad is best served at room temperature. The fall/winter salad is good at room temperature or just a warmed a bit.
  • The flavors in the fall/winter salad are stronger so you will can adjust your amounts depending on how much you enjoy one flavor over another.
  • The Alderwood smoked salt is very subtle, but salty, so go lightly when you first start adding it.
  • 4/30/11 – At the Western Wake Farmers’ Market I made this with steamed shredded carrots and finely chopped steamed broccoli along with green onions, chives, green garlic and chevre. I eliminated the red pepper,  spinach and sausage but you could easily serve this over chopped fresh spinach and add a very light dressing.


Posted in Fall, Nut-Free, Recipes, Spring, Summer, Winter | Tagged , , , , , , , , , , , , , , , , , , , , | Leave a comment

Omelettes at the Farmers’ Market

I was going to start by linking to a list of omelette making tips because I thought there would be a standard set of instructions if you are just starting out. Well was I ever wrong! Everyone has an opinion on this topic!

The method I use is one I learned from the NC Egg Association way back when. It’s pretty simple so I’ll pass it on. Feel free to try it or stick to your own method. This seems to be foolproof for me and it’s the method I teach kids who are just beginning to cook.  They get a huge sense of accomplishment when they master this beautiful egg dish.
This process is more about patience and using a lower heat than anything else. We’re not in a restaurant where speed is key. Take your time and get comfortable with the steps and then you can turn the heat up just a little. Cooking eggs with high heat can make them tough and unevenly cooked which isn’t good for omelette making.

[print_this]

Beginners’ Omelette

Ingredients:

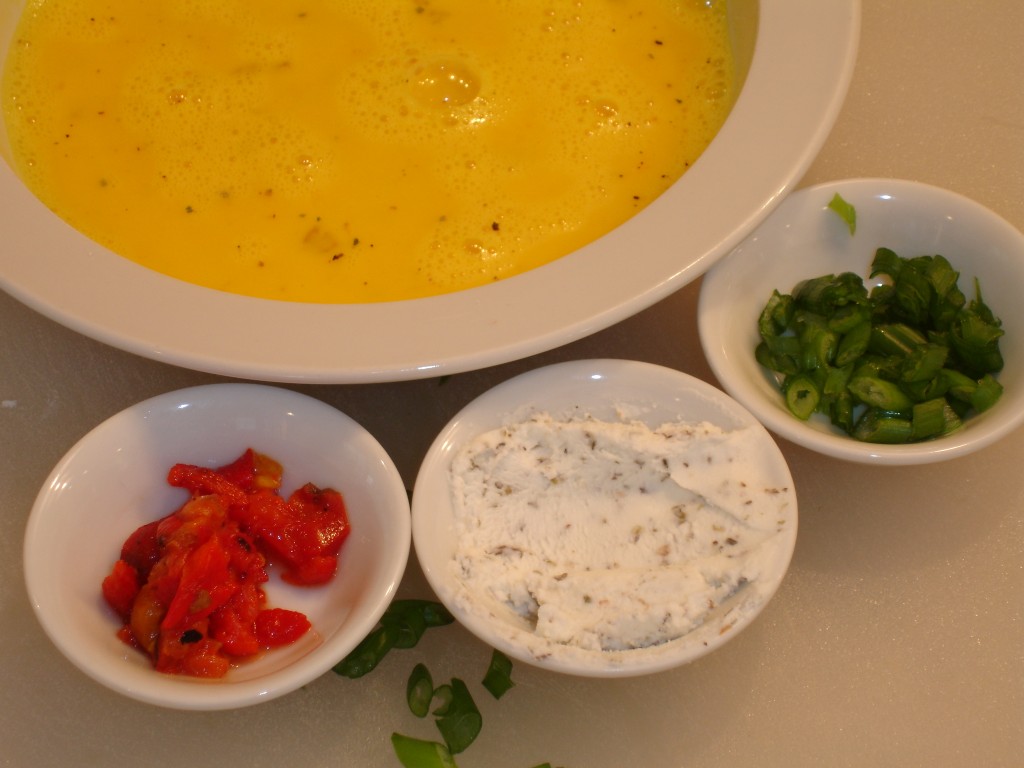
  • 2 eggs, lightly beaten with 2 tablespoons water
  • Pinch of pepper & salt.
  • 1 tablespoon each of  chopped meat or meat substitute
  • 1 tablespoon fresh farmstead cheese like chevre
  • 1 tablespoon each of a couple of different vegetables: my favorites include roasted or raw red pepper, green onions or baby leeks, fresh spinach
  • 1/2 teaspoon fresh chives, chopped

Preparation:

  • Heat a non-stick 8″ pan on medium/low heat and add a bit of olive oil or butter to the pan before filling it with the eggs.
  • Pour the eggs into the oiled/buttered pan and spread them around by moving the pan to swirl the eggs to cover the bottom of the pan but not up the sides.
  • Put the pan on the burner on medium/low heat to cook the eggs slowly and using a heat-proof spatula, pull the cooked part of the egg into the center of the pan and swirl the pan to let the remaining liquid eggs fill in the gap. You will do this all the way around the pan one time and by the time you are finished you should be just about ready to add your meat, cheese and vegetables.
  • Sprinkle the additional ingredients on top of the egg when it is almost cooked all the way through.
  • Let the cheese melt a little. Then use your spatula to make sure you don’t have sticking spots under the half of the egg you are going to flip. Gently put your spatula under the egg and quickly flip half over half.
  • Plate it up and sprinkle some cut chives from my garden on the top of the omelette just before serving. You can add them to the inside just as easily.

Notes:

  • An Italian Black Truffle Sea Salt mixed into the chevre is very good. Be sparing.
  • During the summer, I mix fresh herbs like thyme and rosemary into the chevre.

[/print_this]


Posted in Egg, Gluten-Free, Nut-Free, Recipes, Vegetarian | Tagged , , , , , , , , , , , , , , , , , , , , , , , , , | 1 Comment

Fresh Berry Topping From Last Summer’s Harvest

Continue reading

Posted in Dessert, General, Nut-Free, Summer | Tagged , , , , , , , , , , , , , , , , , , , , | Leave a comment

Shepherd’s Pie by the Numbers

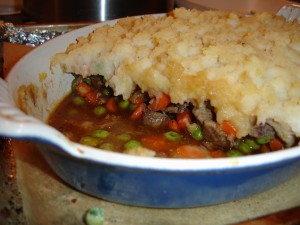
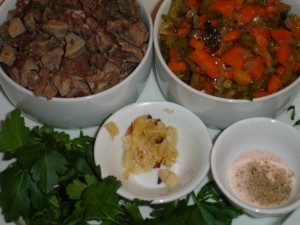
Shepherd’s Pie is pretty simple to make in a single dish if you put things in the freezer in bulk. During the spring I roast heirloom carrots, celery and onions in olive oil and then freeze them in smaller portions. Freshly processed meat is almost always available at the market, so I frequently cook up some portion of what I buy (this includes sausage, hamburger and stew beef) in large amounts and then freeze it too. The broth is made up in larger batches because it takes an afternoon.

This accomplishes three things. First, I’m using the freshest ingredients and preserving their flavor and nutrients. Second and more importantly, when I’m busy, I’m prepared to make a balanced and healthy meal in a fraction of the time it would normally take.  Third,  it’s an opportunity to teach the kids how to “assemble/cook” many meals without them being quickly bored.

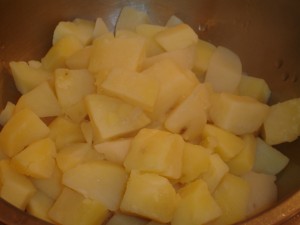
This recipe is all about ratios. 1 1/2 cup of meat, 2 cups of broth, 3 cups of vegetables (2 cups of mixed celery, onion, carrots and 1 cup of frozen baby green peas, 4 cups of mashed potatoes (about 4 medium potatoes). With everything in the freezer, it’s really a matter of pulling it all out a day ahead of time and then assembling and cooking this recipe the next day. This pie serves about 4 hungry people; more if you add some side dishes.

Shepherd’s Pie

Ingredients:

  • 1 1/2 cups of chopped lamb or beef stew meat. (1/2″ cubes or smaller)
  • 2 cups beef broth
  • 2 cups of mixed onion, celery and carrots chopped
  • 1 cup frozen baby green peas, thawed
  • 4 medium sized medium starch potato
  • 1 clove roasted garlic, minced
  • 1/2 cup fresh chopped flat leaf parsley
  • 2 teaspoons cornstarch or arrowroot
  • salt & pepper to taste

Preparation:

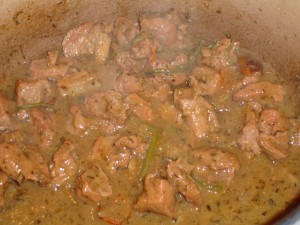
  • Cook your meat. This will take a while if you are using stew meat because you want to have it tender. Chop it into pieces that are no more than 1″ square. Cook it slowly with a little oil to start, adding whatever herbs you prefer like thyme and rosemary along with a bit of water just to cover it. As it cooks keep adding a bit of water so that it doesn’t burn but just simmers slowly. It will take about an hour to get it really fork tender. If you want to deglaze the pan at the end use a little bit of red wine but I’ve found it’s not really necessary. If you use a shallow and wide Dutch oven casserole with a lid you can just cook the whole pie in it.
  • If you decide to use ground meat, please make sure to drain your meat of grease before adding it to the pie. And wipe the pan dry from the grease if you are using the same casserole dish.
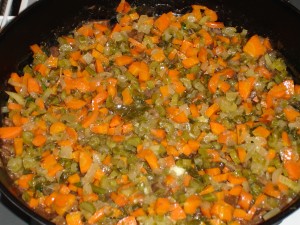
  • Saute your vegetables in a bit of olive oil starting with the celery which will take the longest. As it begins to soften, add your chopped onion. You want both of these nearly cooked all the way through so that they are more incorporated into your broth. Add the carrots once your celery and onions are translucent and cook these just until they are beginning to soften. They will finish cooking in the pie. Add the thawed peas but don’t pre-cook them. Set the entire mixture aside.
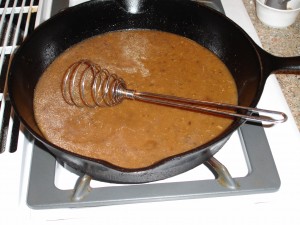
  • Add your cornstarch or arrowroot to the cold broth and blend well before adding this to a pan and heating. That will help eliminate lumps. I also prefer to use a gravy whisk which helps blend the sauce better. Once you have the broth mixture in the pan, bring it up to a rolling simmer/boil and keep it there a couple of minutes to activate your thickening agent. Add your roasted garlic and then reduce the heat and stir constantly until you have a medium thick broth base which should take less than 5 minutes. You don’t want this as thick as gravy because it will stick to the bottom and it won’t incorporate into the other ingredients as well. Turn off the heat.
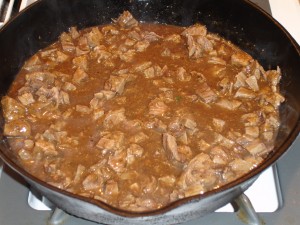
  • To the thickened broth add the meat, vegetables and fresh parsley. Blend well. and put into the bottom of your baking casserole. Taste the base and add your salt and pepper at this point. Adding it last allows you to keep track of it if you have dietary restrictions and you can use different types of salt to alter the flavor. (Use finely ground salt, because we are basically finished “cooking” at this point). If you’ve been working in the dish you plan to bake in, you’re all set for the next step.
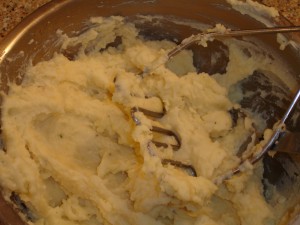
  • Your mashed potatoes should be seasoned to your taste and not rely on the seasonings in the meat & vegetable portion of the pie.  So you can add your salt & pepper along with butter, milk and any other ingredients you like at this point. Spread your mashed potatoes over the entire top of the pie evenly.
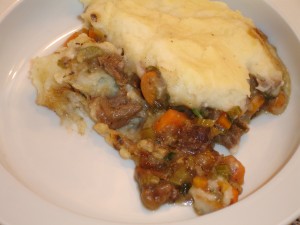
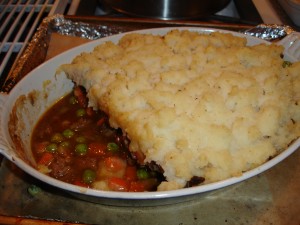
  • Bake the dish at 350 for 30 min to 1 hour depending on whether your ingredients were hot or cold when you started the assembly. You will be cooking this until you see the gravy bubble up into the edges of the mashed potatoes. Let that occur for about 15 minutes. You are not trying to brown the potatoes (that requires the broiler and they get dry). You are just heating everything all the way through so your potatoes will be moist and you will still have a bit of gravy in the bottom to mix well with them.

Notes:

  • Ground meat works just as well as stew meat. And it can be pre-cooked as well.
  • Leftover meat from roasts or leg of lamb work well.
  • You can add 1/4 cup of low-fat ricotta cheese to your mashed potatoes.
  • You can change the base flavor of the meat & vegetables by adding smoked salt.
Posted in Beef, Dairy-Free, Gluten-Free, Nut-Free, Recipes, Year-Round | Tagged , , , , , , , , , , , , , , , , | Leave a comment