Zucchini & Carrot Cake or Bread


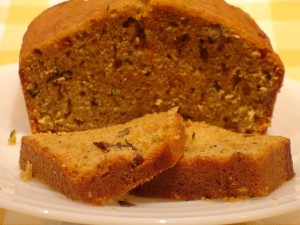
This past week the lovely little green zucchini showed up at the market. Now I love these guys sliced in ribbons, lightly grilled and then served with pine nuts and fresh cheese, but we’ll talk about that later this week… In the meantime, I am trying desperately to clean out the freezer from the fall and incorporate fresh items to demonstrate the versatility of these vegetables.


The carrots I used in this cake were grated and lightly steamed before I put them in a small container and froze them. It’s a great way to keep their beautiful color and texture and you can add them into raw salads or into baked goods quite easily. It can also save you some money, buying up extra carrots from your local vendor in the fall when the farmers’ markets are getting ready to close and the carrots are ready for harvesting.


I’ve had some great success with zucchini olive oil cakes and I thought that the carrots would be a compliment to them so I went hunting on the web and apparently, it’s not a new idea. I found several recipes, mostly laden with butter or olive oil and various spices that I wasn’t sure I would like and didn’t have time to test so I just “edited” and combined a few that were similar.

This came together with minimal effort and it’s something I’ll make again. There’s enough for 2 large loaves or 2 cakes – or one of each. I used a (8.5″ x 6.5″) cake pan that fits into my toaster oven and a regular bread pan (9″ x 5″). Both did equally well. Pull the cake pan at least 10 minutes earlier than the bread pan.


Zucchini & Carrot Cake / Bread

Ingredients

  • 3 large eggs at room temperature
  • 2 cups organic cane sugar
  • 1 cup (liquid) coconut oil
  • 2 cups grated raw green zucchini (large grate)
  • 1 cup grated carrot (large grate)
  • 1 tablespoon real vanilla extract
  • 2 cups all-purpose flour
  • 1 cup white/wheat flour
  • 1 teaspoon fine Himalayan salt
  • 3/4 teaspoon baking soda
  • 1 teaspoon baking powder
  • 1/2 teaspoon ground cloves
  • 1/2 teaspoon ground nutmeg
  • 1 1/2 teaspoons ground cinnamon
  • 2 cups coarsely chopped toasted pecans or walnuts

Preparation

  • Preheat the to 350F.
  • Butter (unsalted or salted for this one)  and flour your pans.
  • In a large bowl sift together both flours, salt, baking powder, baking soda, cloves, nutmeg and cinnamon. Set aside
  • In a mixer, beat your eggs until they are light and fluffy.
  • Add the sugar to the eggs and beat again until fluffy.
  • Continue beating on low speed and add the coconut oil and vanilla extract to the eggs and sugar.  Incorporate well.
  • On low speed, add the grated zucchini and carrot.
  • Beating at a low speed, quickly add in the dry ingredients and stop beating when they are just incorporated.
  • Hand blend the nuts of your choice to the batter. You can separate the batter and add different nuts.
  • Bake the cake for about 40-50 minutes. It will rise quickly and brown lightly.
  • Bake the loaf pan for 50-60 minutes. It rises more slowly in the middle but bakes all the way through by the end.


Posted in Dairy-Free, Dessert, Recipes, Summer | Tagged , , , , , , , , , , , , , , | Leave a comment

Roasted Beet & Chocolate Bundt Cake

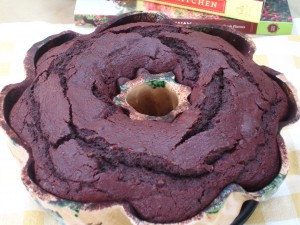
It’s beet season again, but I still have roasted beets in my freezer from the fall that need to be used. A few of the vendors at different farmers’ markets have had beet cakes that used raw beets, so I figured I might try to use the roasted beets as a substitute. I found several recipes on the web and after making some adjustments I served this cake at NoFo last Friday and again on Saturday at the Five Points Sidewalk Sale.  It’s really easy and with the substitutions and reduction in oil and sugar, it is still surprisingly moist and it holds up well for up to 4 days.

One thing I found when testing this recipe was that the cocoa powder mattered. Unfortunately the Valrhona brand that I have been using for a while has been dropped by Whole Foods recently. I’ve checked several resources locally like Southern Season, Parker & Otis, and Williams-Sonoma, but none of them carry it.  You will probably need to order it online directly from the company. 6/2/2011 Note: Fresh Market carries the chocolate in the specialty section near the coffee and chocolates (not the baking section). They buy it in bulk and repackage it in smaller amounts.

I also experimented with different salts and found the best results from the two Hawaiian salts. They seem to bring out the chocolate flavor and add some undertones that work well with the beets. The red clay and activated charcoal added to the sea salt creates a subtle difference.

Roasted Beet & Chocolate Bundt Cake

  • 2 cups all-purpose organic unbleached flour
  • 3/4 cup Valrhona 100% cocoa powder
  • 2 teaspoons baking powder
  • 1 teaspoon baking soda
  • 1 teaspoon salt (Red Alae Hawaiian Kai sea salt or Black Lava Hawaiian Kai sea salt)
  • 1 cup organic low-fat buttermilk **
  • 1/2 cup virgin organic coconut oil
  • 1/2 cup brown sugar (not packed)
  • 3 large eggs
  • 1 cup organic cane sugar
  • 2 teaspoons real vanilla extract
  • 7-8 oz of roasted, pureed beets (skins removed)

Preheat oven to 350F.

Using soft unsalted butter, coat the inside of the bundt pan well and then use additional cocoa powder to “flour” the pan so the cake releases from the mold easily.

In a large bowl, sift together the flour, cocoa powder, baking powder, baking soda,  and salt (the salt comes in large granules so you will need to use a mortar & pestle to grind it down to a fine powder).

Using a mixer, beat the eggs until they are creamy. Add the cane sugar, brown sugar, and vanilla extract and beat until creamy and well incorporated. Add in coconut oil (make sure it is totally liquid but not hot. It will not incorporate well if it has turned the slightest bit solid. You can warm just briefly to get it back to liquid form. Make sure it’s not hot when you add it to the eggs and sugar.)

Carefully fold or mix in the beets on low to avoid making a mess everywhere.

On low-speed, add in the dry sifted ingredients to the wet mixture and beat until it is just incorporated. You can scrape the sides and blend in any remainder that doesn’t mix with a spatula before filling the cake pan.

Fill your cake pan and bake for 50-60 minutes. Test with a long wooden skewer or toothpick. The pan I use is made of pottery clay and holds the heat very well. My cakes continue cooking after they are pulled out of the oven so I bake mine for 50 minutes.

Let cool for about 20 minutes and it should release easily on to a wire rack to continue cooling.

You can dust with confectioners’ sugar before serving or serve with Strawberry Balsamic Jam and whipped cream.

**Buttermilk substitute: Add one tablespoon white distilled vinegar to a 1 cup measuring cup and then add organic low-fat milk to it. Let it sit for 7 minutes. This is the method I use most often.

Posted in Dessert, Fall, Nut-Free, Recipes, Summer, Winter | Tagged , , , , , , , , , , , , , | Leave a comment

Fennel, Apple, Carrot & Walnut Salad with Fresh Pea Shoots

About a year ago I had a lovely chilled fennel bulb salad at one of my favorite restaurants and a separate fresh pea shoot salad at the same dinner. Normally I would ask the chef a little about the recipe, but I  totally forgot about it until I noticed fennel and pea shoots for sale this past week.

So, I went in search of a recipe that I could make  for a farmers’ market demonstration. It needed to be kid-friendly. Most of the recipes I found appeared to have adult-oriented flavors.

Using a design process called “editing”, I started eliminating ingredients and adding them back in as I tasted the salad. This recipe is more about ratios than exact measurements because the size of the individual ingredients is going to vary from location to location and season to season. I find that our local organic farmers pull the vegetables when they are younger, sweeter and more tender than what you typically find at the grocery store.  Adjust as you go.

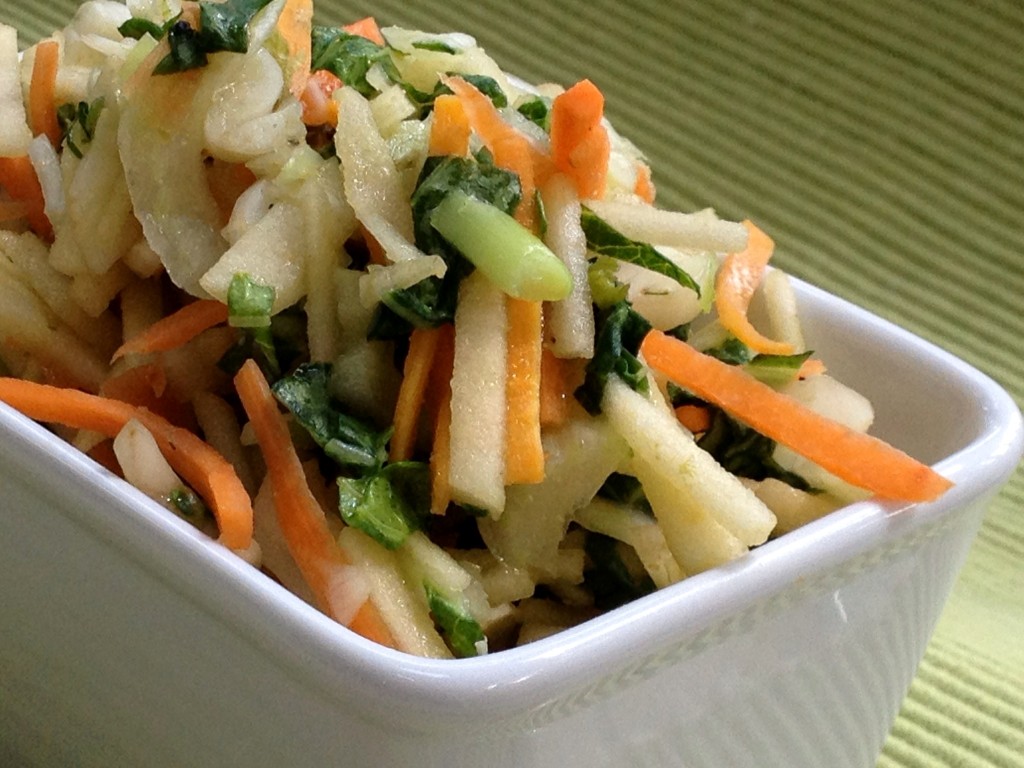
Several young kids and teenagers tried the salad at the Five Points Farmers Market this past Saturday and enjoyed it as much as the adults, so I think this is a pretty safe “family” recipe. Sorry the pictures are “sans” the pea shoots. I didn’t take my camera to the market. If you can find pea shoots, add bite-size pieces to your salad about an hour before you serve it so they don’t sit in the dressing and wilt. They are tender and delicate.


Fennel, Apple, Carrot & Walnut Salad with Fresh Pea Shoots

Ingredients

  • 1 fennel bulb, (about 1 & 1/2  cups, use part of the stalks for texture)
  • 1 tart, crisp apple, skin removed (about 3/4 cup)
  • 1/2-3/4 cup shredded carrot
  • 1 tablespoon fresh lemon juice (helps keep apple from turning)
  • 1 tablespoon honey
  • 1 tablespoon apple cider vinegar (white balsamic or rice vinegar)
  • 1/4 cup chopped toasted walnuts (or toasted pecans)
  • salt ( Murray River Flake Salt)
  • fresh ground pepper to taste
  • 1 tablespoon virgin olive oil (optional)
  • 1 cup bite-size pea shoots
  • 1/2 cup finely sliced bok choi  and/or young green cabbage

Preparation

  • Clean the fennel bulb and pull off the outer pieces if they seem too dirty or discolored. Thinly slice the bulb and cut the pieces to bite-size.
  • Remove the skin from your apple. Julienne the apple and use about 3/4 cup of the apple. You can use less if you enjoy more licorice flavor from the fennel. Add to the fennel.
  • Add the shredded carrot to the fennel and apple.
  • Mix the lemon juice, honey, apple cider vinegar, salt & pepper. Adjust the flavor to suit your taste and add to the salad. You may add the olive oil but I didn’t find it was necessary to use it at all and preferred the dressing without it.
  • Let the salad sit for a couple of hours. Right before serving add in the walnuts and pea shoots for color, texture and flavor.
  • Sunflower seeds might be an interesting addition to the salad at the end as well.

 Notes

6/17/12 – Since last year, I’ve had a chance to make this a few more times and it’s also great with small pieces of both the stem and leaf of bok choi added in if you make it during the very early part of the fennel season when bok choi is still being harvested small. If you miss that, the early small cabbage or savoy cabbage is lovely in it.  Pecans add a hint of sweetness once toasted if you’re not a fan of walnuts but it’s equally nice without the nuts. I also found the mustard dressing with white balsamic vinegar works well with the flavors and I expect that rice vinegar would too.

You can also use  a shredding attachment to you food processor and create more slaw texture that pairs really well with chicken sausage without much more than a little vinegar and honey or maple syrup. Leave out the olive oil.


Posted in Dairy-Free, Fall, Gluten-Free, Recipes, Salads, Vegetarian, Winter | Tagged , , , , , , , , , , , , , , , | Leave a comment

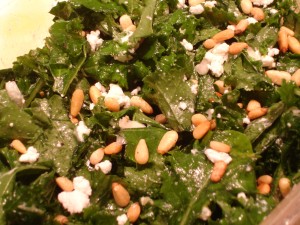
Baby Kale Ceviche with Feta & Pine Nuts

Five Points hosted a Saturday Sidewalk Sale and Farmers Market last weekend which was well-attended by the neighbors. The YMCA Little Princess Group came and sold lemonade to benefit Japan’s tsunami victims.  Local bread maker Dick BesseyABC Pie Company of Raleigh, Wheeler Ranch from Louisburg (pasture raised beef) and Truffles NC (think truffle butter!) came out to sell their wonderful food.

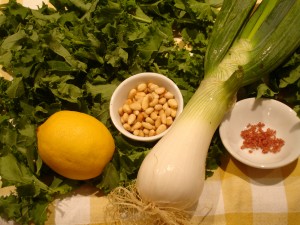
I brought some salads, beet hummus, baked beans, beet & chocolate cake and several jams made with local sustainably grown ingredients. New Grass Gardens supplied the organic fresh baby kale and lovely fresh onions.  I considered making panini sandwiches but the Kale Ceviche recipe from Holly Herrick’s cookbook looked lovely and refreshing for what was going to be the start of our warmer summer weather.  I searched the web for some variations because I thought the original recipe was a bland. What I ended up creating was a merge of several recipes and flavors. I was really surprised at how well-received it was.


Kale Ceviche

Ingredients

  • 4 cups of loosely packed baby kale
  • 1/4 cup uncured sweet fresh onions
  • 2 tablespoon fresh lemon juice
  • 1/2 teaspoon roasted garlic (use less if using raw)
  • 1/8 teaspoon fresh ground pepper
  • 1/8-1/4 teaspoon Red Alae Hawaiian Kai sea salt
  • dash cayenne pepper (optional)
  • 1/4 cup toasted pine nuts
  • 1/4 cup crumbled feta (more if you like)
  • 2 tablespoons extra virgin olive oil

Preparation

  • Wash and dry the kale. Remove the stems and tear into bite-size pieces.
  • Slice the onion thinly and cut the strips into pieces about 1″ long. Add to the kale.
  • Using a mortar & pestle, grind the salt into a fine powder before using it.
  • Smash the roasted garlic and add it to the lemon juice along with the salt, pepper and cayenne.
  • Add the juice, garlic and spices to the kale & onions. Let it sit for at least 8 hours in the refrigerator.
  • Add in the olive oil, pine nuts and crumbled feta about and hour before serving. You can serve at room temperature or chilled.
Posted in Fall, Gluten-Free, Recipes, Salads, Spring, Vegetarian, Winter | Tagged , , , , , , , , , , , , , , , , | Leave a comment

Let’s Preserve Those Fresh Picked Strawberries!

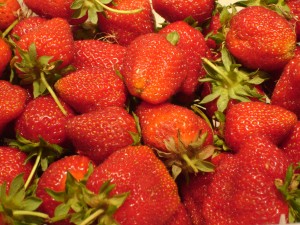
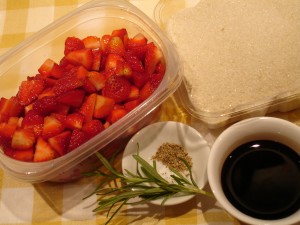
As many of you know, I love fresh fruit. Unfortunately it’s impossible to eat everything that gets picked at the farm in a single week. So I freeze some of them, dehydrate some of them, make different types of jams, and then eat them in everything from salads to breakfast smoothies to desserts. This year I went up to Whitted Bowers Farm which is in Cedar Grove, NC.  It’s not a huge family farm, but they grow using organic methods, which is important to me. Most strawberries are treated with some pretty nasty fungicides that I don’t care to eat. Strawberries are on of the “dirty dozen” foods that are highly contaminated with chemicals. For a while, I gave up eating them all together because I couldn’t find any that tasted like a strawberry should and were chemical-free. But having found this farm, I’m pretty happy to drive the hour to guarantee some healthy strawberries all year-long.

Organically grown strawberries just don’t hold as well once picked, so you need a plan of action if you want to get the most out of your berries. I normally go through my berries right away and select out the very best ones for desserts or salads where it’s important to have a beautiful berry.

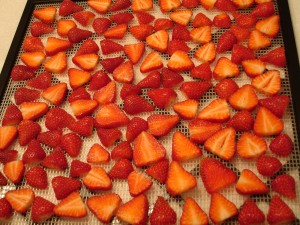
Other perfect berries get sliced for the dehydrator. I use a small Excalibur and find that is sufficient for 2-4 people. It is very important to dehydrate excellent quality fruit to avoid storage issues. Strawberries are wonderful either reconstituted or eaten as a dried snack and they take up very little space once dehydrated.

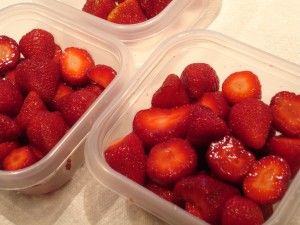
The lesser quality berries get divided between freezing and jams. Strawberries will freeze well sliced, quartered or whole. The sliced berries seem to blend quicker and more evenly in smoothies and the whole berries are great for making jam or cobblers. Regardless of their use, I cut out any bad spots on the berries and then prep them.

I measure out enough berries to make one or two small batches of jam first and add the appropriate amount of sugar to coat the berries and let them sit while I deal with the rest. Working quickly, I get the remaining berries into the freezer. Many folks use freezer bags because they take up less space. I typically use a hard container because I like to stack every thing in the freezer and as things get jostled around, the berries don’t get damaged.

It’s important to measure or weigh your frozen berries,  as well as date and mark the name of the berry that you picked. I also note the farm. Some recipes work better with different varieties of berries and over time, you will develop your favorite places and berries for each recipe.


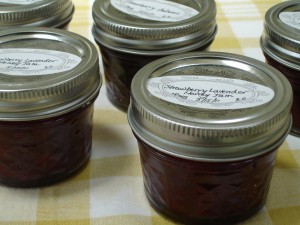
Strawberry Balsamic Jam

Ingredients

  • 8 1/2 cups chopped clean strawberries
  • 2 1/2 cups organic cane sugar
  • 4-6 tablespoons balsamic vinegar
  • 1/4 teaspoon fresh ground black pepper
  • 2 springs fresh rosemary 3″ long
  • 1/2 – 1 teaspoon fresh lemon juice
  • 1/2 teaspoon citric acid (optional)
  • 1 tablespoon very fine chopped dried apple (optional)

Preparation

  • Wash and dry your strawberries quickly.
  • Hull them, removing any bad sections and cut them up into 1/2″ pieces.
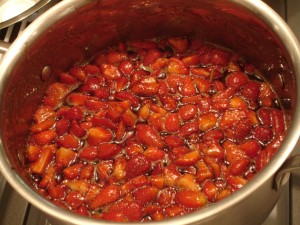
  • Simmer all of the ingredients except for the citric acid, lemon juice and dried apple, in a non-reactive pan for about 10 minutes on medium heat.
  • Using a slotted spoon, remove all of the berries and leave the juice. Set the berries aside.
  • Add the apple to the juice and continue to cook the juice on medium/high to reduce and thicken. You will need to reach a temperature of 220F to get the juice to “gel” because we are not using pectin in this recipe. The dried apple will add some natural pectin and absorb some of the juice as it reconstitutes. You can leave out the apple if you don’t care for the taste or texture and just cook it longer to reduce the water content.
  • Once you reach the 220F point, stop and turn off the heat.
  • Add the berries back in and refrigerate the mixture for 12 hours.
  • After 12 hours, remove the rosemary and reheat all of the ingredients adding your lemon juice at this point.
  • Heat on medium to warm and then move to high and take the mixture to 220F for 5 minutes to make sure you set all of the ingredients well.
  • If you plan to “canning” instead of freezing, add the citric acid which will help acidify the  jam without adding more lemon flavor.
  • If you plan to can, the normal guideline for strawberries is a water bath for 10 minutes for small pint jars using the standard sterile hot jars and hot liquid fill method. I use a half pint jar most of the time personally. Guides indicate to leave 1/4″ head space in the jar which works well whether you pressure can or use a water bath method.
Posted in Dairy-Free, Gluten-Free, Nut-Free, Preserves, Recipes, Seasonal Eating, Spring, Summer, Vegetarian | Tagged , , , , , , , , , , , , , , , | 1 Comment

The Impact of CSA Shares

What the Survey Revealed

Recently I was asked to conduct a survey about CSA purchasing habits for a group of local farms.  Some of our local farmers have seen a decline in the number of “shares” sold for the season. Farmers expend most of their cash during the winter and early spring buying seeds and supplies.  “Shares” represent a commitment by customers to support the farm no matter what happens and allows farmers to manage cash flow during the down season. It can also act as a gauge for how much to plant in the upcoming season.

Running a local survey has some limited value because it’s difficult to get enough responses to from which to draw conclusions. Sometimes asking people similar questions directly offers more insight into buying choices and patterns. A farmers’ market is a great place to gather information, but you need a wider net to really get good data on food purchases.  The crowd at the market is a bit biased because they have already committed to spend money and time locally. Only some of the questions are relative to their decision process..  What I really needed for a fuller picture was data from non-market-buyers. So I went out in search of some answers personally in many locations, pestering people all over town.

Most of the farmers that responded to my on-line questionnaire  had been farming for more than 10 years. About half of the farmers reported the same number of folks in their CSA program from last year but most had an increase in the amount of money families committed to spend. Farmers that had less than desired subscription rates tended to be newer to farming. There was no data about quality or depth of their product line so I can’t assume that they didn’t put out good products. I might tend to draw a conclusion about marketing skills or ability to get into a strong farmers’ market.  Based on my personal observations at different markets, the newer farmers had excellent quality products.

The data about subscription shares was confirmed by both market managers and consumers that responded to the survey.  About a quarter of consumers were decreasing their spending amounts but they didn’t say why, and about a quarter remained the same in spending from last year. The surprise in the data was that by late April, almost a third of the respondents had not purchased their CSA shares and only about half intended to purchase in the near future. The remainder intended to spend the same amount of money, but not purchase farm shares. It’s not clear why they made that decision.

Drop Points vs Home Delivery

Most of the consumers preferred using one or two drop points over multiple points.  A Wake County survey last year showed that less than 1% of respondents went out of the county to other markets and very few went to more than two farmers’ markets regularly. So you might assume that time and distance are critical factors for buying direct. But, when asked if they would prefer home delivery as a replacement for pick-up points, more than two –thirds responded that they would not prefer home delivery.  So I’m going to assume consumers that buy-direct consider it important to have a “one-on-one” interaction with their local farmer; something different from the typical grocery store experience.

What I have found doing informal surveying of people, is that the idea of “market” consumers is a bit muddled.  I have found three types of consumers buying “farm-to-table” food. First, those that make a conscious choice to allocate time to buy direct and forego other activities to experience shopping at a farmers’ market, or going directly to the farm. They consider it important to have an active relationship with their farmer which is very similar to the way our grandparents and great grandparents viewed the local specialty shops for meat, cheese, and baked goods.  Second, there are consumers that want direct food, but they lack the time to go to a market because of work or physical constraints. And third, there are folks that need or prefer the convenience of home or office delivery.  This group crosses into the second group that has time and physical constraints. For the second and third group of individuals, the mobile-market business models offer a lot of choice.


Mobile Markets as an Emerging Option

Mobile markets either set up stands or bring a delivery truck with some additional products directly to a workplace, school or centralized location. Employees can pick up their CSA box, pre-order specific products, or select out products that they like when the market truck shows up. But it’s not always the ideal business solution for either the small farmer or the consumer that has specific needs. Most of the business models that are successful around the country combine products from several small farms and have a combination of CSA boxes and additional selections. They are run by either a group of farms or a local non-profit organization. They are expensive to begin but over time the savings in fuel and time to individual farmers can be significant. This model seems to be a good way to find and keep new customers.

Lastly, I want to note that all of the consumers buying direct had two similarities. They are able to plan meals ahead of time and they don’t want to waste anything. The questions they ask of the farmers are two-fold: How do I cook this today? How do I store this for later? Waste not, want not seems to be a common thread.


Flexible Accounts Offer Cash Flow Alternative

And getting back to the folks that were going to spend as much money buying-direct, but didn’t want to commit to the early “shares” I found a couple of data points worth noting. A lot of people don’t want a prepared box. They may try this the first year despite their fear of what’s in the box each week and get tired of wasting food so they switch to buying what they need and add time into their schedule to accomplish the task. . A “market account” where they can “spend-down” on an allotted amount of money seems to serve them better. The few farmers that I found offering this type of service were more apt to take surveys of their customers to find out what they wanted to purchase (and planted those items to meet demands). These farmers also tended to keep pretty good records of what was purchased year to year to help them quantify the data from consumers.

Hopefully, this will help some farmers figure out new ways to find consumers or market to existing ones. And consumers can ask farmers about the possible services they might be willing to offer and what flexibility in the accounts they might be willing to accept.

Growing a stronger local economy for sustainable farms is crucial to food security in our community.
Posted in General | Tagged , , , , , , , , | Leave a comment

Chili: One Spice at a Time

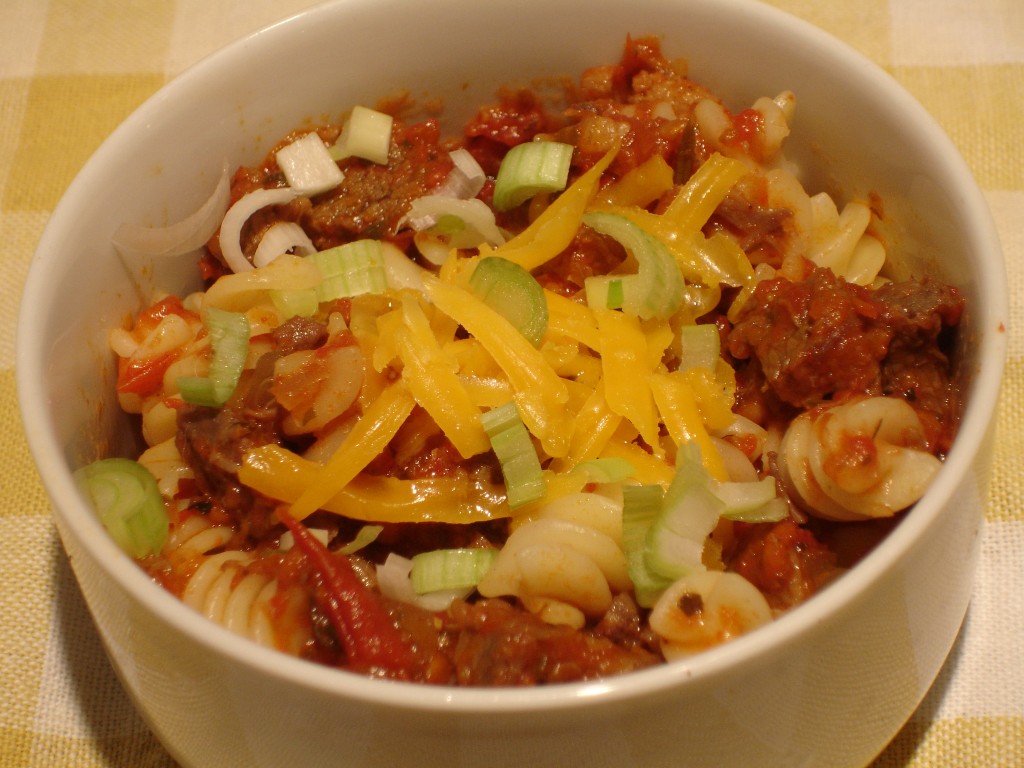
I’m pretty fond of chili because of its versatility. So using pre-cooked, frozen stew beef with onions as the base was relatively easy for the Midtown Farmers’ Market at North Hills a week ago.  The blend of spices that I used for the market came from Savory Spice Shop and replaces a pre-mix that I normally use so that I can control the sodium more closely. This recipe is on the spicy side. I’m not sure that the sample that folks had at the market really allowed the “heat” and different levels of peppers to come through adequately because I served it on noodles to make it easier to eat. So please taste as you go and note that each chile has a different “heat level”.  I served this with some  Ashe County Sharp Cheddar Cheese that I’m able to get at the NoFo Market. But there are several other local cheeses that I think might work well with this recipe and our local vendors are always surprising me with new products!


Spicy Beef Chili

Ingredients:

  • 1 lb of pre-cooked stew beef (sautéed with 1 onion for 1 hour before freezing)
  • 2 cups roasted tomatoes
  • 1/2 -1 cup of sweet onion chopped
  • 1 teaspoon roasted garlic, minced
  • 1 teaspoon Aleppo Chile, crushed flakes
  • 1/4 teaspoon Guajillo Chile powder
  • 1/4 teaspoon Ancho Chile powder
  • 1/4 teaspoon Mild Chimayo Chile powder
  • 1/2 teaspoon Sweet Paprika powder
  • 1/8 teaspoon Aji Amarillo Chile powder
  • 1/2 teaspoon Oregano, ground
  • 1 1/4 teaspoon Cumin powder
  • 1/4 teaspoon Alderwood Salt
  • 1 tablespoon brown sugar
  • 2 oz favorite fresh salsa
  • 1 teaspoon tomato paste
  • 1/2-1 cup tomato juice or water
  • 1/2 tablespoon cornstarch

Preparation:

  • Put it all in a dutch oven on medium heat and stir it occasionally as the liquid reduces to keep from burning. I believe this would also work in on low in a slow cooker.
  • It should be simmering the whole time. The meat will break up further in the process.
  • I serve this chili without beans, unlike all of my other recipes.
  • Instead of adding sour cream, try mixing a local yogurt with some fresh chopped green onions


Posted in Beef, Dairy-Free, Diabetic Friendly, Gluten-Free, Nut-Free, Recipes, Second Harvest, Summer | Tagged , , , , , , , , , , , , , , , | Leave a comment

Taco Salad in a Jiffy

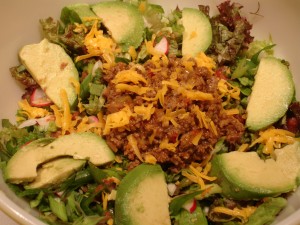
I know I promised to get the recipes up from this past weekend, and I will, but not today. Late Tuesday I drove across town to check out the new Western Wake Farmers’ Market and found a whole host of greens, some organic tomatoes and lovely long white mild radishes. At home, I already had an avocado, green onions, Ashe County Sharp Cheddar Cheese from my CSA this past week and some local salsa that I needed to finish up. And, I had taco beef already cooked up in the freezer. Just like the stew beef, I cook up about 5 pounds of hamburger at a time and repackage it for the freezer in 1 pound increments so it’s ready for anything. Some of it I make into taco-meat with the “Simply Organic” line of mix and freeze in small quantities. This is one of the few times I really cheat and don’t make up my own spice mix. This works with meat substitute too! I’ve tried it with the Gimme Lean brand of sausage.  It’s also beautiful as a vegetarian salad.

The taco meat took less than 2 hours to thaw and I warmed it up in about 5 minutes with a little additional water. I chopped the lettuce, sliced all the other ingredients and the cheese was already shredded from my market demo on Saturday.  I used the leftover salsa as the “dressing” for the salad (very healthy and virtually no calories or fat) so the lettuce was wet enough to attract some salt & fresh ground pepper. It took less than 15 minutes from start to finish to put this lovely salad on the table and about the same amount of time to eat it all up!

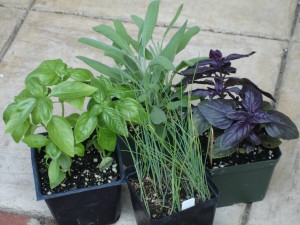
Now there’s plenty of time left to deal with the plants I purchased at the market….


Posted in Beef, Recipes | Tagged , , , , , , , , , , , , | Leave a comment

Options for Stew Beef

Most folks only think of using stew beef for potato & vegetable stew during the winter months. A couple of years ago I discovered the stew beef I was buying directly from my local farmer was typically made up of cuts that tended to be a significantly higher quality of meat than what I found at the grocery store, so I could use it in more ways. For our family, it’s become a great way to eat something more healthy than hamburger while spending about the same amount of money.

Stew beef is great marinated for grilled kabobs in the summer when you have all the beautiful vegetables at the market. It’s also easy to find during the summer months at the market so I typically purchase several pounds at a time and pre-cook some of it with onions and garlic to save some time later when I’m making soup, stew, chili, stroganoff or fajitas. This is so simple you really don’t need much of a recipe.

Basic Pre-Cooking

  • For each pound of beef stew you are going to need one sliced sweet onion and one clove of garlic minced. I typically don’t salt or pepper the meat when I pre-cook so that I can adjust the recipe with different salts and peppers later in the process. But it is important to cut up the stew meat so that it’s uniform in size, typically around 1″ squares.  And I normally cook up at least three pounds at a time.
  • Put about 3 tablespoons of olive oil in a wide saute pan or dutch oven and throw in your  three onions (for 3 lbs of meat) once the oil has heated up. Cook them until they are just beginning to turn translucent, stirring as necessary so they don’t brown or burn. Add the stew meat and cook that lightly on all of the sides. Add in enough water to cover the meat about 1/3 of the way up. Cover all of it with a tight lid and reduce the heat to low so it continues to simmer for an hour. Leave it alone. The meat should be tender when the hour is up.
  • Once your meat is cooked, put it into the freezer in smaller containers for later use in different recipes. I find about  1/2-3/4 lb packages work well for 2 people because you can make most recipes with that amount. Label and date the meat. It will last frozen 90 days.


Beef Fajitas

  • Use roasted peppers during the winter if you have them, and fresh red and yellow sweet peppers in the summer to keep your cooking time to a minimum during both seasons.
  • You also have the option of adding some additional grilled onions.
  • If you like, you can add 1/4 cup of balsamic vinegar, 1/3 cup of soy sauce, 1 teaspoon ground cumin, and 2 tablespoons of your favorite salsa to spice this up more.
  • Season with salt and fresh ground pepper.

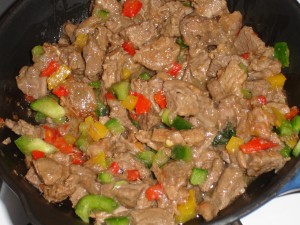
Last Saturday, at the Western Wake Farmers’ Market I simply added the fresh chopped red and yellow bell peppers and a bit of salt and pepper.


Beef Stroganoff

  • Cook up the pasta of your choice. I like to use pasta that will hold onto some sauce. Cook it to “al dente” because it will finish cooking in the sauce.
  • Pick up some fresh Shitake mushrooms from the market and either grill them with a bit of olive oil or slice them and quickly stir fry them in some olive oil before chopping them up for your dish.
  • Add in 1 additional chopped roasted clove of garlic, 2 teaspoons of sweet paprika and 2 teaspoons Dijon mustard.
  • Mix about 1 tablespoon of cornstarch to 8-12 ounces (cold) beef broth and add this to your beef, mushrooms and seasonings while the pan is on medium heat. The corn starch will thicken the broth as it comes to a boil and keep the recipe gluten-free. (You can use flour if gluten is not a problem for you.)
  • Once this has thickened, you can reduce the heat and stir in your noodles along with 1/3 cup of low-fat sour cream.
  • Season with smoked Alderwood or Truffle salts to enhance the flavor of the mushrooms. Use less of the truffle salt because it has a dominant flavor. The Alderwood salt is more subtle. (I get this at Savory Spice Shop in Raleigh)
  • Garnish with either 2 tablespoons fresh chopped parsley or fresh chopped chives.
  • To keep this gluten-free, either use rice based noodles or  serve the beef and sauce over long grain wild rice. The nutty flavor and texture of the rice is an excellent compliment to the mushrooms and beef.


Posted in Beef, Nut-Free, Recipes | Tagged , , , , , , , , , , , , , , | Leave a comment

Feta Couscous Salad

This is probably one of my favorite types of sides to take on a picnic. It starts out cold and ends up at room temperature where the flavors stand out best. And, it’s so simple you can make it  in 15 minutes.

Want to know more about sunchokes? Here’s a quick summary of their nutritional value and storage. Sunchokes. I simply scrub mine and roast them in the spring and fall when they are in season and then freeze them in small quantities to use later. The sungold tomatoes are so plentiful near the end of the summer each year that you can buy them in bulk from farmers and dry them at home.  The sungolds dry sweeter than the store-bought brands. Store them in airtight containers all winter.


Feta Couscous Salad

Ingredients:

  • 1 1/4 cup water or chicken broth
  • 1 cup couscous
  • 1/8 teaspoon pepper
  • 1 tablespoon roasted sunchokes chopped
  • 1 tablespoon sun-dried Sungold tomatoes chopped finely
  • 1 teaspoon dried shallots (or half of a fresh one)
  • 2 tablespoon olive oil
  • 1 tablespoon finely chopped green onion
  • 1 teaspoon finely chopped fresh chives

Preparation:

  • Add the sun-dried tomatoes and dehydrated shallots to the olive oil and let sit for 15 minutes or up to a day.
  • Bring water / chicken broth to a boil.
  • Add couscous.
  • Place lid on the pot.
  • Turn off the heat.
  • Let sit for 5 minutes.
  • Fluff with a fork.
  • Add sunchokes, sun-dried tomatoes and shallots with the olive oil, green onion, chives, feta and pepper.
  • Mix well and serve or refrigerate.

Notes:

  • The feta tends to be very salty, so I adjust the salt after I have added all of the ingredients.
  • You can add substitute 1/2 teaspoon roasted garlic for the green garlic.
  • You can substitute small pieces of lightly roasted thin asparagus for the sunchokes.
  • You can serve this on a bed of shredded fresh chard or spinach.


Posted in Nut-Free, Recipes, Summer, Vegetarian | Tagged , , , , , , , , , , , , , , | Leave a comment