Steaming & Dehydrating to Save Space

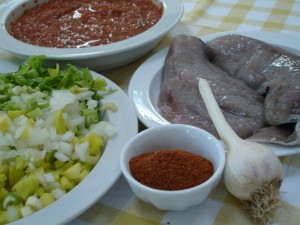
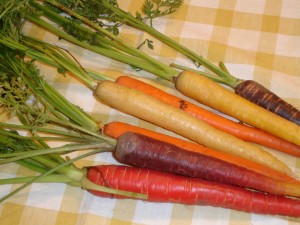
This week has been a blur of onions, carrots and celery. So much great stuff came in at one time that there have been boxes of vegetables all over my house for two weeks. While I love to roast and freeze vegetables for use throughout the year, it takes up a lot of space and requires an additional freezer. For the last couple of years, I’ve been working on better techniques for dehydrating and recipes that really take advantage of dehydrated items.

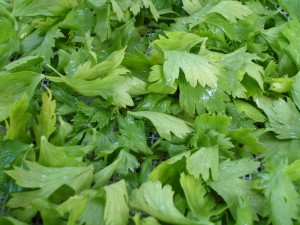
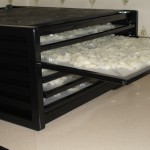
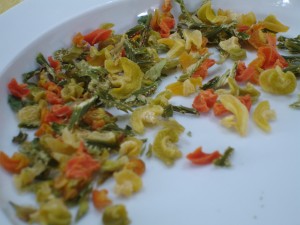
Last year, I was less pleased with the dehydrated carrots and celery. They didn’t seem to be as tender as I wanted in the recipes.  So this year I decided to partially steam them and then dehydrate to see if I could improve my results. I ran a brief test to see how they would cook up and the test went very well.  The added advantage is you can dehydrate  the celery leaves separately and add them to soups or dressings for some flavor without much texture.

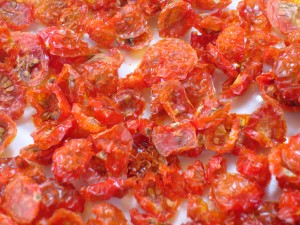
Lastly, I want to tell you how easy and wonderful the little sungold cherry tomatoes are dehydrated.  Dehydrated, these little wonders make excellent snacks or toppings for salads.  They also work wonders in stews and soups. You can soak them in a bit of olive oil and herbs and add them all sorts of recipes like meatloaf  or chicken cooked in tomatoes with rice, or steamed fish and vegetables on the grill. They absorb many of the juices and fat released from the base foods so you end up with a delicious rich thick broth in your finished meals.


Posted in Recipes, Second Harvest | Tagged , , , , , , , , , , , , , , , , , , , , , , | 2 Comments

Local Fish Stew Cooked with Heirloom Vegetables

One of my favorite healthy meals is fish stew made with lots of different sorts of seafood. This is a fast recipe for you to try that will accommodate one variety or several types of fish in it at once. It’s pretty quick to throw together and I like it served over some steamed rice.

This weekend Locals Seafood had a bit of extra Bluefish after the NOFO market. Bluefish holds up really well when cooked in a soup and it’s also a good choice for tacos because the flavor and texture will stand up well against spices and quick hot cooking. It’s also  inexpensive compared to other seafood and easy to find all summer long.  Smaller fillets are very tender and make this a fast meal when they are cut up into the one-inch pieces and a great filler fish for a recipe like fish stew.

For this recipe, I used local heirloom carrots from Ben’s Produce, celery from Wild Onion Farms and sweet onions from Roberson’s Rocky River Farm. There are just a couple of weeks when you can all of these ingredients together at the market! Later in the season, it’s  just as easy to use pre-roasted or steamed vegetables from your freezer.  The heirloom carrots come in delightful colors of yellow, white and a light green, red, orange, and sometimes purple. The lighter colored ones stand out better against the deep red of the roasted tomatoes in this recipe,  so I picked out some of those for the stew.

The tomatoes are a blend of heirlooms roasted with fresh herbs, garlic and onions last summer, the tomato juice is what I pull off of the tomatoes after I roast them. I’m able to use the juice in all sorts of recipes throughout the year. I have made this recipe using Old Bay because it’s what I grew up eating and I like it a lot. However, Old Bay is heavy on the celery and salt so you may want to adjust the amounts or select a brand of seafood seasoning that you normally use if you don’t like Old Bay. I’ve also tested the Savory Spice Coastal Bay Seasoning mix which has a stronger base of black pepper so it’s a bit hotter than the Old Bay.  The recipe is versatile enough to use with different levels of heat, salt, paprika, celery, garlic and bay leaf. Just follow the techniques and you’ll be fine making this quickly for dinner. You can always add some additional spices to suit your own taste.

This recipe will easily serve 4 people without any sides, 6 if you have some side dishes.  I like to serve this stew with roasted corn on the cob or corn bread.

Fish Stew

Ingredients

1 – 1.5 lbs bluefish fillet

1 tablespoon olive oil
1 cup finely chopped heirloom celery
1 cup finely chopped sweet onion
1 cup chopped light-colored heirloom carrots
1 clove garlic, minced
2 cups roasted tomatoes with herbs
1 1/2 cups tomato juice (or vegetable juice)
1/4 cup rough chopped fresh flat leaf parsley
2-3 teaspoons Old Bay or other seafood seasoning blend
Zest of one lime
squeeze of fresh lime juice (optional)

Preparation

  • Remove the skin from the bluefish fillets and cut the fish into 1″ pieces.
  • Saute the garlic onion, celery and carrot in the olive oil on medium heat. Do not brown, just cook them until the onions and celery have just started to soften.
  • Using a large pot, combine the roasted tomatoes, tomato juice, vegetables, parsley and spices. Cover and simmer on medium heat for 5-10 minutes without boiling. The fish will cook very quickly.
  • Leave the cover on for another 5 minutes just to let the spices mix into the vegetables and serve in a bowl with a squeeze of lime juice and some lime zest or over some steamed rice

Variations

  • add 1/4 cup of cooked yellow split peas for more savory and filling texture
  • add 1/4 cup of freeze-dried yellow corn (Savory Spice) for some sweetness
  • add in different types of fish like shrimp, mussels and squid


Posted in Dairy-Free, Fall, Fish, General, Gluten-Free, Nut-Free, Recipes, Summer | Tagged , , , , , , , , , , , , , , , | 8 Comments

Shrimp Bites

Summer is clearly here with the consistent 90+ temps and that means some excellent fish from the coast! Locals Seafood had some great choices for the folks that stopped by the NOFO’s Saturday Fair.  They left a few things for shoppers to pick up inside the frozen section of the market in the store.  Yesterday I used their white shrimp along with a few other items from the market.

The recipe originates from Gena Knox’s “Southern My Way”, which you can pick up in the store too.  This is very similar to the recipe I’ve used for years for crabcakes.  One thing to note is that you will need to adjust the amount of celery in this recipe depending on the type you use. I typically use an heirloom, locally grown celery. Not many farmers grow it but it is most similar to celery found in Asian markets. Wild Onion Farms grows this in Johnston County and sells it at a couple of the Raleigh markets for just a couple of weeks.  The stalks are thin and shorter than those found in traditional grocery stores throughout the US. It tends to have a beautiful head of green leaves that are quite flavorful and excellent in soups or salads. The stalks also tend to be less tender and more pungent in flavor, so in this recipe I sautéed them along with some sweet onion. Most of the farmers have finished pulling the smaller green onions so I used what was coming into the markets now. I didn’t want either of these flavors to overpower the shrimp and just a couple of minutes in the pan with some olive oil softens them up and tempers the flavor. But if you are shopping at your local store and plan to use the more mild celery and green onions, you can certainly skip the saute step.
As many of my readers know, I freeze many things, bread being one of them. Rarely am I able to finish a loaf before I know it will be stale so I normally cut a loaf in half and put one half in the freezer. In this case I had a couple of choices for the recipe and decided to try a Yeasted Corn Bread from Chicken Bridge Bakery in Pittsboro. After all, hushpuppies and shrimp are a true Southern favorite so I figured it would be fun to try it out in this recipe. Everyone liked it, so if you are in the area, try to pick some up. It also makes some excellent croutons for a tomato salad or an excellent tomato and cheese grilled sandwich because it’s not overly “corny” in flavor.

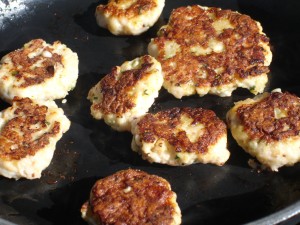
The other thing I did yesterday was just saute little bits of the mix in a cast iron pan with a little butter. When I ran the test batch on Friday night, I noticed that it took a while to cook the mix as a burger and when I cut up the burger for samples, it got messy and didn’t present well. So I decided to cook up little tiny shrimp bites instead and they were wonderful and brown all over. Most importantly, they held together very well as a sample.  I served these with the same little Dijon Aioli that I use for the crabcakes but they would be great with the homemade tartar sauce that Gena has in her cookbook. You can really make these any size and change the topping;  I love that about the recipe!

The original recipe is published on Gena’s own website as well as in her book: http://bit.ly/jpQBPe

Here is the adapted recipe as I made it at NOFO’s Saturday Fair in Five Points with Frozen White Shrimp (26-31 count) from Locals Seafood.

Shrimp Bites

Ingredients

1 cup fresh bread crumbs, finely chopped
1 lb shrimp, cleaned (26-31 count)
1/6-1/4 cup heirloom celery stalks, finely chopped
2 tablespoons sweet white onion or green onion, finely chopped
1 teaspoons olive oil
1 tablespoon fresh flat leaf parsley, finely chopped
1 teaspoon Dijon country-style mustard
1 teaspoon fresh lemon juice
3/4 – 1 teaspoon Old Bay seasoning

Preparation

  • In a food processor or by hand, finely chop the bread into a crumb mix.
  • In a food processor or by hand, finely chop the shrimp after you have cleaned the veins out.
  • In a small non-stick pan, saute the celery and sweet onion in the olive oil until it’s barely cooked. A little crunch is still fine for this recipe.
  • Mix the celery, onion, mayonnaise, parsley, mustard, lemon juice and Old Bay (and cayenne) together in a large bowl by hand.
  • Add the shrimp to this mix and blend well by hand.
  • Add the bread crumbs to the mix and blend well by hand. The mix will be sticky and easy to mold at this point.
  • You can refrigerate or cook these immediately or save them for the next day.
  • Saute these in an equal mix of butter and olive oil on medium heat in a cast iron pan to get a nice brown crust on them.

Optional

  • Add in 1/4 teaspoon cayenne as the original recipe is written for some heat
  • Add in a little sweet red bell pepper as the summer ripens them
  • Add in some jalapeno pepper for some heat and color as they come into season
Posted in Appetizer, Fall, Fish, Nut-Free, Recipes, Summer | Tagged , , , , , , , , , , , , , , , , , , , , | 3 Comments

Zucchini Olive Oil Cake with Lemon Glaze

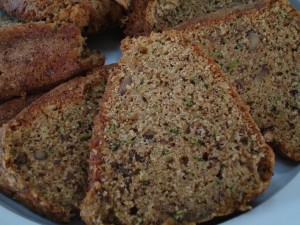
This cake is really light and I think you could actually use the batter for muffins and add a Lemon Cream Cheese Frosting. Or if you are adventurous, a Lemon Chevre Icing! The original recipe came from Gina DePalma’s “Dolce Italiano: Desserts from the Babbo Kitchen”. It’s not on my book shelf, so I probably borrowed it from the library. I’ve had this one a while and made a few changes over the years. Most recently I decreased the amount of olive oil. It’s great with more and it stays moist for a couple of extra days, but I felt like it was “heavy” in the summer and the volume of water in the zucchini more than makes up for the 1/4 cup of reduction in olive oil. I don’t think you can take it down any further without sacrificing texture.  You can change the nuts in this from walnut to almond or pecan. I’ve used all three and had excellent results. So pick your favorite and go with it! And try the cake before you add the Lemon Glaze. It’s not terribly sweet, but it does have enough sugar to stand on it’s own.  I reduced the glaze as well. The original made a ton and I felt like it overpowered the delicate flavors and texture of the cake once the recipe was lightened up.


Zucchini Olive Oil Cake with Lemon Glaze

Ingredients for Cake

1 cup toasted Almonds, Pecans or Walnuts
1 cup White/Wheat Unbleached Flour
1 cup White Unbleached Flour
1 teaspoon Aluminum Free Baking Powder
1/2 teaspoon Baking Soda
1 teaspoon Pink Himalayan Fine Salt
2 teaspoons Ceylon Cinnamon
1 teaspoon Ground Ginger Powder
1/2 teaspoon Ground Nutmeg
3 large Eggs, room temperature
1 3/4 cup Cane Sugar
3/4 cup Extra Virgin Olive Oil
2 teaspoons Pure Vanilla Extract
2 1/2 cups Zucchini, grated (large)

Preparation of Cake

  • Preheat oven to 350F and grease a 10-cup bundt or tube cake pan with butter and then flour it. Tap out the excess. If you don’t have a bundt or tube pan, you can use regular cake pans, but decrease your bake time.
  • Pulse the nuts in a food processor until they are finely chopped but NOT ground to a “flour”.
  • In a bowl, sift together the flour, baking powder, baking soda, salt, cinnamon, ginger and nutmeg. Set aside.
  • In a stand mixer with the paddle attachment, beat the eggs and then add the sugar and olive oil. Beat 3 minutes on medium speed until the mixture seems light and well incorporated.
  • Scrape down the sides of the bowl with the eggs and add the vanilla extract. Beat just a minute to incorporate it.
  • With the mixer on low/medium, add the flour mix slowly until it’s incorporated. Stop and scrape down the sides.
  • Beat on medium/high for 30 seconds.
  • Stir in the nuts and zucchini by hand.
  • Pour the batter into your pan and bake for about 45 minutes until a toothpick (I use a 4″ wood skewer ) comes out clean.
  • Cool for 10-15 minutes before removing from the pan.
  • You can freeze the cake before you add the glaze but you will need to warm the cake or the icing to glaze later.
  • Make the lemon glaze right after you pull the cake out to cool.

Ingredients for Lemon Glaze

1/8 cup freshly squeezed Lemon Juice & the Zest of one lemon
1/6 cup Cane Sugar
1/2 cup Confectioner’s Sugar (10X sugar)

Preparation of Glaze

  • In a small bowl, whisk together the lemon juice, zest, and both sugars until it’s smooth.
  • Cool the cake for 10 minutes. Carefully remove it from the pan.
  • Brush the glaze over the cake while it’s warm with a pastry brush.
  • Let the cake and glaze cool completely before serving so the Lemon Glaze sets up as a crunchy topping.


Posted in Dairy-Free, Dessert, Recipes | Tagged , , , , , , , , , , , , , | Leave a comment

Roasted Pumpkin Smoothie


It’s already hot here in Raleigh. Unlike the beach or mountains, there’s no breeze and frozen drinks are great for breakfast and lunch. This one is really simple. I used my own roasted pumpkin from last fall which I froze in small containers. You can use ice-cube trays and then store the little cubes in containers as well. It’s also possible to add some protein powder to this drink and make it a meal replacement which is sometimes a necessity when it hits the upper 90’s and 100’s. Both kids and adults liked this one at the Midtown Farmers’ Market. It’s fairly sweet, but not from a lot of sugar. The secret is using coconut water to replace some of the honey. The preparation section of the recipe makes a single serving so increase the amounts as needed.


Roasted Pumpkin Smoothie

Ingredients for Base Frozen Mixture

1/ cup of roasted Pumpkin (try canned if you don’t have the roasted)
1/2 cup Coconut Milk
1/4 cup Vanilla Extract
1/16 teaspoon Ginger
1/16 teaspoon Cardamom
1/8 teaspoon Nutmeg
1/4 teaspoon Cinnamon
Dash Allspice
1 tablespoon Honey

1/2 Coconut Water to blend in preparation stage

Preparation

Blend all of the base ingredients together and freeze in ice-cube trays. Then store the cubes in containers. When you are ready to make a smoothie, allow 1/2 cup worth of the cubes to slightly thaw and blend with an equal amount of coconut water (1/2 cup) until it’s smooth. You can add whipped cream or protein powder to the drink as well.

Posted in Breakfast, Dairy-Free, Dessert, Fall, General, Gluten-Free, Nut-Free, Recipes | Tagged , , , , , , , , , , , , , , , | Leave a comment

Summer Squash Carpaccio for Two

The original recipe for this comes from the Eating Local cookbook by Janet Fletcher. I have enjoyed using this book quite a bit this season for farmers’ market samples because the book tends to stay true to season with the ingredients in each individual recipe. It’s a great book if you like raw food without the stigma that many raw cookbooks seem to impart.

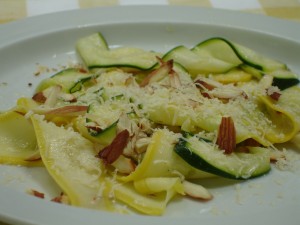
When I first tested this recipe at home, I was able to eat it right away before the squash had a chance to release any water. When I made the sample batch for the Raleigh Midtown Farmers’ Market at North Hills, I had to slice and dice the squash into smaller pieces to fit into the sample cups and I had to dress the salad about two hours before I served it. I think the flavor of the original dressing was fairly watered down as the sat in the cooler. I also used pine nuts in the sample at North Hills, but my preference is for the sliced almonds which I think work better with the flavors and textures of the ribbon squash.  Originally the test batches included Chapel Hill Creamery’s Asiago cheese, finely grated. I did not include this in the market sample because normally, there’s a good number of dairy-free folks that stop by to sample the salads; but my preference in this recipe is to add the cheese because it works well with the Dijon mustard and both types of nuts.

So even if this wasn’t your favorite sample at the market, give it a try in a small batch. I think it tastes significantly better when you first make it and don’t allow it to sit around as I did at the market. You can create the ribbons using a wide vegetable peeler like the OXO or a traditional mandoline.  Make sure that you pick up the same volume of baby zucchini to squash so the salad has both colors evenly distributed and the smaller squash have fewer seeds and a firmer texture. This is a dish that could change dramatically with some infused olive oil or infused white balsamic vinegar to replace some of the lemon juice. You could change the roasted garlic to a small amount of shallot or green garlic as they come into season. I did try the salad with some fresh thinly sliced fresh sweet onions, but I thought they overpowered the squash in this recipe. Keep your flavor choices and amounts light. This is a great summer side that is worthy of our 90+ degree humid Southern summers when we try not to turn on the oven.

Summer Squash Carpaccio for Two

Ingredients for Salad

4 oz Baby Green Zucchini
4 oz Yellow Crookneck Squash
1/4 cup Slivered Almonds, lightly toasted
1/4 cup fresh Flat Leaf Parsley, roughly chopped
1 teaspoon fresh Chives, finely chopped
1/4 cup Asiago Cheese, finely grated (sub Parmesan)
Salt & Pepper to taste

Ingredients for Dressing

1/8-1/4 teaspoon Roasted Garlic
1/8-1/4 teaspoon Dijon Mustard
1 Tablespoon Extra Virgin Olive Oil
2 teaspoons fresh Lemon Juice
1/4 teaspoon Honey

Preparation

  • Mix your dressing with a small whisk. Set aside.
  • Toast your almonds lightly in a toaster oven or a saute pan. You can use a bit of butter if you want, but it’s not necessary. Go for a golden color, not really browned. Set aside.
  • Using a vegetable peeler or mandoline, finely slice the zucchini and squash lengthwise, throwing away the first and last slices away because they are mostly skin. The baby zucchini and squash work well for this application because they create a good size of ribbon that holds together in the salad without many seeds.
  • Mix in your parsley and nuts.
  • Dress the salad and top with the cheese; serve.


Posted in General, Gluten-Free, Recipes, Salads, Sides, Summer, Vegetarian | Tagged , , , , , , , , , , , , , , , , , | 1 Comment

Early Summer Carrot Cake

Sometimes I am my worst enemy. Having planned to make a second cake for the market last Saturday, I left 3 eggs in the fridge while I went to my Friday coffee at NoFo with a fresh Carrot Cake.  A mix of fresh local ingredients, I worked hard to eliminate things that I could not find locally so I could feature it at the Saturday Midtown Farmers’ Market as well. Unfortunately I forgot that the kids are at home for the summer and sometimes they actually cook their own food. You know where this is going…..

Most Fridays are spent in a furious routine having Coffee at NoFo where I help open the indoor farmers’ market and answer questions about the crops, cheese and bread that has come in for the weekend. Then I rush home and start preparing the food I’ll need for the Saturday market. It’s always a mix of prepared items and some items I’ll be cooking at the market so I have to plan a couple of days in advance what items I will need to take with me.

Around 8 pm the house had finally cooled down. The windows were open and it was quite comfortable in the kitchen. I  mixed the dry ingredients for the cake, and started to mix the wet. It was just about 8:15 when I discovered 1 egg, not 3 in the fridge. Yes, there are stores open 24/7 in my neighborhood, but who knows where those eggs have come from or how old they really are and whether the chickens were eating feed laced with arsenic preservative. I realized that I could not remember the last time I bought eggs from a grocery store. It’s been years that I have been buying my eggs directly from farmers.

In the end, I only took a little over half of the cake to the Midtown Market and was the early folks were happy to gobble up the samples.  This fall I am going to be able to feature a couple of items like this cake with NC grown walnuts that I will be getting from a sustainable farm that recently found an old producing tree on the property. In the meantime, this cake is excellent made with NC sustainably grown pecans. It’s not terribly sweet because I’ve swapped out the plain white sugar for a couple of other types of sweeteners that I think add more depth and nutrients to the cake. This cake is moist, the texture is rich and flavor if dynamic so you won’t miss cream cheese icing. Unfortunately, I completely forgot to take a picture of the cake this week so as soon as I make it again, I’ll update this post.

Early Summer Carrot Cake

Ingredients

1 cup all-purpose flour
1 cup white/wheat flour
2 teaspoons baking soda
1 1/2 Ceylon Cinnamon
1/2 teaspoon Himalayan salt
1/4 teaspoon Nutmeg
dash of  Ginger
dash of Allspice
3 Eggs at room temperature
1/2 cup Coconut oil
3/4 cup Buttermilk
1/2 cup Date Sugar
1/2 cup Dark Brown Sugar
1/2 cup Cane Sugar
1 teaspoon Vanilla Extract
1/4 teaspoon fresh Lemon Zest
1 cup toasted Walnuts or Pecans
1/4 cup Golden Raisins

Preparation

  • Sift the flours, baking soda, spices, and salt to together.
  • Lightly beat the eggs.
  • Beat the coconut oil (liquid, but not hot) into the eggs.
  • Beat the buttermilk into the eggs.
  • After the wet ingredients are mixed well, add the date, brown and cane sugar. Mix until well blended.
  • Blend the vanilla extract and lemon zest into the egg mixture.
  • Add the dry ingredients to the wet slowly using a spatula.  Blend it until it just comes together.
  • Fold the nuts and raisins into the batter with a spatula .
  • Pour into a well-greased 9″ x 13″ x 2″ pan (butter or coconut oil).
  • Bake at 355F for 25-30 minutes. Start testing the cake with a toothpick at 25 minutes.


Posted in Dessert, Fall, General, Recipes, Summer, Winter | Tagged , , , , , , , , , , , , , , , , , | Leave a comment

Simple Saving Techniques for the Late Spring Harvest

Today I had the same conversation with two farmers. The early and frequent rain brought a great crop of zucchini, yellow squash, carrots, onions and garlic this year. In previous years the water dried up before we even started into June and most of us that love these products could not find much to put away for the winter. Which brings me to a welcomed problem. There is a bit of a glut of these items and people just don’t have simple ways of putting away these things to use later. So I have some suggestions for you. They are all healthy and simple. No cooking experience is necessary. I will add some photos later next week along with the posts that I was supposed to finish from last weekend’s market. It’s been busy here this week!

As with everything you put away, please remember to date and label it carefully. I normally put the farm source on my labels so year to year I can tell which products fare better when I try different varieties. This was a quick post so if you have questions, just send them to me and I will add to the post.

Carrots

  1. Clean them up and slice them lengthwise and roast them in olive oil at 400F for about 10 minutes. I like a little brown on mine. Then simply freeze them in freezer bags or containers.
  2. Clean them up and chop into bite-size pieces. Then saute them in olive oil until they are still firm. Freeze them in containers.
  3. Clean them up and chop them into bite-size pieces and steam them just until they are barely cooked all the way through. Freeze them in containers.

Green Zucchini & Summer Yellow Squash :

  1. Gently clean the outside and then grate them with a large size grater. Steam them just about 3-4 minutes and freeze in containers. You can add them to casseroles, cakes or make zucchini vegetable or seafood cakes out of them later. They hold up well enough for casseroles but not very well for other applications.
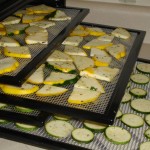
  2. You can dehydrate them, but the texture changes quite a bit when you hydrate them later. Use might include soups or stews where the appearance is not critical.

Onions:

  1. These dehydrate very well and are a great way to make your own healthy onion dip for all those winter sports parties!
  2. They are also wonderful grilled in thick slices and then frozen to be used in your chili during the cold months.
  3. You can thin slice them and saute them in olive oil and freeze them as well. Don’t cook them all the way through and you can finish browning them later if you want to add them to your burgers or on top of a steak or roast during the winter.

Garlic

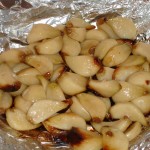
  1. If you love using garlic as much as I do, you might consider roasting it in olive oil and freezing it for the winter. This is as simple as cleaning the skins off and putting all the cloves in a container with some olive oil just to coat them. Cover and bake at 375 for about 15-20 minutes. You are trying to get them a little “golden brown” color on parts of them, but not all. Just a bit.  Let it cool and them put it in a container and freeze it. This will make it easier for you to save time and energy making meals the rest of the year.

Chard & Spinach

  1. Clean the leaves and lightly steam these to hold the color if you are still getting them at the market. Just freeze them in containers and pull them out for soups or casseroles.

Cauliflower

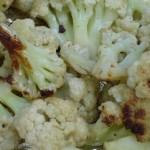
I roast up a lot of this for soups in the spring and the fall. Chop up and add some olive oil, salt & pepper. Roasting around 400F in a sealed container takes about 10 minutes. Leave the lid on and remove from the heat. Let it sit another 10 minutes. This will be lightly browned and it’s great in soups. Put it in a freezer container. You can puree it ahead of time if your recipe calls for that. It will take up less room in your freezer.

Broccoli

I normally clean, chop and steam the broccoli. Then I use freezer containers and freeze it for soups, casseroles or quiche.


Posted in Recipes, Second Harvest, Spring | Tagged , , , , , , , , , , , , , , , , , | 1 Comment

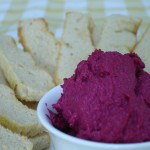
Roasted Beet Hummus

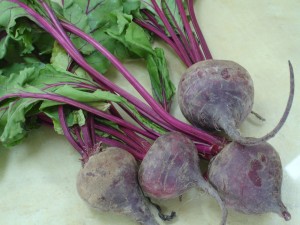
This is a hummus that Barney would love! Yes, it’s purple. It’s also fun and tasty and goes well with toasted naan. Using  ingredients from your freezer or just some leftover roasted beets from a meal, you can make this in your food processor in minutes. Make it more or less sweet by changing the amount of tahini, garlic, chickpeas and cumin, just check the notes at the end of the recipe. If you make too much, throw the extra in the freezer and enjoy it some other time!

Roasted Beet Hummus

Ingredients

  • 8 oz roasted beets, mashed
  • 1/4-1/3 cup tahini
  • 3 tablespoon virgin olive oil
  • 2 tablespoon fresh lemon juice
  • 1 1/2 teaspoons roasted garlic
  • 1/2 cup cooked chickpeas
  • 1/2 teaspoon cumin
  • 1/4-1/2 teaspoon salt (optional/ Murray River Flake Salt)

Preparation

In a food processor (small size), blend all of the ingredients until smooth. It takes a couple of minutes and I found doing it in two batches resulted in a smoother consistency.

Notes

  • Using less tahini will result in more beet flavor coming through and less creamy texture.
  • Eliminating chickpeas will result in sweeter hummus with more beet flavor and less creamy texture.
  • Adding more chickpeas will result in more mild flavor overall.
  • If you are using raw garlic instead of roasted, start with half of the amount.
  • Use more cumin if you like the flavor of it. Kids usually don’t like it loaded up with cumin.
  • The olive oil helps you process the foods more smoothly so you can add or subtract as you go along.
  • Salt and pepper if you like, but I didn’t find it necessary.
Posted in Appetizer, Dairy-Free, Fall, Gluten-Free, Nut-Free, Recipes, Summer, Vegetarian, Winter | Tagged , , , , , , , , , , , , , , , , | 1 Comment

Buttermilk Corn Cakes

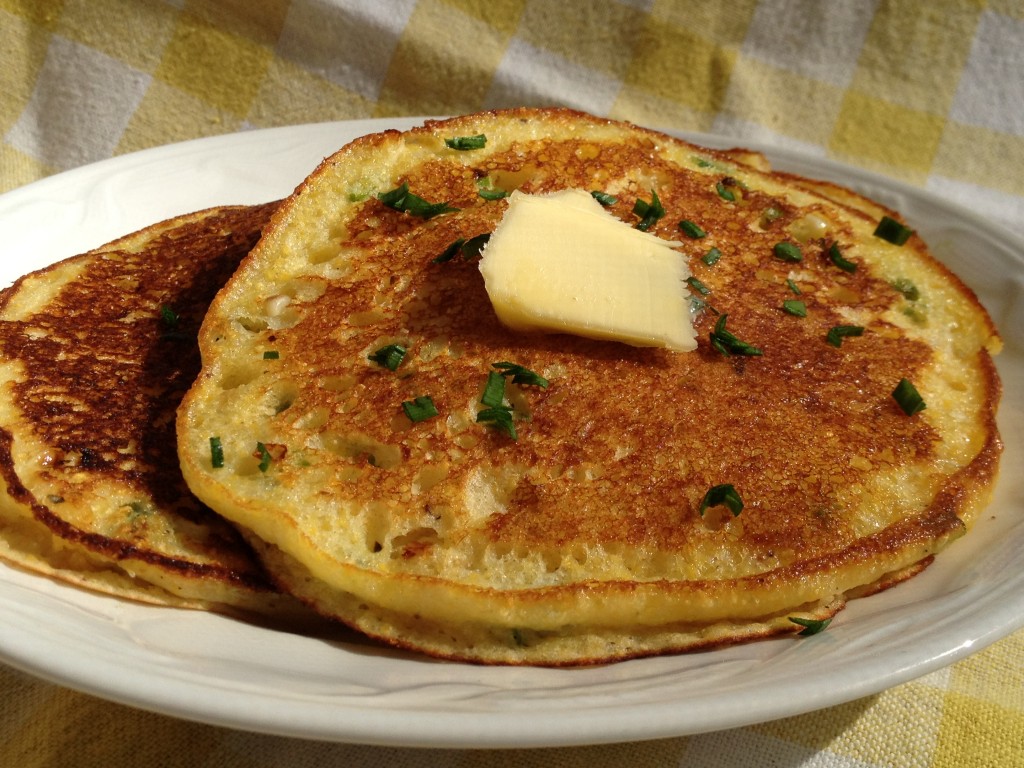
Corn cakes, hoe cakes, lace bread, flat bread. The names are just about endless.  But the beauty of this little corn cake is it’s versatility. Serve it with eggs and honey in the morning, a heaping spoonful of  jalapeno goat cheese and a salad at lunch, or as a side to a vegetable plate at dinner. It’s incredibly easy to make and you can add in herbs, green onions, hot peppers, chile powders, or cheese and create an entirely different flavor for your meal each time you cook. The possibilities seem endless. I served these at Western Wake Farmers Market with Strawberry Balsamic Jam.

5/30/11 – Today I played around with these cakes a bit more to get ready for a different farmers’ market this weekend. I added some local green onion and some freeze dried corn. I had dehydrated corn last fall, but that was used up months ago so I picked up some freeze dried just to try at Savory Spice about a week ago. It’s like a sweet snack when it’s freeze-dried. My dehydrated is great in soups and stews, but this is wonderful by the handful. It’s not organic, GMO-free or local, unfortunately. I’ll try some local organic roasted corn in this recipe when I can get it in a few weeks and update this post with the results.

2/11/2012 – We had a few questions about converting these to a gluten free recipe yesterday at the Carrboro Farmers’ Market. Our Nutrition intern suggested brown rice flour to replace the wheat flour and I tested that today. She has a wonderful site for gluten-free baking:  Cakes ‘N’ Bakes.

The texture holds up well even without the use of any sort of gum. I did add 1 teaspoon of an organic, GMO free, gluten-free corn starch. I believe there is enough change in the base flavor that you will need to increase the salt to at least 3/4 – 1 teaspoon. And I found the roasted corn that I used also needed to be bumped up to 2/3 cup to maintain the flavor profile. We also want to test potato flour next week so we can make additional recommendations.

Buttermilk Corn Cakes

Ingredients

  • 1 cup corn meal
  • 1 tablespoon baking powder
  • 1/4 cup flour
  • 1/2 teaspoon salt
  • 1 1/4 cups buttermilk
  • 1 egg
  • 1 tablespoon olive oil
  • 1/3 cup finely chopped green onion (optional)
  • 1/3 cup freeze dried corn (optional)

Preparation

  • Mix the corn meal, flour, baking powder, and salt in a bowl.
  • Mix the egg, buttermilk, and olive oil in another bowl.
  • Add the dry ingredients to the wet and blend until just mixed.
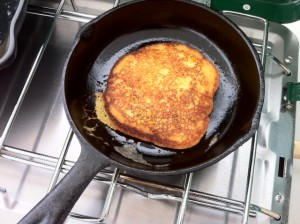
  • Cook in cast iron skillet with a minimum of olive oil on medium heat.
  • Lightly brown both sides.
  • Serve hot with any number of toppings.

Notes

  • This recipe will work fine if you eliminate the egg, OR if you use regular milk instead of  buttermilk (or make your own by adding vinegar to milk) OR by eliminating the flour or changing it to rice flour.
  • You can substitute another milk but you may need to reduce the amount of your substitute if it is thinner in texture. The buttermilk has a chemical reaction with the baking powder so your may not be quite as fluffy.
  • If you remove the flour, then you might need to reduce the amount of the buttermilk. It depends on how think you like your cakes. You can replace the flour with rice flour, but increase the buttermilk to 1 1/2 cups, add 1/4 – 1/2 teaspoon of additional salt, and double the roasted or blanched corn in the recipe because the rice flour changes the flavor and competes a little with the corn. After we test potato flour & potato starch we will leave additional notes.
  • If you remove the egg, the batter will have a little less flavor but the rest of the measurements should remain the same.


Posted in General, Nut-Free, Recipes, Sides, Vegetarian | Tagged , , , , , , , , , , , , , , , , | Leave a comment