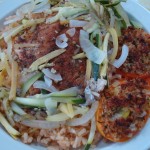
Spicy Sheepshead Fish on the Grill with Summer Squash

This post should finish up the series of recipes for the Raleigh Downtown Farmers’ Market this past Wednesday. The folks at Locals Seafood suggested I try Sheepshead fish in this recipe because it remains firm when cooked. The taste of this fish is fairly mild, but it will absorb all sorts of spices and sauces and it hold up to just about any cooking process, which makes it versatile for many dishes. It’s also not expensive and fairly easy to find. And, I enjoyed working with it a couple of weeks ago when I made a fish stew!
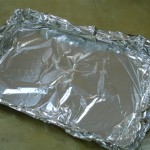
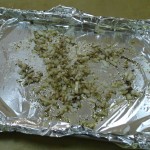
You can grill this dish anywhere. Just make sure to use heavy-duty aluminum foil for easy clean up.  Simply cover the cooking surface of a  heavy grilling pan with the foil. In a pinch, use a 2″ deep cast iron skillet and fit the foil in it! You can use a heavy cast iron one like those from Lodge or an inexpensive, but heavy,  metal one that won’t warp under higher temperatures. It’s helpful if it has a lip around all four edges in case you have a tear in your foil. You can contain the mess.
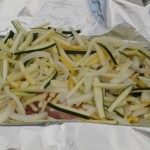
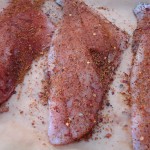
First coat your foil-covered surface with just a tablespoon of olive oil. You just need a little to keep the fish from sticking. Some of the skin will still stick, but it isn’t a problem at serving time. Lay your fish on the foil skin side down on the foil; flesh side up to the sky. Coat the fish with any rub or seasoning (lemon juice, garlic, chives, thyme, rosemary, marjoram, pepper flakes). At this point, you can stop and cover the fish tightly with another piece of foil, or spread vegetables on top of the fish and around the sides. Your vegetables will need to be thin and require the same or less cooking time than the fish.
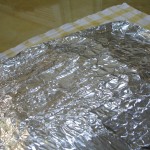
The fish and vegetables are going to cook for at least 8-10 minutes and probably more depending on the type of grill. You will be listening and smelling to figure out the timing on this dish. The more fish you are cooking in one package, the longer it takes to cook  the dish. Try not to overcrowd the dish or use ingredients that are too chilled because it will take so long to come up to temperature, that parts of the fish or vegetables may get over-cooked in the process.
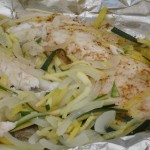
As the fish and vegetables come up to temperature, you will hear a lot of sizzling and popping. The fish and vegetables will start to smell good as they get close to being finished.  When it’s finished, the fish will remain white and flaky. The vegetables will be in a range of just barely cooked to some steamed rather well. It all tastes good so don’t worry about it. Because I leave this covered and sitting to let the fish rest, the vegetables tend to finish cooking while the package is still shut tight so I pull it off just a couple of minutes early to let it finish cooking on its own.

There aren’t specific quantities for this recipe. It’s more like a campfire recipe. You’ll need to adjust based on your appetite and how many people you are feeding. For two of us, I prepare one fillet each and about 2 cups of finely sliced or julienned vegetables. Generally I use zucchini, summer squash and sweet onions.  I like to use the smaller vegetables in this dish because there are fewer seeds and it will make a difference in how the dish cooks up. New Grass Gardens had some this past week that were just the right size. Pattypan squash are great for this dish as well.. It takes about 2 small squash per person once they cook down a bit and an onion that weighs in around 4 ounces. Wild Onion Farms has had some excellent onions this season that ranged in size and flavors.  Don’t go too heavy on the onion in this dish. Just sprinkle the Old Bay seasoning on top of the fish before you add the vegetables so they cook with the fish. If you are not familiar with Old Bay, it can be salty and many consider it hot. Start with 1/2 teaspoon per fillet. Each fillet was a little less than a half pound.

Posted in Dairy-Free, Fish, General, Gluten-Free, Nut-Free, Recipes, Summer | Tagged , , , , , , , , , , , , , , | 2 Comments

Mexican Rice with Heirloom Tomato Juice & Roasted Onions

This recipe is really just an excuse to use up something I didn’t want to waste. Roasted tomato juice. After roasting all of those beautiful heirloom tomatoes throughout the course of a day, I find that there is more juice than I care to blend into the final tomato sauce recipe. One year I started freezing it and realized over the course of a winter that a lot of my recipes called for something like tomato or vegetable juice. As it turned out, not only did I save a little change,  I had just about enough of the leftover roasting juice  in my freezer to make it through the fall and winter season. You can do something similar when you open a can of tomatoes to make any of your recipes. Most folks will cook off the liquid and nutrients during the course of preparing something. Instead,  pour it into a freezer container and skip all that extra cooking.

This rice is pretty tasty with all sorts of summer squash. You can grill, saute or steam the squash and place it on top of the rice. It’s also good with tacos, regardless of whether they are soy, meat, poultry or fish based. Today I used it as a base for grilled fish and summer squash at the Raleigh Downtown Farmers’ Market.

Over the years, I have found that an equal amount of chicken broth and tomato juice results in the best flavor and doesn’t cook up terribly sticky. My favorite, basmati, will be more sticky than long-grain white rice.  Grilled or sautéed sweet onions that are pre-cooked and chopped are excellent as an additional element to the dish. I keep the onions and roasted peppers in the freezer in different size containers. Capers are tasty as well, but don’t add the brine. Hot peppers are in full swing at the market now and excellent to add for some spice. This recipe makes enough for four/six. The bonus… you can freeze this after you make it and use it in casseroles or soup.


Mexican Rice with Heirloom Tomato Juice & Roasted Onions

Ingredients

  • 2 teaspoons olive oil
  • 1cup basmati rice
  • 1 cup home-made tomato juice or juice from canned roasted tomatoes
  • 1 cup broth (preferably chicken)
  • 1/2 teaspoon salt (if your tomato juice is salt-free)
  • 1/8 teaspoon pepper
  • 1/4 teaspoon fresh chopped oregano
  • 1/4 cup chopped roasted onions, chopped
  • Optional – chopped jalapeno, capers, other herbs like marjoram or thyme

Preparation

  • Heat the olive oil in a heavy bottom pan on medium/high heat. Be careful not to scorch it.
  • When it’s piping hot, pour in your rice and stir to coat it. Keep stirring this around until it’s popping. Don’t brown it.
  • Just  as it begins to turn color add in your liquids and any seasonings like salt, pepper, thyme, oregano, capers, red pepper bits, jalapeno, or chopped onions.
  • Bring to a rapid boil and cover.
  • Immediately turn down the heat to low and simmer for 20 minutes.
  • Turn off the heat and DON’T peak. You will release  necessary heat and steam. Leave on the stove for 10 more minutes.
  • Uncover and fluff with a fork.

Notes

  • Lots of folks bake their rice in the oven. I have done this in the past with great success and if I can find my notes sometime soon, I’ll post them with this recipe.
  • A good heavy pot is necessary to retain even heat when cooking your rice. I have used all sorts of pots in the past and prefer my dutch ovens for this purpose if I’m not using a dedicated rice cooker.
  • Freeze leftovers for use in casseroles or soups.
  • Rice cookers seem like a huge expense. I only recently was given one. It makes excellent rice that is more consistent than mine in a pot when I need to make a large amount for cooking demos and large family gatherings. It doesn’t use oven or stove top space which can be valuable commodities when you’re cooking for a group.  It keeps the rice warm and perfect for hours on end. And, it cooks  brown and wild rice perfectly without effort any on my part. Call me lazy, but I find it to be a useful tool which doesn’t cause me to waste food.
Posted in Dairy-Free, General, Gluten-Free, Nut-Free, Recipes, Summer, Vegetarian | Tagged , , , , , , , , , , , , , , | Leave a comment

Dried Tomato Scones with Local Chevre

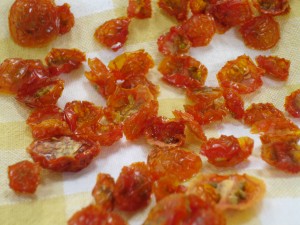
This recipe came about as a sidestep from a recipe I worked on last week with shredded zucchini & chevre. Basically I thought the little dark orange and red dehydrated sungold cherry tomatoes would be pretty dotted in a scone and taste good with the chevre. I didn’t have a chance to try bacon pieces before the  Raleigh Downtown Farmers’ Market this morning, but I’m betting that would be good as well! I used heavy whipping cream today to keep the scones as moist as possible because of the high temperature.

This recipe is for those “non-bakers” out there. The dough gets a little sticky, but there’s nothing magical about making  these, and no special equipment is necessary. You can even make them in a toaster oven if you are careful. They are delightfully light despite all the cheese and butter, and would be great for lunch with a salad during the summer or soup in the cooler months  if you’re not up to savory breads for breakfast.

Being scones, you will have to trust me when I say you need to leave the fat in these and you should just make the small batch and enjoy them occasionally. The fact that it takes 24 hours to dehydrate the little sungolds in your oven should not deter you. You can put them in your oven to bake at 150-170 on a baking sheet with parchment paper under them, and sprinkle them with a herb mix and they will be finished in a day, rewarding you with a super-healthy snack (even if the scones aren’t).  This recipe makes four healthy size scones. If you want two, then just make some scrambled eggs out of your extra egg and milk mixture at the end to eat with the scones.


Dried Tomato Scones with Chevre

Ingredients

  • 1 1/4 cups of AP white unbleached organic flour
  • 1 tablespoon plus 1 teaspoon of fresh baking powder
  • 1/2 teaspoon Himalayan sea salt
  • 2 oz regular cream cheese (at room temperature)
  • 4 oz chevre (at room temperature)
  • 2 oz cold butter
  • 2 tablespoons finely chopped fresh chives
  • 1/3 cup chopped dried sungold cherry tomatoes (dried with herbs, no oil)
  • 1 egg, lightly beaten
  • 1/2 cup cream or half/half
  • 1 tablespoon whole or low-fat milk

Preparation

  • Preheat oven to 400F
  • Sift the flour, baking powder and salt together in a bowl.
  • Using forks or a pastry cutter, mix the cream cheese and chevre into the flour in small bits.
  • Add in the butter using a pastry cutter so you don’t warm it up.
  • Working quickly to keep the butter cold, add in the chives and sungold tomato pieces using the pastry cutter.
  • In a separate bowl, mix the egg and cream together. This will make about 3/4 cup of liquid.
  • Using 1/2 cup of the milk and egg mixture and save the rest. Gently pour the 1/2 cup of egg and cream mixture into the flour dough and working quickly with your hands, loosely incorporate the milk into the batter and form a loose ball in your hands. Be careful not to overwork the dough.
  • Add a tablespoon of regular milk into the leftover egg and cream mixture and beat together.
  • Cut the dough with a large knife into 4 pieces of scone and brush the tops and sides
  • On a floured surface, pat out the ball until it’s about 1″ thick and about 9″ diameter. Focus on the thickness more than the diameter and don’t worry if it doesn’t look perfect and neat. As long as the dough sticks together, it will taste good.
  • Using a pastry brush, cover the top and sides of each scone with the egg and milk mixture. It will soak into the flour and batter as you brush it on. Don’t cover them a second time in wash. You don’t want scrambled eggs on the top of your scone. You will probably have some egg and milk mixture left over.
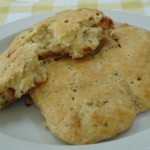
  • Bake on a baking sheet covered with parchment paper at 400F for about 18 minutes, until they are golden and browned but not all over. Just a light coloring. These are easy to over-cook by a minute or two. The photo shows them about 2 minutes overcooked. They should not be quite that brown on the bottom or the top.
  • Cool on a baking sheet about 10 minutes before serving or store in airtight container after about 20 minutes. They tend to dry out quickly.


Posted in Breakfast, General, Nut-Free, Recipes, Summer, Vegetarian | Tagged , , , , , , , , , , , , , , , , | Leave a comment

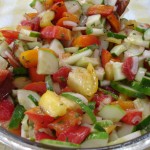
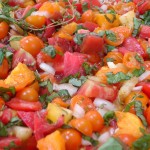
Heirloom Tomatoes, Cucumbers & Sweet Onion Salad

This salad is so versatile. If you are able to make it just before serving with fresh ingredients, it tastes wonderful. But sometimes, we find ourselves in a pinch for time, and we need to prepare a salad early. Unfortunately, veggies like cucumbers and fruits like tomatoes, weep their juices when they sit around. It’s not a problem with this salad. You can add any sort of interesting bread that you have on hand. I have used yeasted corn bread croutons, toasted focaccia bread saturated with olive oil and spices, and lovely fresh crusted ciabatta bread. The point of the bread is just to soak up all those seasonal juices of summer.

So dig in and make this salad while the tomatoes are ripe and plentiful! This recipe serves at least 4 people.


Heirloom Tomatoes, Cucumbers & Sweet Onion Salad

Ingredients

  • 3 lbs of heirloom tomatoes, all sizes and varieties
  • 1 lb of small cucumbers with thin skins
  • 1/2 cup of thinly sliced sweet onion
  • 4 tablespoon Extra Virgin Olive Oil
  • 1-2 tablespoons White Balsamic Vinegar
  • 1/2 teaspoon sea salt
  • 1/4 teaspoon fresh ground pepper
  • pinch of sugar is optional
  • teaspoon of fresh thyme leaves, or chopped rosemary (optional)

Preparation

  • Whisk together the olive oil, vinegar, salt, pepper and adjust the sugar if you choose to use it in the dressing.
  • Set aside while you rough chop the heirloom tomatoes, slice the cucumbers (skin on) about 1/8″ thick in quarters or halves, and thinly slice the sweet onion.
  • Combine the vegetables and about 30 minutes before serving, dress the salad and let it sit at room temperature.

Notes

  • If you have some fresh or smoked mozzarella on hand, it’s great cubed up in this salad at the last minute. Grated cheese will tend to clump in this salad.
Posted in Dairy-Free, Gluten-Free, Nut-Free, Recipes, Salads, Summer, Vegetarian | Tagged , , , , , , , , , , , , , , , | Leave a comment

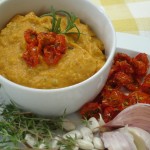
Sungold Tomato & Cannellini Bean Dip

Looking for a healthy snack alternative for summer or fall? This is a breeze to whip up, and like most of the dips I’m fond of, you can make this from fresh or from “stored” foods.  It will also freeze well after you make a batch for a couple of weeks. I used some fresh roasted Sungold cherry tomatoes from one of our local CSA farms. I like these tomatoes roasted because they take on a sweet taste when you mix them with a little olive oil, salt & pepper. In this case, I did choose to use a Hawaiian Red Alae Salt which I think has an earthy tone to match the tomatoes, but regular sea salt will work well if you have it on hand.  Blend the tomatoes with inexpensive white beans, mix in some fresh chevre from a local cheese maker, a little garlic, some onion,  a  few red pepper flakes to take the heat up and some fresh thyme leaves and rosemary from the garden and you’re finished. Throw it all into your little food processor and whip it around for a couple of minutes, and you will have a delightful treat to serve with vegetables or on some fresh bread or crackers. This is also excellent as a spread on turkey or chicken sandwiches as an alternative to mayo.


Sungold Tomato & White Bean Dip

Ingredients

  • 1 cup of cooked cannellini white beans, no liquid
  • 1 cup of roasted Sungold cherry tomatoes, with liquid
  • 1 1/2 teaspoons garlic ( I used roasted which is mild)
  • 1/2 cup sauteed or roasted sweet onion, chopped
  • 1/4 teaspoon pepper
  • 1/2 teaspoon Red Gold Hawaii Kai Sea Salt
  • 1/8-1/4 teaspoon Red Pepper Flakes
  • 2 tablespoons plain Chevre
  • 1 teaspoon fresh thyme leaves (removed from stem)
  • rosemary leaves removed from a 4-5″ stem
  • olive oil – just a little to process if necessary

Preparation

Using a small food processor (may require 2 batches) blend equal amounts of the cannellini white beans and roasted Sungold tomatoes along with the garlic, onion, salt, pepper, chevre, thyme and rosemary. Taste and then adjust the heat with the red pepper flakes.

You can substitute feta (even marinated) for the chevre

I tried using yogurt instead of the chevre, but I didn’t think it worked well

Posted in Appetizer, Gluten-Free, Nut-Free, Recipes, Summer, Vegetarian | Tagged , , , , , , , , , , , , , , , , , | 2 Comments

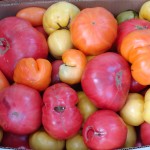
Tomato Season 2011: Roasting Tomatoes

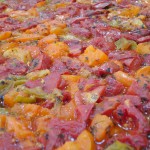
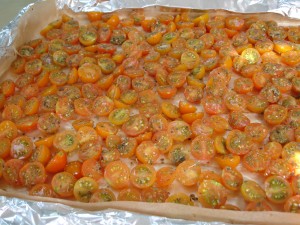
My favorite fruit is the tomato. For me, the whole summer revolves around putting up tomatoes of all sizes and shapes in all sorts of ways. There’s tomato jam in the freezer that is excellent on meatloaf sandwiches. There are hundreds of little Sungold dried tomatoes in containers waiting to get eaten on hikes, used in dips, and added to sauces. There are literally hundreds of pounds of tomatoes to be roasted with fresh herbs, garlic and onions and stored in the freezer as sauce, salsa or soup. Are you hungry yet?

When I was a child, I was just as crazy about tomatoes. I could not wait for the season to begin so I could eat tomato and mayo sandwiches for breakfast, lunch, and dinner. I didn’t need the lettuce or the bacon. Just a bit of salt and pepper. My sandwich has changed a bit over the years and now avocado replaces the mayo and I’m able to find some excellent sustainable bacon and shade-grown baby lettuce greens during the summer that make a sandwich worthy of any meal.

There are so many beautiful colors, shapes and sizes of tomatoes that it boggles the mind. Typically, the more yellow or orange the tomato, the sweeter and less acid it will be. The deeper red to black, means it’s got a lot of acid. Every year I discover new varieties because there are hundreds of heirlooms and we are fortunate to have some excellent growers in the Piedmont area.  A local farmer recommended a couple of good books: “The Heirloom Tomato” by Amy Goldman and “100 Heirloom Tomatoes for the American Garden”  by Carolyn Male.

To figure out what you want to roast, just go try tomatoes and see which ones you like. Typically, I’ve found that just including any that I like raw makes for a delightful blend once it’s roasted with the olive oil and herbs. Your sauce will be your own and it will change from year to year just a bit as the farm conditions change. It’s like a fine wine, and you keep refining it each year based on the crops.  Keep careful notes and adjust the blends to suit the way you use the sauce in other recipes. If you like to can your tomatoes, you are going to need to monitor your pH, and I recommend a pH meter similar to what dairies use.


Roasting Tomatoes

Ingredients

  • 5 lbs of Heirloom Tomatoes, rough chopped
  • 1/4 cup olive oil
  • 1/2 teaspoon sea salt (Savory Spice Red Hawaii Kai)
  • 1/4 teaspoon pepper
  • 1 tablespoon dry Italian herb mix
  • 1/2 cup chopped sweet onion (optional)
  • 2 minced garlic cloves (optional)

Preparation

  • Using heavy-duty aluminum foil, cover a heavy-duty stainless rimmed 13″ x 17″ baking sheet, (you must use heavy duty because the temperature will make a lightweight pan warp and it becomes dangerous with the hot liquid) all the way and wrap the excess foil around the edges and on to the bottom if necessary. This is to save you horrible clean-up time.
  • Mix all of the tomatoes, spices and olive oil together and spread it over the entire bottom of the pan evenly.
  • Cover the mix with another piece of heavy-duty foil.
  • Roast at 500F for 20 minutes.
  • Remove the top foil and roast another 10 minutes uncovered.
  • Let mixture cool.
  • Using a food processor, in batches, puree the mixture along with the juice until you reach the consistency that you like. It can be chunky or smooth. You can also use a food mill to do this process with equal success.
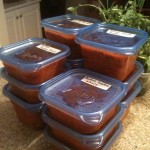
  • Put in freezer containers with a little “head room” and freeze for the season. I do not carry mine over season to season.

Notes

  • I find it useful to have different size containers of the sauce; small and large, depending on the recipes, you can pull the amount you need for a recipe.
  • You can also use fresh herbs, onions and garlic while roasting. Take a look at the recipes you normally cook and decide if that will work for you. Or do some each way and label carefully.
  • Typically for our family of four, I put up about 125 pounds of tomatoes, not including dehydrated ones that we’ll discuss in the next posting.


Posted in Dairy-Free, Freezing & Canning, Gluten-Free, Nut-Free, Recipes, Second Harvest, Summer, Vegetarian | Tagged , , , , , , , , , , , , , , , , , , , , , , | 1 Comment

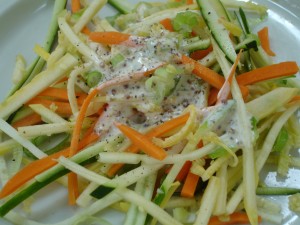
Summer Squash Slaw

Summer squash is so beautiful that I love finding recipes that contrast the vibrant skin colors to the delicate texture and color of the interior flesh. The original recipe for this slaw came from Sara Foster’s “Fresh Every Day”. I’ve modified both the quantities and ingredients just slightly so that this will make plenty for two and probably enough as a side for four. My taste for dressing is on the lean side and I prefer mustard to mayo so you may decide to adjust the mayo. When you do that, you will probably need to increase the amount of vinegar also. I rarely use more than a teaspoon of dressing on a small side salad, so the quantities I’ve listed won’t leave you with spare. Just a note, this dressing is also very tasty on  crab cakes served on a bed of baby lettuce greens, especially with a bit of celery seed.

Summer Squash Slaw

Ingredients

1 (6 oz) green zucchini
1 (6 oz) yellow straight neck yellow summer squash
6 oz of heirloom carrots (any color you desire), peeled
1/4 – 1/3 cup green onion, chopped
Sea Salt & Pepper to taste
2 tablespoon mayonnaise
1 tablespoon Dijon country mustard
1 teaspoon white Balsamic vinegar
1/8-1/4 teaspoon cane sugar

Preparation

  • Wash and dry your summer squash. Smaller squash work well because they have fewer seeds. Clip off the both ends.
  • Julienne both the zucchini & yellow squash including the skins into 1/8″ pieces. If you have a mandoline, it works well with the soft vegetables. I do not bother to remove the seeds, but depending on the size of your squash, you may need to. Set aside in a bowl.
  • Remove both ends from the carrot(s) and julienne them into 1/8″ pieces as well. Add to the squash.
  • Chop your green onions, from the bulb up through the good parts of the stem. Add to the vegetables.
  • Mix the vegetables together and add some salt and pepper to taste. I find a lighter salt like Himalayan or Murray Flake work well for this salad.
  • Mix the mayonnaise, mustard, and vinegar together. Add the smallest amount of sugar and then adjust the mayo, vinegar and sugar to suit your taste.
  • Drizzle on top of your salad or mix into the salad completely.

Notes

  • If you want to serve this salad on top of hot dogs or sausages, chop your pieces of julienne strips into smaller sizes so that you can blend it really easily with the dressing or consider using a large shredder for the vegetables.
  • Honey did not work well as a substitute for the sugar in this recipe.


Posted in Dairy-Free, General, Gluten-Free, Nut-Free, Recipes, Salads, Sides, Summer, Vegetarian | Tagged , , , , , , , , , , , , , , , | Leave a comment

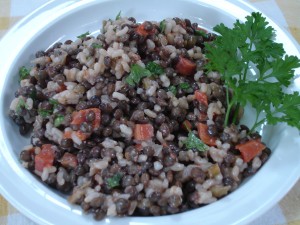
Lentil, Vegetable & Rice Salad

This is an easy dish to prepare if you saute the celery, onions and carrots together when they come into season and then freeze them in small quantities. You can also pre-cook rice and freeze it. I always try to make a little extra so I have some in the freezer for a single serving. All you have to do at that point is cook up your lentils and you are ready to throw this together. The other nice thing about this recipe is you can add some meat to it if you are camping and want a one pot meal. It’s also excellent with additional broth and a little meat or meat substitute thrown into it.

I’m going to give the recipe as if you are starting from scratch. It will seem like it takes some time, but most of the time is in the prep with all the chopping of vegetables. It is easy enough for a beginner cook to make this successfully so don’t be intimidated by the number of steps when you see it in list form down below!

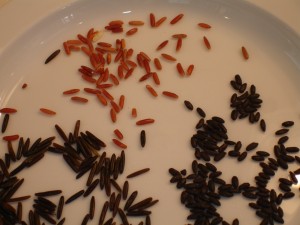
As usual, I can’t say enough for buying this from you local sustainable farms. I was so excited to be able to serve this dish today at the North Hills Midtown Farmers’ Market using the rice grown at Edible Earthscapes by Jason & Haruka Oatis last year. They are one of only two farms growing rice in North Carolina and a dear friend got me a pound of rice last year, foregoing some for herself! It has a lovely nutty flavor and texture similar in size to white sushi rice. This doesn’t have all of the outside hull polished off so it’s more nutritional, but takes a bit longer to cook. They harvested by hand last year, so I was very careful not to spill.

This recipe is great using Maine’s wild black long grain (also hand harvested) and a red Himalayan Red long grain rice. Both are more expensive that I care to admit, but you don’t need a lot in these dishes and I promise it’s really tasty. When I started making this recipe, I always used brown or white Basmati which is readily available.  I would not recommend the green bamboo rice or the short grain black rice. I don’t think either work well for this dish.


Lentil, Vegetable & Rice Salad

Ingredients for 6-8 Servings


1 cup of carrot, peeled & chopped
1 cup of celery, chopped
1 cup sweet onion, finely chopped
1 teaspoon roasted garlic, minced
1 cup lentils, (French-green)
1 ½ cup chicken or vegetable broth
1 bay leaf
1 cup long grain Basmati rice
1¾ cup chicken or vegetable  broth
½ cup chopped flat-leaf parsley
½-1 teaspoon lemon juice
1 tablespoon fresh thyme leaves
1 teaspoon celery seed
Salt & Pepper


Preparation


  • Heat 1 tablespoon of EVOO in saucepan and sauté the onions, celery and carrots until the onions just start to look translucent.
  • Stir in the lentils and celery seed.
  • Add 1 ½ cups of broth and bring to a boil.
  • Decrease the heat to medium/low, cover and simmer gently until the lentils are just tender, not overcooked or even slightly mushy. About 15 minutes.
  • There should be very little liquid left.
  • Meanwhile bring the 1¾ cup broth to a boil and cook the rice according to directions.
  • Fluff the rice and add it to the lentils.
  • Add the fresh parsley, thyme and lemon juice.
  • Add salt & pepper to taste

Notes

  • To make soup, add 2 cups of additional broth: maybe some mushrooms if they are in season
  • If serving warm, consider adding a meat (meat substitute) of some sort.
Posted in Dairy-Free, Fall, Gluten-Free, Nut-Free, Recipes, Salads, Second Harvest, Sides, Soup, Summer, Vegetarian | Tagged , , , , , , , , , , , , , , , , , , | Leave a comment

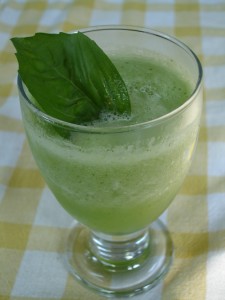
Cucumber Cooler

If you had a chance to stop by the North Hills Midtown Farmers’ Market July 2nd, you might have had one of these green chillers. The original recipe came from Heidi Swanson’s “Super Natural Every Day”. I thought it was a bit sweet so I decreased the honey. There were only a few folks at the market who said it needed to be sweeter, but then I wasn’t really measuring  too precisely either, given the wasps that took up shelter in my tent to cozy up to the honey jar. All I can say is that I was given 4 huge cucumbers. The kind the farmers can’t really sell and I used every bit of all of them on the 90+ day.


Cucumber Cooler for Two

  • 1 – 1/2 cups chopped cucumber, partially peeled
  • ½ cup cold water (sparkling)
  • 3 cups ice cubes
  • ¼ cup Honey
  • ½ lime, juiced
  • Pinch of pink sea salt

Using a blender, combine all of the ingredients. Pulse until it’s completely smooth and frosty; free of ice chunks. Serve immediately.

Posted in Dairy-Free, Drinks, Gluten-Free, Nut-Free, Recipes, Summer | Tagged , , , , , , , , , , , , , , , , | Leave a comment

Simple Summer Pasta Salads

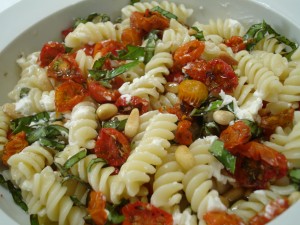
The salad I’m taking to the North Hills Midtown Farmers’ Market this Saturday is simple, light and interchangeable to suit what’s available each week at the market. I’ve created it for the “Farm it Forward” families that are going to get sungold dehydrated tomatoes this season along with some recipes for storing food from their CSA boxes.

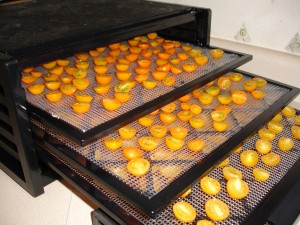
Today I used spiral noodles because they hold the soft goat cheese and chopped basil well. Both the dehydrated tomatoes and goat cheese  would be delicious with a whole grain pasta if you have that on hand. If you want something even lighter, go with an orzo pasta and you can add some protein by adding some chopped local bacon. Today I used partially dehydrated sungold tomatoes that had Italian herbs, salt & pepper sprinkled on them before they hit the dehydrator. They were sweet, soft and yummy because they were only in the unit for about 12 hours. If you take them out at this step, you need to refrigerate them and use them in the next few days or freeze them. Otherwise, continue to dry them completely and you can store them in your pantry to eat all winter, if they last that long.

The other suggestion for this salad is to use either hot or chilled cheese ravioli and shredded baby spinach or arugula. You could make an entire meal out of this salad with the addition of some local small ravioli and greens. If you aren’t fond of basil, swap out some fresh flat leaf parsley. If you don’t like pine nuts, eliminate them.  If you prefer feta or something like Asiago, use that instead of the goat cheese. All of these changes will still highlight the star of the show, the dehydrated sungold tomatoes with herbs.

If you don’t feel like drying the tomatoes, lightly cook them in a non-stick pan for a couple of minutes and add them just warmed up. You can add fresh thyme, rosemary, roasted or raw minced garlic. Whatever you have on hand.

To partially dry the sungold cherry tomatoes, you can use a dehydrator set at 125F or you can set you oven at 150F and place them cut side up on parchment paper for about 12 hours. To fully dry them in the summer it can take as long as 24 hours. You will need to continue to check their progress and rotate the trays so they dry evenly.


Summer Pasta Salad

Ingredients for 2 servings

2 cups dry spiral pasta
2 tablespoon toasted pine nuts
2/3 cup of partially dried sungold tomatoes with Italian herb mix
or 1 cup of sungold tomatoes halved and lightly cooked in EVOO
2 tablespoon plain chevre (feta or asiago)
4 basil leaves, chopped
1 teaspoon olive oil
Sea Salt & Pepper to taste
1/4 teaspoon minced roasted or raw garlic (optional)
2 teaspoons chopped olives (optional)
2 tablespoons chopped crispy bacon (optional)
Substitute fresh flat leaf parsley for basil (about 2 teaspoons rough chop)

Preparation

  • Cook the pasta according to the directions. Drain it and leave it to cool in a bowl while you assemble the rest of the ingredients.
  • Mix the tomatoes, basil (parsley), cheese, olive oil together, garlic, olives, and bacon together with the pasta.
  • Add salt & pepper to taste.
  • Serve at room temperature or chilled.


Posted in General, Recipes, Salads, Summer, Vegetarian | Tagged , , , , , , , , , , , , , , , , , | Leave a comment