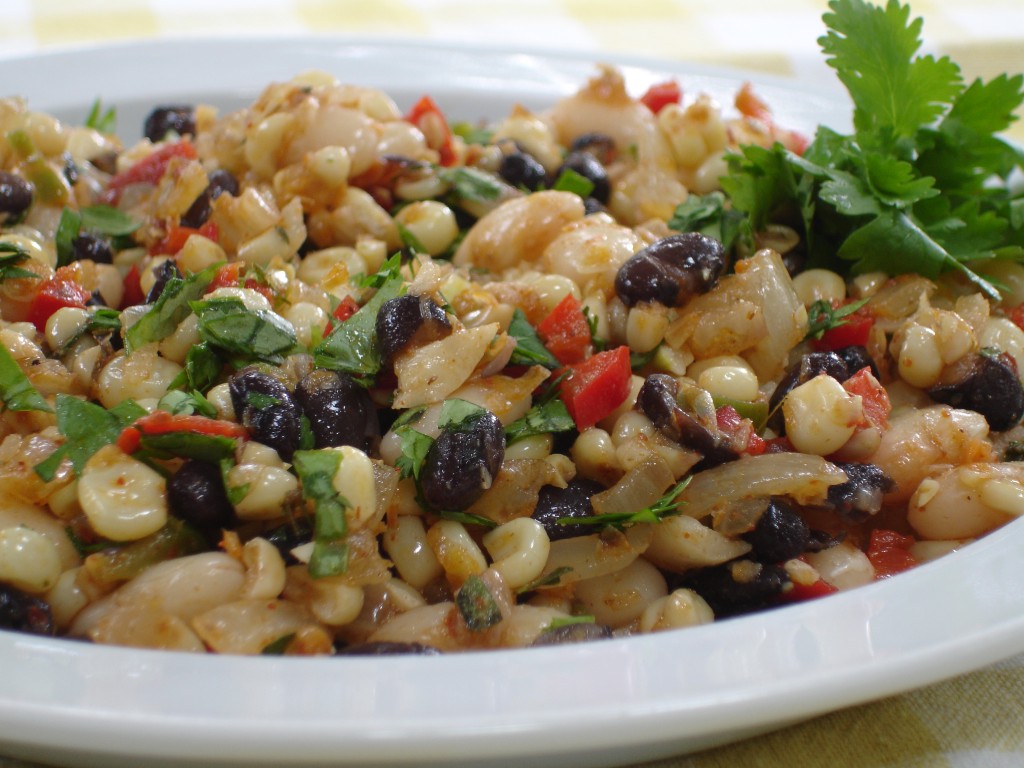
Black & White Bean Salsa with Corn, Peppers, & Onions

If you’re headed to a market around the Triangle area tomorrow, corn is going to be plentiful! This is a super recipe to make in the hot weather. I’m pretty sure the original recipe came from Cooking Light more than 20 years ago. I’ve written all over it, spilled on it, changed the ingredients over time and figured out how to make it pretty inexpensively with dry beans. This is great for summer parties because you can serve it chilled and about the time it’s finished it is room temperature and still tastes great. But the best part is that it’s just beautiful. You want to eat this and it’s good for you!

One caution on this. Cook the black beans separate from the white. They will color the white and the difference in color is important to the look of the finished dish. Other than that, it’s easy to make this any time of the year if you take some of the great sweet corn that’s coming in again this week and roast it and then freeze it off of the cob in about 1 1/2 cup increments. This comes together in no time at all and you can make it a day in advance of any meal. Add some hot peppers that’s your thing. The version I have here is pretty tame and easily feeds 6.


Black & White Bean Salsa with Roasted Corn, Peppers & Onions

Ingredients

  • 2-4 tablespoons olive oil
  • 1 cup cooked black beans ( about a 15 ounce can)
  • 1 cup cooked cannellini or other white bean (about a 15 ounce can )
  • 1 1/2 cups of roasted corn kernels
  • 1 cup chopped sweet red bell pepper
  • 1/3- 1/2 cup chopped green bell pepper (or substitute orange or yellow)
  • 1 cup chopped sweet onion
  • 2-3 tablespoon minced garlic
  • 1  1/2- 2  teaspoons ground cumin
  • 1 teaspoon Aleppo crushed red pepper flakes
  • 1/2 teaspoon Guajillo ground chile powder
  • 1 tablespoon minced fresh oregano (1 teaspoon dried)
  • 1 tablespoon fresh chopped cilantro (skip it if you can’t use fresh)
  • 2 tablespoons fresh lime juice
  • 1/2 cup chopped avocado (optional)
  • 1 jalapeno chili, seeded and chopped (optional)

Preparation

  • Rinse and drain canned beans. Drain cooked beans. Combine the two.
  • If you are using frozen corn that hasn’t been cooked, saute it 3 minutes on med/high  in about 2 tablespoons of olive oil with salt & pepper.
  • Transfer the corn to the bean mixture.
  • Add another 2 tablespoons to the same pan and saute the bell peppers, onions and garlic for about 3 minutes and add the cumin and chiles (and dry oregano). Cook for another 2 minutes and add to the beans and corn.
  • Add the oregano, cilantro, lime juice, (and jalapeno) to the vegetables.
  • Adjust the seasons.
  • Serve as a side salad or with tortilla chips as a “dip”

 Notes

7/13/12 -If you want to save a couple of dollars, cook up dried beans. The trick to making good beans is the overnight soak. After soaking, rinse your beans and start with fresh filtered water, bringing them to a simmer. Follow the package directions for the correct amount of time, but remember not to add any salt until the last 5 minutes of cooking or the outside skin of the bean will not soften during cooking. For added flavor, add fresh celery leaves, onions and even some Mesquite & Apple Wood Smoked Peppercorns.  During the last 5 minutes you can add additional flavors to the beans by selecting any number of different salts.

Posted in Appetizer, Dairy-Free, Diabetic Friendly, Gluten-Free, Nut-Free, Recipes, Salads, Second Harvest, Sides, Summer, Vegetarian | Tagged , , , , , , , , , , , , , , , , , , , , , , | Leave a comment

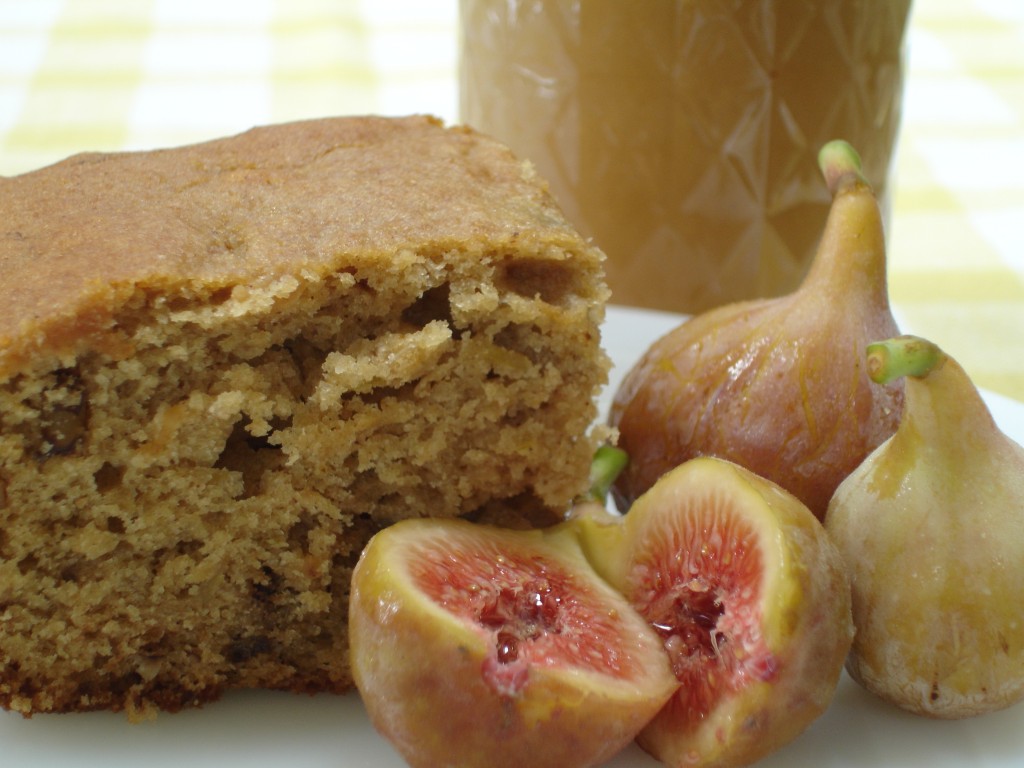
Applesauce & Fig Cake

I had really planned to make a fig cake this week because there’s an abundance of figs since the rain. But most of the fig cake recipes I looked at seemed like something you would want in the fall and it’s still almost 100F here so I widened my search a bit.

The original recipe for this cake comes from Smitten Kitchen but I didn’t have enough home-made applesauce in the pantry to make the original. What I had on hand was a lot of fresh fig jam and fresh figs. While this didn’t use up as many figs as I would like, it’s a great start and easy to assemble and bake.  I’m pretty sure you could swap out a bit more of the applesauce for fresh figs or fig jam.

This cake doesn’t need frosting, in my opinion.  I think it would be entirely too sweet and detract from the delicate undertones of ginger, cloves and cinnamon. This cake stays moist for days, as promised in the original recipe. I’ve made some swaps and additions to the recipe based on what I had on hand and trying to make it a little more healthy. Feel free to search your pantry and do the same.


Applesauce & Fig Cake

Ingredients

  • 1 cup all-purpose unbleached organic white flour
  • 1 cup white/wheat organic flour
  • 2 teaspoons baking powder
  • 1/2 teaspoon baking soda
  • 1/2 teaspoon cinnamon (my applesauce and fig jam have cinnamon)
  • 1/2 teaspoon ground ginger
  • 1/8 teaspoon ground cloves
  • 1/2 teaspoon Himalayan Salt
  • 3 ounces salted butter (Homeland Creamery) at room temperature
  • 1 cup light brown sugar (unpacked because the figs and jam are very sweet)
  • 1 teaspoon Vanilla extract
  • 2 large eggs
  • 1 ounce virgin coconut oil (liquid)
  • 1 cup home-made (cinnamon) applesauce
  • 1/4 cup home-made fig preserves
  • 1/3 cup cleaned & chopped fresh figs (they may be previously frozen)
  • 3/4 cup chopped toasted walnuts


Preparation

  • Preheat the oven to 350F.
  • Butter or use coconut oil to coat the inside of a 9″ x 9″ square pan.
  • Sift together the flours, baking powder, baking soda, spices and salt. Set aside.
  • On high speed, beat the butter, brown sugar and vanilla together until it is lighter & well blended.
  • Add in one egg at time and beat on medium / high until both are well blended.
  • Add in the liquid coconut oil. Coconut oil solidifies in cooler temperatures and you can heat it on low to make it liquid again. It blends much better into the batter.
  • On low speed, blend in the applesauce, fig preserves and chopped figs until they are barely incorporated. Don’t over-mix.
  • Hand mix the walnuts with a couple of turns of a spatula.
  • Pour evenly into the cake pan and bake for 35-40 minutes.


Notes

  • I used an 8″ x8″ pan and the corners got a bit more cooked than I would have liked at 42 minutes but the center was not finished at 35 minutes.
  • This might cook more evenly in a circular pan or you could make two thin stack circular cakes if you would like to use cream cheese or a mix with chevre icing. It might work well in the small serving bread pans but you would need to watch the bake time.
  • It might be possible to use all fresh figs instead of preserves and possibly swap out more of the applesauce so the volume of each was even.
  • Pecans could be easily substituted in this cake if you have access to them locally.


Posted in Dessert, Fall, General, Preserves, Recipes, Summer | Tagged , , , , , , , , , , , , , , , , , | 1 Comment

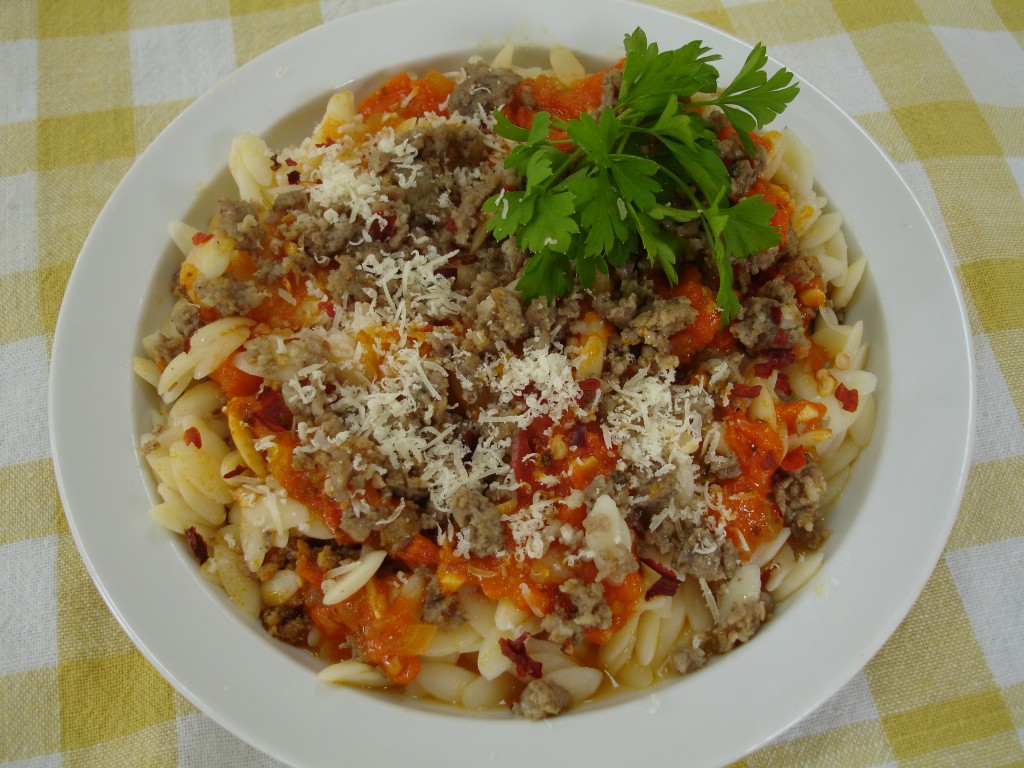
Kellogg’s Breakfast: Tomato Sauce, Orzo & Spicy Sausage

Kellogg’s Breakfast is the name of this bright orange juice-colored heirloom tomato that’s been showing up in my bulk box of tomatoes lately. This is another beefsteak that can get huge! It’s meaty, juicy, sweet and beautiful on a salad. But we’re making sauce out of this today. After it cooks down it kind of reminds me of the color of one of some of those canned tomato pasta “meals”. But it tastes a lot better and has a delightful texture. It is thin-skinned like it’s cousin “Lillian’s Yellow”, so be careful carrying it around and cleaning it.

We’re going to use almost the same recipe for this sauce as the yellow, but we’re adding the spice through a local sausage instead of directly into the sauce this time. And we’re going to add a little more brown sugar to deepen the color of the sauce and contrast the increased spices from the sausage.

The Kellogg’s Breakfast is going to cook up with a deeper flavor than the yellow but not as acidic as a traditional red beefsteak tomato. This is very simple to throw together in one pan. And, I hope you have remembered to keep some pre-cooked sausage in your freezer because this is one of those times when you will add it at the end and save yourself about 15 minutes of cook time and the same in clean-up time being prepared. One meat-free product that I treat the same way is Gimme Lean Sausage. I break it up in a non-stick pan with a little olive oil to give it that “browned” texture and appearance. Then I freeze it in small quantities to use in recipes like this or on a flat bread pizza.


Kellogg’s Breakfast Heirloom Tomato Sauce

Ingredients

  • 3 tablespoons olive oil
  • 2 pounds diced Orange Kellogg’s Breakfast Heirloom tomatoes
  • 2 tablespoons finely chopped raw garlic
  • 3 tablespoons finely chopped sweet onion
  • 1 tablespoon, finely chopped fresh rosemary
  • 1/4 – 1/2 teaspoon sea salt (your sausage will have salt)
  • 1 teaspoon light brown sugar (not packed)
  • 2 teaspoons fresh thyme leaves
  • 1/2 teaspoon finely chopped lemon zest – optional
  • red pepper flakes – (optional depending on your sausage)
  • 1 cup spicy sausage (or meat substitute product)
  • 1/4 cup julienned fresh basil leaves
  • or 1/2 cup finely chopped fresh flat-leaf parsley

Preparation

  • Add olive oil to a stainless steel pan and saute onions on low for 5 minutes.
  • Add garlic to the onions and saute for 2 minutes on low.
  • Add tomatoes, rosemary, salt and sugar and cook on medium high to reduce the liquid for about 10 minutes.
  • Add thyme and pre-cooked sausage and warm through.
  • Mix in julienned basil (or parsley) and lemon zest (optional) right before serving.

Notes

  • The sausage should have been drained of grease prior to adding to the sauce.
  • Do not cook the sausage in the sauce the entire time. You will loose a lot of the flavor and texture of the sausage.
  • Balance any additional hot peppers with your sausage and adjust for your taste.
  • Balance the salt and pepper after the sausage is heated all the way through the sauce.
  • I used a simple sea salt because the sausage has so much in it already that would overpower almost anything else.
  • This sauce would be great for quick flat bread pizzas on the grill.
  • This sauce will hold up to a feta or chevre cheese topping.


Posted in Dairy-Free, General, Nut-Free, Recipes, Second Harvest, Summer, Vegetarian | Tagged , , , , , , , , , , , , , , , , , , , , | 2 Comments

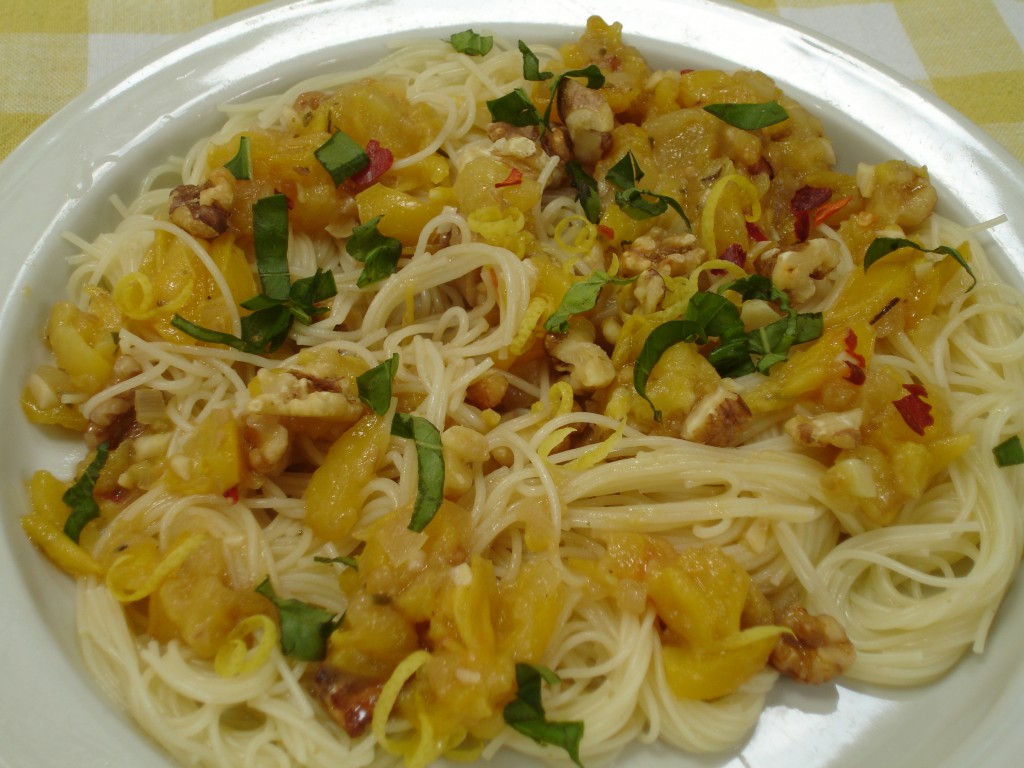
“Lillian’s Yellow” Heirloom Tomato Sauce

My bulk box of tomatoes from the  farmers’ market has included quite a few yellow (Lillian’s Yellow) and orange tomatoes of late. It seemed like a huge challenge at the time, but a little internet research turned up some interesting dedicated recipes for these bright heirlooms.

This yellow heirloom is a beefsteak variety with very few seeds,  sweet and juicy just like its red cousin. This one is quite pale compared to many of the other yellow varieties, but considered one of the best tasting sliced tomatoes. The skin is thin and they seem to bruise easily, so you need to handle them with some care.  I have always enjoyed it in salads for both its flavor and color, so I thought it would be fun in a sauce, albeit a bit wet; but you can save the extra juice from the sauce for other recipes. It freezes quite well.

After selecting  Heidi Swanson’s recipe as a base (Golden Tomato Sauce), I made some immediate changes based on the ingredient list. Heidi’s recipe calls for a  yellow plum tomato that has more flesh, thicker skin and stronger flavor. Her recipe also relies on garlic and red pepper flakes which I felt would be a bit much for our southern summer heat. I wanted to create a lighter sauce that would be bright and almost refreshing. Mine is less potent on the heat side and uses a blend of herbs, Chardonnay Oak Barrel salt,  lemon and walnuts to keep the sauce light but interesting.

This takes less than 30 minutes to prepare start to finish because you don’t need to cook this sauce for very long. It makes enough for 2 people and I would suggest some greens as a side to it. Save any excess juice for another recipe or throw it into your water when you cook the pasta.

Heirloom Yellow Tomato Sauce

Ingredients

  • 1 1/2 pounds “Lillian’s Yellow” Tomatoes, diced
  • 1 tablespoons finely chopped raw garlic
  • 2 tablespoons finely chopped raw sweet onion
  • 1/2 teaspoon Chardonnay Oak Barrel Salt
  • 1/8-1/4 teaspoon fresh ground pepper
  • 1 teaspoons finely chopped fresh rosemary
  • 1/2 teaspoon light brown sugar
  • 1/2 teaspoon fresh thyme leaves
  • pinch of red pepper flakes (less than 1/4 teaspoon)
  • 1/2 cup toasted walnut pieces (skins removed)
  • 1 teaspoon finely chopped lemon zest
  • 1/4 cup of julienned fresh basil

Preparation

  • Remove any bruised or overripe sections of the tomatoes and dice into 1/2″ pieces.
  • Add olive oil to stainless steel saute pan set on low and cook the onion for 2 minutes, without browning.
  • Add the garlic to the onion and cook 1 minute without browning. add the tomatoes and salt and cook for about 10 minutes on medium high to reduce the liquids. Continue to stir so the sauce doesn’t brown or burn.
  • Add the rosemary and brown sugar and cook for 5 minutes.
  • Add the thyme and red pepper flakes and cook for 2  minutes.
  • Turn off the heat and toss with the walnuts,  lemon zest  and basil.
  • Serve over pasta of your choice.


Posted in Dairy-Free, General, Gluten-Free, Recipes, Summer, Vegetarian | Tagged , , , , , , , , , , , , , , , , | 1 Comment

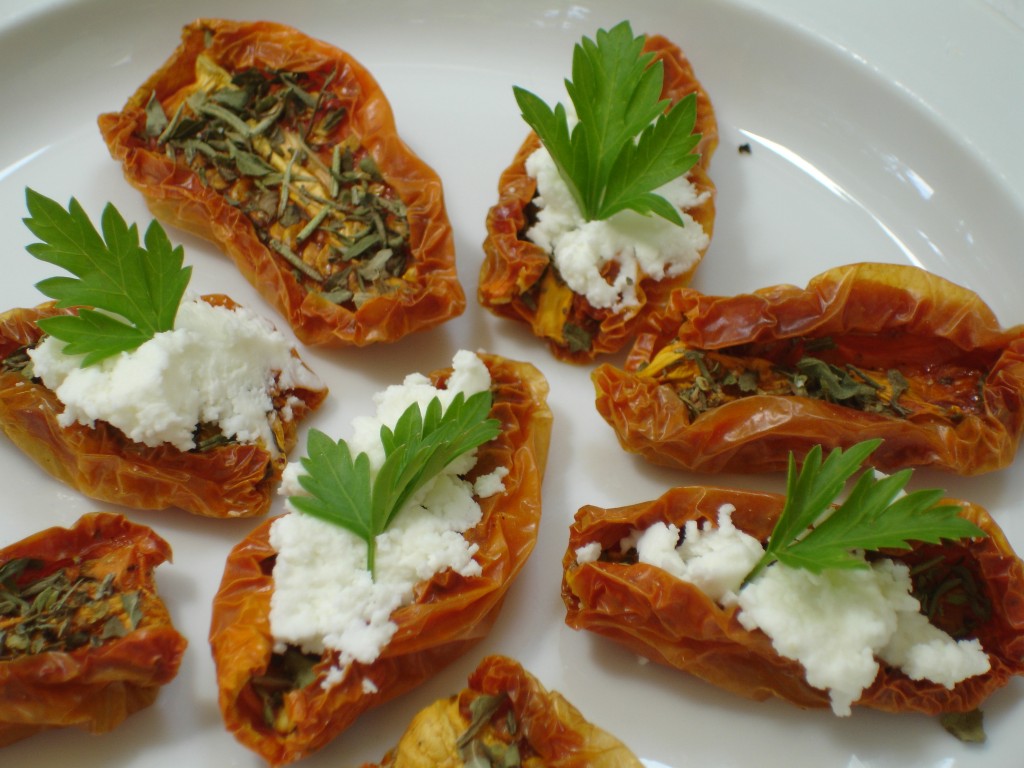
Dehydrated Heirloom Plum Tomatoes with Herbs

This is simple and fast if you have a dehydrator on hand. I’m not sure that I’d recommend this one for the oven because there is a lot of flesh to dehydrated and I think the circulating air of a dehydrator is necessary for this to come out safely.

Having stated that, these little orange banana heirloom plum tomatoes will not disappoint you as a snack topped with some local cheese. I used some fresh chevre, but I think some fresh feta would work equally well. The flavors of the tomato and herbs are concentrated during the dehydration process so these can take a stronger cheese if you prefer it.

I used a setting of 145F on my Excalibur for about 18 hours to get them about 90% dehydrated. These are a little soft so I would recommend refrigeration and use within a week. If you want to store them on a shelf, leave them in until they are completely dry. You might need to hydrate them just a bit using steam when you go to use them, or chop them into a salad. You can also freeze them if you want to leave them a little moist.  I previously put up a lot of sungolds, but these are equally nice and you can more readily top these with cheese, where you can’t with the little cherry tomatoes.  These go further as an appetizer with cheese.

Dehydrated Heirloom Plum Tomatoes with Dried Herbs

Preparation

  • Wash and dry your tomatoes, gently.
  • Slice in half
  • Sprinkle with a tiny bit of salt and about 1/8 teaspoon of dry Italian herbs (salt-free) I used the Savory Spice herbs because there isn’t garlic or onion in the mix which can be an allergy problem.
  • The herb and salt flavor will concentrate so go lightly. SKIP the Pepper!
  • Set the tomatoes cut-side up on the tray.
  • Dehydrate at 140-145F until the center are dry and the edges seem just a little full of moisture and plump. Like a wrinkled lip. It takes about 18 hours here with the humidity levels. Adjust for your location.
  • You can mix some green onion, parsley and fresh or roasted garlic into your cheese before you top them and serve.
  • To store the partially dry type, use a freezer bag and squeeze as much air out of the bag as possible before sealing.
Posted in Appetizer, Dehydrating, General, Gluten-Free, Nut-Free, Recipes, Second Harvest, Summer | Tagged , , , , , , , , , , , , , , , , , , | Leave a comment

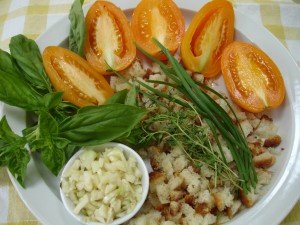
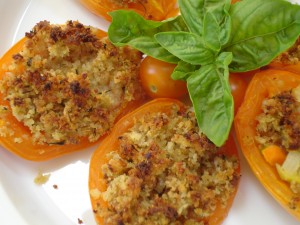
Heirloom Plum Tomatoes Baked with Local Cheese, Bread & Fresh Herbs

By now most of you can guess I cook hundreds of tomatoes each season, in all different shapes and sizes. My sauces vary each year depending on the crops that are available. This year has been very good for just about everything despite the lack of rain and intense heat. I had an opportunity to experiment with some new varieties of tomatoes and recipes and one of the most fun was an heirloom orange plum called orange-banana (they do not taste like either oranges or bananas).

The base for this recipe came from Andrea Reusing’s new book (Kathe’s Baked Plum Tomatoes). I served them warm the first time I tested the recipe. The next day they were served as chilled farmers’ market samples at the NoFo Saturday Fair. I really preferred it warm when the bread and herb topping is crunchy. The color of the tomatoes stays bright and the texture remains firm, but I think that a fork and knife is a safe way to eat them over finger food. These would be tasty served on a bed of salad greens or arugula, alongside some not-so-local avocado slices and some crispy bacon (apologies to the vegetarians).

You can change the flavor by changing the bread crumbs and herbs. I used a gluten-free focaccia the first time around, and then a sourdough for the second test. You’ll need to adjust your oil, salt and spices depending on the bread you select and the tomato. The heirloom I used is lighter on the acidity level than most reds so lighter spices and breads work well.  I selected a local hard cheese (Calvander/Asiago from Chapel Hill Creamery) and the Chardonnay Oak Barrel Salt from Savory Spice which has just a hint of smoke to it.

I’ve made some adjustments to the base recipe. I cut back on the shallot and garlic because the lighter orange plum tomatoes are easily overpowered compared to traditional red plum tomatoes. We sampled a red “Long Tom’s” plum at the North Hills Midtown Farmers’ Market last weekend, and their delicate flavor and firm flesh would be lovely with this recipe as well


Baked Heirloom Plum Tomatoes

Ingredients

  • 6 ripe  heirloom plum tomatoes
  • 1 cup fine breadcrumbs made from local bread (adjust the herbs depending on the bread type)
  • 1/3 cup finely grated hard aged cheese
  • 1/3  cup of fresh herbs like thyme, rosemary, parsley; whatever you like and have on hand. (basil can burn, so maybe save that for topper as you serve)
  • 1/4-1/2 teaspoon minced garlic or finely chopped shallot
  • 1 tablespoon olive oil
  • 1/4 teaspoon Chardonnay Oak Barrel salt (bread may be salty, so adjust)
  • 1/8 teaspoon fresh ground mixed peppercorns

Preparation

  • Preheat the oven to 350F.
  • On a baking sheet lined with parchment paper, spread out the bread crumbs and lightly toast them in the oven. This takes less than 5 minutes. Do not brown them, just dry them out a bit.
  • When they come out, mix them with the olive oil, shallots/garlic, herbs and cheese, salt & pepper
  • Wash and dry each tomato
  • Slice each tomato lengthwise. You can scoop out a bit of the center seeds and juice if you like. I did to make some room for the topping, but it’s not necessary. Place each half on the baking sheet with the parchment paper.
  • Evenly divide and top each half tomato with the bread crumb mixture.
  • You can drizzle additional olive oil on top of each tomato at this point, or simply watch the baking process so you don’t burn the topping.
  • Bake for about 30 minutes. The longer you bake, the softer the tomatoes will get. I prefer mine firmer for market samples, but you can bake these up to 45 minutes if you closely watch the topping. Riper tomatoes will take less time and be more flavorful.

Notes

  • These will store for a day or two in the fridge. I haven’t tried storing them in the freezer this way.
  • I am running a test on using previously frozen heirloom tomatoes for this recipe and I’ll let you know how that turns out in a week or so.


Posted in Appetizer, General, Nut-Free, Recipes, Salads, Sides, Summer, Vegetarian | Tagged , , , , , , , , , , , , , , , | Leave a comment

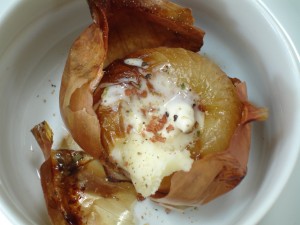
Whole Roasted Onions

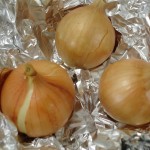
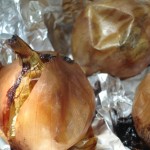
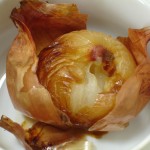
This recipe from Andrea Reusing’s new book “Cooking in the Moment”.  I tested it this past week on a whim because the photo was lovely, and, well, I really like onions. I decided to use some sweet onions from the stash I purchased at the farmers’ market a few weeks back. I selected some small ones ranging from 3.5 to 4.5 ounces. They fit easily in your hand and are a great side serving to a steak, meatloaf, veggie casserole. Seriously, these are good! The upside is that they take less than the hour to roast if you choose some smaller ones. You can roast these in the oven or on the grill  and the smaller size take anywhere from 35 minutes on up. They won’t be totally brown at 35 minutes, but they are certainly tender and cooked all the way through. The smell is amazing.

You know I hate clean up in the summer so I decided to put these in some aluminum foil in a  little aluminum pan and shoved them into the grill with the lid down while I was roasting some other vegetables. The temperature varied a bit, but I can report that these still turned out great despite the fluctuations and there wasn’t much to clean up.

The result of this method of roasting the onions in their skin is outstanding and only gets better when you add a little local butter and creme fraiche which I happened to have for another recipe. Sour cream would be nice, but not nearly as interesting. It only takes about a teaspoon of each on the smaller onions for added flavor. I also used a Red Hawaii Kai Sea Salt and some mixed fresh peppercorns. The recipe is simple.


Andrea Reusing’s Whole Roasted Onions from “Cooking in the Moment”

  • Pick good onions ranging in size from 3.5-4.5 ounces
  • Leave the skins on but brush off the dirt
  • Place upright on some aluminum foil
  • Roast at 425F for at least 35 minutes and up to 1 hour
  • If you choose larger onions your roast time will be closer to 45-1 hour or more
  • Let them cool 5 minutes
  • Pierce with knife and spread them out a bit
  • Add your creme fraiche, butter, salt & pepper
  • Enjoy
Posted in Gluten-Free, Nut-Free, Recipes, Sides, Vegetarian, Year-Round | Tagged , , , , , , , , , , , , , , | 2 Comments

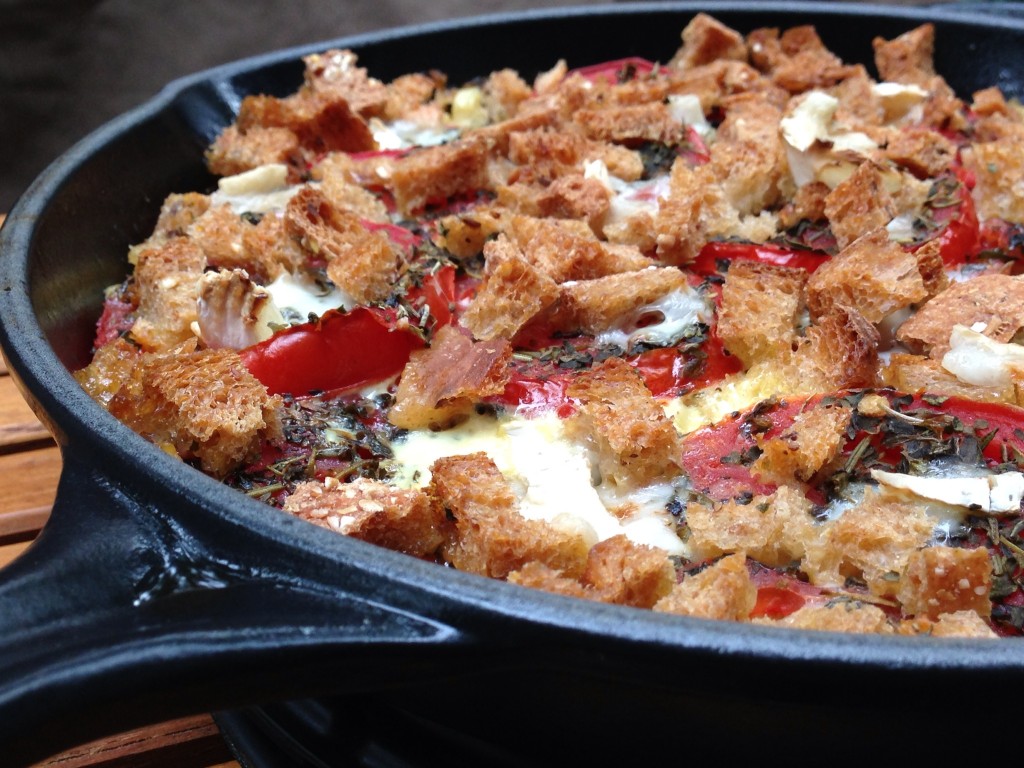
Fresh Corn, Tomato & Onion Gratin with Local Brie

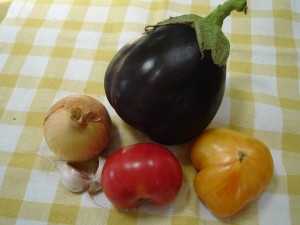
Last week I was able to pick up some wonderful white sweet corn from Cedar Rock Family Farm at the Midtown Farmers’ Market in Raleigh. Several of the vendors also had beautiful heirloom tomatoes and I was able to pick up both tomatoes and onions from Wild Onion Farm. The last thing I needed was a bit of Chapel Hill Creamery‘s Carolina Moon to make a recipe out of Holly Herrick’s “Southern Farmers’ Market Cookbook”. The original recipe only calls for the onions and tomatoes, but fresh corn goes well with both of those and it is currently in season.  What’s missing from my recipe are green onions. They are just a couple weeks out of season here. Up around Maryland & Virgina you can get them at the same time as tomatoes. But I think it works just as well with the local sweet onions that are freshly dug from local farms.

This is a very simple recipe, and uses only one cast iron pan. It’s more healthy with the olive oil substitute for most of the butter.  The cheese is used in a limited quantity but the flavor comes through. The downside to this recipe is that it doesn’t freeze. But the corn, onions and roasted tomatoes freeze so you could make some variation of it during the fall or winter.


Fresh Corn, Tomato & Onion Gratin with Local Brie

Ingredients

  • 1 tablespoon butter
  • 1 tablespoon olive oil
  • 12 ounces of thinly sliced sweet onion, cut in half circles & separated
  • 1/2 cup fresh ears of corn from the cob
  • 8 ounces of 1/4″ sliced tomato (dark red, higher acid type)
  • Sea salt & fresh pepper
  • 2/3 cups of low-fat or whole milk
  • 1 egg
  • 2 tablespoons fresh chopped parsley
  • 2 tablespoons fresh chopped basil
  • 1 cup breadcrumbs
  • 1/3 teaspoon fresh thyme leaves (pulled from the stems)
  • Zest of 1/2 lemon
  • 1/4 pound Chapel Hill Creamery -Carolina Moon Brie (or New Moon Brie)

Preparation

  • Preheat oven to 350F.
  • Heat butter and olive oil in a 10-12″cast iron skillet and add the onions. Cook, stirring occasionally, until the onions are softened and lightly season with salt and pepper.
  • Add the raw corn to the onions and cook for about 2 minutes on medium-low heat so you don’t brown the onions or corn. Use a lid if necessary to steam the corn.
  • Set the pan aside to cool down.
  • Toast the bread crumbs lightly in a toaster oven or pan without burning them. Add the lemon zest and thyme. Toss together and set aside.
  • In a separate bowl, whisk together the milk and eggs. Add the parsley and basil and blend well and set aside.
  • Slice the cheese into 1/4″ thickness and then gently chop into 1/2″ pieces to spread throughout the gratin.
  • In the cast iron skillet spread out the onions and corn, add the slices of tomatoes to cover the onions and corn.
  • Pour the egg custard over the vegetables.
  • Place the sliced cheese pieces over the tomatoes and top with the bread crumbs.
  • Bake for 30 minutes until it’s bubbly and turning a light brown color.
  • At the 15 minute mark add a cover of parchment paper or hard cover in to avoid burning the bread topping.
  • Allow it to sit for 10 minutes before serving.

Notes

8/15/13 – Tested this recipe using Firefly Farms Merry Goat Round – Brie style (replacing Chapel Hill Creamery Carolina Moon- Brie). You can purchase the Goat Brie at Weaver Street. Turned out excellent. Also used Chicken Bridge Bakery Organic Multigrain Sandwich Bread. Wonderful texture and flavor in this dish.


Posted in Nut-Free, Recipes, Sides, Summer, Vegetarian | Tagged , , , , , , , , , , , , , , , | Leave a comment

Stuffed Eggplant on the Grill

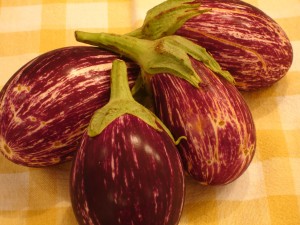
It’s hot so eggplant is in full swing and it will be around well into August. This is one of the vegetables that farmers hate by the end of the season in the south. It seems to grow as you are picking down a row so you can go back and re-pick the same row later in the day.  A good number of folks simply don’t like eggplant or think it’s difficult to work with and nothing is farther from the truth. I was one of those until one of the local farmers egged me endlessly about it a few years back. Now I can’t get enough.

It’s also one of the vegetables that is great with different types of salts. I like the Alderwood Smoked Salt when I’m grilling these half-open and using some lemon juice. I like the Murray River Fake Salt when I’m grilling eggplant as chips because they stick to the olive oil so well. And, in this recipe I enjoy the Oak Barrel Salt. Selecting the right eggplant for the job is also key. If I’m making a dip, I need a strong eggplant to balance out the garlic, onion, yogurt and lemon in the dish.

If  I’m grilling or using it in lasagna, I might prefer something like a rosa bianca which is thin-skinned, mild and is the easy to prepare.  This recipe benefits from a small pear shaped eggplant that has tender flesh and a young but thicker skin to hold up in high heat and longer cooking times. You could also prepare some risotto or mixed rice to compliment the vegetables. And, many of the cheeses we have locally will work with this dish from fresh goat cheese to some of the hard cow’s milk and softer ricotta.

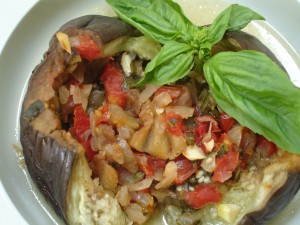
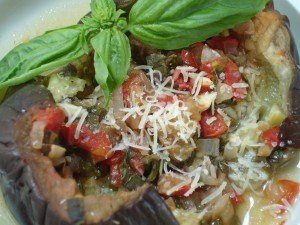
The original recipe comes from Holly Herrick’sSouthern Farmers Market Cookbook” (Stuffed Eggplant Parmesan, page 113). The recipe calls for tomato sauce, breadcrumbs and ricotta cheese. But I had none of the above when I decided to make this initially so I took the technique that was outlined and the vegetables I had on hand to create this  gluten & meat free version. This would also work with some grilled zucchini and summer squash mixed into the stuffing or placed on the side.

Sunday night I decided to play with this recipe again. I noticed that the first time through there was a lot of juice from the eggplant so this time around, I added some of the dehydrated sungold tomatoes that I put up a few weeks back along with some dehydrated roasted onions. Instead of the hard cheese, I added ricotta to my eggplant tonight along with some leftover zucchini and summer squash. It turns out to be quite a different meal when it’s finished. The advantage to the dehydrated vegetables is that they soak up all the juice from the eggplant and other vegetables at it’s all cooking. They are plump and tangy and the onions are delightfully sweet. It’s a great alternative to using all fresh. If I had finished dehydrating the summer squash, I would  have added it in also.

Here’s what I did and this is enough for a meal for one with very easy clean up in the heat of the summer.


Stuffed Eggplant

Ingredients

  • 1-12 ounce pear-shaped dark purple eggplant
  • 3-4 oz heirloom tomato (preferably Cherokee Purple), chopped 1/2″ pieces
  • 1 tablespoon finely chopped sweet onion
  • 1/2 teaspoon finely grated fresh garlic
  • 1 tablespoon finely chopped fresh basil
  • 1-2 tablespoon grated Asiago style cheese ( Parmesan works too)
  • 1/4 teaspoon Chardonnay Oak Barrel Sea Salt
  • Pinch of fresh ground pepper to taste
  • 2 tablespoons olive oil

Preparation

  • Carefully cut the top off of the eggplant. It can be prickly so hold it from the bottom smooth part.
  • Using a tablespoon or grapefruit spoon, scoop out some of the interior of the eggplant. There isn’t going to be a lot of seed in an eggplant this small so you will be pulling good flesh that we will re-use. Go gently so you don’t bruise it terribly and take out more at the bottom wider section. Leave enough so that the skin has shape, about 1/8-1/4″ thick wall. That isn’t going to leave a lot of room for stuffing. Just go with it.
  • Working quickly, mix about a tablespoon of olive oil with the eggplant pieces, chopped tomato, onion, garlic, and basil. Season with a turn of fresh pepper and a pinch of salt. You can add all, some or none of the cheese at this point.
  • Again, working quickly, pour about a tablespoon of olive oil into the cavity of the eggplant and swirl it around to coat the inside. Sprinkle about 1/4 teaspoon of the salt and a turn of pepper into the cavity to season it.
  • Stuff all the veggie mix back into the eggplant. Make it fit.
  • Wrap the entire eggplant in aluminum foil and place in a small pan to keep it upright and catch any drips that might occur during baking. (Easy cleanup)
  • Bake at 400F for about 20 minutes. Pull it out and let it sit another 10 before serving. It will split easily when you are moving it. Try using a slotted spoon and thongs for best results. You can garnish with some, all or none of the cheese.

Notes

  • You can bake this (wrapped in foil) on the grill if you are out cooking other items.
  • You can add 1/4 cup of ricotta cheese to the center vegetable mix, but cut back on the salt.
  • You can add 1/4 cup of toasted bread crumbs with herbs (gluten-free would work fine) to the top of this as a finishing touch.
  • The salts have all been purchased at Savory Spice in Raleigh
  • You can use 1/4 cup of dehydrated sungold tomatoes & 1/6 cup of dehydrated onions


Posted in Gluten-Free, Nut-Free, Recipes, Sides, Summer, Vegetarian | Tagged , , , , , , , , , , , , , , , | 3 Comments

Tomato Jam in the heat of the Summer

We’re having an excellent tomato season so why not spend some time making some fun condiments that you can use now and freeze for the winter months. This little jam is simple and tasty and it goes well with burgers, meatloaf or on crostini with sausage and cheese. There’s no picture of the jam because it’s not very pretty on it’s own and being dark red doesn’t help it’s cause when photographed with other things!

The original recipe is from Sara Foster’s book “Southern Kitchen”. I have simply reduced the amounts and tweeted them just a bit to make less. This recipe has less ginger, thyme, red pepper flakes, and  no chili powder, I used a Red Hawaiian Sea Salt from Savory Spice that I think works well with the tomatoes, and some locally produced Sorghum from the State Farmers Market Restaurant to replace some of the brown sugar, and I added a little butter at the end to make it just a little richer and smooth out the consistency. You can certainly leave out the butter. This makes enough to freeze a couple of small containers for later bbq’s with friends or cover the top of a meatloaf or on your sliders with some pimento cheese. You’ll just be using your small food processor or a potato masher for this so it’s something you can make with the kids.


Tomato Jam

Ingredients

  • 1 teaspoon raw garlic, minced
  • 1 tablespoon olive oil
  • 1/2 cup chopped raw sweet onion
  • 2 cups roasted tomatoes with their juice
  • 1/3 cup dehydrated Sungold (or other low acid yellow/orange) tomato
  • 1 tablespoon sorghum
  • 1 tablespoon light brown sugar (not packed)
  • 2 tablespoons apple cider vinegar (Bragg’s recommended)
  • 1/4 cup fresh orange juice
  • 1 1/2 teaspoons fresh orange zest
  • 1/2 teaspoon fresh thyme leaves
  • 2 whole cloves
  • 1/2 teaspoons red pepper flakes
  • 1 1/2 teaspoons fresh grated ginger
  • 1/4- 1/2 teaspoon Red Hawaiian Kai Sea Salt
  • 1/8-1/4 teaspoon Mixed Peppercorns, fresh ground
  • 2 teaspoons butter (salted or unsalted)

Preparation

  • Heat the olive oil in a non-reactive pan on medium heat and add the onions when it’s hot. Cook the onions for about 5-10 minutes until they are soft and golden. You don’t need to brown them.
  • Add the garlic and cook for just another minute.
  • Add the tomatoes, sorghum, brown sugar, vinegar, orange juice and zest, ginger, thyme, red pepper flakes, cloves, salt and pepper (begin with the smallest amount and adjust to your taste as it cooks).
  • Bring the mixture to a gentle boil and reduce to low heat.
  • Add the butter and cook for about 20 minutes stirring occasionally.
  • Let cool and adjust the salt & pepper using a fine grain of the salt. You can achieve finer grain salt using a mortar and pestle.
  • Cool and use a food processor to create a  smooth jam or a potato masher for a chunky jam.


Posted in Appetizer, Gluten-Free, Nut-Free, Preserves, Recipes, Summer, Vegetarian | Tagged , , , , , , , , , , , , , , , , , , , | Leave a comment