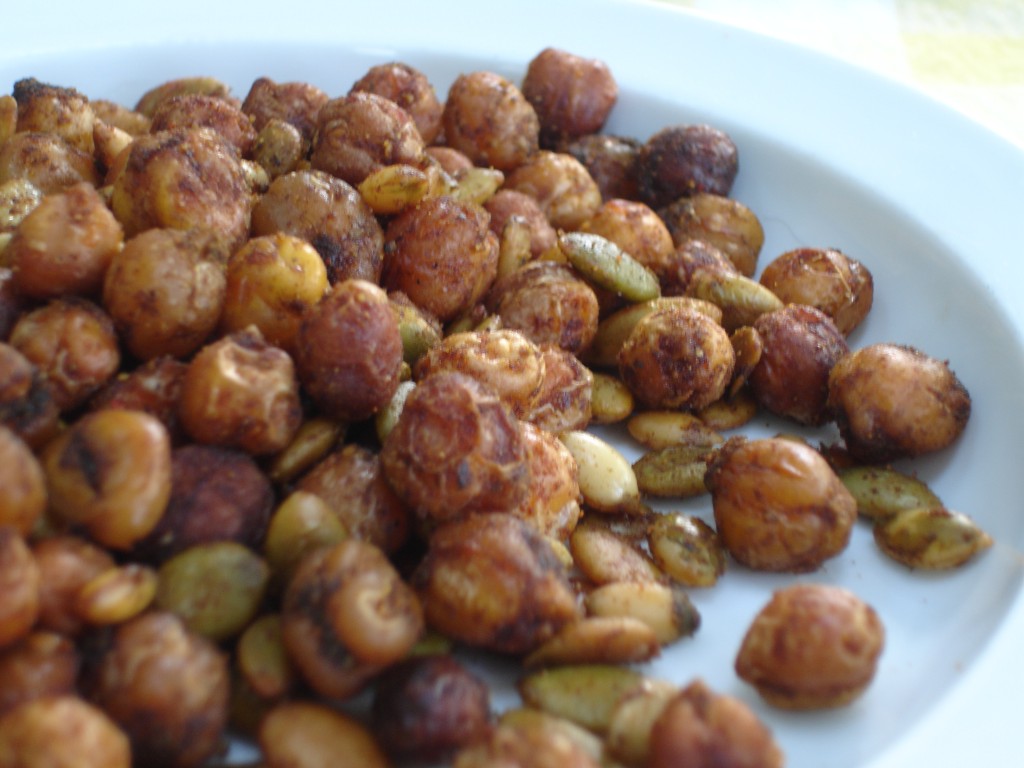
Roasted Chickpeas & Pepitas

This week I had two elementary school events with Advocates for Health in Action. In a sea of fast food restaurants and busy schedules, it’s always a challenge for parents to make sure their kids are getting nourishing meals and healthy snacks. And don’t think that challenge stops once your kids leave for college. There are as many questions about meal planning from college students at the farmers’ markets as from parents. So I’m going to post a few ideas and recipes in the upcoming week that are really flexible and you can modify to fit your needs. I would love to hear how you decide to adapt the recipes.

First up is Roasted Chickpeas. There are several recipes on-line for roasted chickpeas and they vary from spicy to sweet. If you are trying to cut your food bill, dry beans are a great way to take your cost down significantly in a recipe like this one. Raw pumpkin or sunflower seeds are also inexpensive and easy to find in bulk. Beans are very easy to make and a bag normally cost just a dollar or two, compared to cans that can cost five times as much for the same volume. Most of the time I use a quick soak method where you cook the beans for 2-5 minutes and let them stand covered for an hour. Then you cook them for 10-45 minutes depending on the bean.. There are always directions on the bag and that’s what I follow unless a recipe has some specific notes. Drain and rinse your cooked beans one more time, and you’re set to go for most recipes. Cheap and easy!


Roasted Chickpeas & Pepitas

Ingredients

Preparation

  • Mix the dry spices together with the olive oil.
  • Toss the olive oil spice mix with the chickpeas and pumpkin seeds and coat well.
  • Place the chickpeas and seeds on a large baking pan covered with aluminum foil.
  • Bake at 400F for up to 30 minutes, mixing them around every 10 minutes to keep them from burning.
  • Depending on the amount of time you roast these, they will get more or less crunchy. They also harden more as they cool.

Notes

  • If you prefer the chickpeas softer, leave the olive oil mixture on the chickpeas for 15-30 minutes before baking.
  • If you like the chickpeas crunchy, mix the oil, spices and chickpeas and roast right away.
Posted in Appetizer, Dairy-Free, Diabetic Friendly, General, Gluten-Free, Nut-Free, Snack, Vegetarian, Year-Round | Tagged , , , , , , , , , , , | Leave a comment

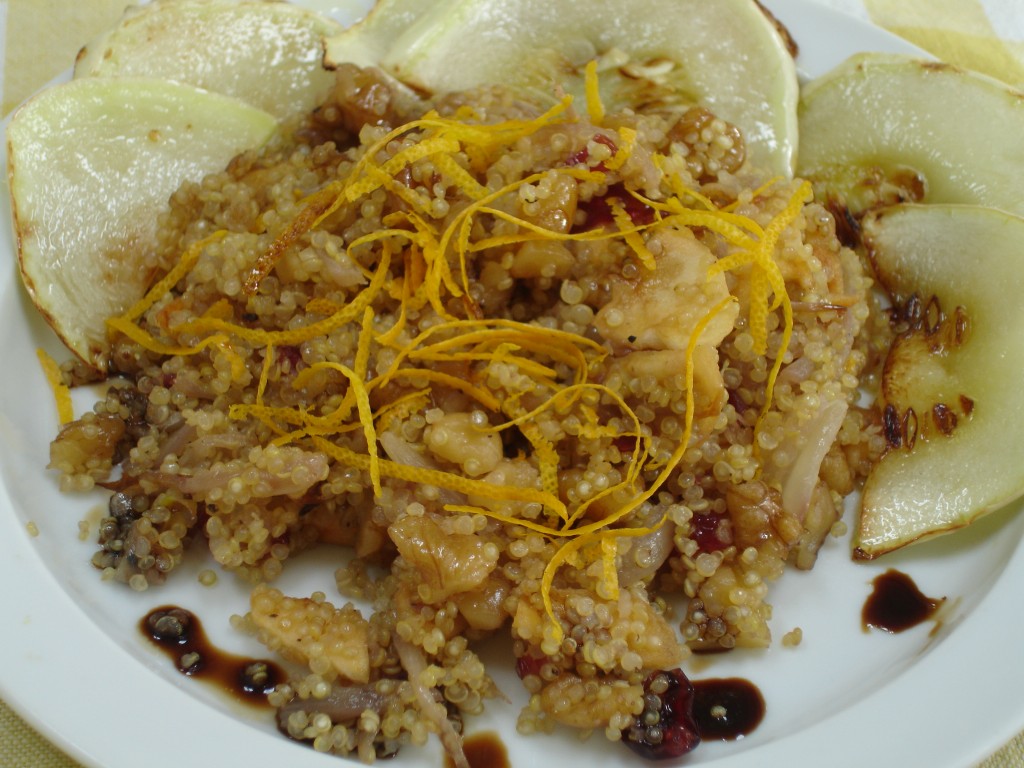
Quinoa Salad with Apples, Onions & Nuts

Getting ready for the Triangle American Diabetes Association Step-Out Walk in October has me testing quite a few new recipes that are gluten-free and low in sugar. As I browsed through one of the books on loan to me I found a Quinoa & Browned Onion Salad that looked pretty tasty and adaptable to some local ingredients like dehydrated apples.  I think you could easily make this with fresh apples, but the ones I picked last week were clearly a variety that wasn’t going to hold very well, so I went ahead and dried them right away. The flavor is concentrated  and slightly tart, but the color is a little on the brown side, even with a lemon wash as a color preservative.

I’ll have this at the North Hills Farmers’ Market tomorrow so we’ll see how well it holds up sitting in the refrigerator tonight for about 16 hours. It tastes pretty good now, but you can taste all of the individual flavors as you eat it. I’m not sure whether it will be as good or better when the flavors have a change to mingle with each other. We’ll see.

The other thing I’d like to try in this the next time I make it is dried figs or dried cherries instead of cranberries. Both would go well with the balsamic vinegar and orange zest. The cranberries I had on hand are organic, but they were pre-sweetened and  had added oil to keep them soft. So they aren’t my favorite choice. I think some dried cherries from Western North Carolina might be a wonderful addition.

I made the salad with toasted walnuts but it would be delightful with toasted pecans. I simply ran out after making granola earlier in the day. I also experimented with the salts again. My favorite with this salad was the Savory Spice Chardonnay Oak Barrel Smoked Salt. You’ll have to add it to the onions and quinoa because it comes in the larger grain so it needs to cook and break up a bit. Or you can grind it down with a mortar and pestle to a fine grain.

Quinoa Salad with Apples, Onions & Nuts

Ingredients

  • 1 1/2 – 2 cups cooked quinoa (use water or broth)
  • 3/4 cup chopped toasted nuts (walnuts or pecans)
  • 1 cup raw thinly sliced sweet onions
  • 1 tablespoon olive oil
  • 1/2 – 3/4 cup chopped dehydrated slightly tart apple (1/2-1 cup fresh mildly tart crisp apple)
  • 1/4 cup dried cranberries or cherries
  • zest from 1/2 orange
  • 1 tablespoon aged balsamic vinegar
  • salt & pepper

Preparation

  • In a skillet heat oil to medium/high. Add  onions and cook until translucent and golden-colored.
  • Add cooked quinoa to pan and cook for another couple of minutes to toast it.
  • Add onions and quinoa to the remaining ingredients and mix until blended.
  • Serve or store.


Posted in Dairy-Free, Diabetic Friendly, Fall, General, Gluten-Free, Recipes, Salads, Second Harvest, Sides, Vegetarian, Winter | Tagged , , , , , , , , , , , , , , , | Leave a comment

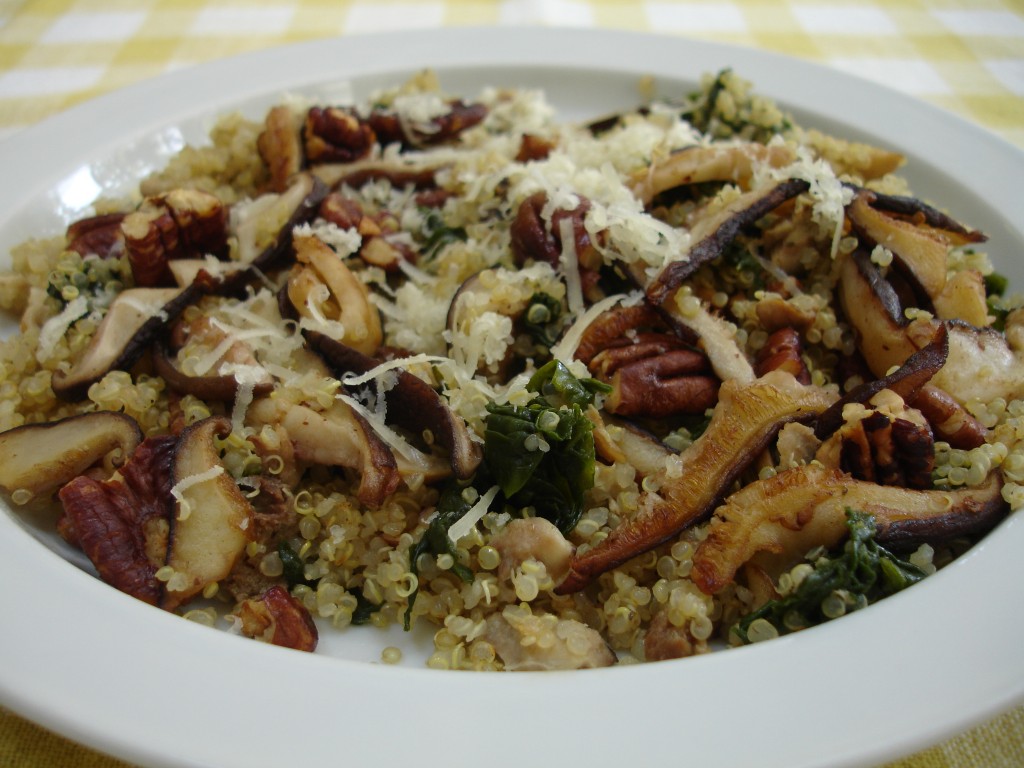
Quinoa Salad with Shiitake Mushrooms, Spinach & Pecans

Right before I headed up to Boone to see the Solar Homestead last week, I visited the farmers’ market to pick up a few things for my trip. I was surprised to find the first of the shiitake mushrooms, delicately tucked inside of bags, ready to take home. Totally irresistible!

Earlier in the week, I picked up a local chicken and had some broth left from cooking that I used to prepare the quinoa. The broth tones down the nutty taste of the quinoa and allows other flavors to take center stage. You can also use vegetable broth. I have yet to try beef broth, but that’s next on the list along with some caramelized onions.

Using a small saute pan, I quickly cooked strips of shiitake mushrooms in an equal mix of olive oil and butter so there would be a little browning action. I also added a small minced shallot that I had from the market along with some broken pieces of  pecans.

The spinach was  from a batch I steamed in the spring and put in the freezer, but it should be fresh in the market again soon.  After thawing, and chopping the spinach, I warmed it in the saute pan at the end with the quinoa. The shredded cheese is local Chapel Hill Creamery Thunder Hill Swiss, but it’s just a topping and you can eliminate it  or change it to something else.

This is a meal in itself with the quinoa and pecans providing protein and a mix of vegetables but it would be great served next to poultry, meat or pork. This recipe is better warm or at room temperature rather than chilled.


Quinoa Salad with Shiitake Mushrooms, Spinach & Pecans

Ingredients

  • 1 cup of cooked quinoa
  • 1/4 cup steamed spinach (about 1 1/2 cups raw)
  • 2 medium fresh shiitake mushrooms (1 1/2 oz with stems) sliced 1/8″ wide
  • 1 teaspoon minced fresh shallot
  • 1/4 cup large broken pecan pieces
  • Pepper and Salt (Chardonnay Oak Barrel Smoked Salt is especially good in this recipe)

Preparation

  • Prepare the quinoa according to directions. Using chicken or vegetable broth will mellow out the flavor a bit. Set aside.
  • Chop the steamed spinach. If you are using fresh, rinse and dry it. Chop it up and you can add it at the end and it will cook very fast. Mix into the quinoa and set aside.
  • In a non-stick pan heated to medium-high, add 1 teaspoon butter and 1 teaspoon olive oil. When it’s hot add the sliced shiitake mushrooms, shallots and pecans. Stir to coat everything and continue to cook on a medium-high heat until the mushrooms are slightly browned. This takes about 2 minutes.
  • Working quickly, add in the quinoa and spinach. Add a pinch of pepper and about 1/4 teaspoon of salt.  Continue to cook for one additional minute until the quinoa is toasted and some moisture is removed.
  • Serve and top with shredded cheese.


Posted in Dairy-Free, Diabetic Friendly, Fall, Freezing & Canning, General, Gluten-Free, Recipes, Salads, Sides, Spring, Vegetarian | Tagged , , , , , , , , , , , , , , , , , , , , , , , | Leave a comment

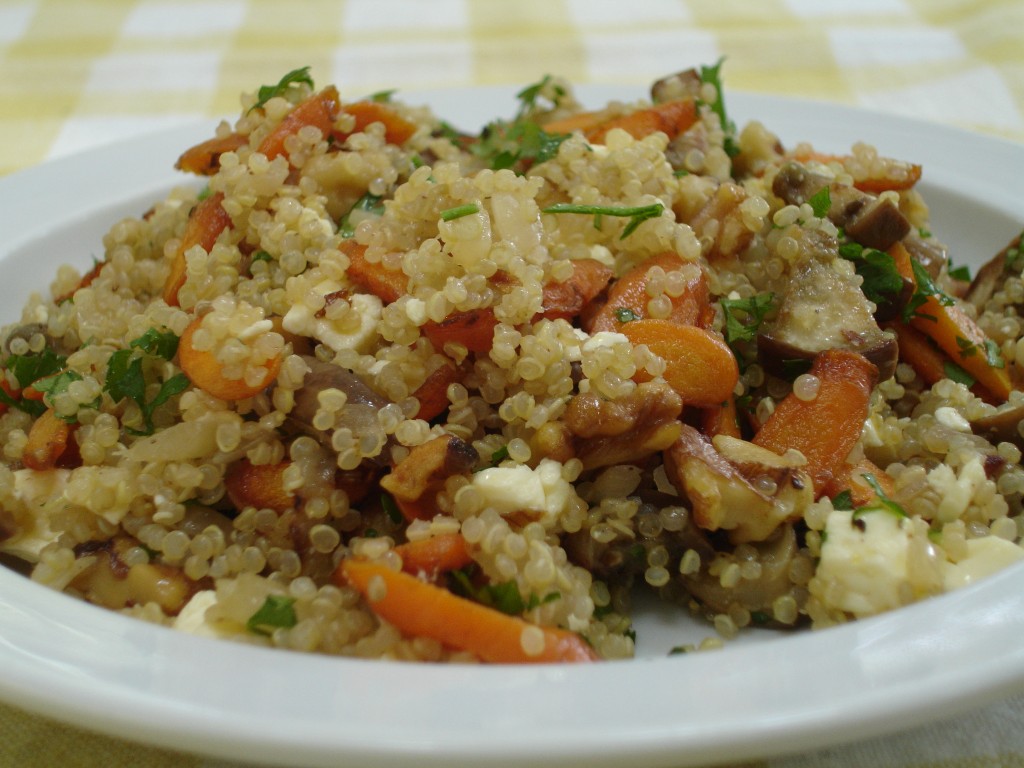
Quinoa Salad with Roasted Vegetables & Cheese

I’m always looking for ways to adapt recipes and this is a good example of a summer salad that can really be used year round. This is very similar to the couscous salads that I’ve posted in the past and used in several markets to highlight whatever vegetables were in season. The nice thing about these salads is that you can roast, steam or saute many of these vegetable in-season and have them as a second harvest at another point in the year. So buy a little extra at the farmers’ market and put some into the freezer to enjoy later!

Quinoa is the seed of a broad-leaf plant that is most closely related to spinach and beets. It was domesticated more than 4000 years ago for consumption. It has great nutritional value with an average protein content of 15% and a balanced set of amino acids which make it a complete protein for human consumption. And it’s gluten-free and a great substitute for couscous or white rice.

You can eat this side salad warm, chilled or at room temperature and it holds for a couple of days if you want to make it in advance or have it a couple of days in a row. This recipe will easily feed 2-4 people and you should feel free to change the vegetables and nuts to fit your personal preferences!


Quinoa Salad with Locally Roasted Vegetables

  • 1 cup of cooked quinoa (1/2 cup uncooked quinoa: 1 cup water)
  • 2 tablespoons sauteed or roasted onion
  • 1/2 cup diced cooked carrots (steamed, roasted or sauteed with Himalayan Pink salt)
  • 1/2 cup diced Japanese eggplant  sauteed in olive oil with a light smoked salt like Chardonnay Oak Barrel or Alder Wood
  • 1/4 cup toasted walnut pieces (or sauteed in butter with the carrots)
  • 1-2 tablespoons chopped parsley or 1/4 cup of chopped green onion
  • 1/4 cup of Feta broken up into pieces

Preparation

  • Cook the quinoa according to directions or use a toasting method.
  • Saute the vegetables separately so they hold their own flavor. You can do them one after the other but do the eggplant last as the smoked salt will change the flavor of other vegetables.
  • You can let the quinoa cool down or add the hot vegetables to it while it’s warm.
  • If the salad will be served chilled, let the quinoa cool before adding cheese and fresh herbs.
  • Taste and season with sea salt & pepper.  Smoked salt is just an undertone, use a sea salt to finish.

Notes

  • Alternate nuts include pecans, pine-nuts and almonds
  • Alternate vegetables include peppers, cherry tomatoes, summer and winter squash
  • Alternate cheese includes chevre, hard goat & cow’s milk
  • Alternate herbs included fresh thyme, rosemary, oregano and marjoram
  • Other finishing salts that would work well with the nutty flavor of the quinoa are the Hawaiian Black or Red Gold salts but they are intense so watch the quantity that you add carefully.
Posted in Appetizer, Diabetic Friendly, Fall, Gluten-Free, Recipes, Salads, Second Harvest, Sides, Summer, Vegetarian | Tagged , , , , , , , , , , , , , | Leave a comment

Dixie Speckled Butter Beans & Fresh Corn Salad

This year I was introduced to a little butter bean or pea call “Dixie Speckled”  that is a relative to the lima bean. One of our local farmers decided to try out this little bean or pea (depending on what you “google”) which appears to thrive in heat! The size is small and the pods are not terribly easy to break into, but the work is worth the effort upon your first bite. Now don’t get me wrong, I love tender young butter beans and I’ll shell them until my fingernails are all gone, but these little beauties come in all different shades of reddish-purple when you first break them out of the shell and then they cook up more tender and buttery than any butter bean I’ve ever had. Mix them with some fresh corn that is barely cooked, raw shishito pepper, a squeeze of lime and a touch of olive oil (and a little non-local avocado).  You have a light and healthy lunch when the temperatures soar past 100F! A little local bacon is also a nice touch to this salad if you have it around.


Beth’s Dixie Speckled Butter Bean & Corn Salad

Ingredients

  • 1 cup of shelled, cooked dixie speckled butter beans
  • 3/4 cup roasted or steamed corn (leftover from corn on the cob will work just fine)
  • 2 tablespoons finely chopped sweet onion
  • 1 teaspoon fresh finely chopped shishito peppers (jalapeno if you like hotter)
  • Squeeze or two of lime juice (not much)
  • Murrays River or Himalayan Sea Salt
  • A dash of fresh ground pepper
  • Salad greens (if you can find them this late in the summer)
  • 1/2 Avocado chopped (optional)

Preparation

  • Gently mix all of the ingredients except the salad greens and avocado together.
  • Add the avocado last and gently turn it into the salad.
  • Serve on small bed of “shade grown” summer salad greens.


Posted in Appetizer, Dairy-Free, General, Gluten-Free, Nut-Free, Recipes, Salads, Second Harvest, Summer, Vegetarian | Tagged , , , , , , , , , , , , , , , , , , , , | Leave a comment

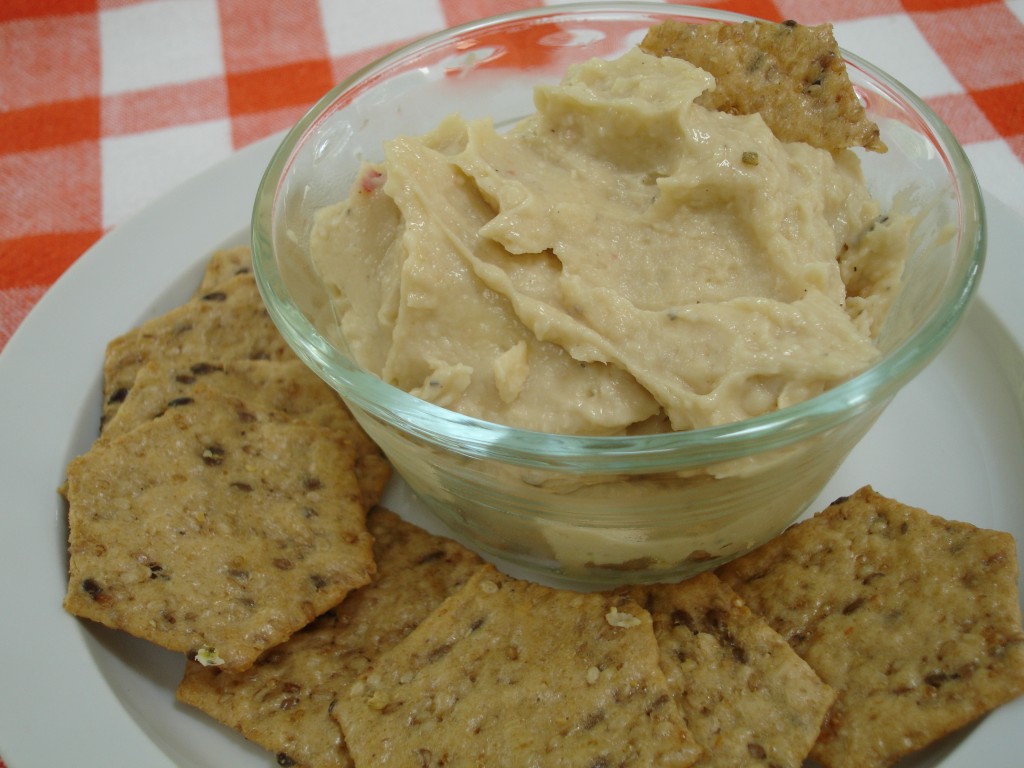
White Bean & Toasted Almond Spread

July and August are so unbearably hot that it’s difficult to think about eating some days. There are lots of healthy spreads and dips you can use to coast through a meal and many of them freeze exceptional well if you want to make them ahead of time. This recipe started as one of Heidi Swanson’s from her Super Natural Every Day cook book. In my opinion, it was a bit plain the first time I made it, but the base was smooth and creamy so I thought I might add a  bit of smoke, salt, texture and color with marinated olives, smoked salt and roasted garlic, onions and red peppers to create some variations on the theme for different seasons of the year. This along with some home-made crackers and a fresh salad are a great finish to a hot summer evening or a lovely beginning to a warm meal in the winter.


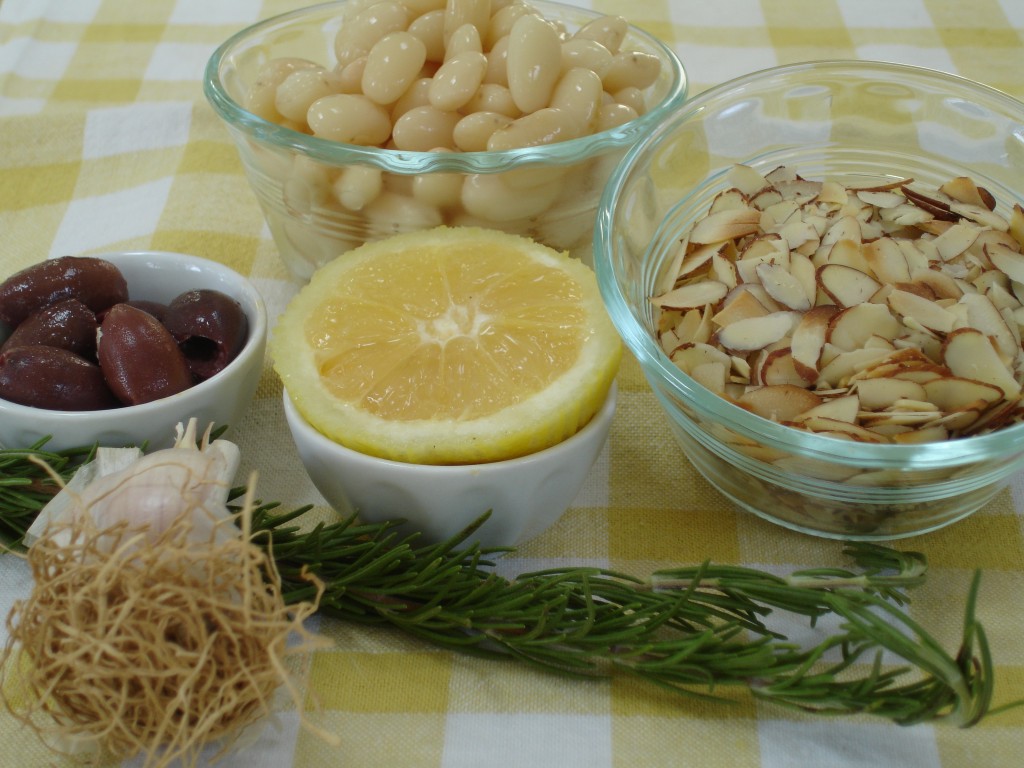
White Bean & Toasted Almond Spread with Fresh Rosemary & Marinated Olives

Ingredients

  • 2 tablespoons extra virgin olive oil
  • 1 cup cooked & drained cannellini beans
  • 1/2 – 1 teaspoon minced roasted garlic
  • 1/3 cup toasted slivered almonds for spread
  • 4 teaspoons fresh lemon juice
  • 1/4 cup filtered water
  • 1/2 teaspoon Chardonnay Oak Barrel Smoked Salt
  • 3/4 teaspoon finely chopped fresh rosemary leaves
  • 1/2 teaspoon minced lemon zest
  • 2 tablespoons marinated olives (your favorite type), finely chopped
  • 1/3 cup toasted slivered almonds for garnish

Preparation

  • Dissolve the salt in the 1/4 cup of water.
  • Using a food processor, combine beans, garlic, almonds, lemon juice and water (with salt).
  • Pulse until creamy and then hand mix in your finely chopped olives, rosemary, and lemon zest.
  • Garnish with the remaining 1/3 cup of almonds.

Notes & Options

  • Include a couple of tablespoons of finely chopped roasted red pepper (you can blend them in the food processor & the dip will change colors)
  • Blend a tablespoon of finely chopped caramelized sweet onions in the food processor portion of the recipe.
  • Blend 1/4 cup of shredded Chapel Hill Creamery‘s Calvander or Thunder Mountain Swiss cheese
  • If you use canned beans instead of dry, you may need to reduce the added salt.
Posted in Appetizer, Dairy-Free, Diabetic Friendly, Freezing & Canning, Gluten-Free, Recipes, Second Harvest, Vegetarian, Year-Round | Tagged , , , , , , , , , , , , , , , , , , , , , | Leave a comment

Slow Cooking the Beef Bottom Round Steak

During a recent visit to Lucky 3 Farm in Louisburg, I picked up a couple of smaller steaks that were new beef cuts for me. The land has been in the family for at least 4 generations and comes complete with a family graveyard.  The beef herd is small at just over 20 and it’s completely 100% pasture raised so the flavor is quite different from what you get with grain-fed cattle.  A lot of attention is paid to each pasture, encouraging the most beneficial greens for the herd to thrive and trees for ample shade.  The family  raises their herd in a stress-free environment in the quiet rolling meadows of Franklin County without the use of hormones and antibiotics.

The cuts of beef I brought home should appeal to the consumer on a couple of levels. First, they take the traditional roast cuts that are flavorful, but large and require a long time cooking, and replace them with smaller “steak” size cuts from the same section that require less than half the cook time and a lot less storage space in your freezer. These smaller cuts are designed to easily feed two people, or one if you like leftovers or you’re just a huge carnivore.  They are much less expensive than the tenderloin cuts, so they’ll fit into your budget more readily, being just over the cost of hamburger. And lastly, being grass-fed, they pack more nutrients and are leaner than what you’ll find at your grocery store.

They still require a little preparation to reap the full benefit of the flavor locked inside; but nothing a starting cook can’t manage. I did a little research and found several sites that gave good explanations of the cuts as well as cooking methods and recipes.  Following those suggestions, I decided to use a shortcut for one of my favorite Julia Child recipes (brisket).

My research indicated that the Beef Bottom Round Steak would be best if seared on both sides and slow cooked with moisture to tenderize the steak. Well it’s small at just about a pound of meat so I was concerned about overcooking it on the initial sear.  An enameled cast iron dutch oven allows you to get the pot hot, but reduce and simmer your beef once you’re finished searing. Normally I would allow a large roast to come close to room temperature so the interior portion of the meat wasn’t so cold that it cooked unevenly. With a 1″ thick steak cut I decided to take the steak straight from the refrigerator to the pan so I wouldn’t start the interior cooking while I was searing.Using just a couple of tablespoons of olive oil and seasoning the meat with a little salt and pepper, I got a great crust on the little steak in just a couple of minutes and the interior temperature remained slightly chilled.

Once the searing was complete (and you can add a little olive oil when you turn the beef over if the pot looks dry), I pulled the meat out for a minute and threw  in about a cup of sliced sweet onions to sear. Then I put the meat back in and added 2 cups of roasted tomatoes that were left from a previous recipe. This is really close to the Julia Child method I’ve used for years when cooking a brisket.

I set the smallest burner on low and covered the pot. I checked and stirred the mixture about every 30 minutes to make sure it wasn’t burning. Normally I would cook this in the oven, but using the very smallest of my dutch ovens, it seemed like a waste. It’s also good to know you could take this camping (or demo at a farmers’ market!) and cook it on a small grill.

After the first hour, I started checking the meat with a fork for tenderness. It was already cooked all the way through, but like a roast, I assumed it would get better with time. Around the 2 hour mark it was clearly tender so I turned off the burner and left the pot covered while I finished cooking the rest of the meal. That took about thirty minutes and the meat was clearly able to shred at the point where it was served. If you decided to use a bbq recipe instead, you would have an awesome sandwich base!

The nice thing about fresh pasture raised beef is that it’s lean and full of flavor. This cut was no exception and it makes a great dinner for two without much effort. If you don’t have roasted tomatoes at home in your freezer, you can use a 15 oz can of roasted tomatoes and add in thyme, rosemary, oregano, and garlic to achieve something similar. I would chop the tomatoes if you they aren’t already and if you have any carrots or celery on hand, maybe a 1/4 cup of each would add some additional flavor.
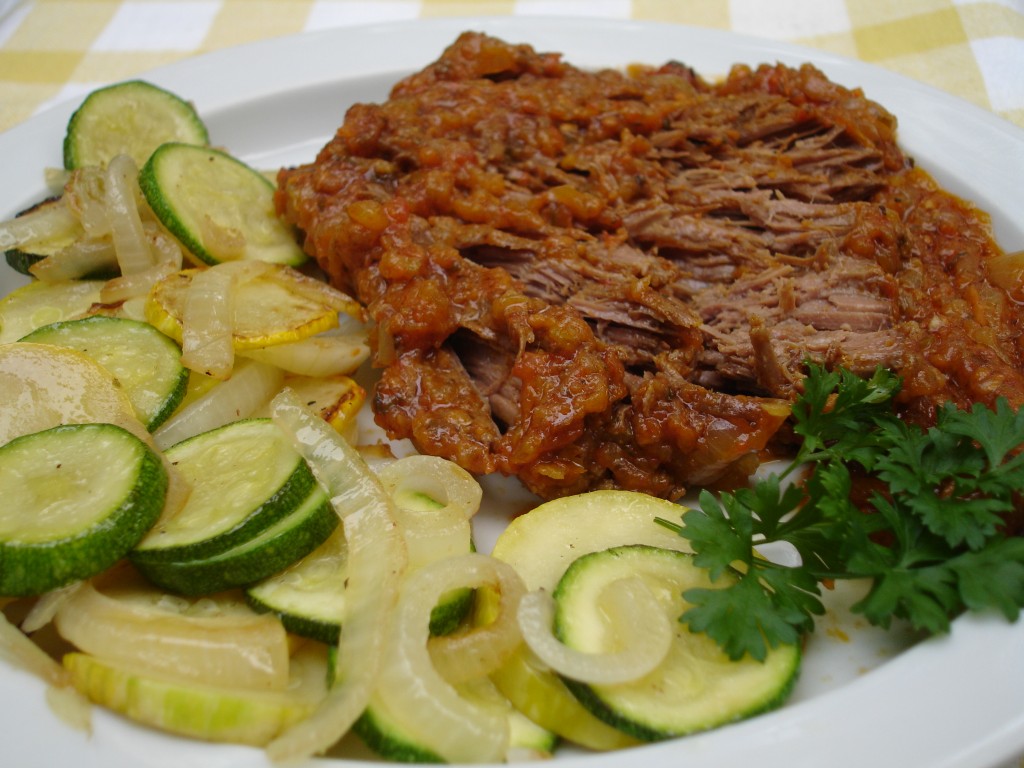
 

Beef Bottom Round Steak

Ingredients

  • 1 lb Beef Bottom Round Steak
  • 2 cups roasted tomato sauce (or 15 ounce can roasted tomatoes)
  • 1 cup sliced sweet onions

Optional ingredients:

  • 1 tablespoon Italian spice blend
  • 1/4 cup chopped carrots, 1 4/ cup chopped celery, 1 teaspoon minced garlic

Preparation

  • Season the beef on both sides, minimally with salt & pepper.
  • Using a dutch oven ( small about 6″ diameter x 4″ high), heat some olive oil on med/high heat.
  • Sear the beef on both sides on med/high heat without burning.
  • Remove the beef and add the onions ( & garlic) and cook for a minute or two.
  • Add the beef back into the pot and cover with tomatoes and any additional vegetables or herbs.
  • Cover and reduce heat to low. Simmer for 2 hours, checking to make sure it’s not burning.
  • After 2 hours, check the meat with a fork to make sure it’s as tender as you like. You can continue to cook for another 30 minutes or just cover and let it sit for 15-30 minutes before serving.
  • Puree the vegetables to make a smooth sauce. No thickening agent is required.


Posted in Beef, Dairy-Free, Diabetic Friendly, General, Gluten-Free, Nut-Free, Recipes, Second Harvest, Year-Round | Tagged , , , , , , , , , , , , , , , , , | 8 Comments

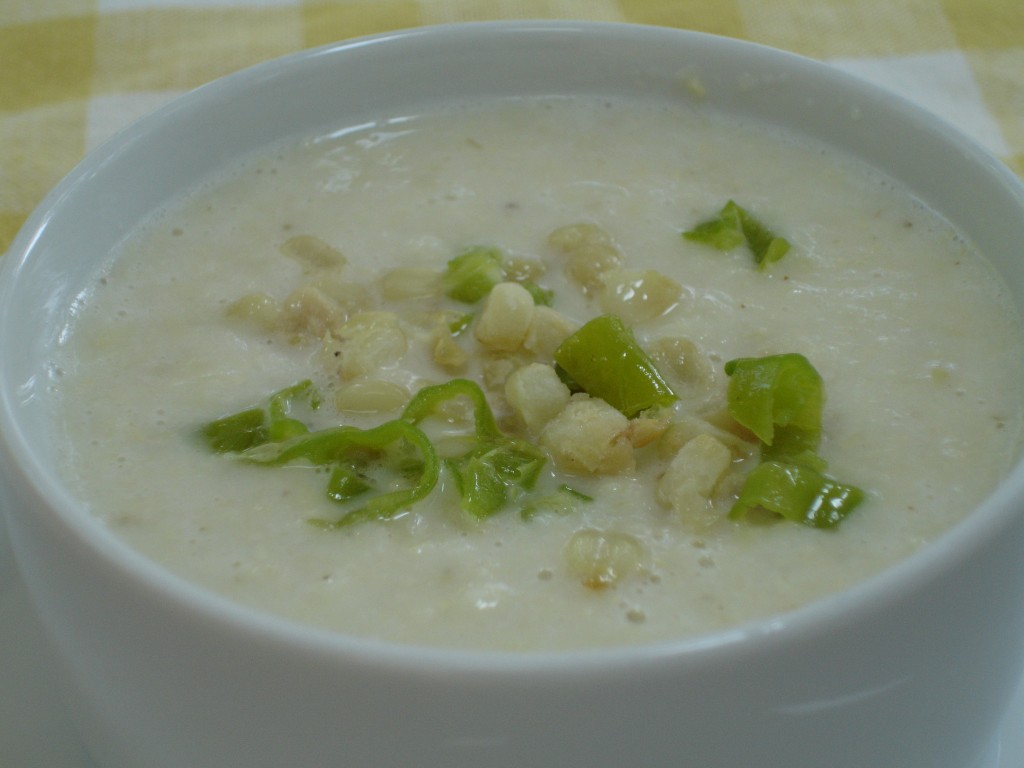
Chilled Corn Soup with Blistered Shishito Peppers

The corn this year at the markets has been some of the best I can remember in many years. Apparently the ridiculously hot weather agreed with whatever our local farmers put into the ground. I put a ton of it up in the freezer for the fall and thought this chilled soup with coconut milk might be a light meal for many of you in the extreme heat. It takes about 30 minutes to prepare  regardless of whether the corn is raw, blanched or roasted in the freezer.  Then you chill it and eat it sometime in the next day or so.

I did make the peppers fresh because I just picked them up from the market and this provided some excellent color and just a bit of heat. You can step this soup up a bit by using hotter peppers or adding some chile powder to the soup. I plan to freeze the leftover shishito peppers to use later when I make this again and just incorporate them into the soup. I think this soup would be good in the fall with a warm sandwich or as an appetizer to a meal.


Chilled Corn & Coconut Milk Soup with Blistered Shishito Peppers

Ingredients

  • 1 can (15 ounce) of light coconut milk
  • 2 1/2 cups of corn cut from the cob (blanched, steamed or roasted)
  • 1 1/2 cups water
  • 1/2 teaspoon dried shallots (about 1 teaspoon fresh)
  • 1/4 cup chopped sweet onion
  • 1 teaspoon Himalayan sea or Andes mountain Salt
  • 2-6 shishito peppers

Preparation

  • Saute the onion (and fresh shallot)  in a little olive oil until soft.
  • Pour the coconut milk and water into a large pot.
  • Add the onion, shallot (dried or fresh), corn
  • Bring to a boil and quickly reduce and simmer on low for 20 minutes.
  • Puree the soup (without the peppers)
  • Chill and top with fresh blistered shishito peppers when you are ready to serve, or incorporate them into the chilled soup after it has been processed (it can turn the soup an unappetizing color). If you want to use fresh peppers like jalapeno, you can just chop them into the soup either during the cooking phase or after the soup if finished.

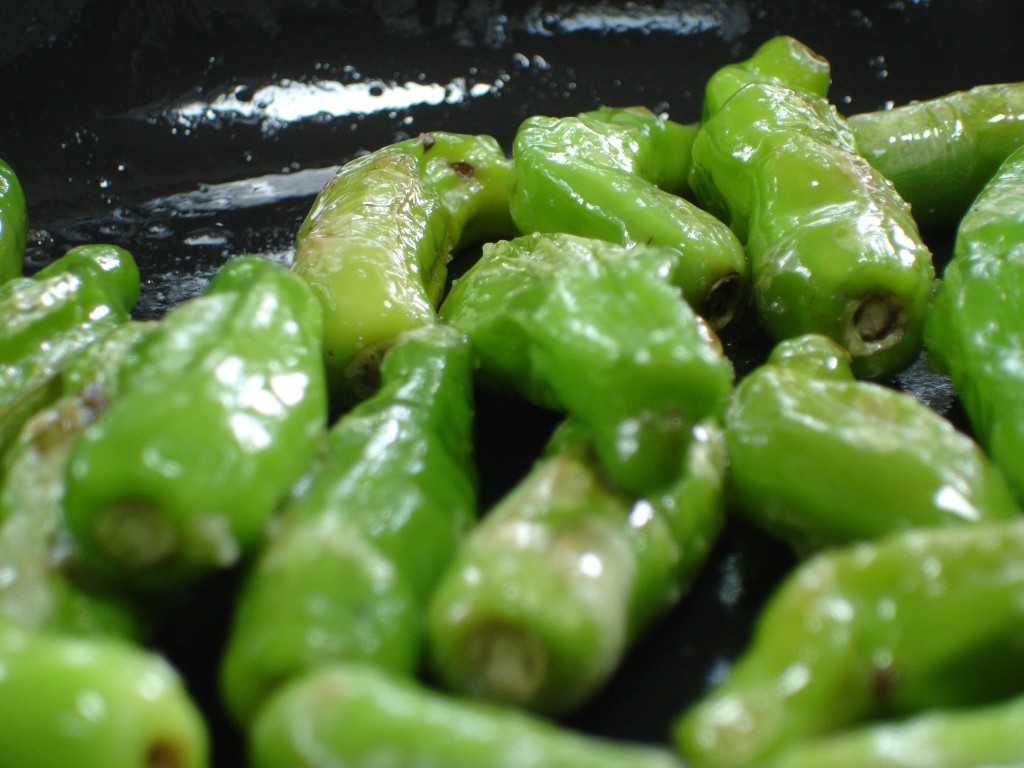
Blistered Shishito Peppers: Coat a heavy pan with just a little olive oil; about a teaspoon. Heat the pan on medium/high until the oil thins and spreads lightly across the bottom. Toss in the peppers (after cleaning them with a damp paper towel) and let them sit a minute and start to blister from the heat. You can add some salt during this process. It will stick to the peppers as they are coated with the oil. Turn the peppers as necessary to avoid burning. The blistering will be light to dark brown in color on spots but not the whole pepper. You can cook them less than this if you like. I actually prefer them a little less cooked with some crunch still left since they are topping a soup. They are also great with kabobs because they are so mild.


Posted in Dairy-Free, General, Gluten-Free, Nut-Free, Recipes, Soup, Summer, Vegetarian | Tagged , , , , , , , , , , , , , , , , , | Leave a comment

White Bean & Marinated Feta Dip

This is probably the easiest dip you’ll make because the spices are already in the feta marinade. And it freezes well too! Featuring this one at the North Hills Farmers’ Market this weekend using Prodigal Farm’s Marinated Feta.


White Bean & Marinated Feta Dip

Ingredients

  • 15 ounce can of Cannellini beans.
  • 4 ounces of  Marinated Feta without the oil
  • 3 tablespoons of the oil feta marinade
  • 1-2 tablespoons of plain olive oil
  • 1/4-1/2 teaspoon Chardonnay Oak Barrel Smoked Salt

Preparation

  • Drain & rinse the beans.
  • Break up the feta.
  • Put all of the ingredients in a food processor and blend until smooth.
  • If you use a small processor, it will take 2 batches.
  • It’s also great with 2 tablespoons of chopped olives or roasted red peppers thrown in if you have them.
Posted in Diabetic Friendly, Gluten-Free, Nut-Free, Vegetarian, Year-Round | Tagged , , , , , , , , , , , | Leave a comment

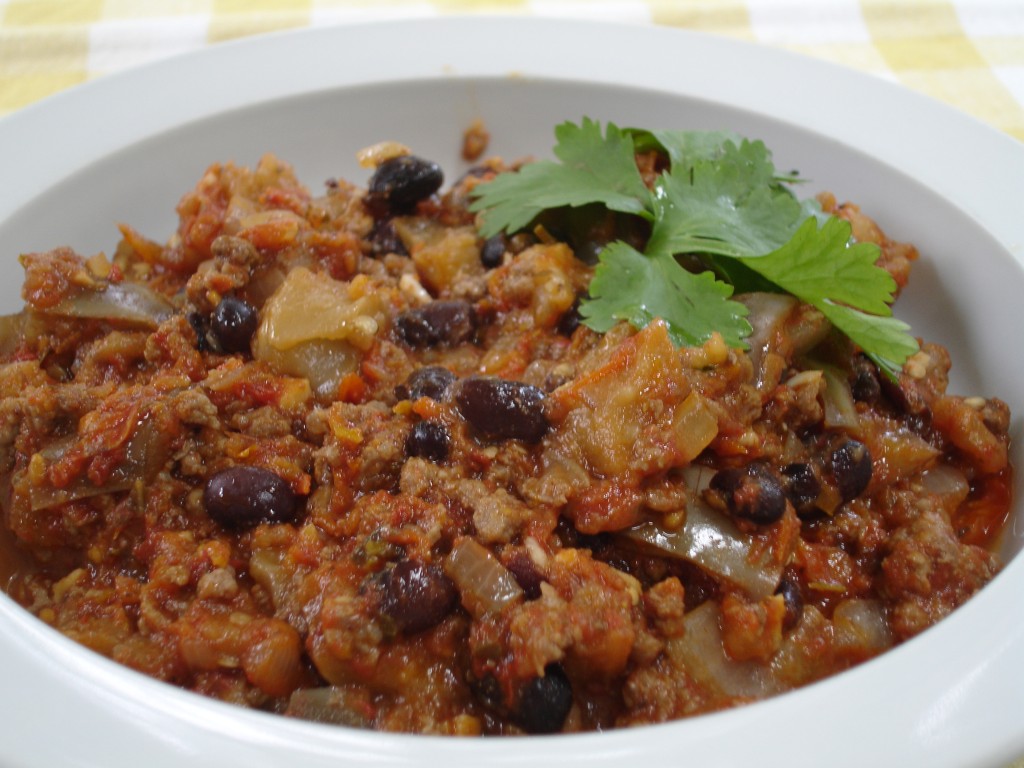
Eggplant & Black Bean Chili

I really didn’t expect to love this recipe. I figured it would work well for a market demonstration, but not be something I’d put in my binder at home. But this honestly has great flavor and it was really flexible when I started playing with the spices and meats. The initial test of it was a vegetarian entrée, and then I tried it with ground beef and spicy sausage. Venison is next. I’ll let you know how that works out in a couple of weeks.

This recipe is amazingly fast too. Most of the recipes I found on-line roasted or grilled the eggplant. I was trying to find one that could use some frozen (or home canned) ingredients so it would be budget friendly and healthy.  One thing to note on this recipe is that I used Rosa Bianca Eggplant. It is a mild eggplant compared to it’s larger dark purple cousins. Fewer seeds and thinner skin mean you can just slice and dice this right into a cast iron pan with some olive oil. If you choose to add some smoky flavor to it (it is chili after all!), you can use some Alderwood or Chardonnay Oak Barrel Salts with the eggplant. Then use a lighter sea salt for finishing. Along with the different chile powders, you’ll have multiple levels of flavor as you devour this.


Eggplant & Black Bean Chili

Ingredients

  • 4 tablespoons olive oil
  • 1 Rosa Bianca Eggplant (just under a pound)
  • 1/4 cup chicken or vegetable broth
  • 2 cups of Roasted Tomatoes
  • 1/2 cup of dehydrated sungold tomatoes (optional)
  • 1/4 cup of sweet yellow, orange or red roasted peppers (skins removed after roasting)
  • 1 cups chopped sweet onion (pre-roasted will work)
  • 1 tablespoon minced garlic
  • 1/2 pound ground beef, spice sausage or ground venison
  • 1 teaspoon Worcestershire
  • 1 teaspoon Aleppo crushed Red Pepper flakes
  • 1 teaspoon Mild Chimayo chile powder
  • 1/2 teaspoon Alderwood smoked salt
  • 1/2 teaspoon Chardonnay Oak Barrel smoked salt
  • 1 cup cooked black beans (rinsed and drained)

Preparation

  • Wash the eggplant in cool water and dry. You can leave the skin but slice off any blemished parts. Working quickly chop the entire eggplant into  1/2″ cubes.
  • Put 3 tablespoons of olive oil in a heavy pan and heat on med/high. Add the eggplant and the smoked salt. Saute for about 5 minutes, stirring as needed to avoid burning.
  • Add the chicken broth and cover. Simmer for 5 minutes. The eggplant should be tender but not falling apart.
  • Remove the eggplant and set aside.
  • Add 2 tablespoons olive oil to the pan and saute the onions and garlic until they are translucent (about 5 minutes)
  • Add the roasted tomatoes spices, chopped peppers, chile powders, and Worcestershire to the onions and cook another 5 minutes.
  • Add the eggplant, black beans and a ground meat of your choice to the vegetable and spice mix.
  • Adjust the seasoning and cook until it’s heated through.


Posted in Beef, Dairy-Free, Diabetic Friendly, Fall, General, Nut-Free, Pork, Recipes, Second Harvest, Summer, Vegetarian | Tagged , , , , , , , , , , , , , , | Leave a comment