Stuffed Paprika Peppers

During the past few weeks, I’ve been going through some of my very oldest recipes, dating back more than 25 years. What I noticed was the “heavy” nature of most of them. Laden with tons of meat and sauces, they don’t really fit the way I eat now. But like most people, I like my “comfort food” and many of these recipes were given to me by my mother and grandmother. So I’m spending some time changing them to fit a more active and healthy lifestyle.

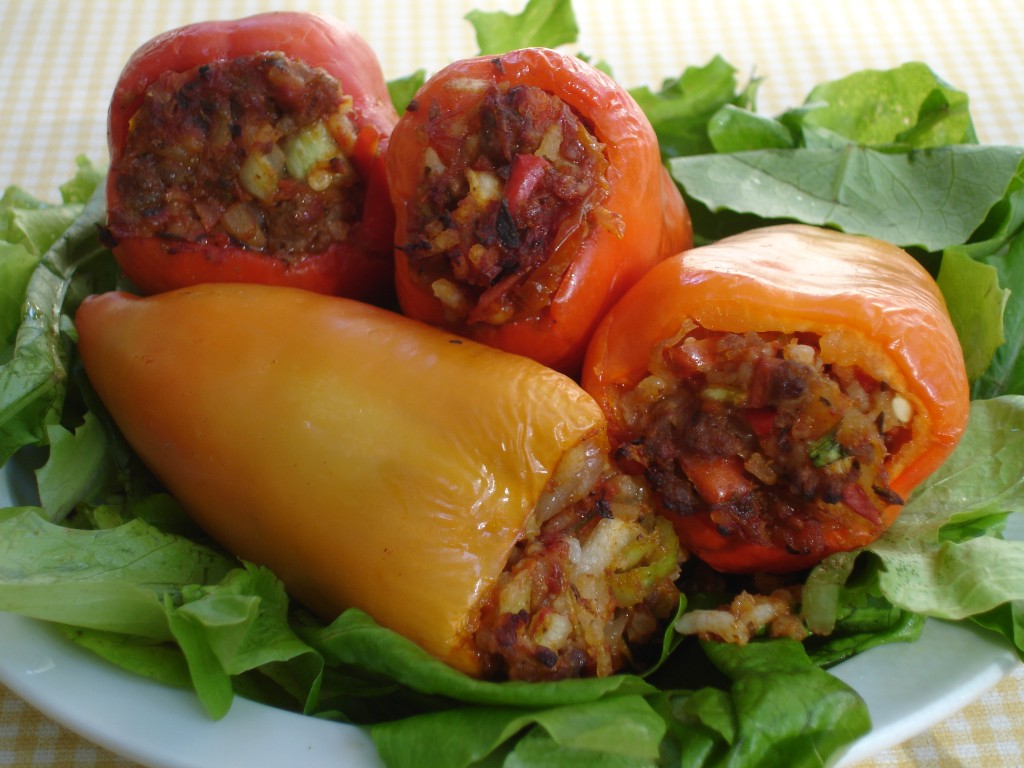
One of my less favorite recipes was green bell stuffed peppers. Back in the day they were stuffed with bread crumbs and meat. I’m still not fond of green bell peppers although I recognize their importance in some recipes, I really prefer red, yellow and orange peppers. So a couple of weeks ago when I picked up a bag of paprika peppers from Wild Onion Farm, my original intent was to dehydrate them for a paprika powder. But there were so many, that I decided to stuff these to have on a salad. That was back when it was still hot. Now it’s chilly and I think a bowl of warm soup would be more appropriate! These taste quite a bit different from the standard bell peppers and Italian frying peppers that I normally use. They are quite crunchy and not as sweet  or juicy as the red or yellow/orange bell peppers.  They range in size quite a bit and don’t seem to have as many seeds or veins as other types of peppers so they are easy to clean for stuffing. They dry well in a dehydrator too.

I had some extra cooked spicy pork sausage,  hamburger,  and roasted tomatoes left from another recipe. I made up some NC grown brown rice and white basmati rice and proceeded to make up a simple stuffing for these peppers. It was easy to cut off their tops and get out most of the seeds with my fingers. Then I simply stuffed them with the mixture and baked them until the peppers were just soft enough to be cooked through but not mushy. It’s a good example of how to use those few leftovers to pull together a meal quickly. You could use some leftover meatloaf to make this or add in some shredded greens like chard, tatsoi to add some additional color and flavor.


Stuffed Paprika Peppers

Ingredients

  • 6 -8 Paprika Peppers, washed, dried with tops removed. Leave whole and remove seeds
  • 1 1/2 – 2 cups rice (mixed brown &  basmati)
  • 1/2 lb cooked spicy sausage (defatted)
  • 1/2 lb cooked hamburger (defatted)
  • 8 oz roasted onions
  • 12 oz roasted tomatoes, pureed
  • 1 cup shredded stems and leaves of bok choy, baby chard leaves, or tatsoi leaves
  • 1 teaspoon Italian herbs
  • 1 teaspoon dried basil (2 teaspoons fresh if you have it)
  • Chardonnay Oak Barrel Smoked Salt to taste
  • Ground fresh mixed peppercorns to taste

Preparation

  • Mix everything together except the roasted tomatoes. Add the amount of roasted tomatoes that are needed to make the rest of the mixture hold together. This will vary from 8-12 ounces. If you like the stuffing more moist, just add more.
  • Everything is cooked already so you can adjust the salt and pepper when you finish mixing it all together.
  • Bake at 375F for about 30 minutes uncovered and upright in a casserole dish.
  • You can use some crunched up foil in the bottom to help them stand up better. Otherwise the stuffing will fall out during the cooking process.
  • Remove and serve with soup or on a salad.

Notes

  • This could be made with chicken sausage, meatloaf or with a soy based sausage substitute
  • Couscous or quinoa could substitute for rice
  • Fresh basil is a good addition
Posted in Appetizer, Beef, Dairy-Free, Fall, Gluten-Free, Nut-Free, Pork, Recipes, Second Harvest, Summer | Tagged , , , , , , , , , , , , , , , | Leave a comment

Sweet Potato Hummus

It’s not clear to me whether I should call this a hummus or a spread. What I can say about it is that it’s great on apple slices or just on the end of the spoon. This recipe is slightly sweet and tastes wonderful on the warmer autumn days we have here in the south. You could make this spicy by adding some additional cumin and chile powders, but this recipe was designed to be a healthy replacement for peanut butter which so many people seem to be allergic to these days. The addition of a little tahini gives it a hint of nut butter flavor, but the sweetness of the perfectly cured sweet potato comes through too. If you really want to have some fun with this, use purple sweet potatoes. The flavor is the same, but you’ll keep folks guessing!

This takes nothing more than a small food processor to make and it freezes quite well if you want to make extra to take to work or school for a snack. I’ll have it as a sample on November 5th at the Midtown Farmers Market at North Hills 


Sweet Potato Hummus

Ingredients

  • 3/4 cup roasted/baked sweet potato, mashed (canned will work, drain)
  • 3/4 cup white cannellini beans, slightly mashed (canned will work, drain & rinse)
  • 2 tablespoons olive oil
  • 1/4 – 1/2 teaspoon ground cumin powder
  • 1 generous tablespoon tahini
  • 1/4 teaspoon Ceylon cinnamon

Preparation

  • Put everything into a small food processor and blend until smooth. Adjust your cumin and cinnamon to your taste.
  • Serve on apple slices or use as a sandwich spread

Notes

  • Replacing the olive oil with coconut oil changes the flavor significantly
  • A small pinch of Cayenne pepper increases the heat significantly
  • Freezes well


Posted in Appetizer, Breakfast, Dairy-Free, Dessert, Diabetic Friendly, Fall, Gluten-Free, Nut-Free, Recipes, Snack, Vegetarian, Winter | Tagged , , , , , , , , , , , , , , , , , , | 1 Comment

Honey Glazed Sweet Potato Chips

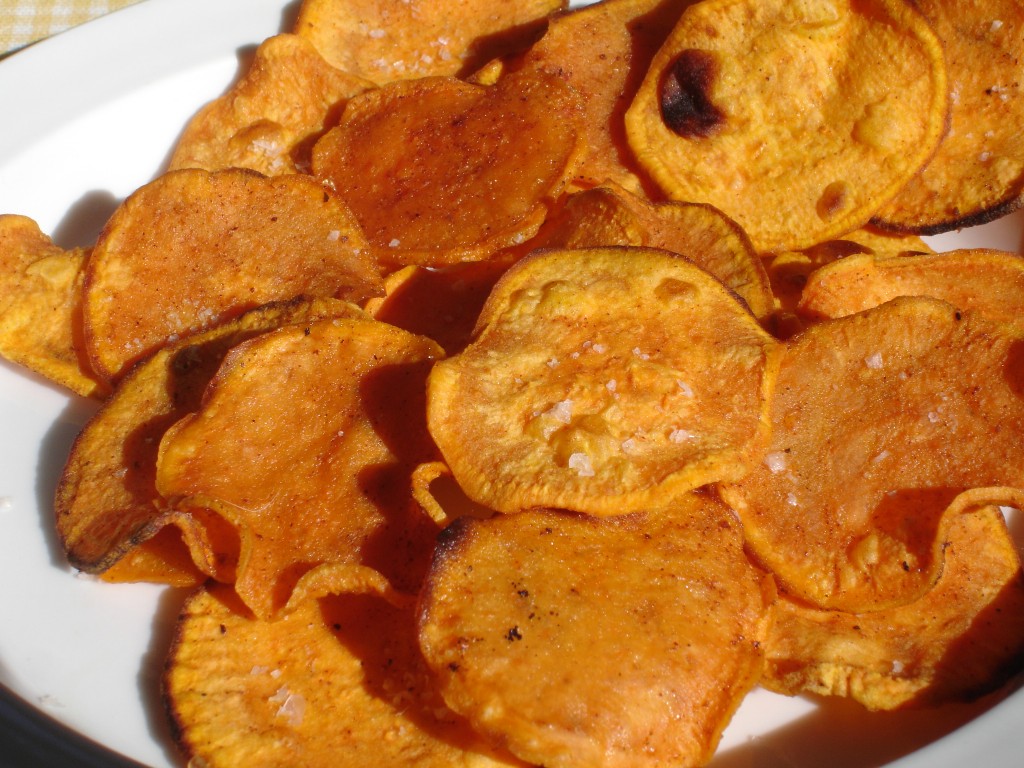
Sweet potatoes are one of my favorite foods in the fall. You can use them in sweet treats to replace sugar or other veggies like pumpkin or butternut squash. And they are excellent in savory and spicy dishes with African and Indian spices. They keep a long time before you need to cook them, and they freeze well once they’re baked. What isn’t there to love?  And best of all, they come in both orange and purple so they are PERFECT for Halloween treats!

This recipe started with one I picked up at the “Honey Buzztival” at the Raleigh Downtown Farmers’ Market this summer. I’ve added a few things to the original.  There were great samples from all of the vendors and recipes all over the place from the market staff. I think you’ll need a mandoline to make these. It’s really impossible to get even slices without one and the broiler time is so critical that you need that level of accurateness. I also used my dehydrator set pretty high to finish drying these out so they would be more crispy and hold for a couple of days. I promise not to post too many of these kinds of demanding recipes, but this one is really fun and something you can do with the kids, given the right kitchen tools.


Honey Glazed Sweet Potato Chips

Ingredients

  • 1 – 1/2 lbs sweet potatoes scrubbed and peeled
  • 1 tablespoon melted butter
  • 1 tablespoon olive oil (mild or medium flavor)
  • 1 – 2 tablespoons honey
  • 1/2 teaspoon ground Vietnamese cinnamon
  • 1/4 teaspoon ground nutmeg
  • 1/8 teaspoon ground ginger (or 1/8-1/4 teaspoon minced fresh if it’s in season)
  • 1/4 teaspoon pink Himalayan sea salt
  • 1/4 – 1/2 teaspoon Murray River Flake Salt for finishing

Preparation

  • Mix the butter, olive oil, honey, cinnamon, nutmeg, ginger and pink sea salt together in a large bowl.
  • Working quickly,using a mandoline, slice the sweet potato just a tad under 1/8″ thick and put them directly into the mixture.
  • Coat all of the slices well and place on a baking sheet (in one layer, without touching )that has been covered with parchment paper.
  • Broil on second or third shelf down from the broiler (set on high) for about 5 minutes.
  • Watch them cook the entire time because they burn quickly. You will see bubbles as they cook in the middle and browning on all of the edges as they get close to being finished on the first side.
  • Pull the baking sheet and turn all of the sweet potatoes over. Quickly sprinkle a little bit of the Murray River Flake Salt on the top of each chip.
  • Place under the broiler for 2-3 minutes more until they are golden.
  • Finish in the dehydrator for about 4-6 hours at 145F. Time varies depending on relative humidity.


Posted in Appetizer, Dehydrating, Fall, Gluten-Free, Nut-Free, Recipes, Sides, Snack, Winter | Tagged , , , , , , , , , , , , , , , , , , | Leave a comment

Pumpkin & Cornmeal Muffins with Granola Topping

It’s fall, despite the 70+ weather we’re having here in the south. The mornings and evenings are cool and quiet. No one is out in a rush to cut their grass and beat the heat. It’s peaceful on the porch and these muffins are a super way to get your kids off to school or just munch on yourself with a cup of tea after they have left for the day. They are light,  not overly sweet or particularly savory like traditional corn or pumpkin muffins. The hint of sweetness comes from the molasses and honey and just a bit of maple syrup and fresh ginger in the granola.  The crumbly texture comes from the addition of cornmeal. Pick your own favorite granola to use on these or make your own. This recipe makes about 24-30 small muffins depending on how high you fill your tins.


Pumpkin & Corn Meal Muffins

Ingredients

  • 1 cup white/wheat flour
  • 1 cup fine cornmeal
  • 1 tablespoon baking powder (no aluminum)
  • 1 teaspoon pink sea salt
  • 1 teaspoons ground cinnamon
  • 1/2 teaspoons ground nutmeg
  • 2 whole eggs (large)
  • 1/2 cup light brown sugar (not packed)
  • 1 1/2 cups pumpkin puree (cooked)
  • 2 tablespoons  virgin coconut oil (liquid)
  • 3 tablespoons butter (melted and cooled)
  • 1 tablespoon molasses
  • 1 tablespoon honey

Preparation

  • Preheat oven to 400F.
  • Using soft butter, grease small muffin tins well on the inside.
  • Sift the flour, cornmeal, salt, baking powder, cinnamon, and nutmeg together. Set aside.
  • Beat eggs on medium/high until they are moderately fluffy (about 2 minutes).
  • Add brown sugar, liquid coconut oil, liquid butter, pumpkin, molasses, and honey. Blend well with mixer on med/high so it’s light in texture.
  • Add the flour in two batches. Start on low to incorporate quickly,  and then beat on med/high when finished so it’s light and almost fluffy. It only takes 30 seconds to a minute to get some air incorporated once the flour/cornmeal mix is combined. Don’t over-blend.
  • Spoon into mini muffin tins about 3/4 full.
  • Carefully top with granola. Press the granola into the wet muffin mix just a bit so it sticks to the top while baking.
  • Bake for 11-13 minutes. Test at 11 minutes. They continue to bake while they are cooling so pull them when they have just finished cooking all the way through.
  • Let cool for 5 minutes or they will stick to the pan and break apart during removal.
  • Using a small plastic knife, gently go around the edge of each muffin before attempting to lift it out with fork or spoon.
  • Serve with soft  honey butter.
Posted in Breakfast, Fall, Recipes, Snack, Winter | Tagged , , , , , , , , , , , , , , , , , | Leave a comment

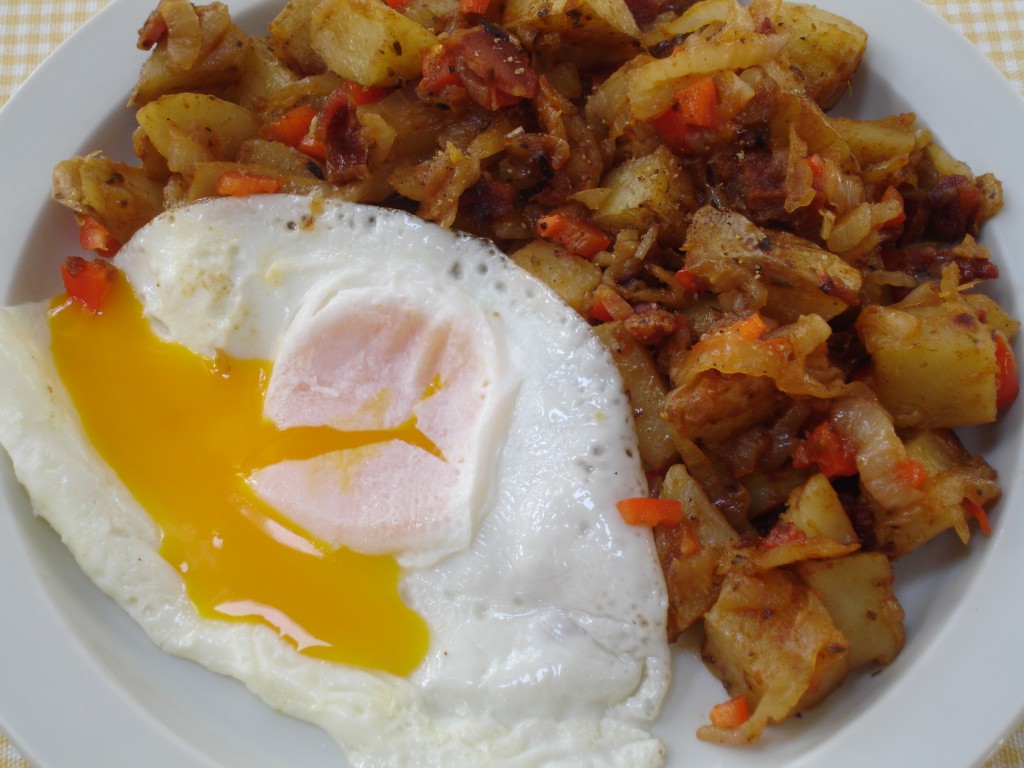
Home Fries with Paprika Peppers & Sweet Onions

I know you are all familiar with ground paprika spices. They are grown all over the world and many for the US market are grown and processed into dried spices in California. It turns out that with a little care, Paprika Peppers can be grown here in NC and they are excellent cooked up with sweet onions and fresh home fried potatoes, or added to some Eggplant Chili.  They really hold their color,  texture and sweet flavor well when cooked so they’re perfect to add to dishes that are a bit dull on color.

These home fries are easy to make a day ahead of time if you are expecting company.  It’s also easy to dish out a little for each person and warm them in a pan with scrambled eggs or an egg “over easy”. It’s also possible to put the finished home fries into a casserole dish and break some fresh eggs on top. Bake the entire dish until the eggs are cooked through and serve. The recipe makes enough for 2 healthy servings.


Home Fries with Paprika Peppers & Sweet Onions

Ingredients

  • 1 tablespoon Olive Oil
  • 1 lb yellow medium starch potatoes, cleaned and chopped to 1″ squares (skins left on)
  • 1/2 cup chopped paprika pepper (the seeds have heat, so leave them out if you just want the sweeter flavor)
  • 1/2 cup roasted sweet onions, or 1 cup raw thinly sliced and chopped sweet onions smoked hot paprika powder
  • 1/2 – 1 teaspoon sweet paprika powder
  • 1/4 teaspoon hot smoked paprika powder (optional)
  • 1 slice of cooked bacon chopped per person (optional)
  • 1-2 eggs per person

Preparation

  • Add olive oil to a heavy cast iron pan and heat it on medium. Add the onions if you are using raw and slowly cook on medium/ low heat until they are lightly browned for about 10 minutes.
  • Add the chopped potatoes and turn up the heat to medium high. Make sure there is enough olive oil in the pan to keep the potatoes from sticking. You can add just a little butter if you would like more browning and slightly sweeter flavor.
  • Add the smoked paprika powder, sweet paprika powder, salt and pepper. Mix everything together well with the potatoes and onions until it’s all well coated.
  • Cover the potatoes with a lid and let them cook for about 5 minutes on medium heat until lightly browned. Stir them around and repeat for another 5 minutes.
  • Check the potatoes and continue the cook until they are nicely browned and cooked through. You can cook them to any level of softness that you prefer. The smaller pieces cook up more evenly and quickly than larger pieces.
  • As the potatoes get close to finishing, add the bacon and fresh paprika peppers. They will need about 5 minutes to warm through. The peppers will still be a bit crunchy and the bacon will soften.
  • Cook your eggs as the potatoes finish and serve on top with a sprinkle of fresh parsley if you have it.
  • If you plan to bake this in a casserole dish, set the oven to 400F and add the raw eggs to the top of the home fries. The home fries should be completely cooked and as close to room temperature or warmer, so the eggs don’t take too long to cook through in the oven. Bake about 7-15 minutes depending on how cold your eggs are to start. You’ll need to watch them after the first 5 minutes because the time can vary significantly.


Posted in Breakfast, Dairy-Free, Fall, General, Gluten-Free, Pork, Recipes, Sides, Summer | Tagged , , , , , , , , , , , , , , , , , | Leave a comment

Stir Fry Kale Sandwich with Smoked Bacon & Cheese

Kale thrives in cool weather and it’s plentiful at the markets right now along with onions, garlic and fresh ginger root. The addition of some crispy bacon and just about any local cheese is wonderful on this sandwich.  If you have some artisan bread, a panini is an excellent way to melt the cheese, otherwise you can put the whole sandwich in a toaster oven for a couple of minutes to finish melting the cheese and blend the flavors. This is just as good with a substitute meat or leaving it off completely. It’s the perfect complement to some of the late harvested cherry tomatoes or a cup of roasted tomato soup once the weather turns chilly.

It’s simple to make the base stir fry for this sandwich. Make some extra because it’s also good mixed into rice as a side dish.  It only takes about a tablespoon of olive oil to get this going. The kale retains a lot of water and releases it as it cooks down. You’ll only need a teaspoon of soy sauce in this so you compliment but don’t overpower the ginger, garlic, onions and kale. The small amount won’t compete with your bacon or cheese either.


Kale Stir Fry Sandwich with Smoked Bacon & Cheese

Ingredients

  • 4 cups raw kale, roughly chopped
  • If you have thick stems, cut them out and chop them more finely.
  • 1/2 cup sliced onions
  • 1/2 teaspoon clove garlic, minced (or roasted)
  • 1/2 teaspoon fresh ginger, minced
  • 2 slices cooked bacon
  • 1/4 cup shredded local cheese (feta, swiss, asiago)

Preparation

  • Saute the sliced onion in about 2 teaspoons olive oil until they are golden brown on low/medium heat. If you have these already cooked and frozen, just thaw them and briefly warm).
  • Add the garlic and ginger as the onions finish browning and cook for about a minute on low heat. Roasted garlic works well here too.
  • Add the kale stems first if you have cut them separately and turn up the heat to medium/high. As those begin to soften, add the chopped kale. You may need to add a couple of teaspoons of broth, water or oil to make sure the kale doesn’t stick as it starts to cook. As it cooks, it will release water. I normally cover the kale initially to keep the steam in the saute pan and then uncover to cook off any extra liquid. Cook until the kale is wilted.
  • Add the soy sauce at the end so it cooks for about a minute or two with all of the ingredients.
  • Assemble your sandwich and either toast or put into a panini pan to crisp up the outside and melt the cheese. This will cause all the excess juices to go into the bread as well, so you want to make sure you have cooked off a majority of them. ‘
  • Serve with some cherry tomatoes or a cup of roasted tomato soup, depending on the weather.


Posted in Fall, Nut-Free, Pork, Recipes, Winter | Tagged , , , , , , , , , , , , , , , , , , , | Leave a comment

Adapting Recipes & Shopping @ the Farmers’ Market

Throughout the season, I’ve encountered many questions about modifying recipes and storing foods from the farmers’ market or CSA boxes. It occurred to me  that explaining my process of selecting and adapting recipes might be helpful with the upcoming Triangle Step Out Walk to Stop Diabetes next weekend. Small changes in a recipe can make a huge world of difference if you have a food allergy or are trying to incorporate more local foods into your diet. And since I like to advocate eating local organic farm foods when I cook at the market, here’s how I go about it. Please feel free to send me questions if something isn’t clear.


7 steps you can use to modify a recipe:

  1. Look at whether the finished product is going to lend itself to being modified by examining the ingredient list. Are there a lot of “processed” foods in the recipe that you can exchange for “whole” foods or does the whole recipe depend on using the processed foods for flavor or texture? Recipes to avoid might be desserts that call for commercial whipped topping or casseroles that have a large portion of mayonnaise in the base. Start with something that has some seasonal ingredients and use fresh as a beginning point.
  2. Are the ingredients in-season together? This makes shopping at the market more productive. If they aren’t “in-season” can you “put up” any of them by freezing, dehydrating or canning prior to making a recipe. If so, it means a recipe can be used year-round which is a huge plus and can reduce your cost. If you can figure out how to store items that you buy in bulk or pick-your-own, you can reduce your overall budget.
  3. Figure out which ingredients can be purchased from local farms. We are fortunate to have many great farmers’ markets in the area and it’s hard to choose where to go “shopping”. If you can’t get something locally, than try to find an ingredient that can be swapped. Let me stress the need to “meal plan” at least a half a week in advance. It gets easier over time. Try to find ways to use the same item in multiple dishes during the week and save a little time and money in the process. Whole chickens, large roasts, a base of quinoa or couscous, or similar vegetables prepared in different ways are good examples.
  4. Are there any “allergy” foods in the recipe? Can anything be swapped to make it more safe; like pecans or walnuts for peanuts? Or tahini for peanut butter; coconut, soy, almond or goat’s milk for cow’s milk? Can salt be reduced or replaced with spices that enhance the flavor and complexity of taste, as well as reduce the need for salt?
  5. How much fat and sugar is in the recipe? Can either be cut back or can ingredients be swapped for more healthy results. Do the swaps maintain good flavor and texture? Butter, olive oil, coconut water & coconut oil, applesauce, low sugar fruit preserves are all good examples of potential sugar swaps. Carrots, raisins, currants and dates can add texture and sweetness to many desserts and some savory dishes as well. Many recipes can be reduced and swapped up to 50% and end up with more interesting flavors. Coconut oil is a great replacement for butter in some recipes and creates a very light cake batter. Broth can be a substitute for fat with a ton of flavor enhancement using spices. Sugars come in all forms so I try to reduce processed sugar with date sugar, coconut water, spices and real fruit. And sometimes you can deconstruct a recipe and assemble it a little differently without some of the sugar or fat. Lastly, are there any good fats that can added if the recipe seems to be too lean already?
  6. Test the recipe noting any adaptations. Try to minimize the changes to 30%. More extensive changes require testing the recipe in multiple steps or starting from scratch with a different recipe.
  7. Evaluate results. Does it taste good? What is there too much of, too little of, and how was the cooking technique? Is it easy or difficult? How long does it take to make? Are the left-overs good? Do they keep well for extended periods? How does everyone else like it? It becomes pretty obvious whether people want to eat it again and whether the recipe is worth the time and effort you put into it.

As you change your recipes, you may find your tolerance for sugar and fat become lower. Learn to look at recipes and foods differently. It becomes easier to change cooking methods over time as you experiment, so don’t get frustrated.

It’s simple to decide what you want to eat and what you want to skip once you learn how your body reacts to different foods. A food diary is helpful as you are trying new foods. Only write down the NEW foods with a couple of notes on the ingredients as you try them. Record how your body feels an hour, a couple of hours and a day after you try a new food or recipe. Did you have more or less energy? Did you feel full or hungry quickly or slowly?  We’re not counting calories or grams of anything. We are all different and our bodies react in particular ways to certain foods. If you need to measure sugar levels, just take a moment to record those as well. You are just noticing things about YOUR body’s reaction to the new food. After a while you can adjust your eating habits and you won’t feel like you are starving or depriving yourself. You’ll figure out how and when to splurge on foods that don’t work well for you and adjust your other meals to compensate for your body’s reactions.

Other examples of healthy swaps include pasta. If you can’t eat it or don’t like the gluten-free varieties, than you can substitute winter spaghetti squash pretty easily or quinoa. And during the summer shredded zucchini,  yellow patty-pan and crookneck squash can be thinly sliced and steamed as a base instead of pasta. You can also use the ribbon cut method on your zucchini and summer squash in lasagna to replace pasta noodles.

Another example is related to meat-based proteins. If you have access to hunters or fisherman, take advantage to try out some new foods in your traditional recipes.  It’s a good way to keep your grocery costs down, experiment with replacement foods that are leaner and more healthy, and expand your food palate. Ground venison can be substituted totally or just partially in many chili and soup recipes. Or you can make burgers with some added pork and bake or roast up sweet potatoes and season them with cinnamon and nutmeg. There are many times when the local fish mongers at the market have some spare at the end of the market that they want to get rid of at a reduced price. They will even offer up recipes for you to try!

Have a great time experimenting! And stop by to see me at the local farmers’ markets!


Posted in Diabetic Friendly, Freezing & Canning, General, Second Harvest | Tagged , , , , , , , , , , , , , , , | Leave a comment

Quinoa Porridge Cooked with Fall Apples & Pears

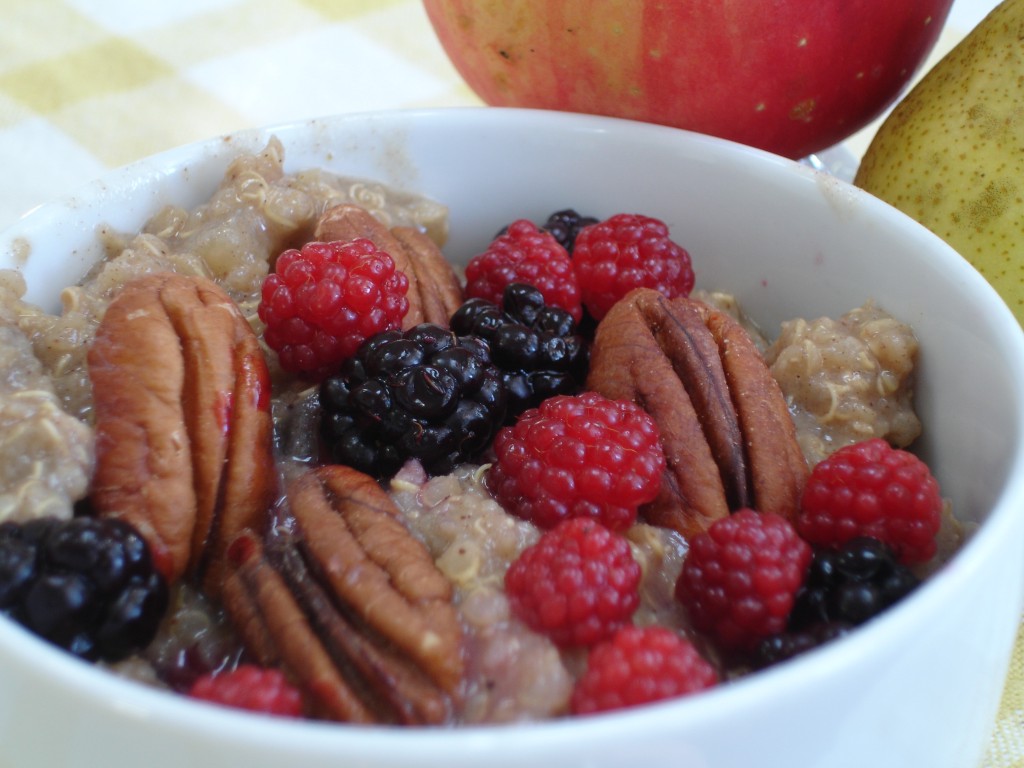
Let’s face it, cooked quinoa just isn’t pretty. It doesn’t matter if you use the beige, red or black variety, it is boring visually, and this porridge isn’t any exception. In fact, I think it is even more ugly than the regular cooked quinoa. It looks a lot like oatmeal.  But the nutty flavor of the quinoa cooked with almond milk and naturally sweetened with  local pears and apples and the tiniest bit of date sugar make this a winner in my book for these early fall mornings. I’m a fan of oatmeal, but I like the flavor and texture of this much more than oatmeal.  Topped with whipped honey yogurt or a little maple syrup along with some toasted pecans or slivered almonds and some thawed berries from summer picking! All I can say is YUM! This is an excellent way to start your day.  And, best of all, you can make a batch over the weekend and enjoy it for a couple of days to start off the week right.

This is simple and healthy. I’ll have samples of it in the ADA Triangle tent as the Step-Out 2011 Walk to Stop Diabetes begins on October 15th at North Hills. Then I’ll move to the Midtown Farmers’ Market and provide additional “Diabetes-Friendly” Samples for everyone to try that are made from local farm food you can purchase from the vendors at the market. There will be recipes at both locations so you can shop with the local farms from 8-12.

Quinoa Porridge with Apples, Pears & Toasted Nuts

Ingredients

  • 1/2 cup raw rinsed quinoa
  • 2 cups unsweetened almond milk
  • 1 tablespoon date sugar
  • 1 teaspoon vanilla powder or extract
  • 1/4 teaspoon cinnamon (your choice)
  • 1 cup cubed apples and pears (1/2″)
  • Pinch of Himalayan salt
  • Optional blueberries or raspberries thawed
  • Optional whipped yogurt with honey or maple syrup

Preparation

  • Heat the rinsed quinoa in a saucepan over medium/low heat along with the cinnamon for about 3 minutes without burning.
  • Pour in the almond milk, vanilla, date sugar and fruit.
  • Bring to a boil over medium/high heat and reduce immediately to a low simmer and cook until the porridge is thick and the grains are tender; about 20 minutes, stirring as needed. Add more almond milk if the mixture becomes too dry and sticks to much to the pan.
  • Top with 1/2-1 teaspoon of maple syrup or whipped honey yogurt and some thawed blueberries, blackberries, raspberries and toasted pecans or slivered almonds.

Notes

  • This can be refrigerated for up to 3 days and reheated on 50% setting in microwave for about 30 seconds or in a stove on low with some additional almond milk.
  • This can be served chilled if it’s warm out.


Posted in Breakfast, Dairy-Free, Dessert, Diabetic Friendly, Fall, Gluten-Free, Recipes, Winter | Tagged , , , , , , , , , , , , , , , , , , , , , , , , | Leave a comment

Pear Butter with Fresh Ginger

Last year I was fortunate enough to be given a large bag of pears from a very old tree at Elodie Farms. It was so much fun making Pear Butter that I thought I would share the recipe. It’s really simple, doesn’t use any additional sugar and this year I added fresh ginger from Edible EarthscapesNew Grass Gardens supplied the pears this year along with Lucky 3 Farms. If you want any local pears at this point, you’ll have to hurry.

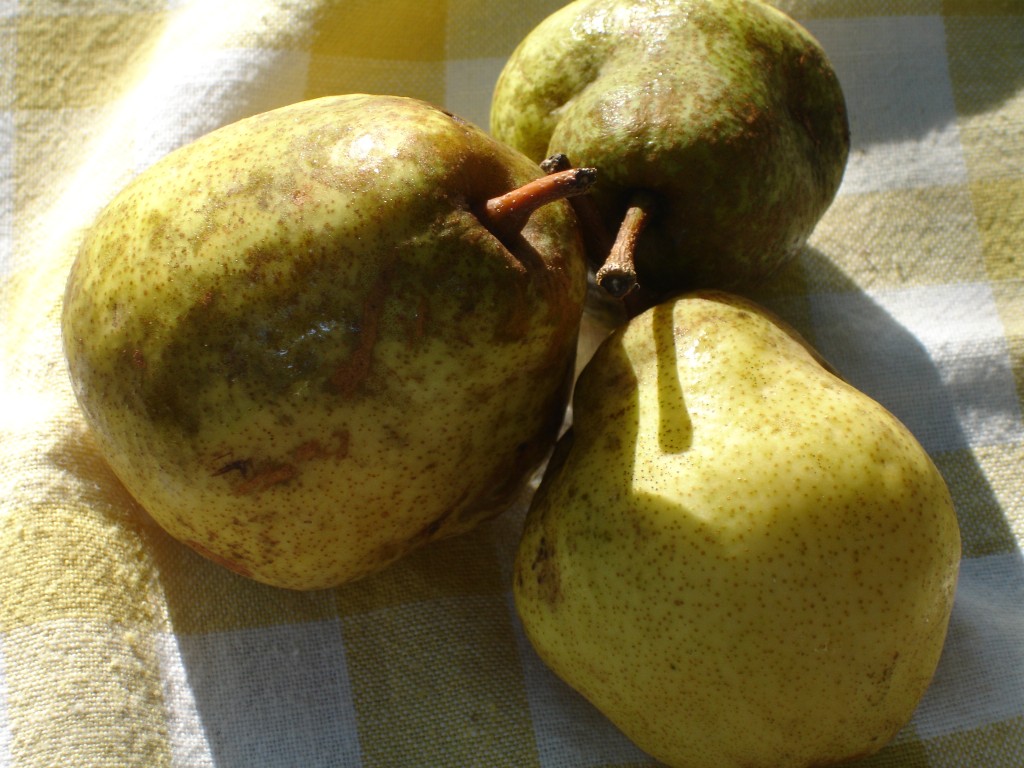
Local pears are not terribly pretty and very different in texture from what you probably buy in the grocery store. They are closer in texture to Asian pears. Crisp and a bit on the hard side, they lack a ton of juice, but the flavor concentrates well when they are cooked or dried. You can use them in cobblers, porridge,  roasts, fruit breads or as a partial oil substitute in many recipes all through the winter. In many ways, I like pear butter better than apple sauce or apple butter. The flavor is complex and the addition of fresh ginger, nutmeg and vanilla balance the recipe without overpowering the fruit.

Many folks cook the entire pear, skin and core included and then use a food mill to separate the inedible parts.  I tend to skin and chop mine because I use organic fruit and there can be some significant insect damage that needs to be removed before cooking.  Pears, like apples, discolor quickly, so the cooking process needs to start as soon as possible. It’s also possible to use a slow cooker on low for about 6 hours with the top lid slightly ajar. I change my cooking method depending on my schedule. But most times, I use a heavy ceramic coated dutch oven on the stove or a professional grade stainless pot with a fair amount of weight to it. The idea is to hold the temperature evenly and avoid burning the fruit as the liquid reduces.

Pear Butter

Ingredients

  • 12 cups of chopped pears (1″ squares)
  • 2 cups of filtered water (if you are cooking on the stove top, use about a cup if using a slow-cooker)
  • 1 1/2 tablespoons fresh minced ginger (pink-skinned ginger that has not been dried or prepared for the grocery store)
  • 1/4 teaspoon fresh grated nutmeg
  • 1/2 teaspoon Ceylon cinnamon (delicate & complex flavor)
  • 1/2 teaspoon Madagascar vanilla extract (vanilla powder will work)

Preparation

  • Peel and chop the pears, discarding the skins, bad spots and core and seeds
  • Put pears in a heavy, high-wall pot with water, nutmeg, cinnamon and minced ginger. If you are using vanilla powder, you can add it at this point also.
  • Cook on low/med as a very low simmer for about 2-3 hours stirring as necessary to avoid burning until the mixture is thick and a light brown color.
  • Add the vanilla extract close to the end of the cooking time. (I have not tried using a vanilla paste)
  • Puree everything using a food processor and freeze in the increments you think you will use it over a week’s time, or in increments for recipes.

Notes

  • I have not canned this recipe.
  • Other flavors that work well are cardamom, fresh orange peel, anise.
  • If you find this isn’t sweet enough for you, add 1 tablespoon date sugar and 1 tablespoon turbinado sugar


Posted in Dairy-Free, Dehydrating, Fall, Gluten-Free, Nut-Free, Preserves, Recipes, Winter | Tagged , , , , , , , , , , , , , , , , , , , , , , , , , , | 2 Comments

The Last of Summer: Sweet Corn & Fresh Lima Beans

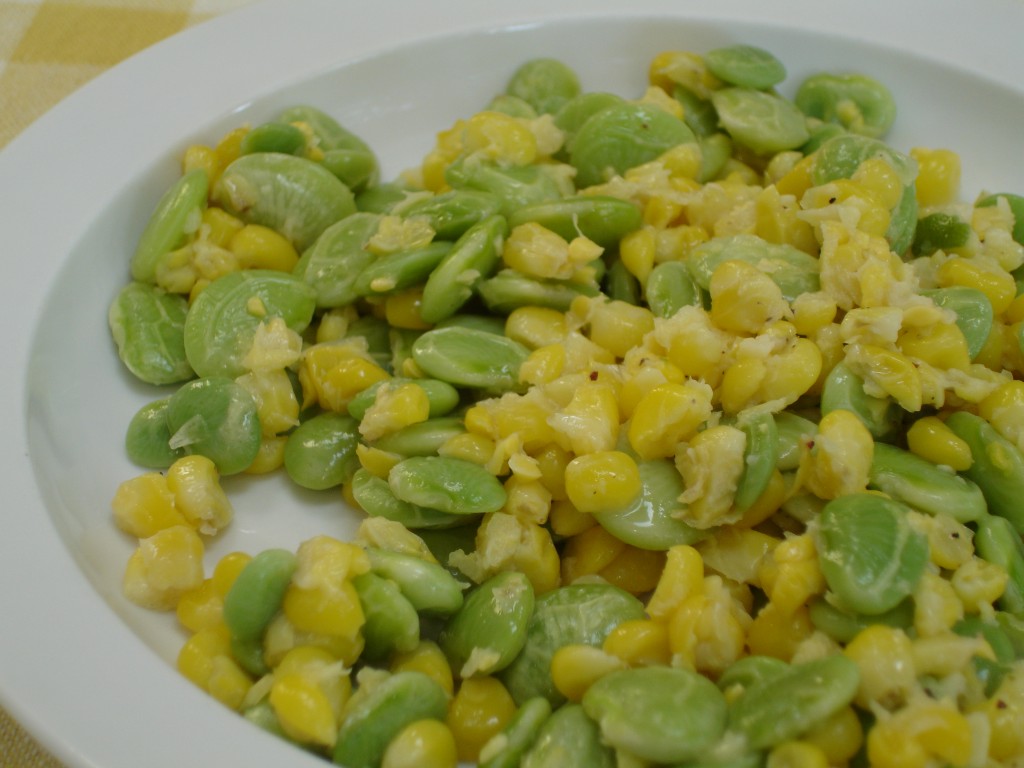
The nights are beginning to get cooler and the mornings not so humid. After blanching about 50 ears of corn for the freezer, I’m looking forward to some wonderful soups and chowder this winter. But in the meantime, there are still some awesome beans coming in and it’s a good time to take advantage of the crop in a simple and delicious side dish. This takes about 10 minutes to prepare start to finish and measuring is not required!


Sweet Corn & Fresh Lima Beans

Ingredients

  • 1 cup fresh sweet corn kernels (yellow or white)
  • 1 cup fresh lima beans (small beans work best)
  • 1/4-1/2 teaspoon salt (Himalayan Pink)
  • 1/8-1/4 teaspoon fresh pepper
  • 2 teaspoons cream (half/half or whole milk)

Preparation

  • Using a 8-10″non-stick skillet, add butter and melt on medium heat.
  • Once that’s melted, add in the corn and lima beans (both should be at room temperature)
  • Add the cream, salt and fresh ground pepper.
  • Cover and cook for 3-5 minutes on medium to medium/low heat.
  • Serve warm right away or chill and serve cold or warm within a couple of days.
  • To reheat in the microwave, use a low power setting like 50% for 1-2 minutes.

Notes

  • The cream helps give the dish some “body” and sweetness, but you can substitute a low-fat milk if you warm it before adding so it doesn’t curdle.
  • Substitute chicken or vegetable broth or plain water for butter, not olive oil. The flavor and texture of both vegetables changes too much with oil.
  • Substitute Dixie Speckled Butter Peas for the Lima Beans or add some in as an additional treat!
  • I haven’t tried soy or almond milk, but both would also add some sweetness. Almond milk is very thin in texture so you might need to experiment with it.


Posted in General, Gluten-Free, Nut-Free, Recipes, Salads, Second Harvest, Sides, Summer, Vegetarian | Tagged , , , , , , , , , , , , , , | Leave a comment