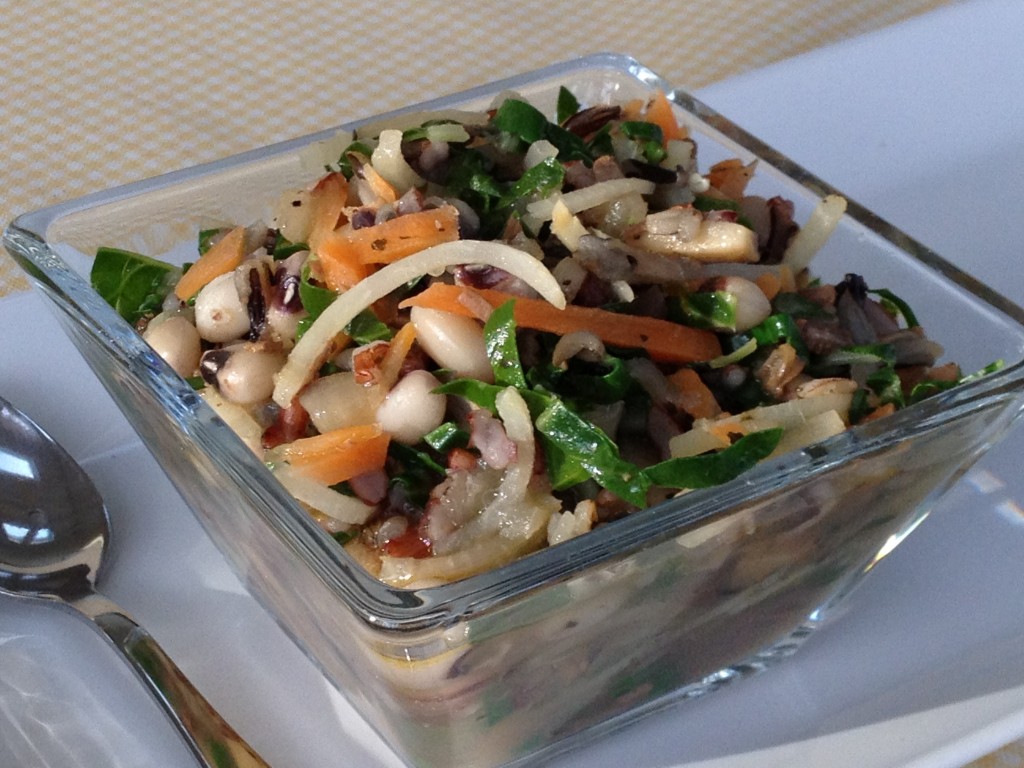
Winter Greens & Turnip Salad with Black Eyed Peas

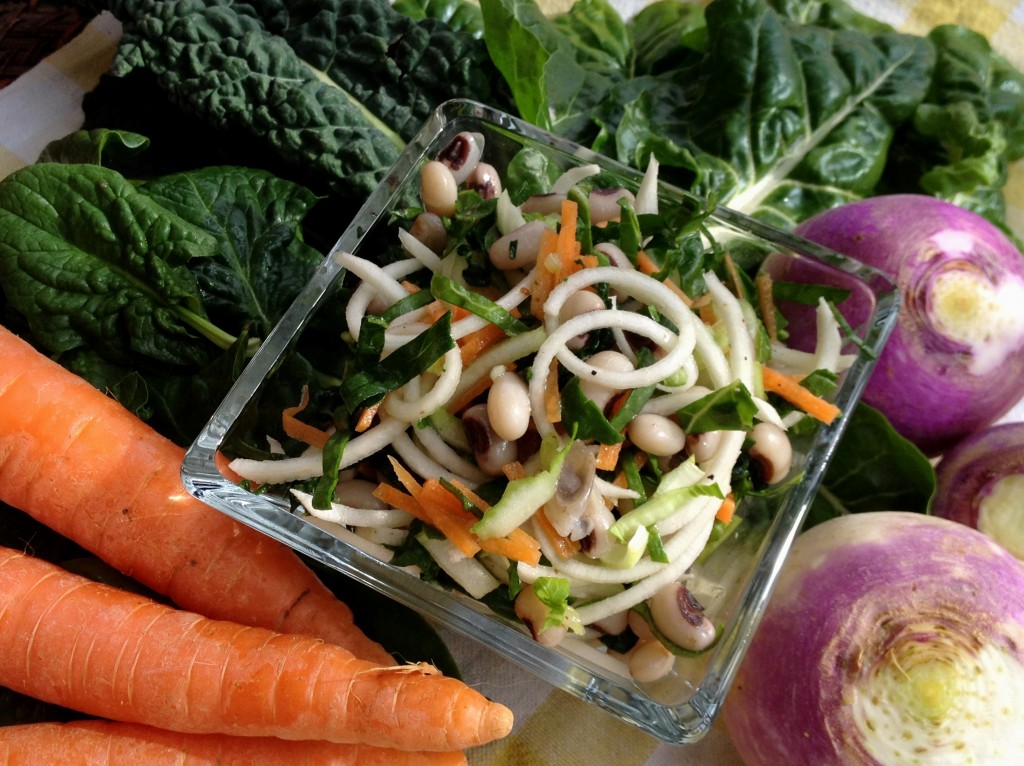
My favorite thing about this salad is the ease of preparation, versatility, and low-cost of the ingredients. After serving  it the Carrboro Farmers’ Market a couple of weeks ago, I’ve made it a few more times and changed the dressing to incorporate locally made mustard from Two Pounds, which has a wonderful kick to it and works really well with both maple syrup and honey. I’ve infused my maple syrup with both local ginger and  local hot dried cayenne peppers and both types are great with this salad.

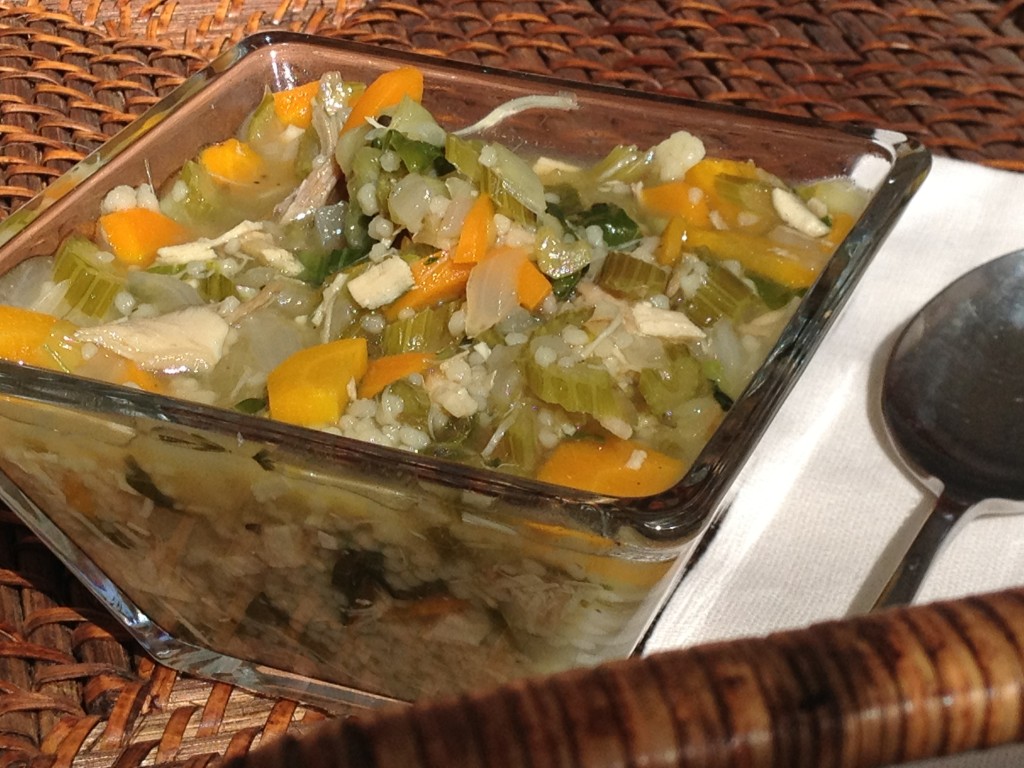
The real beauty of this salad is it can served raw as a large entrée salad; shredded like a slaw and put on top of locally made hot dogs or sausage links; or served warm with a light vegetable broth paired with local mushrooms and onions. I’m going to give you the basics and then some notes on variations that I’ve tried at home to make one basic dish work for three very different meals. You are welcome to adapt the amounts of the greens to whatever you have available or prefer to eat. Most of the time I cook my peas/beans from scratch which takes a little time, but allows me to track the amount of salt. In this recipe I also used a special tool that spiral cuts the turnips into noodles called a turning slicer. If you have kids this is great fun.


Winter Greens & Turnip Salad with Black Eyed Peas

Ingredients

  • 3  cups cooked black eyed beans, drained and rinsed
  • 2 cups baby chard, julienne cut
  • 1 cup baby spinach, julienne cut
  • 1 cup kale, julienne cut
  • 1 cup baby bok choy, julienne cut leaves, thinly slice whites
  • 2 medium white or purple top turnips ( 10-12 oz each)
  • 2 cups julienne cut carrots

Dressing Ingredients

  • 1 – 2  teaspoon Two Pounds Mustard (original flavor)
  • 1 tablespoon White Balsamic (or Apple Cider Vinegar)
  • 2 – 3 teaspoons grade B Maple Creek Farm Maple Syrup
  • 1 teaspoon EVOO
  • If possible, infuse the maple syrup with fresh ginger or hot peppers ahead of time
  • Otherwise add 1/4 teaspoon fresh grated ginger root and a pinch of dry cayenne pepper to the dressing.

Preparation

  • If you prefer to cook your own dried beans, cook the beans according to directions and as they finish, use Chardonnay Oak Barrel Smoked Salt and a few turns of pepper grinder on them for seasoning. Set aside to cool.
  • Julienne cut all of the greens.
  • Peel and shred or julienne cut the carrots.
  • Peel and julienne or spiral cut noodles from the turnips.
  • Mix all of the ingredients together in a bowl.
  • Lightly dress the salad and let sit for about an hour before serving. Check for seasoning.

Variations

  • To make a slaw, chop the greens, a second time until the pieces are smaller; use a large grater for the carrots and reduce the amount to 1 1/2 cups; and use a large grater for the turnips; eliminate the black eyed peas.
  • To make a soup, leave in the peas and add 3 oz of roasted onions, 3 oz of shiitake mushrooms, 4 cups of broth, 1 cup red rice, splash Worcestershire sauce and a small bit of prepared Two Pounds or dijon country-style mustard.



Posted in Appetizer, Diabetic Friendly, Dinner, General, Gluten-Free, Lunch, Nut-Free, Recipes, Salads, Soup, Vegetarian, Winter | Tagged , , , , , , , , , , , , , , , , , , , , , , , , , | Leave a comment

March is National Nutrition Month


Let’s Celebrate Healthy Eating during  National Nutrition Month!

In just a few weeks farmers’ markets will begin a new spring season again, but let’s not overlook all the wonderful vegetables that are coming into winter markets. The weather has been exceptional here in the south for greens. The chard, spinach, and lettuce greens are some of the finest of the year right now, and many farmers are still harvesting their carrots, turnips and radishes. You can put all of them on sandwiches, toss a quick salad or add them to some quinoa or couscous.

And if you like a little cheese on your salad or sandwich, we’re also seeing excellent aged and smoked cheeses at the market that are great on homemade pizza. If you’re pressed for something to do, you can always make your own ricotta using local organic whole milk and fresh herbs from the garden.

To celebrate a month of healthy eating and encourage those of you that started the year off right with new eating habits, we’re offering 5 vegetarian soups for you to eat at the office, a fresh-baked vegetable quiche made with local sustainable farm products (think organic farms, but not certified), and two salads for $40 including delivery to your office in the RTP area.  If you can convince 4 other folks at your office to take a delivery at the same time, we’ll throw in a dessert for the group as our way of thanking you for conserving our time and gasoline!

The lineup for soups includes…

Spicy Winter Squash Soup made from three types of roasted winter squash, local heirloom pears, and Western NC apples combined with our own veggie broth, several types of chiles, and organic coconut milk. Serve this over coconut water jasmine rice with spicy shrimp or white fish cooked in your favorite seafood seasoning blend.

Heirloom Tomato Soup made from six types of locally grown tomatoes, fresh herbs, sweet onions and roasted garlic combined with our own veggie broth, colorful heirloom carrots, and cumin roasted chick peas. Serve this with a grilled cheese sandwich made with a polenta / corn bread and you have a filling meal.

Roasted Summer Pepper Soup created from fire four types of roasted local sweet peppers and combined with our veggie broth, white beans and aged balsamic vinegar for the right amount of acidity. Sausage, goat and shrimp are all delightful additions to this soup.

Black Bean and Eggplant Chili made from EVOO roasted eggplant with a smoked salt, our own blend of chunky heirloom tomatoes, roasted sweet onions and garlic combined with fresh simmered black beans a blend of chiles and our own veggie broth. You can add sausage, goat, beef or chicken for even more flavor.

Indian Inspired Cauliflower Soup made from roasted fall cauliflower, a mix of three types of dehydrated apples from the NC mountains, roasted local shallots and garlic, and sweet onions from Chatham & Johnston county.  This soup is wonderful served over Basmati rice cooked in coconut water with a bit of roasted chicken.

For more healthy ideas, check out the Advocates for Health in Action blog and sign up for their Brown Bag Lunch Challenge later in the month.

To order a week’s worth of soup, salad & quiche , just send an email to tarheelfoodie@gmail.com along with your business address (or home office) and we will schedule a delivery with you or meet you at one of the local farmers’ markets.


Posted in General, Winter | Tagged , , , , , , , , , , , , , , , | Leave a comment

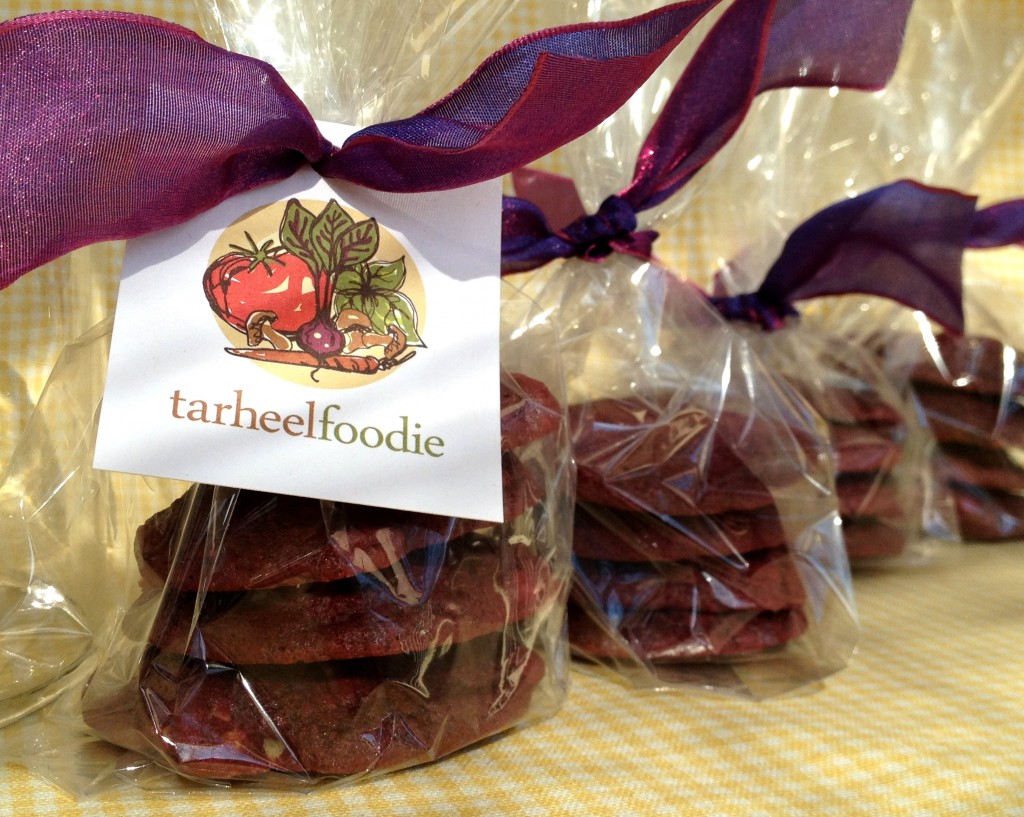
Dark Chocolate Beet & Toasted Pecan Cookies

So many people turn up their noses at beets. I think both the red and golden are delightful in raw salads. Both are equally wonderful roasted and you can freeze them for use in soups or baked goods all through the year. There is the pickled beet lover. I’m not a huge fan of pickling but this is an excellent way to keep them on your shelf to serve with goat cheese or in a relish for your hot dog.

Many versions of this recipe can be found on the internet. I’m always searching for recipes that can be adapted to use local ingredients, especially when they can be purchased together during a single season. The major change that I made to this recipe is that I swapped out half of the butter for coconut oil which is more healthy and dark chocolate chips from white chips, again, a bit less sugar and fat.

If you’re not a coconut fan, it’s a 1:1 swap. So go back to butter. The white chocolate chips are very sweet and these cookies are already pretty sweet. The white chips are very pretty with the red color of the cookies, so if you are making this for Valentine’s Day, the white might be a holiday change, but I still like the flavor of the dark chips better. The pecan harvest this year was awesome, so I’ve been using them in everything from raw salads to desserts. T his cookie is soft like the Pumpkin Cookie Recipe in Holly Herrick’s cookbook. And like that cookie, I love the texture that toasted pecans provide to the muffin quality of this cookie.

For the beet puree, I simply put a slew of washed beets without the tops into a foil lined baking dish and cover them with foil. This method maintains more nutritional value than boiling.  Bake them for 30 minutes to an hour depending on their size at 350F, until they are tender. Let them cool for a few minutes and (using gloves) simply wipe off the skin and cut off a little of the top and bottom. You can store them in the freezer and slice them later for recipes. You can also puree and freeze them in smaller quantities for use in recipes throughout the year. Don’t both with any seasoning when you cook these,  or it will alter your future use of them in recipes.

This recipe makes around 50 cookies depending on the size you make them.  I cut it in half and it was plenty for a couple of days with guests. If you do this, remember to beat your egg and only use half in the recipe. This is a sticky dough and many recipes called for it to be chilled for a couple of hours, but I’m not all that patient and these came out delightfully light and spread out perfectly when they were cooked right away.  I used food grade gloves when I was working with the dough because I find it helps cut down on the sticky nature of the dough. I suspect that you would need to spend more time getting them to look good if they were chilled for a couple of hours. I used two spoons and my fingers to get them all about the same size and they seemed to spread very nicely like muffin tops.


Dark Chocolate Beet & Toasted Pecan Cookies

Ingredients

  • 1/2 cup unsalted butter at room temperature
  • 3/4 – 1 cup cane sugar
  • 1/2 cup light brown sugar
  • 1/2 cup virgin coconut oil (liquid form, but not hot)
  • 1 egg at room temperature
  • 2 teaspoons pure vanilla extract (you can substitute vanilla powder)
  • 3/4 cup of roasted beet puree
  • 1/4 cup buttermilk (no gum gar in the ingredient list)
  • 1 tablespoon apple cider vinegar
  • 2 1/4 cups all-purpose organic flour
  • 1/2 cup unsweetened cocoa powder (Valrhona brand is what I use)
  • 1/2 teaspoon Himalayan Sea Salt (pairs well with beets)
  • 1 teaspoon baking soda
  • 3/4 cup toasted chopped pecans
  • 1 cup dark chocolate chips

Preparation

  • Sift the flower, salt, baking soda and cocoa powder together in a bowl and set aside.
  • Cream both sugars into the butter until it’s well incorporated.
  • Add the liquid coconut oil in a steady stream with the mixer on low and then continue to cream it until it seems light and fluffy.
  • Add the egg and blend well.
  • Add the vanilla extract, roasted beet puree, buttermilk and apple cider vinegar. Blend well on medium speed. Beets stain so use caution with the speed of your blender.
  • On low to medium speed, add the dry mixture and incorporate it into the dough.
  • Increase the speed for about 20-30 seconds to medium/high right at the end to incorporate a little air so the cookies have a light texture, but don’t over blend.
  • By hand,  fold in the chopped pecans and chocolate chips. Use more or less depending on your preference.
  • Using a couple of spoons, drop about two tablespoons of dough for each cookie onto a cookie sheet that has been line with parchment paper. This will keep them from burning or getting hard on the bottom.
  • Bake at 350F for about 11-12 minutes. If you eliminate the nuts and chocolate chips, cut back the bake time to 10 minutes.
  • Cool on the baking sheet for a couple of minutes before transferring to a wire cooling rack or they will stick to the rack.
  • When you store these, use parchment paper between the layers or they will stick to each other because of the high moisture content. They break very easily, so be gentle.

Notes

  • If you don’t like the taste of coconut, the ratio for butter is 1:1
  • If you do like coconut, you might try adding some coconut flake when you add the chips and nuts.
  • European style and stick butter have less water than local butter in a tub
  • Gum gar in the buttermilk tends to produce odd results in texture


Posted in Dessert, Fall, Recipes, Second Harvest, Winter | Tagged , , , , , , , , , , , , , , , , | 2 Comments

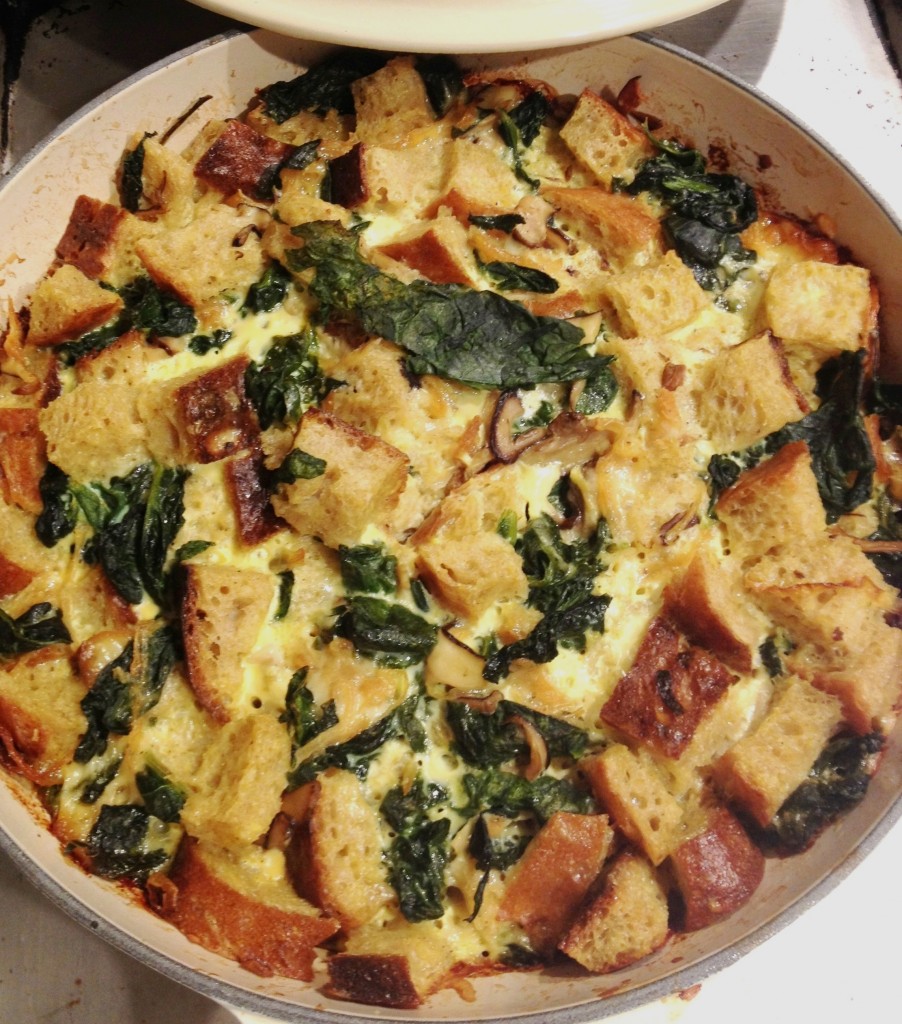
Strata with Seasonal Vegetables & Artisan Bread

The past couple of weekends have been spent meeting new farmers and artisan bakers at a couple of local markets where I’ll be giving cooking demos during the 2012 season. I’ll be starting at Carrboro Farmers’ Market on February 11 from 9-12 in the gazebo. And then I’ll be sampling local sustainable provisions at the Shared Tables event hosted by Duke & UNC on February 28-29.

During the winter break, I’ve also had the opportunity to check out some local businesses around Carrboro and Durham that I wasn’t able to squeeze into my schedule last year.  The redevelopment of existing buildings in downtown Durham is really redefining the city and bringing a wonderful new group of chefs and artists to the area. The fantastic weather hasn’t hurt either!

My visit to the market these past two weekends have yielded some excellent greens that thrive in cooler weather like chard, spinach, baby kale. There has also been some bok choy and napa cabbage to be found if you go early enough. Along with the greens the root veggies are excellent. Beets, rutabagas, turnips, sweet potatoes and carrots have been plentiful. I was also able to get shiitake mushrooms longer than usual and I’ve put them up for some amazing turnip and mushroom soup.

What goes better with soup than bread? Whether it’s a sandwich or just a slice with butter, cheese, or hummus, it’s hard to go wrong. Artisan bakers in the area are thriving and it is unfortunately one of my habits to purchase way more bread than I can consume. I’m sure many of you do the same. I have found that wrapping  a portion of the bread right away in wax paper and then putting it into a freezer bag works really well to keep the bread good for a couple of weeks. The frozen bread thaws within a day and it’s great for toast, grilled sandwiches, homemade croutons, or as a filler for your favorite meatball recipe or topping for a casserole.

There are a couple of breads that I use regularly in my Strata Recipe. The Polenta bread from Loaf in Durham and the Yeasted Corn Bread from Chicken Bridge Bakery in Carrboro both work equally well.  Recently I was able to try Berenbaum’s Potato & Onion Bread. This caramelized onion smells amazing and the bread seems almost sweet. It turned out to be an interesting and subtle foundation for the greens and mushrooms strata, so I thought I would share the recipe in the hopes you will try all three of these bakeries and find something that works for you. You can modify this recipe to accommodate seasonal vegetables and meats.  Using items that are already steamed from a prior meal, frozen or dehydrated can really cut your preparation time to half.

The whole idea for this particular combination started with a beautiful photo of  greens and mushroom baked in a mornay sauce that I found in a cookbook called Long Nights and Log Fires at Quail Ridge Books. I bought this when it was 70F one afternoon, so there was a bit of pretending as I cracked it open to look at the photos.  The original recipe called for buttered bread crumbs to be sprinkled on the top of the dish but I decided that the Potato & Onion bread had enough flavor to stand on its own in something like a strata, so I didn’t exactly follow the original recipe. Nothing new there. I did add a step when I originally tested this combination by melting the cheese into the milk like a traditional mornay sauce, but it’s not necessary and I don’t think it’s worth the time it takes and the pan you have to wash.

It should take about 20-30 minutes to cut up the ingredients and assemble the dish. Then about 25-40 minutes to cook and there are some notes in the recipe about the cooking times relative to the type of baking dish used and the oven settings you use. This dish is particularly useful when you have guests over. It is versatile enough for breakfast, lunch or dinner in any season. Just change your side dishes and serve with soup, salads, or fruit depending on the season and time of day.


Seasonal Strata with Artisan Bread

Serves 4-6

Ingredients

  • 1 tablespoon butter (Homeland Creamery unsalted)
  • 6 cups of cubed artisan bread
  • 4 large farm eggs
  • 1 1/2 cups milk (Homestead or Homeland Creamery low-fat or whole)
  • 1/2 cup lightly steamed and chopped greens (spinach or chard)
  • 1/4 cup sautéed or roasted sweet onions or baby leeks
  • 1/2 – 3/4 cup pre-cooked & drained bacon or sausage (optional)
  • 1 cup shredded cheese (50/50 mix Chapel Hill Creamery Hickory Grove & Thunder Hill Swiss)
  • 1 teaspoon Himalayan Sea Salt
  • 1/4 teaspoon fresh ground pepper
  • Baking dish (9″ glass pie pan, 9″x9″ ceramic baking dish, 10″ cast iron dutch casserole)

Preparation

  • Preheat oven to 350F.
  • Chop the sweet onions or leeks into 1/4″ – 1/2″ pieces and saute in olive oil for a couple of minutes until they are just beginning to soften. For dehydrated onions, rough chop about 1/8 cup and add to the egg mixture to hydrate a little before baking.
  • Rough chop the greens. If the spinach or chard is young and tender, lightly steam or saute them (in olive oil, broth or water) for a minute or two just to soften them up. If the greens are a little larger or older, rough chop them and steam them for about 3-4 minutes to make them more pliable. Add to the cooked onions.
  • In the same pan melt 1 tablespoon of butter to coat the inside of the baking dish you plan to use for baking. You’ll use less if it’s melted and it helps to brown the edges of the bread and egg and makes clean up a little easier after soaking the dish.
  • In a mixing bowl, whisk the eggs first until well blended and then whisk in the milk, salt & pepper.
  • Cut the bread into rough 1″ cubes. Don’t worry about taking off the crust unless it’s burned or the bread is more than a a couple of days old and very dry on the edges. Day old bread will absorb more of the egg mixture but the crust doesn’t absorb much. Add the bread to the egg mixture and let it sit about 5 minutes.
  • Grate the cheese with a large hole grater. Set aside.
  • Spread about half of the bread and egg mixture into the coated baking dish evenly. Spread half of the greens and onion mixture over the bread and then sprinkle half of the grated cheese mix over the greens. Repeat the process, reserving some of the liquid egg to pour over the cheese at the end of assembly.
  • Bake the strata for 25- 35 minutes with the following notes.

Notes

  • Using a round or square glass pie dish will result in more browning on the top of the strata and the center will cook more slowly so the bake time will be around 30-35 minutes depending on the dryness of the bread.
  • Using a ceramic round or square bake dish will result in a bake time between 25-30 minutes because the baking dish will retain heat once it warms up. Leave the baking temperature at 350F and check for browning in the last 5-10 minutes. In a prior test, using a convection oven reduced the bake time to 20 minutes with the temperature set at 350F and provided for nice browning.
  • Using a cast iron casserole with a lid will result in less browning and higher moisture content with baking time around 25 minutes because the heat is retained exceptionally well. The temperature and bake time can be reduced to 325F and 20 – 25 minutes if you are using a high-end convection oven that is pre-heated to 350F. If you want the top of the strata browned, remove the lid for the last 5-10 minutes of baking so it can dry out and brown.
  • Lastly, using room temperature eggs and milk will allow the strata to cook more evenly and reduce the cooking time by a couple of minutes. In tests, the rise on the egg and milk mixture is nicer and the strata has a lighter texture when the eggs and milk are not chilled. Many strata recipes call for chilling and weighting down the mixture but I have found I prefer the lighter texture and shorter  preparation techniques in this recipe.


Posted in Breakfast, Dinner, Egg, Fall, Lunch, Nut-Free, Recipes, Second Harvest, Spring, Summer, Vegetarian | Tagged , , , , , , , , , , , , , , , , , , , | Leave a comment

Festive Winter Slaw

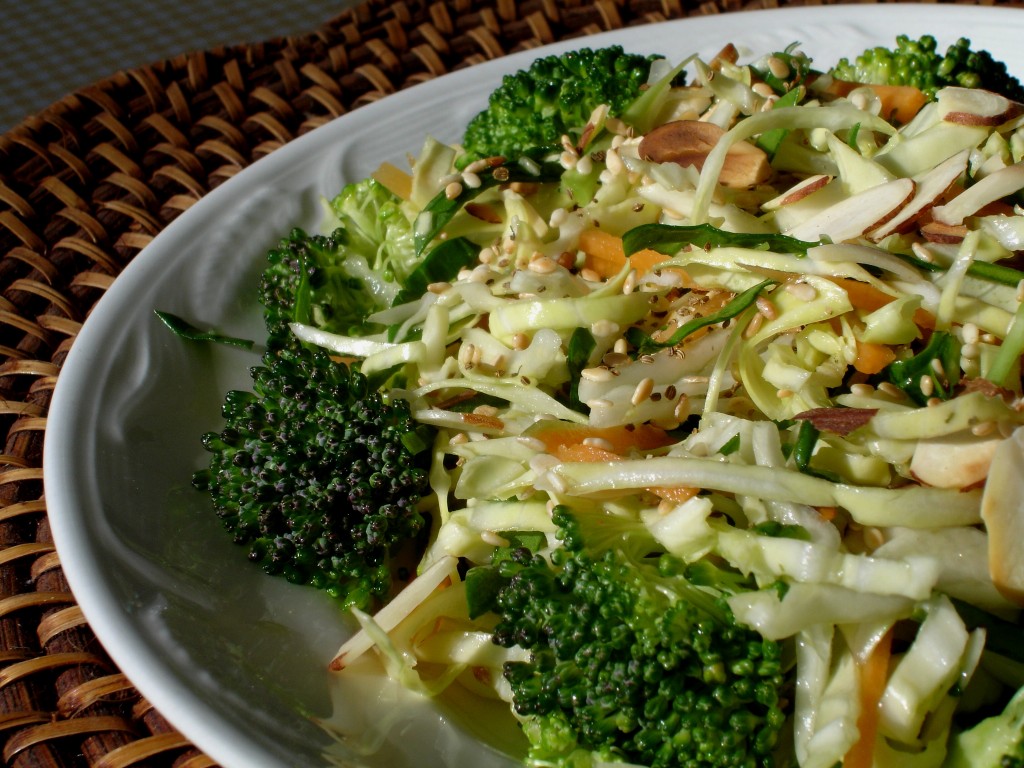
I hope everyone had a lovely holiday break and is ready to embrace the New Year! We won’t talk about dieting because holidays are a time to enjoy both cooking and eating treats made by family and friends. What we will do is share a couple of really simple recipes over the next few weeks that you can make with fresh ingredients from your local winter markets. Many of our local Southern farmers seem to be using both low and high tunnel covers this year so we are still able to get lovely greens, fresh leeks, carrots, broccoli, radishes, mushrooms and herbs.

Over the years, I’ve made cabbage slaw in the Virgina style which is oil and vinegar based. I change the dressing a bit, sometimes using apple cider vinegar, and other times choosing  Balsamic or an Asian variety of vinegar. It just depends on what I’m pairing the salad with for the meal. This simple cabbage slaw can be made with any sort of green cabbage you can find at the market. Just remember you need to select something that is fresh and crisp. The tender baby spinach provides a lovely deep green color but arugula would work just as well and if I had some pea shoots, I would add those into the salad as well!

Carrots are available most of the winter because many farmers that plant them for a fall harvest, leave  extras in the ground over the winter and just pull them as needed. They don’t really grow, but if it’s a good and reasonably dry season, they store just as well in the ground as in the shed. Last year when we were out at one farm we noticed that most of the green tops of the carrots had been chewed down totally and we learned that sometimes the rabbits make great feasts of the tops all winter, which makes it difficult to find and pull all of the carrots in the spring.

And speaking of the carrot tops. You can either cook them into a broth or you can chop them very fine and add nuts and cheese for a pesto or ravioli filling. They are loaded with potassium, so check with your doctor if you are on any medications that requires you to limit your intake.

This salad pairs really nicely with duck. The recipe is set up to feed 4 people as a side salad or two people as a main dish. You can add more nuts for some additional protein. I prefer almonds in this salad but I have used local pecan pieces with excellent results after lightly toasting them in the oven.


Cabbage, Spinach, Broccoli & Carrot Slaw

Ingredients for Salad

  • 6 cups loosely packed cabbage, julienned
  • 1 cup loosely packed spinach, julienned
  • 1/2 cup loosely packed carrot, julienned
  • 1 cup broccoli florets ( julienned stalks can be added)
  • 1/4 cup finely chopped baby leeks or green scallions
  • 1/4 – 1/2 cup chopped dried apple  or 1/4 cup julienned fresh sweet apple
  • 2 tablespoons slivered almonds (toasted or blanched)
  • 1/2 teaspoon sesame seeds (toasted in dry pan until golden)
  • 2 tablespoon crushed dehydrated onions,  (optional)

Ingredients for Dressing

  • 2  tablespoons apple cider vinegar
  • 2 teaspoons honey
  • 2-3 teaspoons olive oil
  • 1/4 teaspoon celery seed (optional)
  • Salt & Pepper to taste

Preparation

  • Julienne cut all of the vegetables and fruit and toss them together with the nuts
  • Blend the vinegar, oil and honey together and toss with the salad up to and hour before serving. Adding dressing earlier will result in softer vegetables.
  • Add salt & pepper to the salad after the dressing. The salt will draw out the water from the cabbage and spinach and dilute the dressing.


Posted in Dairy-Free, Dehydrating, Diabetic Friendly, Fall, Gluten-Free, Recipes, Salads, Sides, Vegetarian, Winter | Tagged , , , , , , , , , , , , , , , , , , , , , , | Leave a comment

Radishes are all the Rage

If you’re a “frequent buyer” at the fall/winter farmers’ markets in your area, you know that radishes love cool weather. Most folks think about serving them in salads all summer, but the truth is that here in the south, the heat can make them downright hot and spicy and the best radishes are had just after the main market season closes and just as it reopens in the spring. Around the Triangle, many of the farmers have started growing all sorts of radishes from small candy colored ones that look like they belong in an Easter basket to huge long jumbo Diakon radishes.  So I thought I might throw a simple salad or two together to see how the different varieties combine and work with other fall vegetables like baby spinach and arugula.

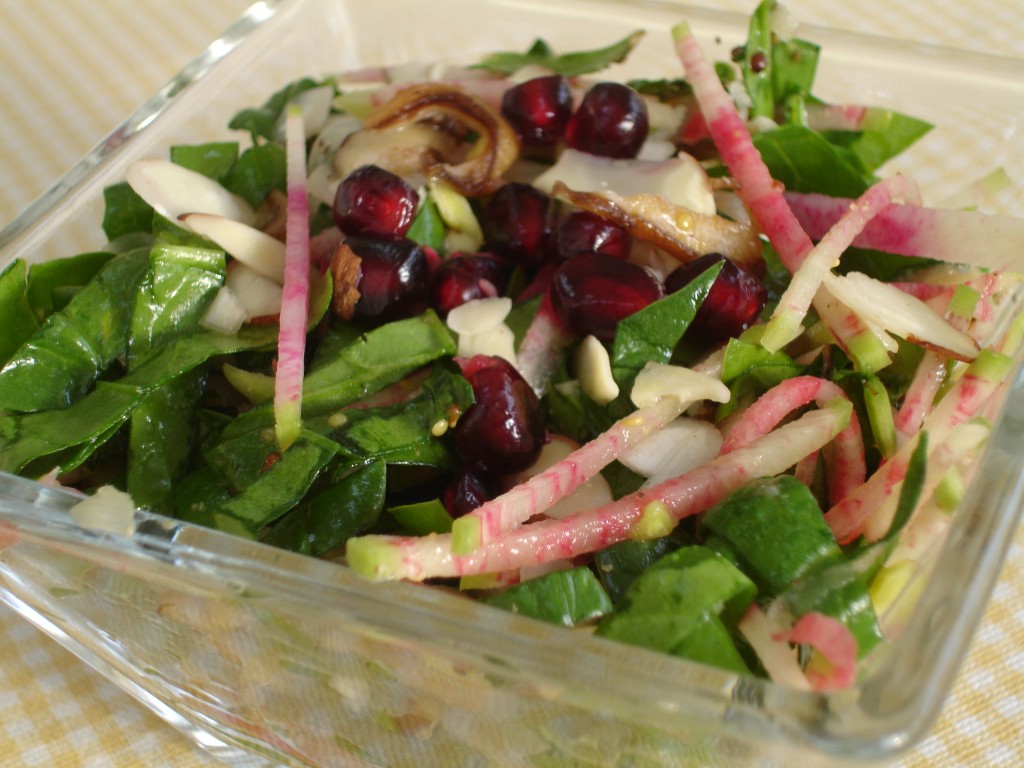
The salad I’ve chosen to share today comes from an inspirational meal at one of favorite restaurants. It is quite colorful, which is probably why I liked it from the start. And, you’ll be able to vary both the radish types and the greens in this recipe to suit your local market offerings. I have left the skins on the radishes to add more color to the salad, so make sure to wash the outside of the veggies well to remove any dirt. You can lightly blanch the radishes to reduce the spicy flavor a little and  it also makes them more pliable in the salad. If you happen to have a spiral slicer in your cabinet, this is an excellent time to pull it out and use it on the radishes so they look and feel like noodles in your mouth. The noodle texture is amazing in this dish, but it’s certainly not a requirement.

For the greens, you’ll need something that is fairly tender so select baby spinach or baby arugula. If you can only find medium leaves, then cut them up a bit into thick ribbons so they will mix well with the julienned radishes and dressing. I’ve also added sautéed local Shiitake mushrooms and some roasted local duck, which make this a pretty hearty lunch salad with a bowl of Turnip Soup. You can use roasted chicken or substitute some nuts and change the mushrooms to a small button variety and serve them raw if you prefer as well. It’s pretty simple to make the mushrooms and the duck (chicken) ahead of time and use them in different dishes over a couple of days. You can serve this as a completely raw salad if you have a preference in that direction using the nuts instead of meat and perhaps adding some pea shoots or sprouts if you have them handy


Radish Salad with Baby Greens & Roasted Duck

Ingredients for Salad

  • 2 oz Misato Rose radishes (about 1 radish)
  • 2 oz baby spinach or baby arugula (about 3 cups loose)
  • 2 tablespoons baby leeks or green onion, finely chopped
  • 1 oz raw Shiitake mushrooms
  • 1 tablespoon pomegranate seeds (optional)
  • 2 chopped tablespoon nuts (optional) (toasted or raw)
  • 2 oz chopped roasted duck (optional)

Ingredients for Dressing

  • 2 tablespoons Apple Cider or White Balsamic Vinegar
  • 2 teaspoons  Honey or Maple Syrup
  • 1 teaspoon country-style Dijon mustard (or  local / home-made favorite)
  • Salt & Pepper to taste

Preparation

  • Thoroughly wash and dry the outside of your radishes and julienne them. Keep any dark or red-skinned varieties separate until you get ready to serve the salad so they don’t change the color of lighter radishes.
  • Wash and dry the leafy greens. Julienne cut them if they are medium size.
  • Leeks and green onions can hold some of the sandy soil they are normally grown in, so take extra care in cleaning those. Finely chop.
  • Gently wipe the mushrooms with a damp paper towel to remove any dirt and pull off the bottoms (save for mushroom stock). Slice into thin slivers and saute quickly in olive oil with either Chardonnay Oak Barrel Smoked Salt or Himalayan Pink sea salt & mixed ground pepper.
  • Roasted Duck should be sliced into bite sized pieces. You can warm this in olive oil with the mushrooms or just warm it a little before tossing it with the salad. The flavor is better at room temperature or warmed rather than chilled.
  • Mix the dressing up and toss the salad ingredients all together a half hour before serving. If you like your dressing sweeter, increase the honey or maple syrup.  This dressing does not require oil because the radishes have a lot of nature liquid that blends with the vinegar and honey.


Posted in Appetizer, Dairy-Free, Diabetic Friendly, Fall, Gluten-Free, Recipes, Salads, Sides, Vegetarian, Winter | Tagged , , , , , , , , , , , , , , , , , , | Leave a comment

Beet, Carrot & Apple Salad with Pepitas & Chevre

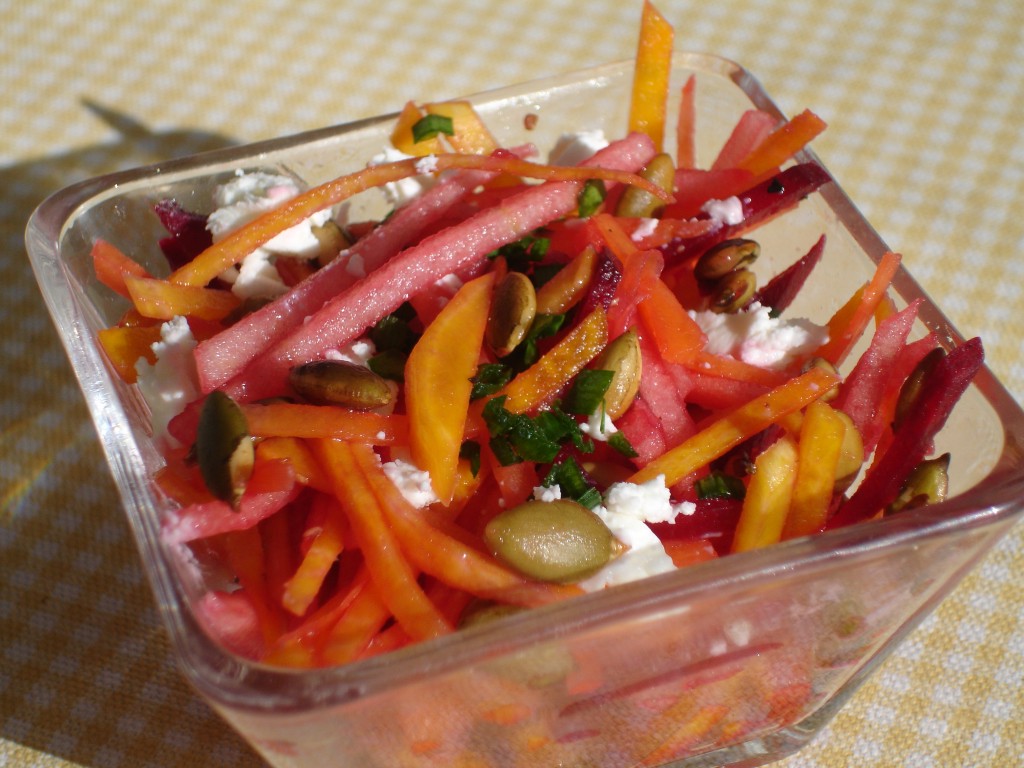
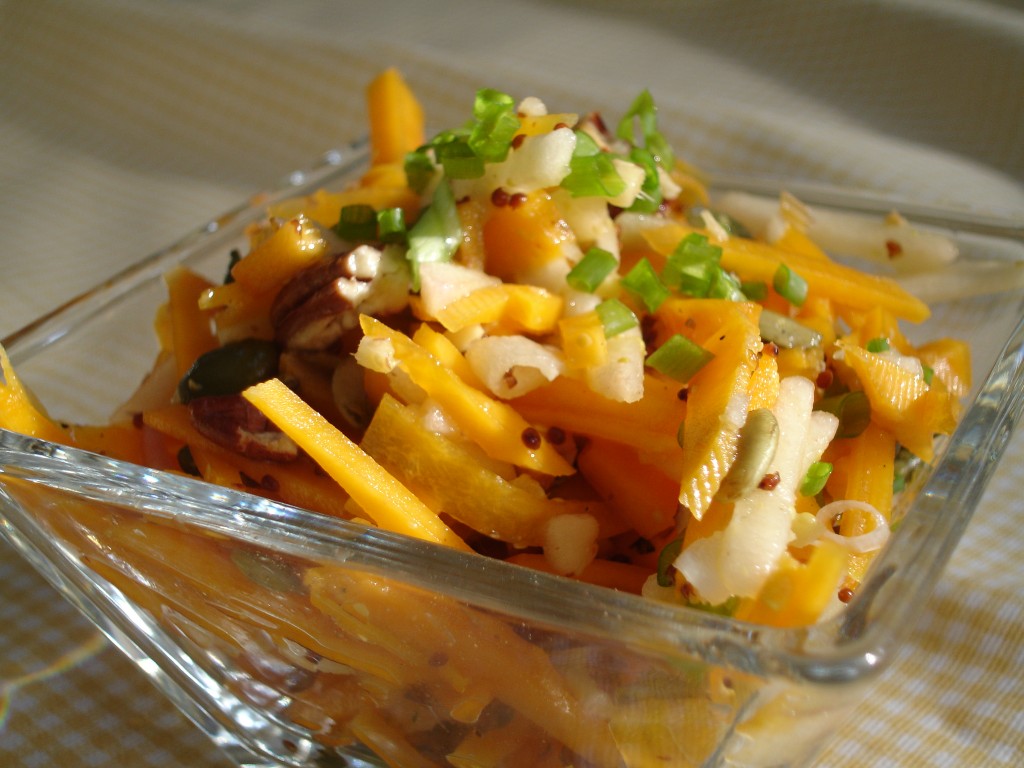
This salad is all about emptying out the veggie drawer in the refrigerator and finding a couple of remaining items from last weekend that you forgot about. Luckily, it’s colorful, simple, versatile and fast to throw together.  It stores in the fridge for a couple of days and you can fake everyone out by using golden beets and heirloom carrots of every color. The way the flavors meld together, people will have a hard time figuring out if they are eating shreds of carrots or beets. The toasted pumpkin seeds add some lovely texture and the apples add a fragrant sweet juice to the mix. While this salad looks like the butternut squash salad, it tastes much different because the dressing doesn’t have mustard and the beets and carrots provide a different set of flavors from butternut squash.

I also tried adding some organic raisins, chives, a little green onion, and some chevre in the salad so check out the notes below on when to add which ingredient. The flavor changes pretty dramatically with each one but they all had their merits. This can be served on a bed of baby greens with a bowl of soup or a toasted cheese sandwich. It also makes a  healthy topping for a shredded pork or grilled chicken sandwich at lunch.


Beet, Carrot & Apple Salad with Pepitas & Chevre

Ingredients

  • 12-16 oz golden beet
  • 8 oz red beet
  • 4-6 oz carrot
  • 4-6 oz crisp firm sweet apple (Fuji)
  • 2 tablespoons raw unsalted pumpkin seeds
  • 1 teaspoon chives, finely chopped
  • 2 teaspoons green onions, finely chopped

Optional

  • 1 tablespoon chevre
  • 1 tablespoon organic raisins

Dressing

  • 1 teaspoon maple syrup
  • 2 teaspoons white balsamic vinegar
  • 1 teaspoon olive oil
  • 1/4 – 1/2 teaspoon Murray River Flake Salt
  • 1/8 – 1/4  teaspoon fresh ground pepper

Preparation

  • Julienne the beets, carrots and apples. Mix them together in a bowl and set aside.
  • Toast the pumpkin seeds in a dry non-stick pan on medium-low heat or in the toaster oven until they start to turn light brown and pop. Add to the mixed vegetables.
  • Finely chop the chives and green onions and add to the mixed vegetables.
  • Mix up the dressing and adjust the taste. If you prefer tart dressing, add 1 teaspoon of balsamic vinegar. If you like more spice, add 1/4 teaspoon mixed fresh ginger. You can eliminate the oil if you want stronger flavor all around. The oil helps “deliver” the other elements to the vegetables.Add the dressing to the mix and toss lightly to coat.
  • If you are going to use this as a side salad to a sandwich, try some raisins and chevre in the salad right before you serve it to keep those flavor and colors distinct. If you are going to use it on a pulled pork sandwich, it might be better to leave the raisins and chevre out of the salad.


Posted in Appetizer, Fall, General, Gluten-Free, Nut-Free, Recipes, Salads, Sides, Snack, Vegetarian, Winter | Tagged , , , , , , , , , , , , , , , , , , , | Leave a comment

Happy Thanksgiving!

Have a wonderful holiday with your family and friends!

Posted in General | 1 Comment

Scalloped Turnips, Onions & Mushrooms for Thanksgiving

About a week ago I started researching new recipes for turnips and ended up with this surprisingly delightful adaptation from another blog site. Since one of our local farmers has about 1,000 pounds of turnips saved up for the winter,  I know I can get them for a while, which makes testing new recipes a lot easier, so be on the lookout!  Apparently, they are easy to plant and grow and have the added benefit of storing well.  He also simply loves to eat these root vegetables above all others.

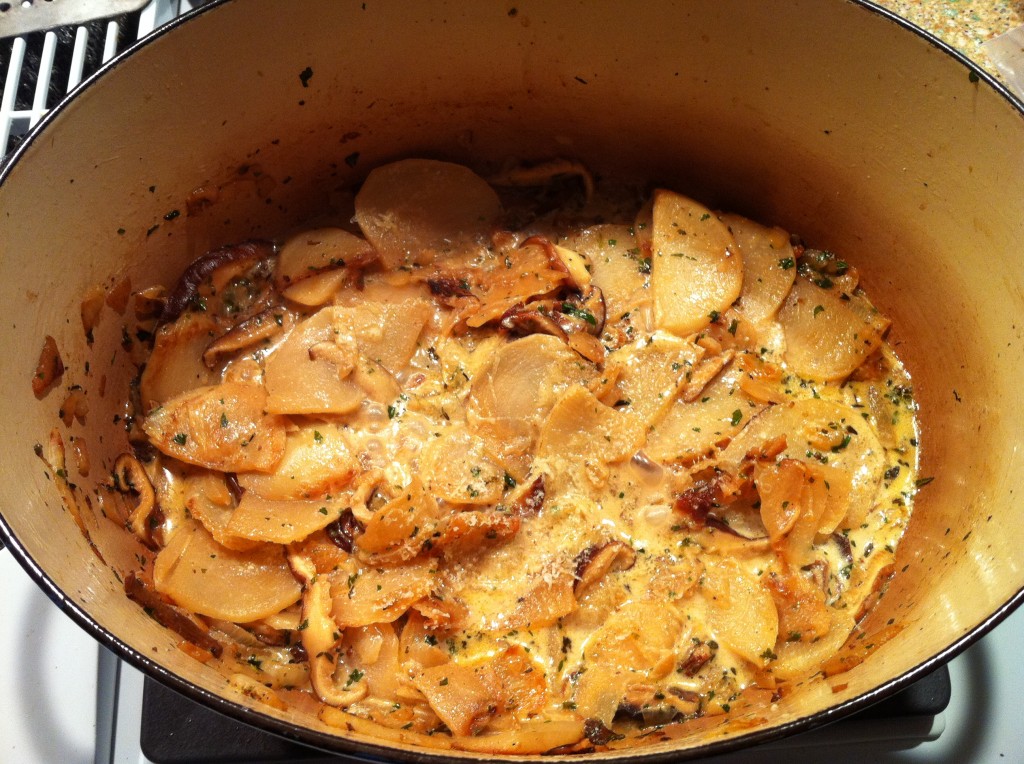
As you head out to the special Thanksgiving Farmers’ Markets today and tomorrow, pick up extra turnips and shiitake mushrooms for this surprising recipe! It’s an adaptation of one I found at the blog “easypeasyorganic“. The original recipe uses potatoes and cabbage and a lot more milk. I eliminated most of the milk and didn’t need to use the cornstarch when I made it as a result. But you can add it back in if you want more creamy sauce for other side dishes. It took no time to make using a Dutch oven and we finished eating the entire batch right out of the pot, which is why there isn’t a lovely picture in the post. Use as large a pot as you have because the veggies need to touch the bottom to caramelize instead of steaming as they cook. Save the turnip greens, you can use those in another recipe.


Scalloped Turnips

Ingredients

  • 2 lbs of turnips, washed and thinly sliced (1/8″ thick), and then halved
  • 1/2 lb sweet onion cut in half and sliced thinly
  • 4 oz shiitake mushrooms, cleaned and sliced thinly
  • 4 ounces Chapel Hill Creamery hard cheese, shredded (Thunder Mountain Swiss, Asiago, or Hickory Grove; all will work well)
  • 1/4 cup chicken broth (can substitute vegetable broth)
  • 1/2-1 cup whole milk or half/half (if you use low-fat milk, you may need a thickening agent like cornstarch or arrowroot)
  • 1/2 – 1 teaspoon roasted garlic, smashed into a paste
  • 1/2 teaspoon Himalayan Pink Sea Salt
  • 1/4 teaspoon Chardonnay Oak Barrel or Alder Wood Smoked Salt
  • 1/4 teaspoon Italian Truffle Salt
  • 1 tablespoon butter (can substitute more olive oil)
  • 3 tablespoons olive oil

Preparation

  • Heat a Dutch oven up on medium heat with 1 tablespoon olive oil. When the oil is hot ( not smoking), add  onions and stir to coat with a spatula. Cover and stir every 3-4 minutes until they are beginning to turn translucent. There will be a lot of moisture from the onions that will help keep them from sticking.
  • When the onions have started to soften and turn translucent, it’s time to add another tablespoon of olive oil, Himalayan Sea Salt and then the turnip slices. Stir to coat them with the oil and distribute the onions. Cook at medium high heat to caramelize the turnip slices and onions. Leave the lid off if it seems like the veggies are steaming and not caramelizing. Keeping it on keeps the heat in the pot, so it’s a balancing act. Use a large enough pan so that there is plenty of surface area for the veggies to touch the hot bottom of the pot which helps them caramelize. Remove the turnips and onions and set aside when they are finished cooking.
  • In the same pan, add the butter and another tablespoon of olive oil while the pan is still hot. Let the butter melt and as it starts to sizzle, add the mushrooms and stir to coat. Cook the mushrooms quickly at medium/high heat. This takes just a few minutes and they should be slightly browned and crispy on some of the edges. They will shrink up considerably.
  • When the mushrooms are done, add them to the turnips and onions.
  • Add the chicken broth to the warm pan and deglaze it.
  • Add the 1/4 teaspoon Smoked Salt (Chardonnay or Alder Wood)
  • Add the garlic to chicken broth and mix well.
  • Add 1/2 cup of milk to the chicken broth and garlic and blend well.
  • Add the vegetables and the Truffle Salt into the liquid. Stir to coat them. The vegetables will soak up some of the liquid. Add the cheese and stir to melt.
  • Check the amount of liquid and adjust the seasonings.  If the dish seems to thin you can use cornstarch or arrowroot mixed into some cool milk or broth (avoids the clumping issue) or you can just cook for a few minutes on low to eliminate some of the water inherent in the milk and broth. If you need more salt, adjust the smoked salt and truffle salt sparingly.
  • To make this ahead of time, add it to a buttered or oiled casserole dish and cover when re-heating at 350F. Make sure to add a little extra liquid so it doesn’t become too dry when you reheat. The vegetables will take up some of the liquid as it sits in the refrigerator and then again when they re-heat.


Posted in Fall, Gluten-Free, Nut-Free, Recipes, Second Harvest, Sides, Winter | Tagged , , , , , , , , , , , , , , , , , , , , , | Leave a comment

Butternut Squash & Apple Salad with Local Ginger Dressing

In the fall, I’m obsessed with winter squash. They exhibit all the beautiful colors of the trees and are so versatile for cooking, or in this case, not cooking. My only regret about these beauties is their tough outer layer. I’m not fond of wielding a large knife to get these guys open. A while back I discovered an OXO serrated peeler. It’s an awesome tool to skin the outside of a butternut squash so you eliminate rough tactics to pry it open.  I served this salad at the North Hills Farmers’ Market this past weekend. It was a little chilly Saturday but the entire container was gobbled up by the die-hard shoppers that came to visit all the local farmers.

This salad is quite simple and you can make it a day ahead of time. It needs to be dressed right away so the apple pieces don’t turn brown and it’s important to select a nice crisp apple that is sweet but not too juicy. I used a honey crisp this week. The dressing provides the tart flavor so your apple and butternut squash are going to provide most of the sweet. At the market I didn’t have the toasted pecans or pepitas in the salad, but I think they add a great deal of texture and flavor to the salad after working with the recipe more this week.

You can vary the dressing on this recipe. I tend to like more acidic dressing and this one doesn’t use any oil; you won’t miss it at all. The Murray’s River Salt is bright and light compared to many plain sea salts. It’s a little brighter in flavor than the Pink Himalayan which is why I like it in particularly well in this salad.  In the dressing, it will help weep some natural juice from the squash and apple as it sits but it doesn’t become overly watery or salty. The maple syrup flavor holds up well in the salad without being overly sweet.

Your choice of white balsamic vinegar and your mustard will also change the flavor slightly. A flavored vinegar like white mixed with pear would be fun to try in this recipe, or you can just add some crisp Asian  or heirloom pear pieces! I also happen to really like mustard, but you will probably need to cut back a smidge on the mustard as you increase the volume of this recipe.  A little goes a long way, especially if you plan to make it a day ahead of time and let the flavors develop. You can also use a local variety or make your own mustard. I’ll be adding some notes to the recipe over time as I test out some new products available locally.

This recipe is sized for two people. Doubling it is straight forward, but if you plan to go larger you’ll need to taste your dressing before you use it and make sure it’s balanced for your taste buds.


Butternut Squash & Apple Salad

Ingredients

  • 1/2 a small butternut squash, skinned (about 4-5 ounces finished)
  • 1 small crisp sweet apple, skinned (about 2-3 ounces finished)
  • 1 tablespoon toasted pepitas
  • 1 tablespoon toasted pecans, broken pieces
  • 1 tablespoon greens of young green onions, minced (or fresh chives)
  • 1 tablespoon white balsamic vinegar
  • 1 teaspoon whole grain Dijon mustard
  • 1-2 teaspoons maple syrup
  • 1/2 – 1 teaspoon fresh pink ginger, finely chopped
  • 1/4 teaspoon Murray River Flake Salt
  • 2 turns of a pepper mill

Preparation

  • Mix the dressing first, using the balsamic vinegar, mustard, maple syrup and ginger. Taste it and then add as much or little salt and pepper as you would like and set aside.
  • Toast the raw, unsalted pumpkin seeds in the toaster on parchment paper or in a pan on medium heat. They should start to pop as they finish toasting. Some will turn light brown, but many stay a shade of green that is slightly paler than their original color. Set aside to cool.
  • Toast  pecans in the toaster oven on parchment paper or in a pan until they are slightly darker in color and begin to smell toasted. Like the pumpkin seeds, they go from toasted to burnt pretty quickly, so don’t walk away during the process until you have a setting you are comfortable using.  Set aside to cool and then break them up roughly with your hands.
  • Julienne the butternut squash first and then the apple. Quickly toss with the dressing to coat completely. There shouldn’t be dressing left in the bottom of the bowl.
  • As the seeds and nuts finish cooling, add them to the salad and toss.
  • Before serving, toss the green onion tops into the salad or dress the top. They add too much flavor if they sit in the dressing for a long period of time. But they add just enough change in texture and flavor to be worth a little effort at the end.

Notes

  • This salad can be made into a slaw by adding some finely chopped baby bok choy, savoy or other mild green cabbage.
  • Raw sweet potato can be substituted for butternut squash
Posted in Appetizer, Dairy-Free, Diabetic Friendly, Fall, Gluten-Free, Recipes, Salads, Sides, Snack, Vegetarian, Winter | Tagged , , , , , , , , , , , , , , , , , , , , , , , , , , , , | Leave a comment