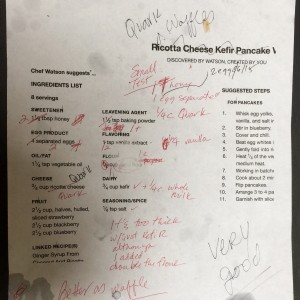
Along the way of developing the Quark Pancake recipe for the Carrboro Farmers’ Market Cooking Class, an accident happened. The IBM Cognitive Cooking program, Chef Watson, doesn’t always specify ingredients in detail. It’s a beta program, so I expect to work around the challenges and try things to see what works best. The case in point here is the flour needed to make pancakes. The program lists several types of flours, but I didn’t want to limit the results by requesting one flour over another initially, so I picked out a generic ingredient and let the computer doing the selections based on its resources. The cool thing about the most recent release of the program is that it allows me to go into any recipe and select alternatives for individual ingredients. Then it re-jiggers the recipe to fit my change, going back to cross-reference chemical compounds and other recipes. Pretty amazing. It’s incredibly easy to spend hours coming up with creative things to cook from the market with this app. Trust me, my recipe box is bulging, hanging around on the cloud, accessible from wherever I happened to be hanging out. And, did I mention you can share them with others on the web?
So, moving forward, the original recipes generated from the application just specified flour so I used all-purpose for the initial test. Mixed with the kefir and the baking powder, the batter just became a little more sticky than I wanted and didn’t have a nice texture once cooked. Kind of gummy bearish. But never wanting to waste ingredients, I decided to play with the first batch to see if it could be saved. We’ve all done this. It’s a risky game and you have to keep notes or risk hearing the peanut gallery of eaters in your home ask you that question we all dread: “Can you make it again, or is this a once in a lifetime event?”. Been there, done that. I now keep a recipe journal that records the tests. Big help.
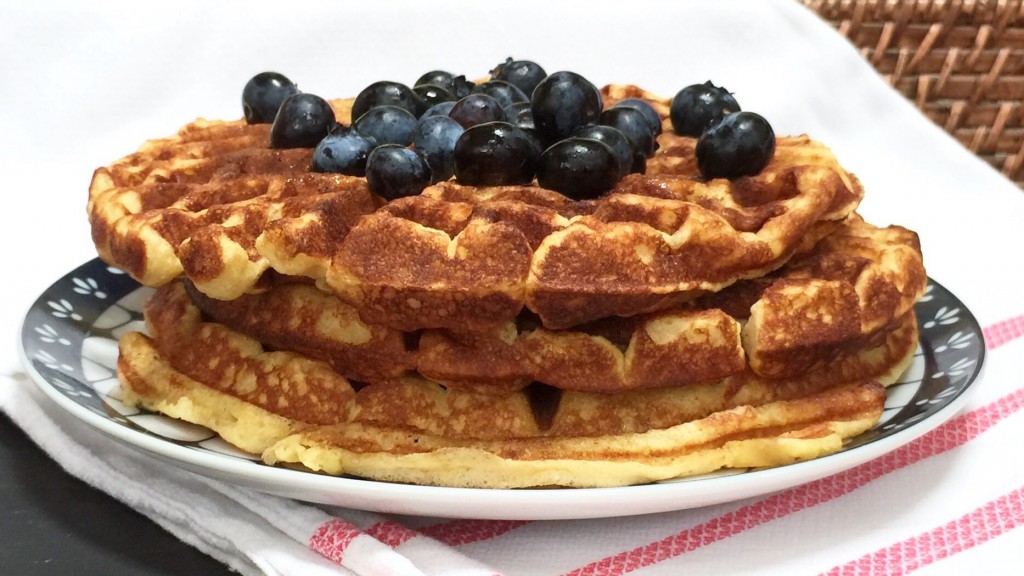
Anyway, adding a bit of whole-fat milk and an additional egg with the white whipped stiffly, helped incorporate some additional air to help it rise better in the waffle iron. Amazingly, this recipe turned out to be a keeper on the first try and I remembered to take good notes! Creamy on the inside, with a nice golden brown crispy outside shell, this waffle might become my go-to recipe over the one I’ve used for more than thirty years. The added protein from the quark cheese does not make these heavy but reminds me of the kind of texture you enjoy when eating a light cheesecake. These are just delightful, even chilled. I’ve been enjoying the extras with fresh fruit or fresh jam squished inside them, folded up, cold from the fridge in the afternoon.
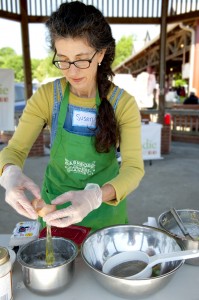
Separating the eggs. Photo copyright Casey Boone Photography. Please contact for permission to reproduce.

Add Chapel Hill Creamery Quark to the batter. Photo copyright Casey Boone Photography. Please contact for permission to reproduce.
I tested one of the initial runs of this with the quark from Chapel Hill Creamery at the market a couple of weeks ago. I used the staff at the Carrboro Farmers’ Market as guinea pigs. The ladies seemed to like it, or at least they were being quite nice to me after munching on them. Which is why you’re getting the recipe so quickly.
A couple of notes are worth talking about regarding the cheese. The quark moisture level can vary a bit, because it’s an artisan cheese. And sometimes you’ll be getting quark with salt, sometimes without. Neither of those issues is a problem for this recipe. If you’ve ever made ricotta or had fresh goat cheese, you know that there are going to be variations in how dry or wet the cheese can be that just depend on a number of factors in the process. Tartness and salt can also vary. Cheese makers keep a log of amounts and times to know which combinations prove to be the best but it’s not an exact science since they are dealing with live animal products. Some of them even note the moon phases. Such is the case with quark. One week it might be a little more loose than another week. I had a chance to try this with three batches that were all slightly different and it turned out well each time, so I’m comfortable passing this on to you, with a word of caution; I also tried this with a low-fat organic version from the store. Not such good results. You need to find a full-fat version because the low-fat just has too many other ingredients holding the texture together in a cold application that don’t work well heated in this recipe. The results are adequate, but if you can possibly find a local dairy to get fresh cheese that isn’t highly heat processed to hold up to weeks upon weeks of shelf life, it’s worth the trouble, I promise. Plus, it actually has a distinct flavor that will vary from dairy to dairy. Honestly, that’s kind of the fun part. If you want to try it with a full fat dry yogurt like European or Greek style, let me know how that works out.
This recipe will make plenty for 2 people and probably enough if you have little kids. Not so much for teenagers. Sometimes you can slow them down by making them cook for you, but I would double the recipe if my kids were at the counter waiting.
Have fun and experiment with your toppings! I found that maple candied pecans were one of my favorites on these, more so than the fruit, probably because I like the crunch contrasted to the creamy flavor of the waffle.
Quark Waffles
Ingredients
- 2 eggs
- 2 tablespoons spring or early summer honey
- 1 tablespoon melted and cooled salted butter
- 1/2 teaspoon vanilla extract (or vanilla powder)
- 3/4 cup kefir (low-fat or whole-milk)
- 1/4 cup whole-milk
- 1/4 cup whole-milk quark
- 1 cup all-purpose flour (or 1/2 cup pastry & 1/2 cup AP)
- 1 teaspoon baking powder (without aluminum)
- 1/4 teaspoon salt (Himalayan pink if possible)
Preparation
- In two bowls, separate the egg yolks from the egg whites using the larger bowl for the egg yolks.
- Lightly beat the egg yolks with the honey, melted cooled butter, vanilla extract (if using vanilla powder, add to the dry ingredients), kefir, milk, and quark until blended.
- In a large sifter above the bowl of liquids, add the flour, baking powder, salt and sift into the wet ingredients.
- Beat the dry and wet ingredients together until smooth, without lumps.
- Start to heat the waffle iron. I use a setting between 2-3 if 5 is the longest and most burnt setting. If you are using an older waffle iron without settings, you will be watching to see when it starts to smoke from the prior oil burning.
- Using a balloon whisk (preferably with an additional ball inside), beat the egg whites until they are stiff.
- Gently fold the egg whites into the liquid yolk batter so they are not deflated.
- When the waffle iron is ready, open it up and using a pastry brush, brush the top and bottom with coconut oil, butter or a very light type of virgin olive oil. Each oil will add a bit of flavor the waffle so choose what you prefer. Close the lid for just a minute to heat the oil (similar to oiling a cast iron pan in the oven before cooking corn bread).
- Pour the batter into the iron until it is about 1/2-3/4 full and close the lid. This should be a sufficient amount to spread to the edges without spilling out. If it spills out, leave it to cook as it will eventually flake off during the process of cooking the entire batch.
- Cook until the waffle iron signals it’s ready at your chosen setting or look for the waffle to push the lid upwards and begin to push away from the edges. You’ll have to look closely for this and use your nose to smell the oil as it will change scents when it starts to burn and smoke. You will get some amount of this naturally in the process throughout cooking regardless.
- Remove gently from the iron and eat immediately with your choice of toppings.

